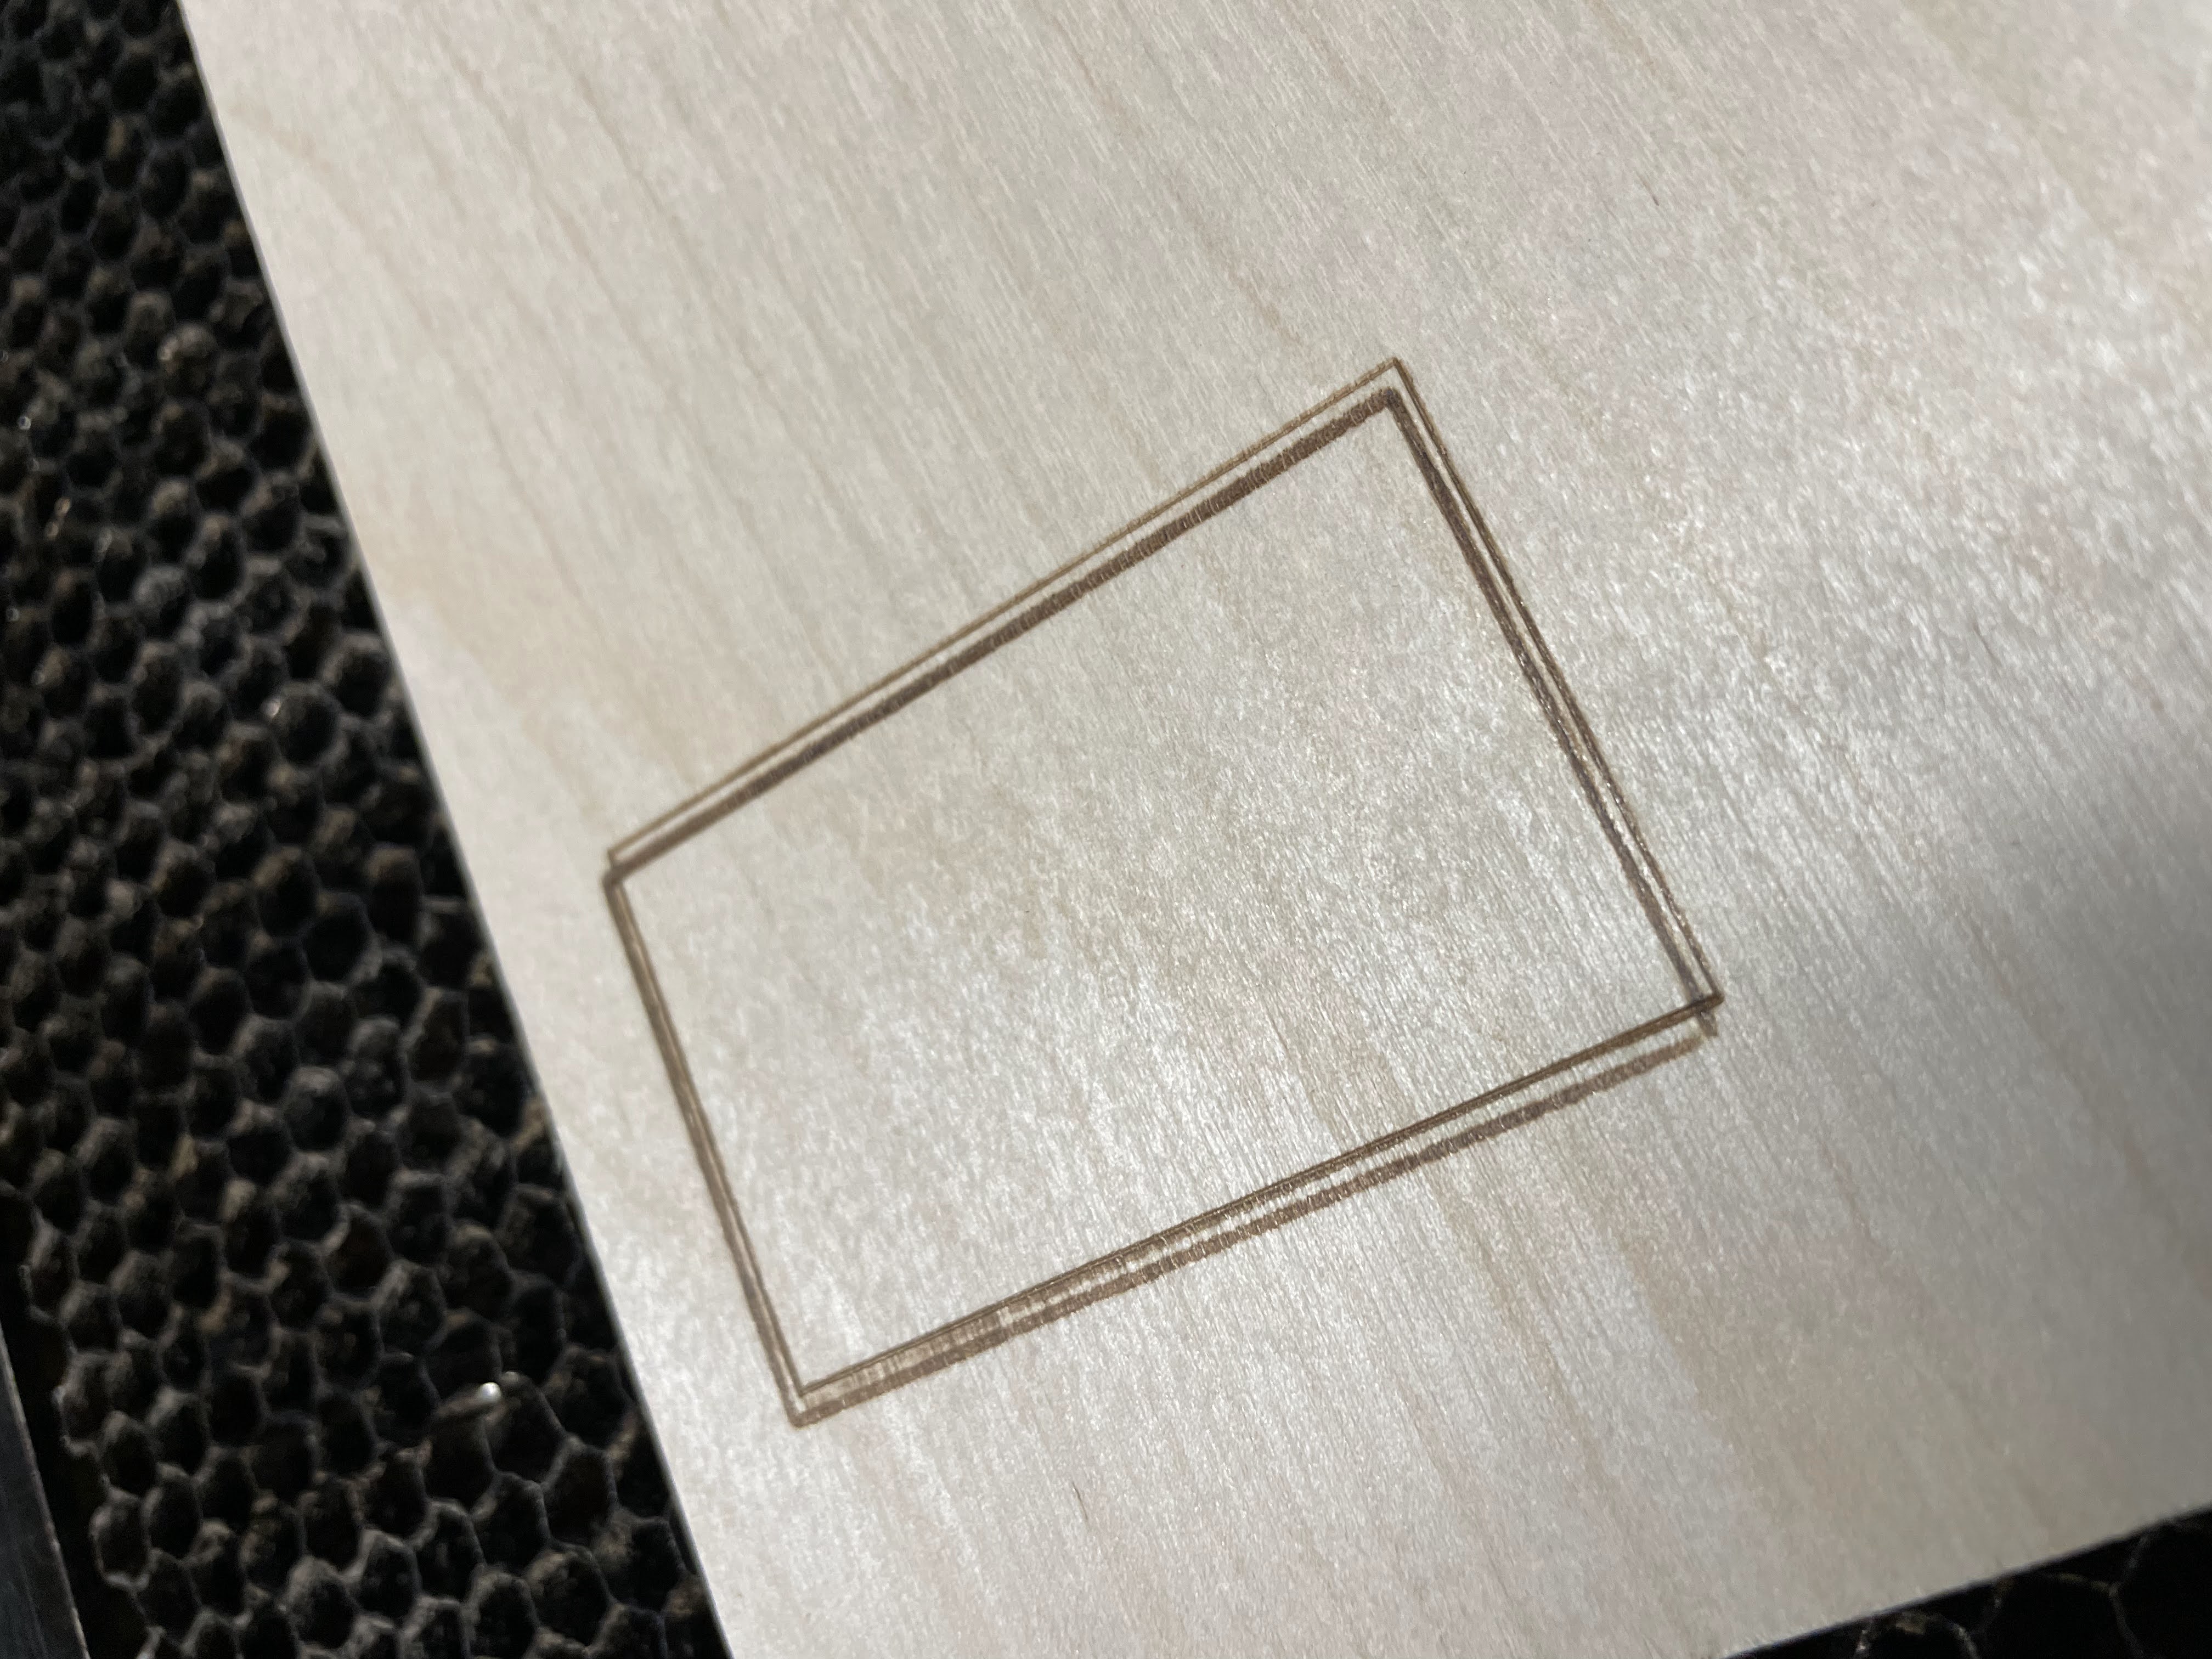
I made a mistake in the initial description and edited it the next day and sent a followup message in the thread. It’s already been pretty well-used with all our walk-up users and the lines are tight and cuts very cleanly. So, something is “off”.
The Z should NOT be negative. It must be POSITIVE. That’s the mistake I wrote the first night, I apologize for that error. I see I need to take a new photo to that effect.
If it is still not correct, and the lens is not damaged, then most likely someone mistakenly reset the focal point on the Z to an incorrect distance.
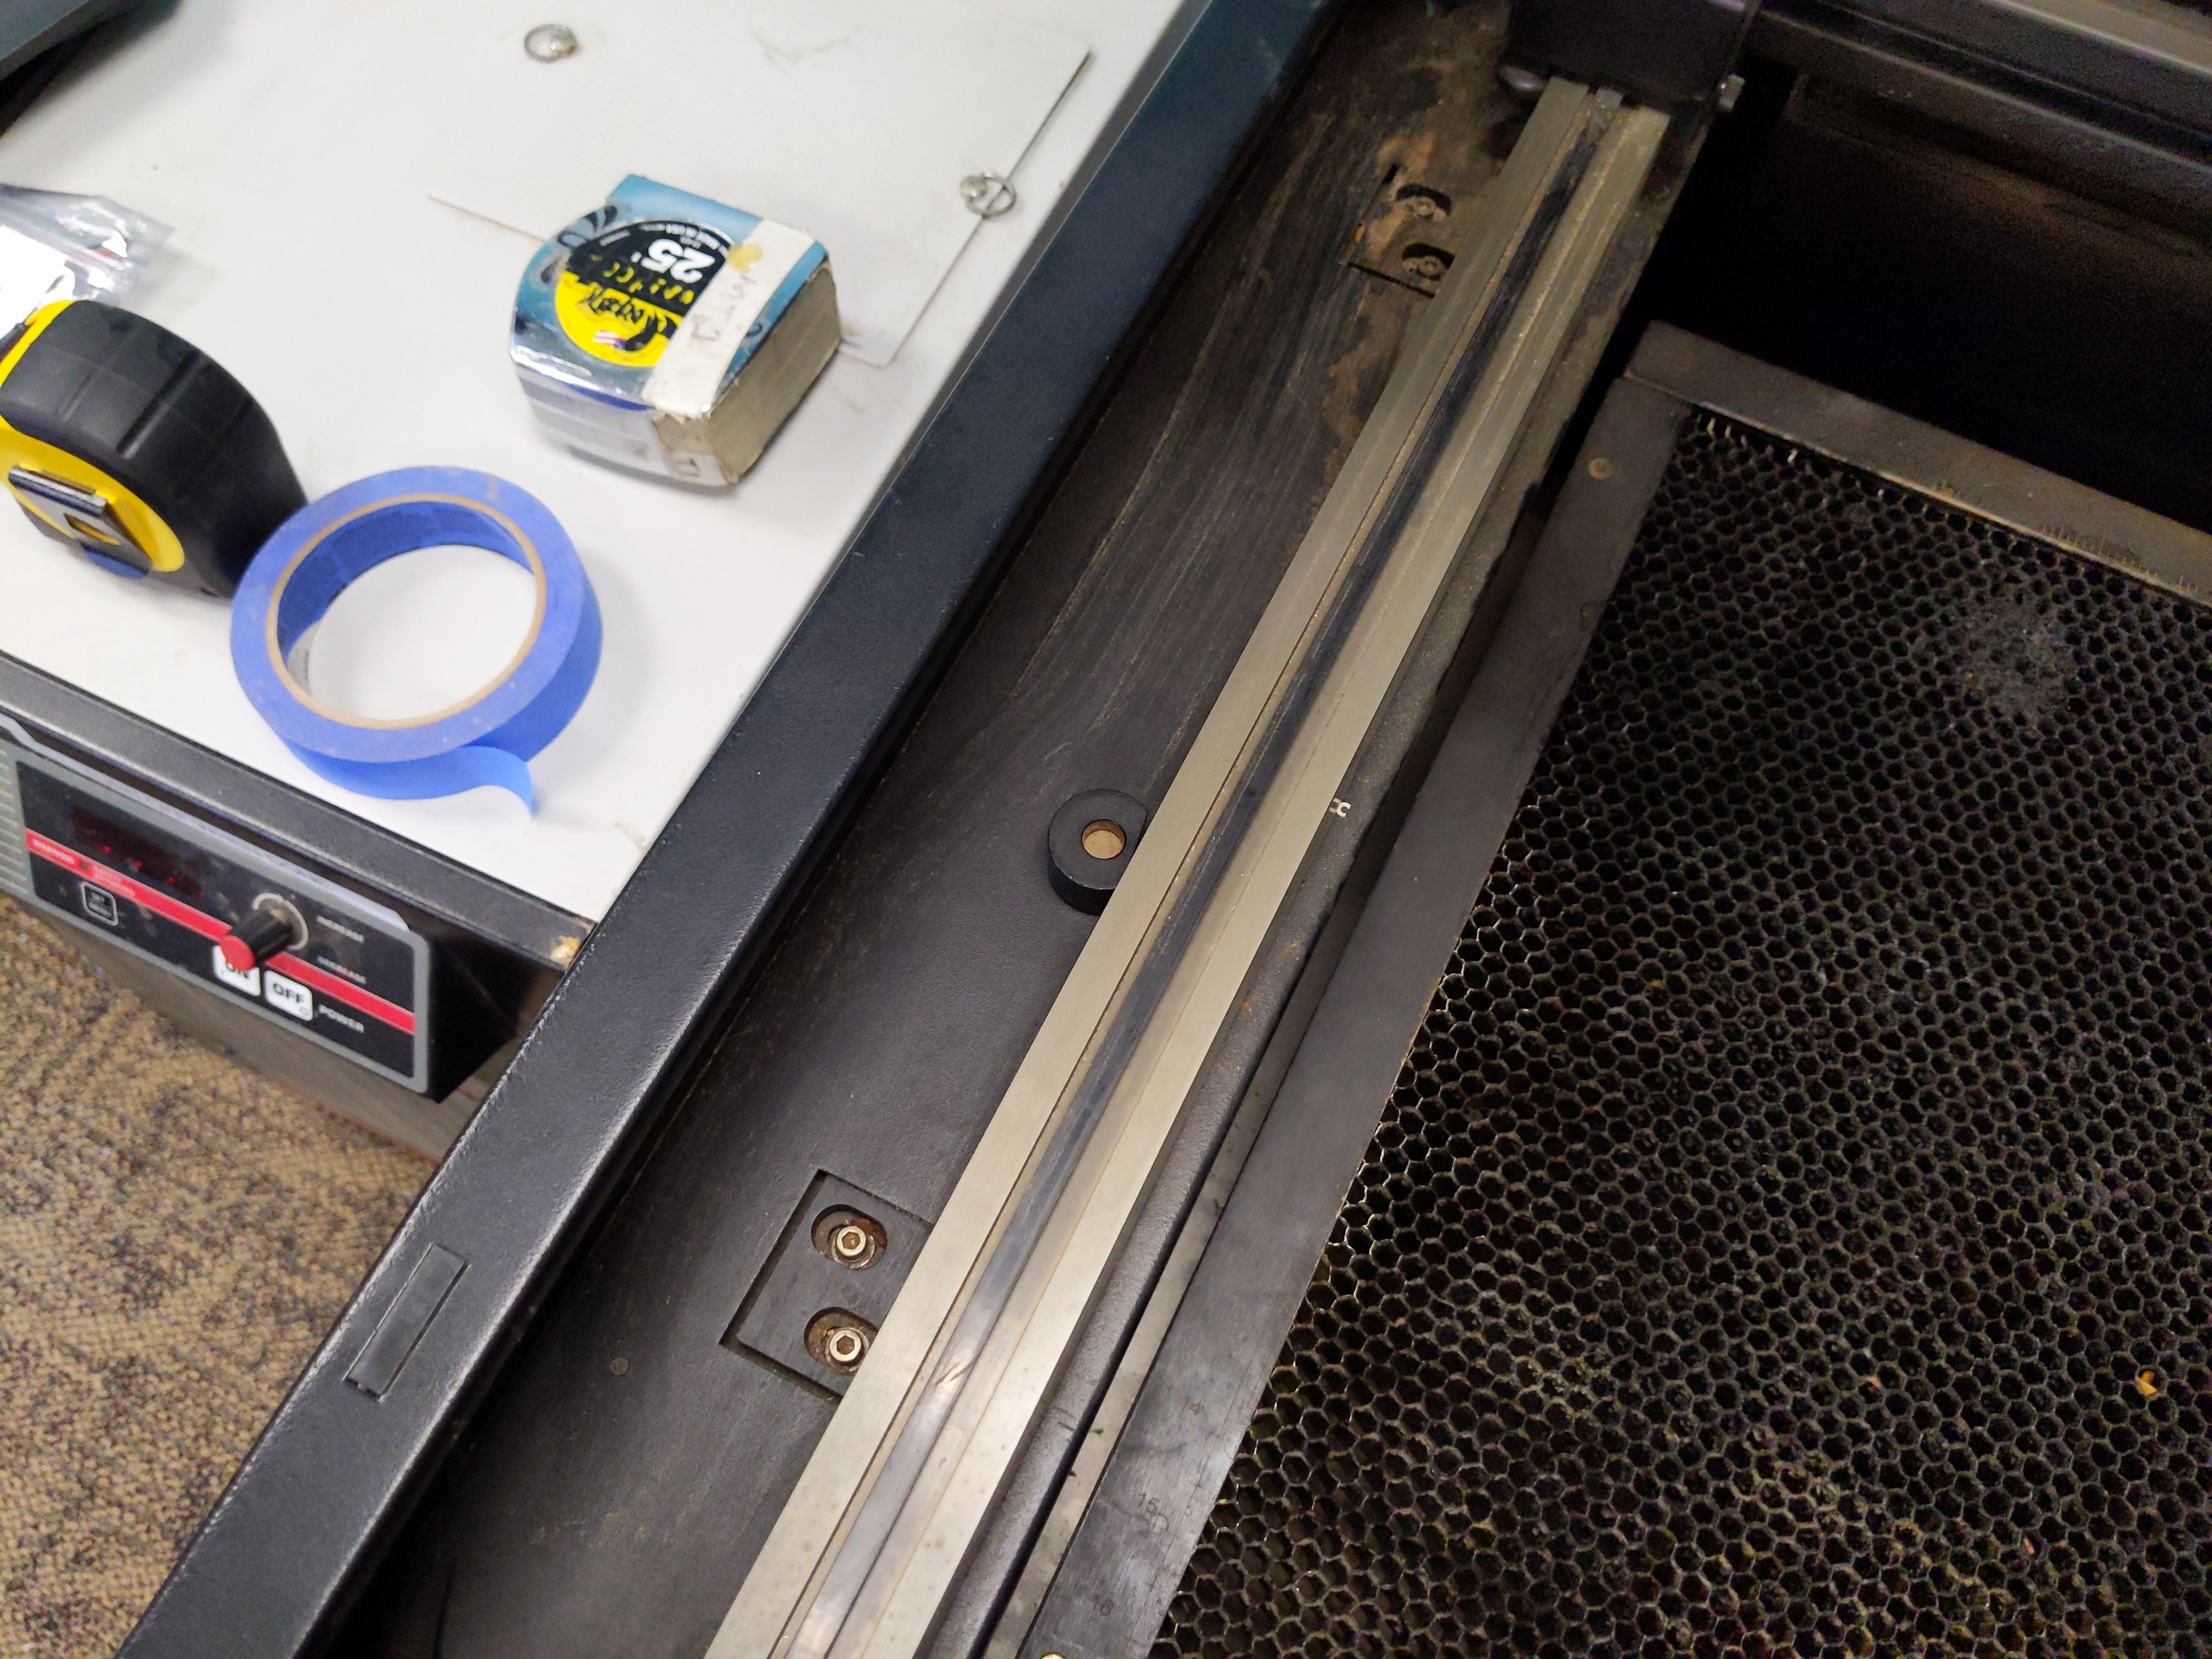
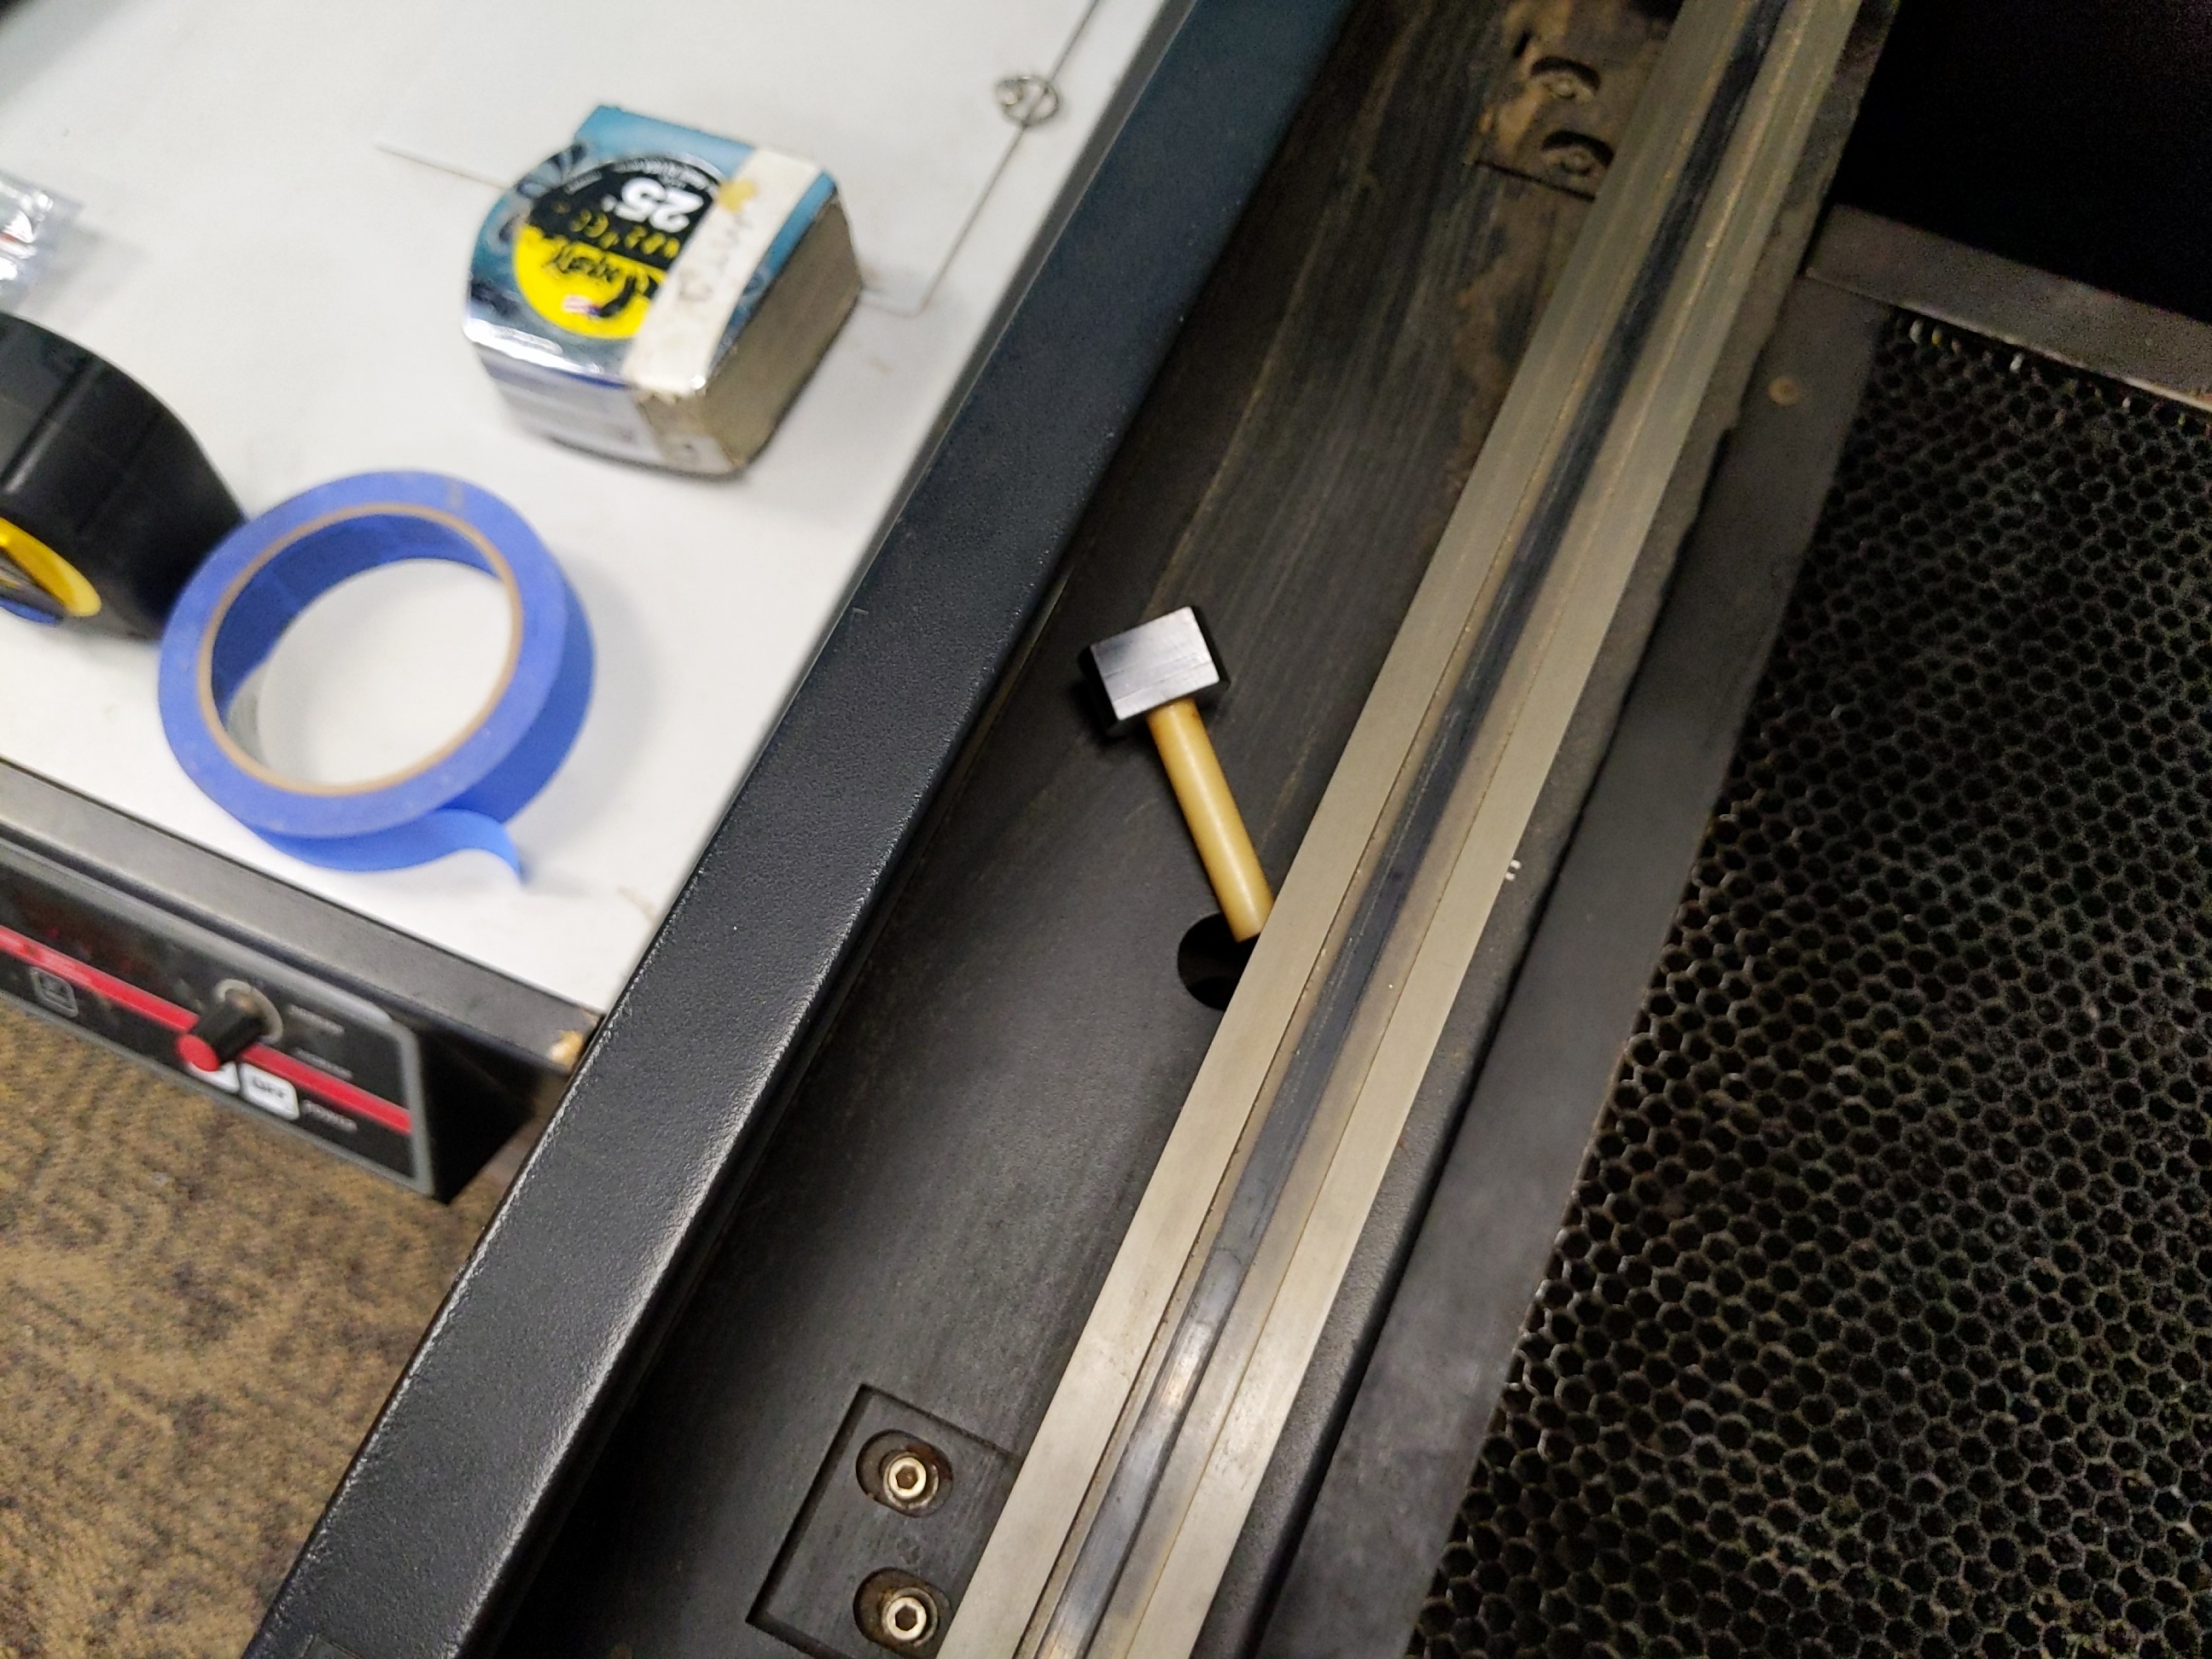
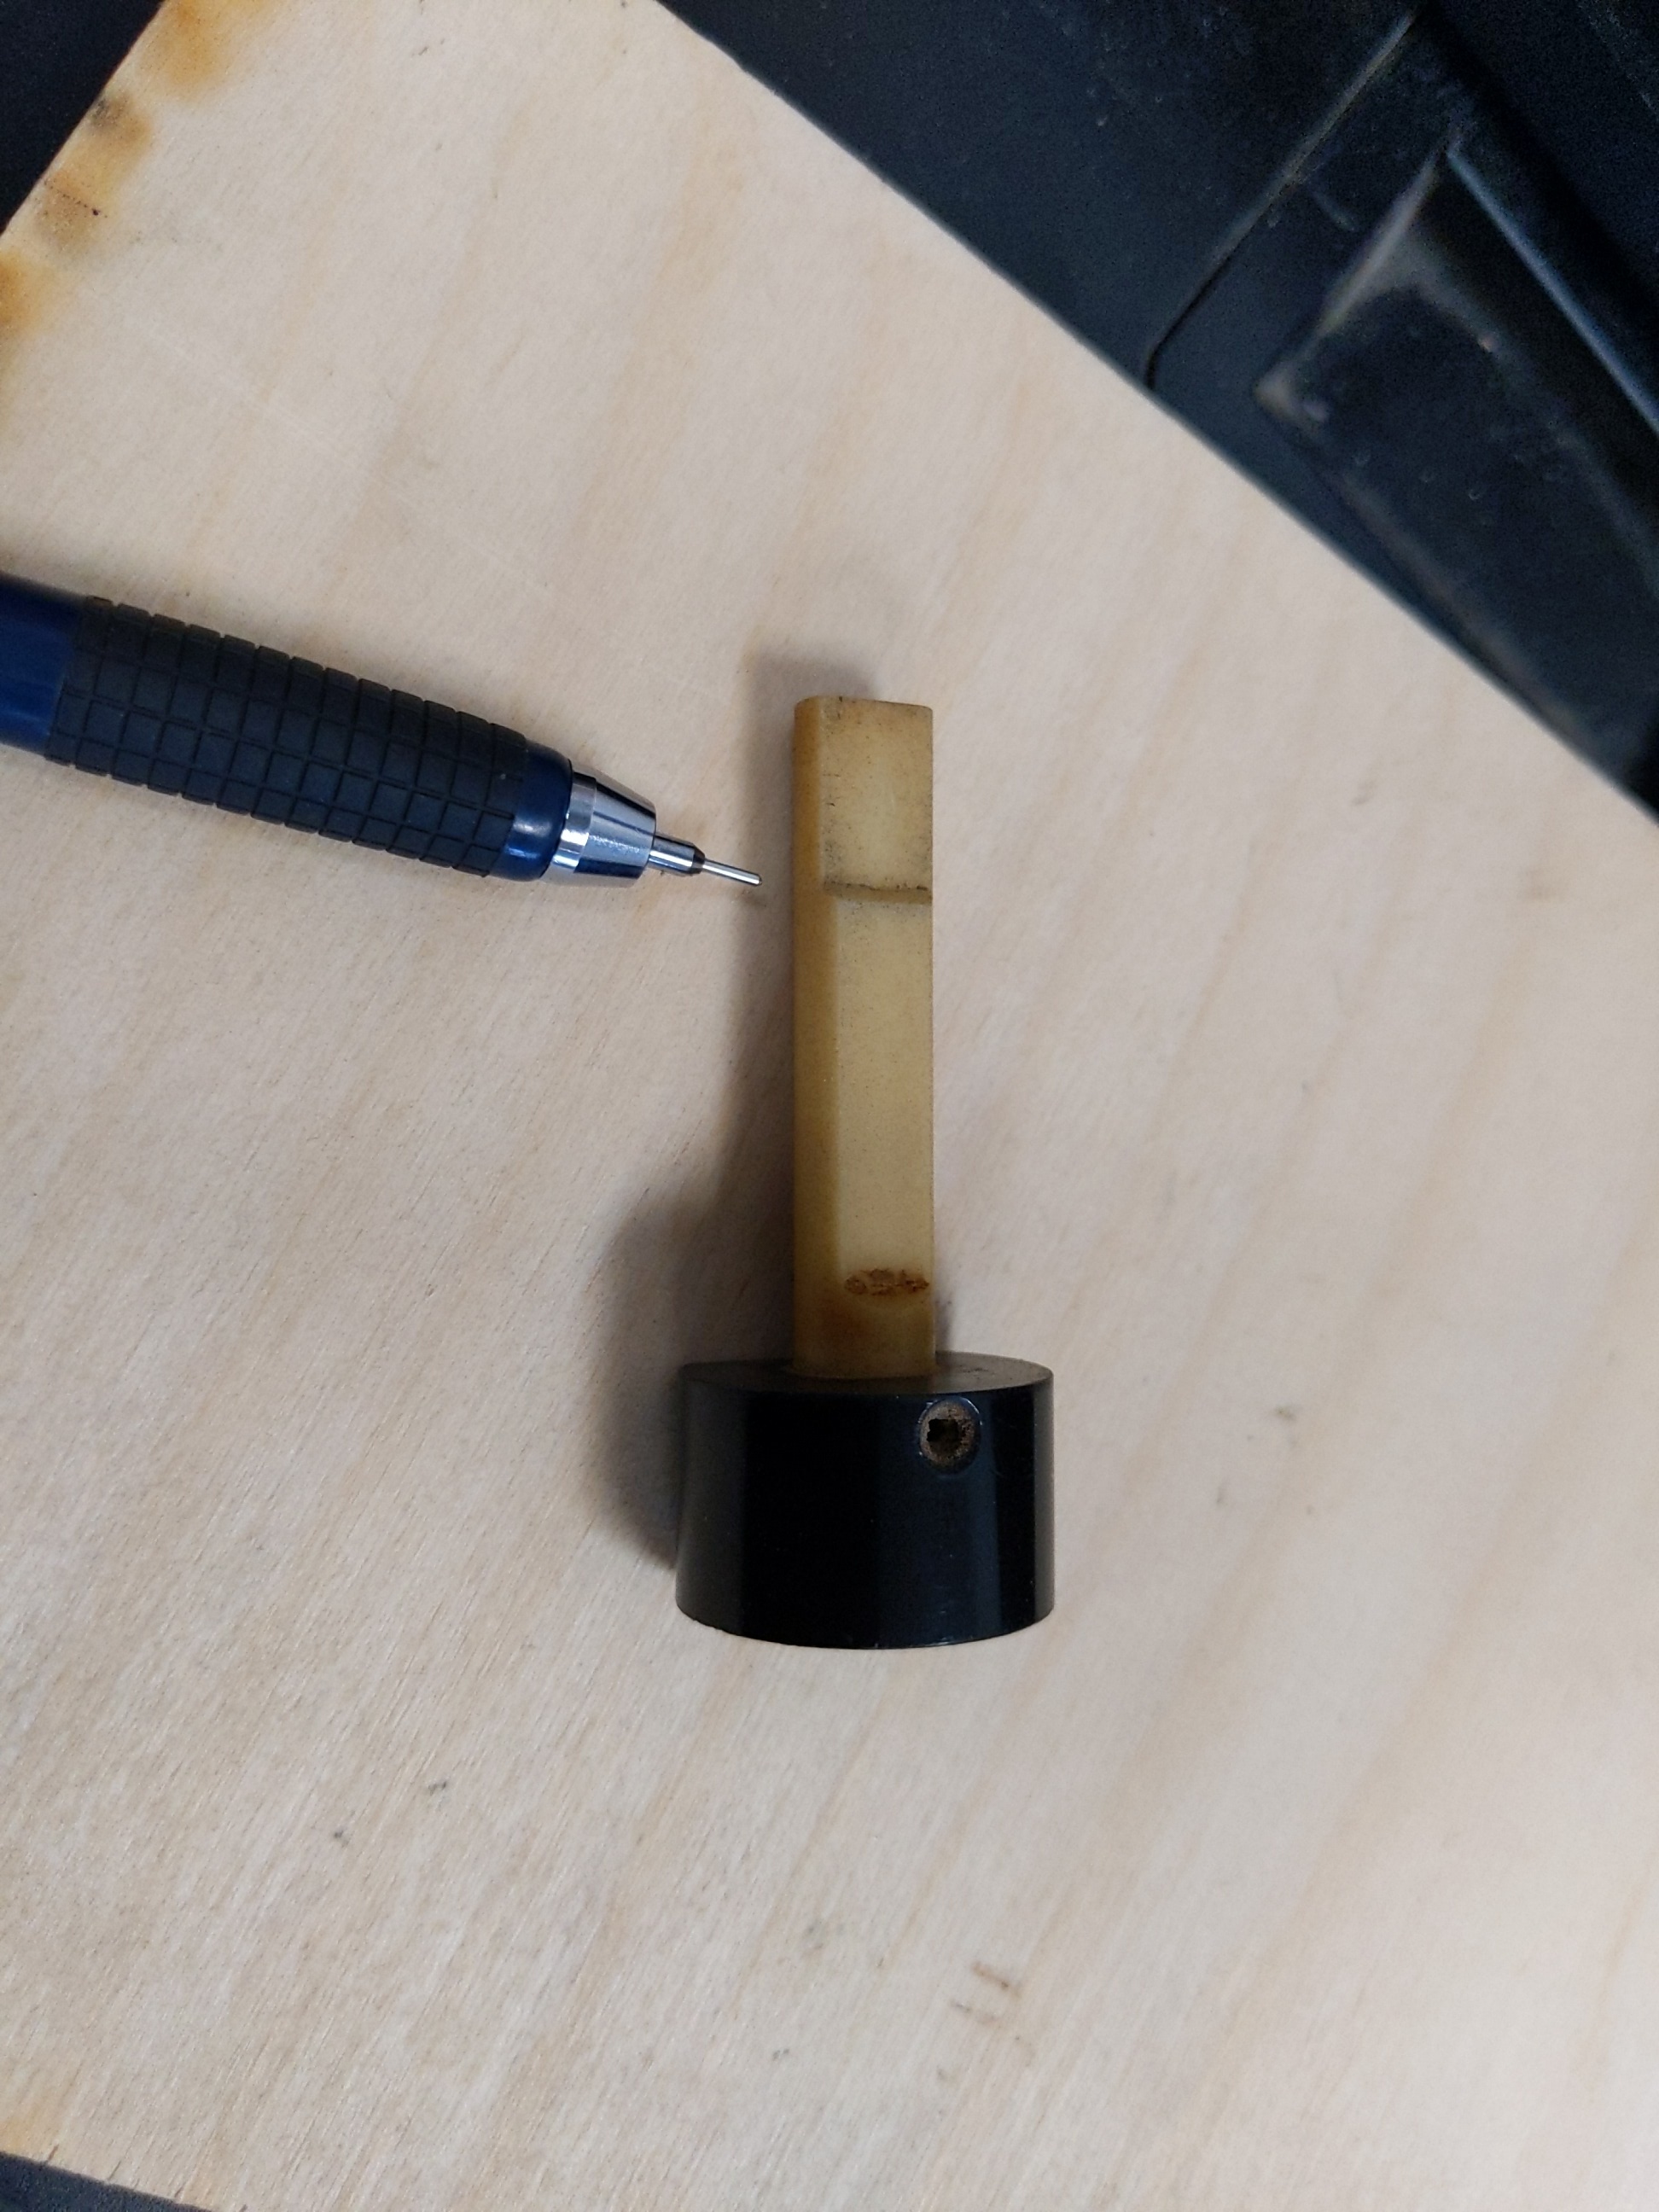
In this case, first made sure you have the little focus stick and know how to use it. It has a flat side with a small slope in the middle and that indicates where the bottom of the front (not side) of the carriage will be when the lens is at the correct distance from the honeycomb surface. The stick as a whole shouldn’t be placed underneath the carriage since it would just get squished. You lift the Z until the flat side of the stick can be placed against the flat front of the carriage.
Go into the menu and “Home Z” just to make sure it knows where it is vs the sensor. That will make it jog the Z all the way down and find the sensor. It is unlikely that this has a problem and the step could probably be skipped if nothing else is amiss, but still a good idea.
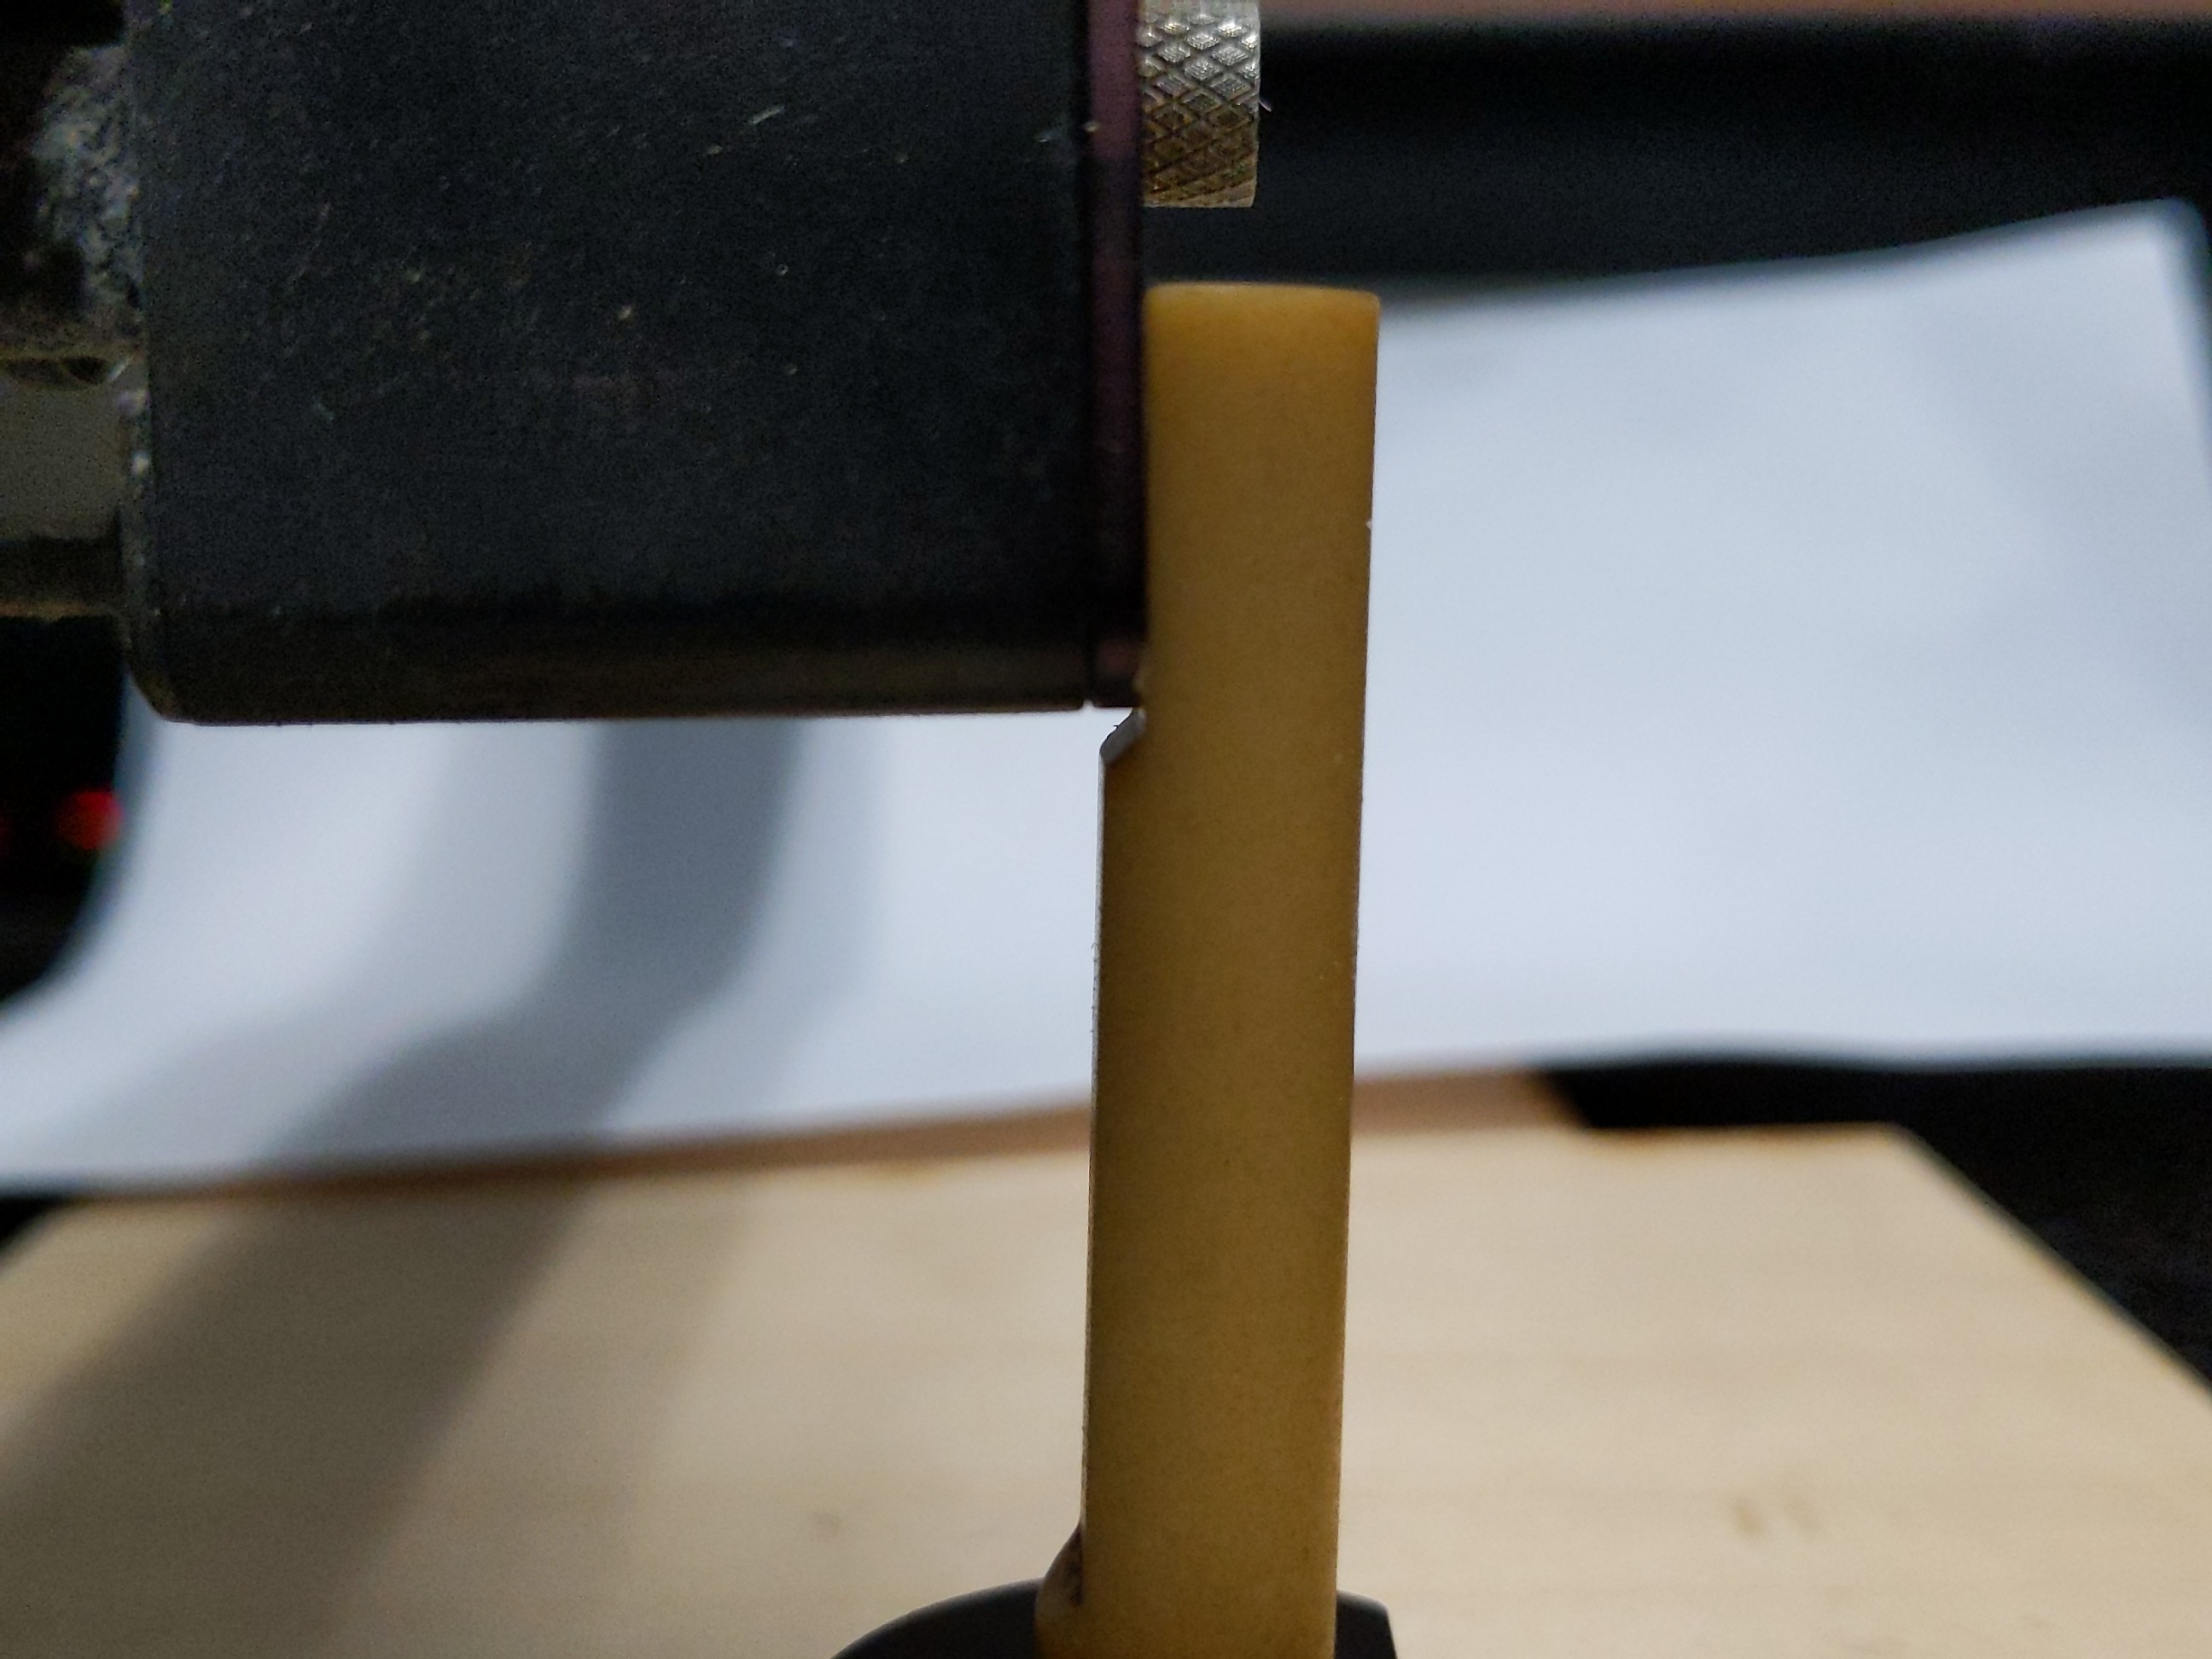
Then lift the Z back up until the stick’s flat side starts to pass the FRONT of the lens carriage and then engages the small sloped feature in the middle of the stick. That slope will make the stick tip away from the carriage, and indicates the correct focal point for Z=0. Bump it up and down if necessary to find the point right before stick’s slope pushes off the carriage. Then set that as the focal point in the menu, that will be the new Z=0.
This is not a normal user procedure. It will only come up if a repair is done or a user has mistakenly gone into the calibration menu and set the Z to the wrong focal point.
Came by and confirmed the Z focus has been reset to about 0.7" from where it should be.
Likely explanation is someone accidentally used the “set focal length” option instead of just running after moving the Z.
Actually, the Z value is sort of optional. A few of the Blue users just used the stick on top of their work to adjust the Z where they wanted and just set the Z to “off” in the print driver anyways.
With Pearl, some already just put the stick on top of their stock and move the Z until the stick indicates 2" and run their job from there without looking at the panel’s readout for Z.
Is the focal length “stick” clearly marked and placed in the same spot. I can’t seem to find it, luckily the focal length looks good now but for future uses it would be nice to know. Also came in today and the Z was at -4.35 so I just rehomed Z and started fresh.
Are your vector lines are being interpreted as raster? We have Lightburn installed on that PC, but the software support for that machine is buggy and cannot vector, so at this time you’ll need to use Illustrator.
Like Corel, Illustrator’s vector width needs to be set very low, 0.001". To do this you’ll need to change the units from “points” to “inches”.
If the Z has been set “off”, you don’t actually need it. You can just use the focus stick with the front of the carriage and run from there. Pearl’s print driver will not move the Z so you can just set the Z to the correct focus with the stick and run from there, regardless of what the display says it thinks that Z is.
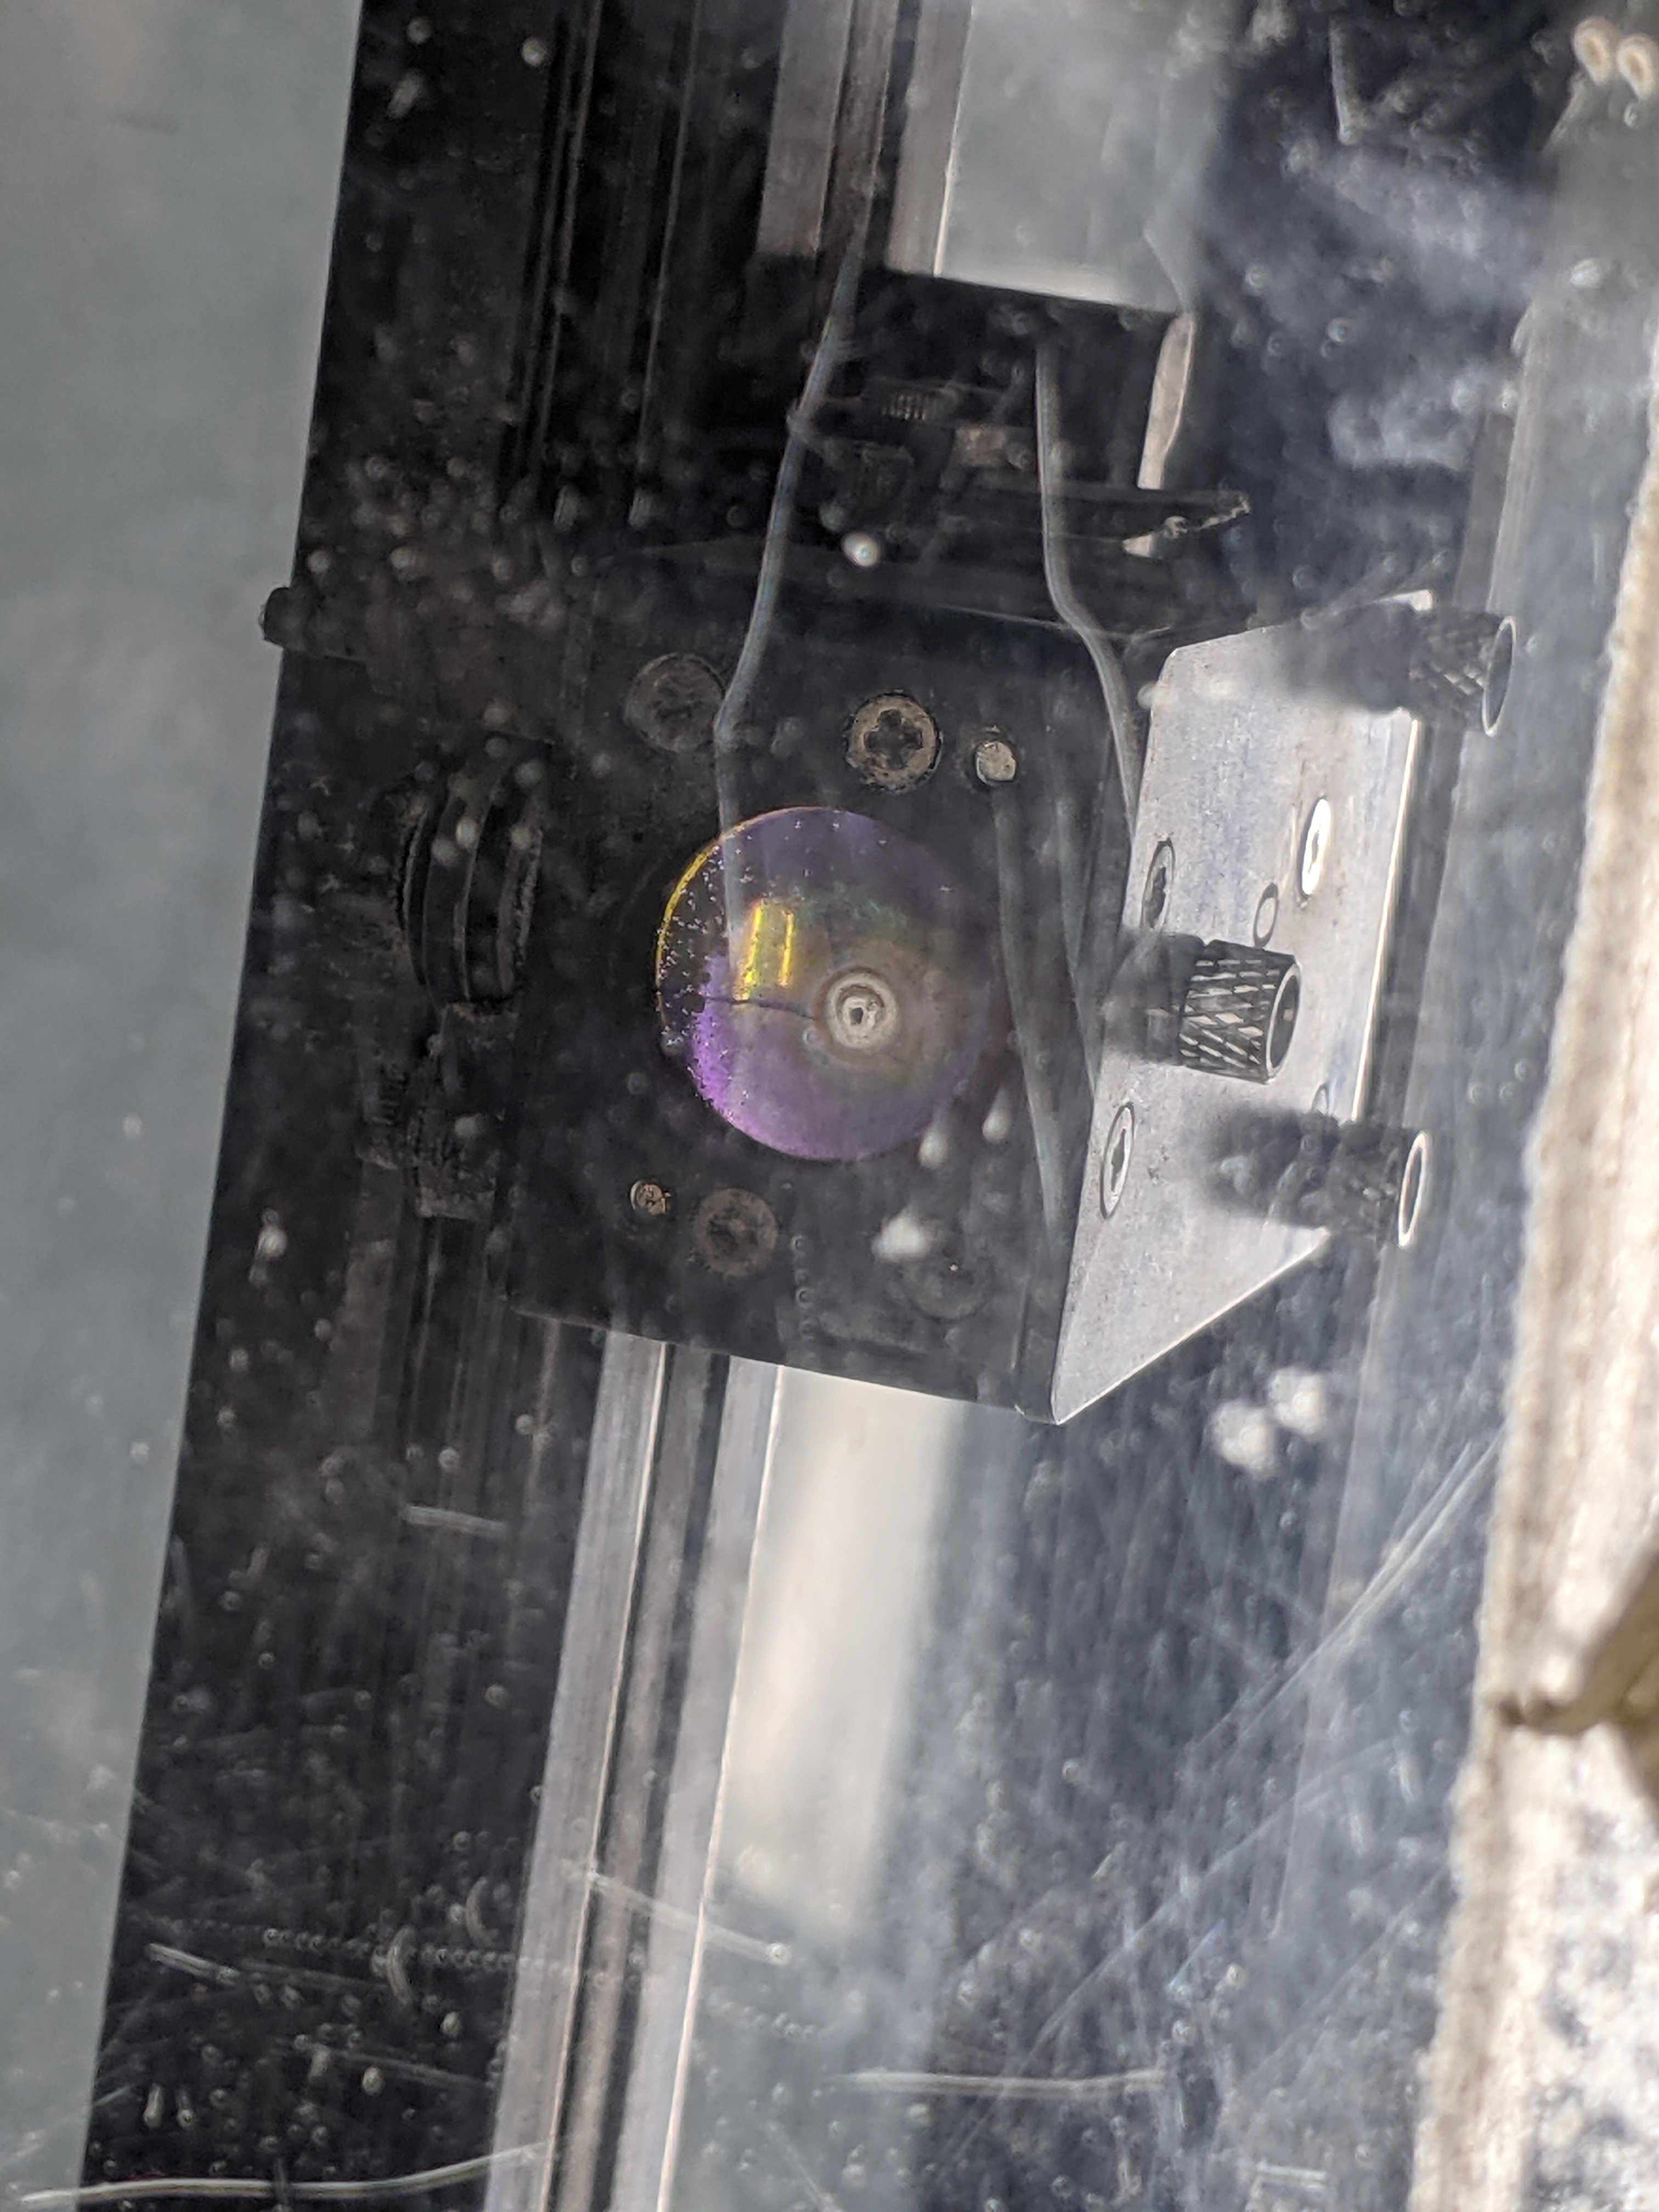
The other thing that can cause this would be a broken lens, which is easy enough to check for (damage will be obvious) and if so we can replace immediately. The lens was fine this morning though so that sounds less likely.
Was found with the Z lifted far too close to the lens. Lens and #3 mirror busted, as apparent on a basic lens check that users should do prior to starting. It is possible the user didn’t turn on the exhaust fan, but given the high position of the Z, the Z position counter on the LCD was likely off. I’m not sure if a user keeps resetting it incorrectly or what, but just don’t use the LCD
Installed backups.
Please ONLY SET FOCUS WITH THE STICK for now. Don’t go by the number on the LCD.
We shouldn’t have to set focus because it isn’t suppose to change? Or does it need to be set after a ‘Rehome Z’? Can you take a picture of the stick on the laser head to correctly set focus? Thanks for fixing it.
Place your work on the bed, jog carriage over work.
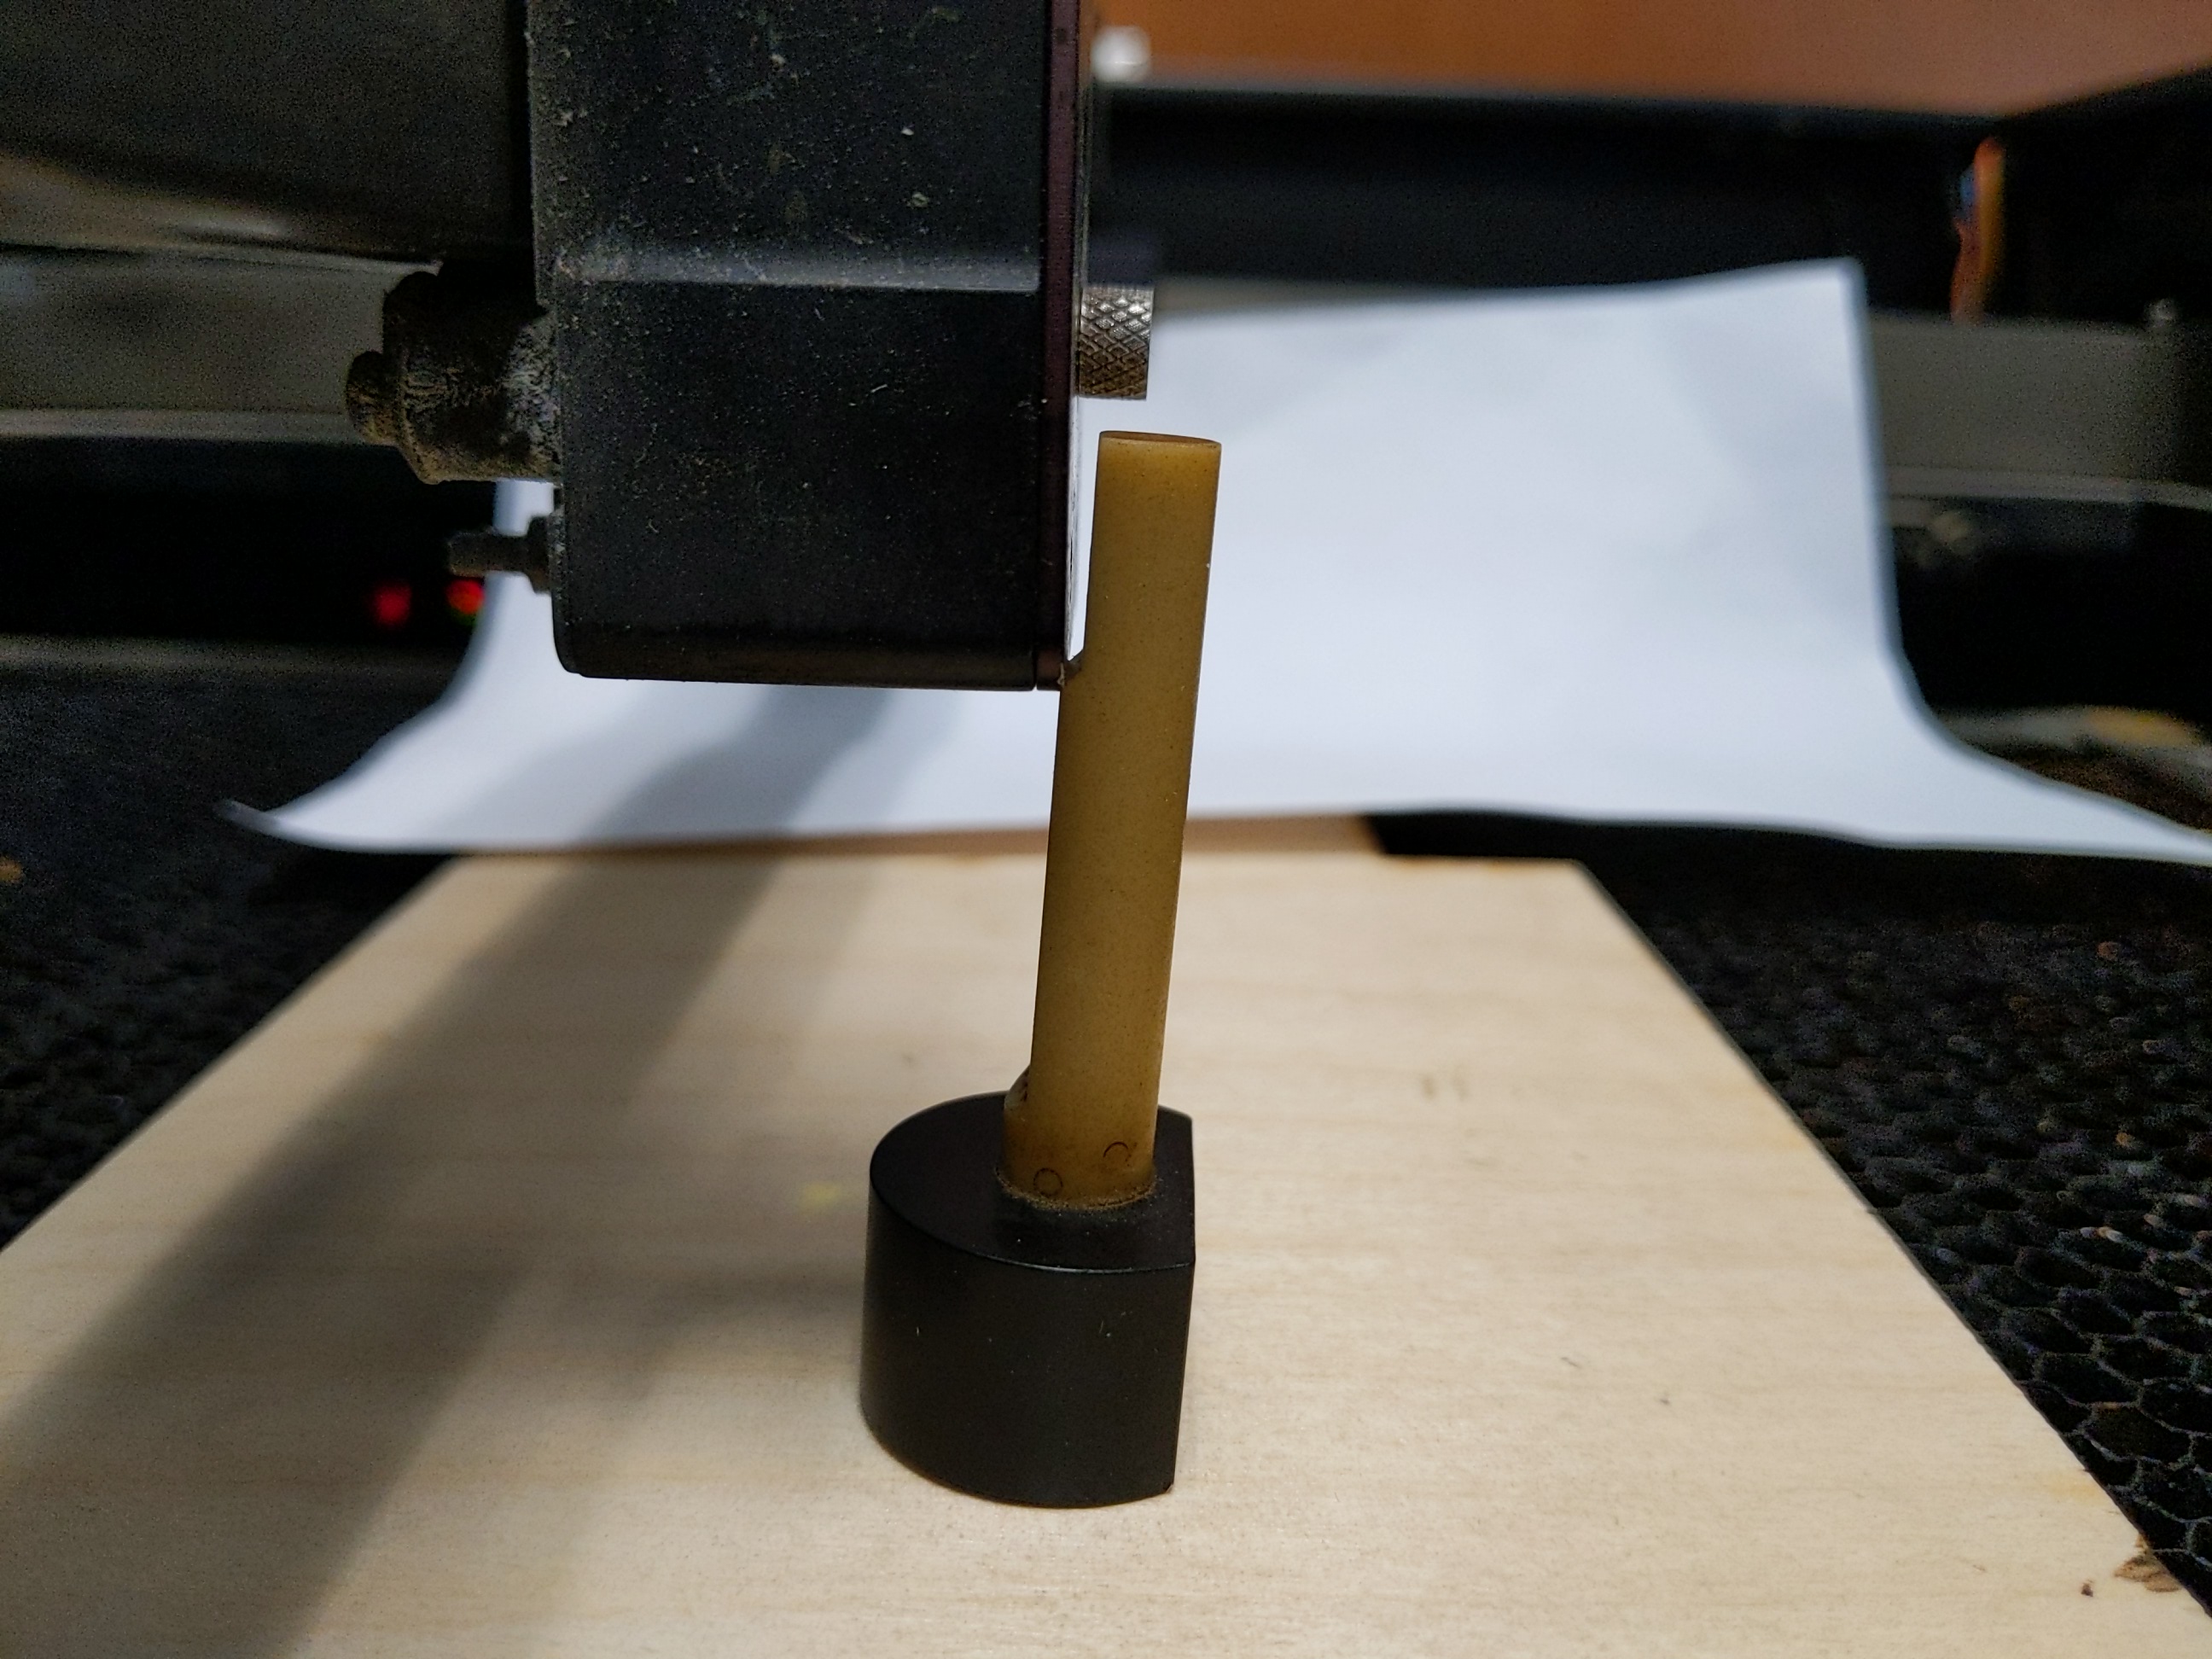
Put stick on the work, flat part of stick on FRONT of the carriage (take care to not touch the lens on bottom) like this:
That means you went TOO FAR UP, drop the Z until the ramp step is under the front of the carriage but if you stepped the Z up one button press (0.1") it would push off.
Being within 0.1" is ok. If you hit SELECT button it will change to 0.01" steps
These are really great pictures and instructions @dannym! Is there a Pearl Laser manual or general laser manual we can add these too? Perhaps a page on the wiki (@Jon)?
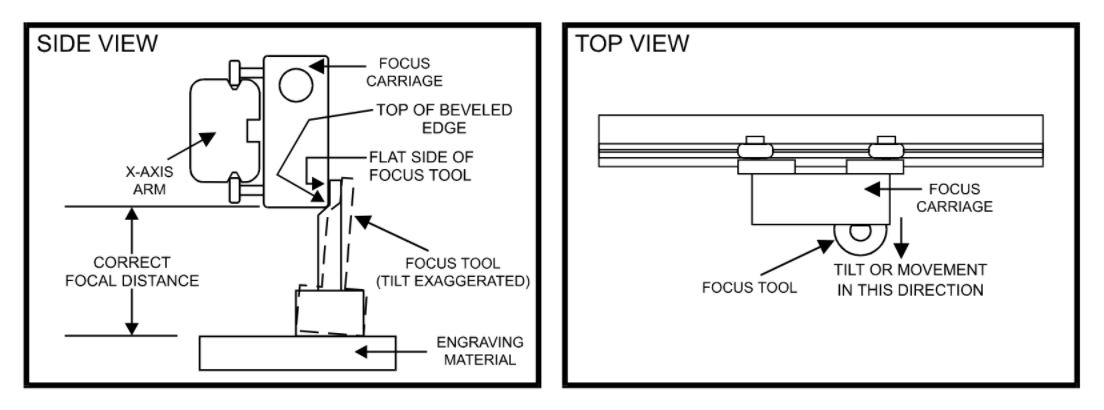
There is an X100 manual. It’s a lot of setup info and bulk that is an interesting reference but maybe not the best starting guide. They do have this picture: