hi everyone, hoping someone can give me some pointers - i want to take one leg of this angle bracket, put it up lengthwise against a round shaft, and bend it such that it matches the contour of the shaft. is this possible with the tools we have in the shop?
No. Not really. Also, do you intend to keep its galvanize plating?
In order to do what you’re describing I would want to clamp/tack it to said pipe/form, and then heat up the bendy parts with a torch. Once hot you can fold it over and possibly hammer the bendy bits into the form/pipe to your liking. Heating up the bracket is likely to ruin the galvanize plating.
You could make a bracket that you want by piecing it together with parts created at the shop, and welded together.
I could be wrong though. Can you post a picture of your desired profile?
I curious as everyone else here about the shape. I think a heavy duty piece of angle setup a v block in the hydraulic press will get you close the shape you are wanting. I think also cutting the angle bracket at the seam and rewelding it back together might yield better results.
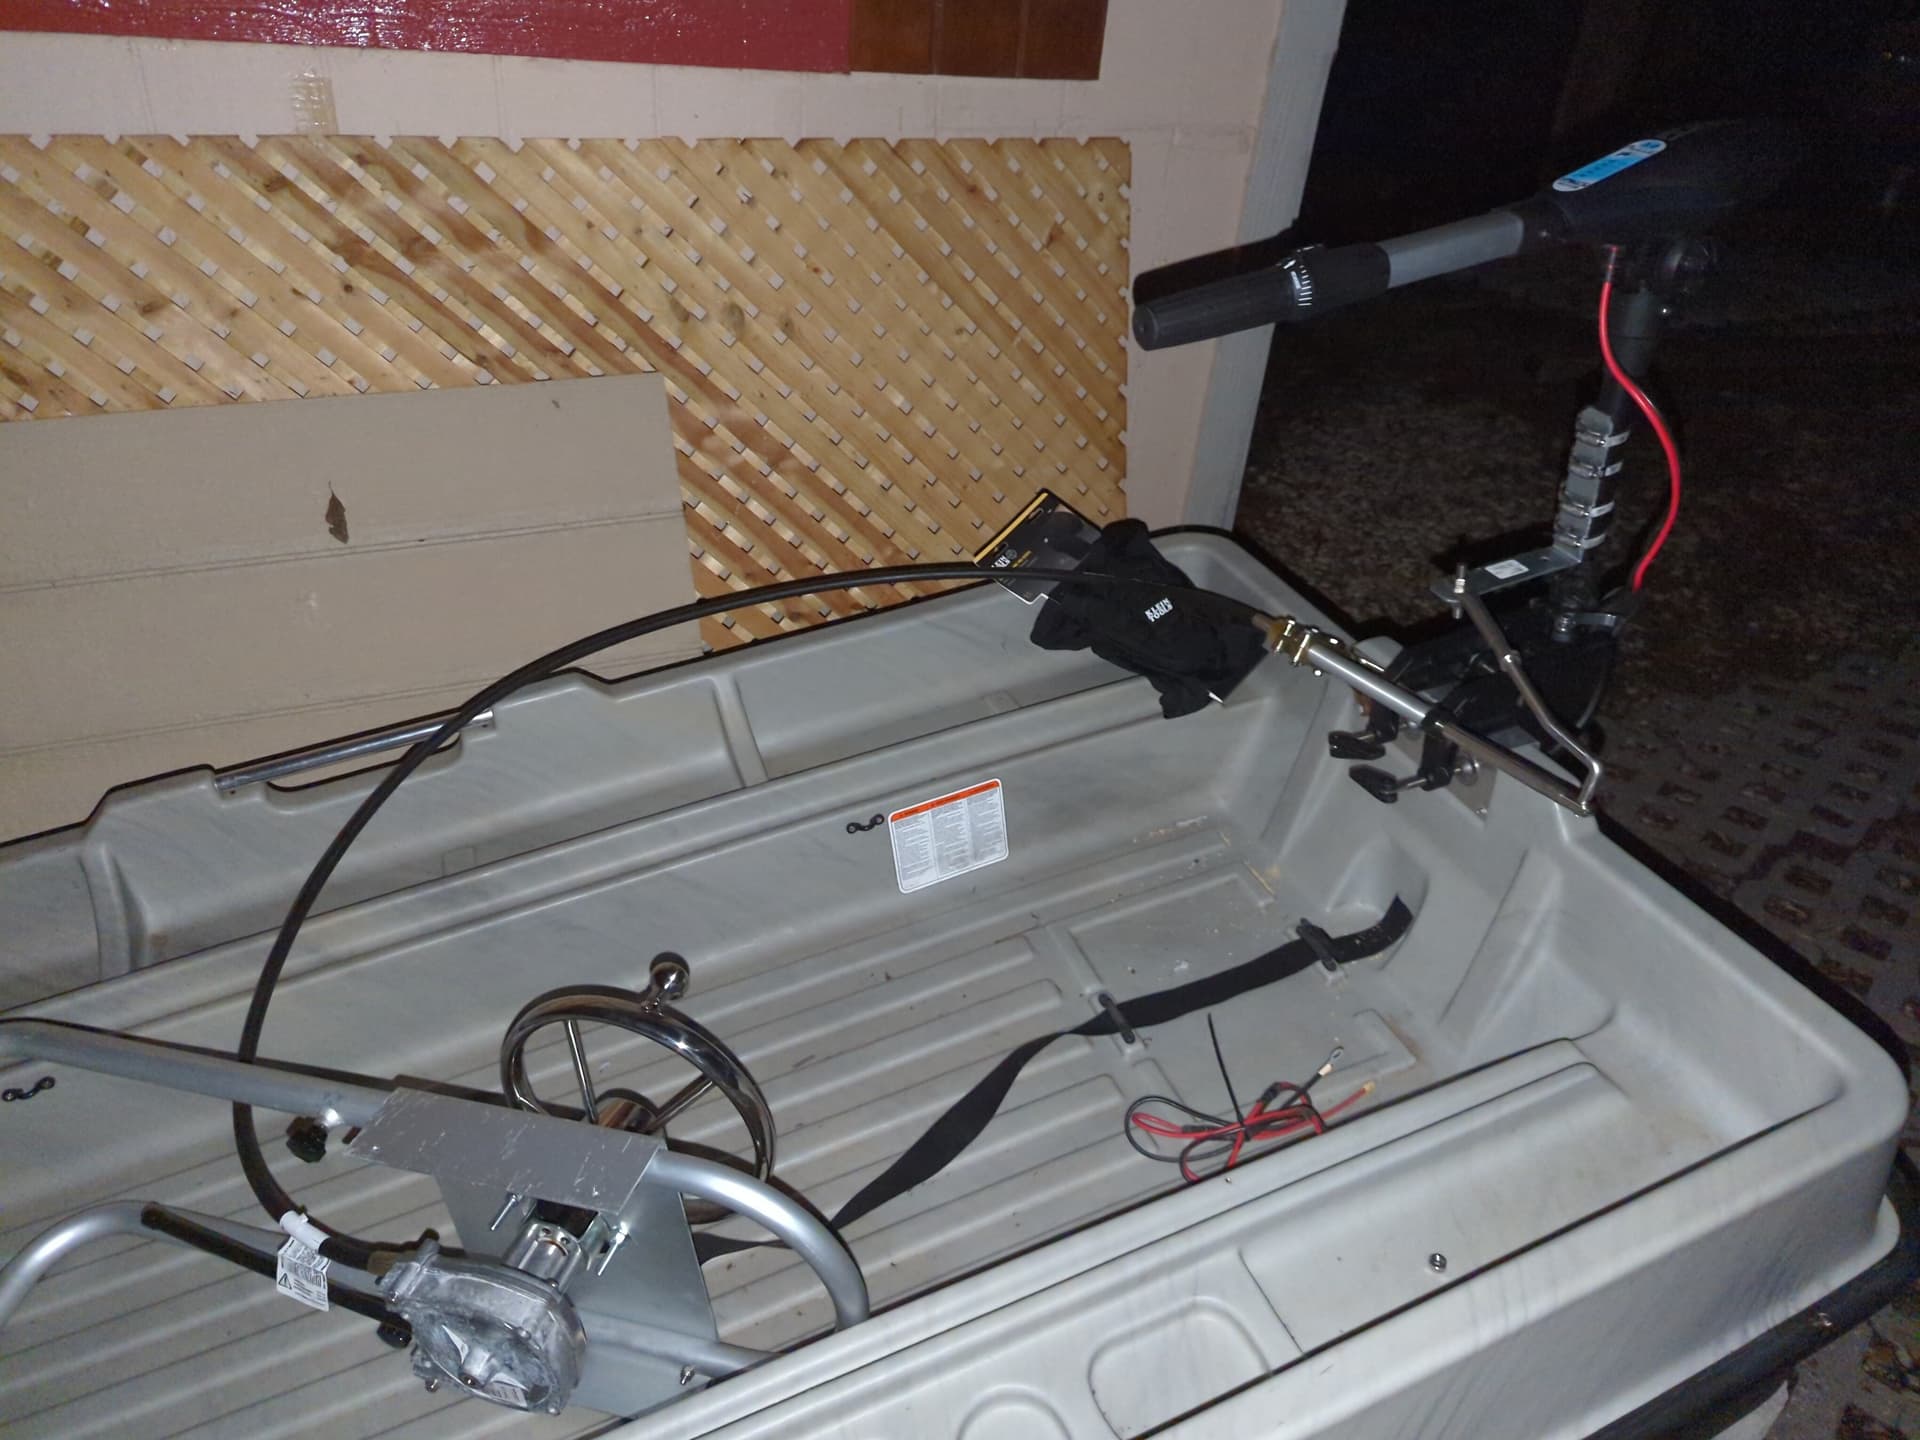
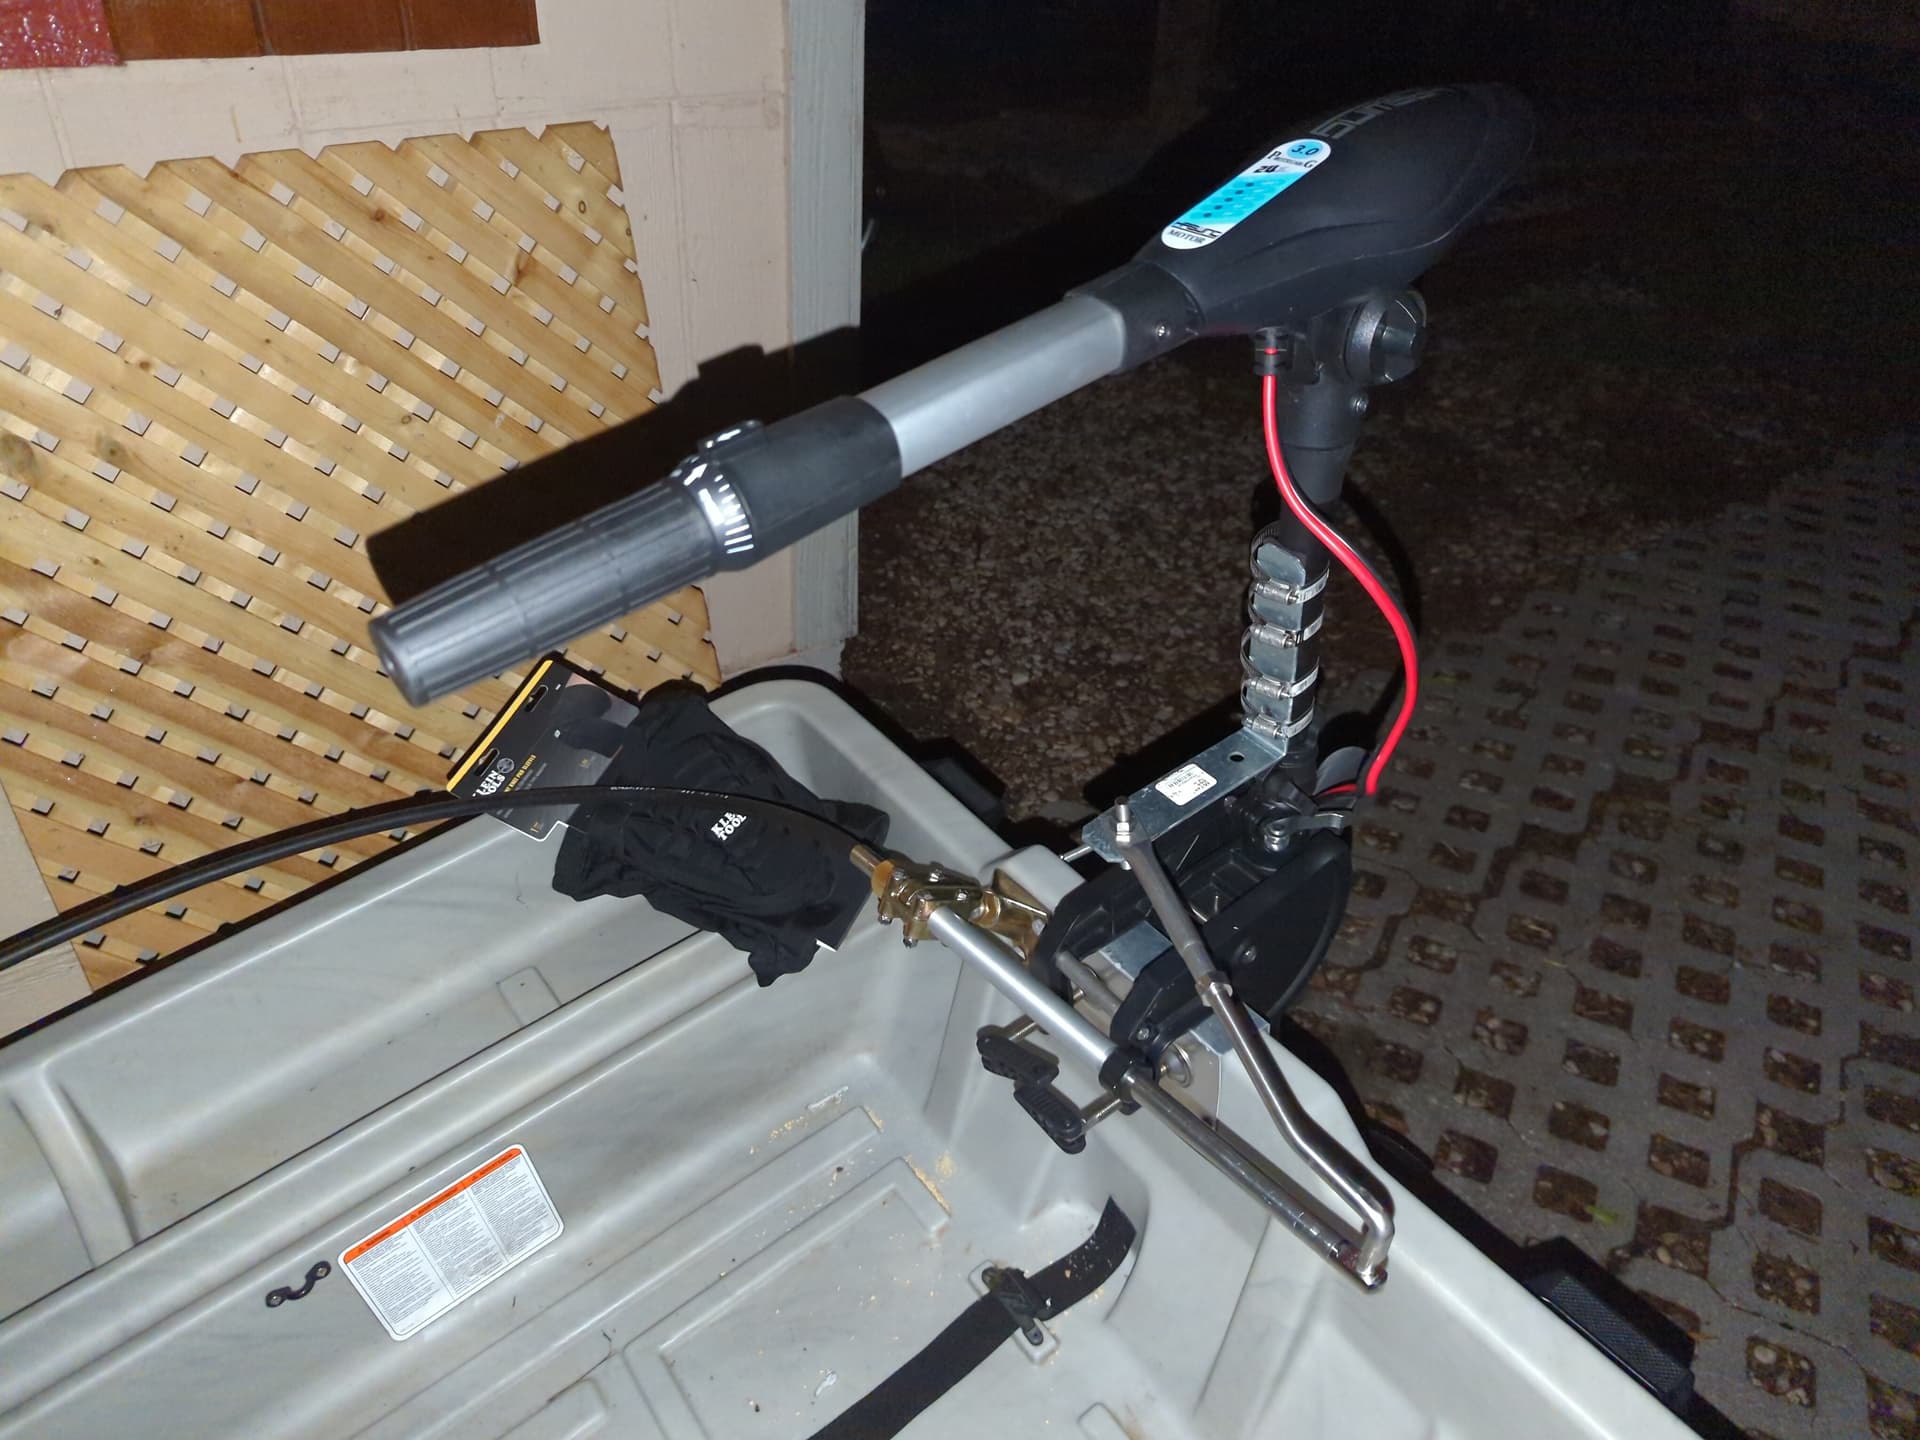
It might help to more clearly describe what I’m trying to do with pictures. The goal here is to use an electric trolling motor as the primary propulsion for a small boat, with “real” steering (as opposed to a tiller). The thing about this is that as far as I can tell, there is exactly one (1) company in the entire world that produces small motors designed to be used this way: a Chinese company called Caroute: W platform - Brushless Electric Boat Motor, Steering Wheel Control-W platform - Brushless Electric Boat Motor, Steering Wheel Control-W platform eMotor-Brushless Boat eMotor - High Efficiency Brushless Electric Boat Motor With every other maker, you’re basically on your own. sure, there are some with a “foot cable steering” system or even steering via servomotor, but the former is kind of janky and not easily adaptable to what I want to do and the latter costs hilariously large amounts of money per pound of thrust. Caroute is great for what it is, but their costs are also pretty high. I think I might use them for a bigger project, but this one is just for powering a small (8’) boat. Too, the lead time on Caroute motors is very large and I’m trying to get this project done as quickly as possible.
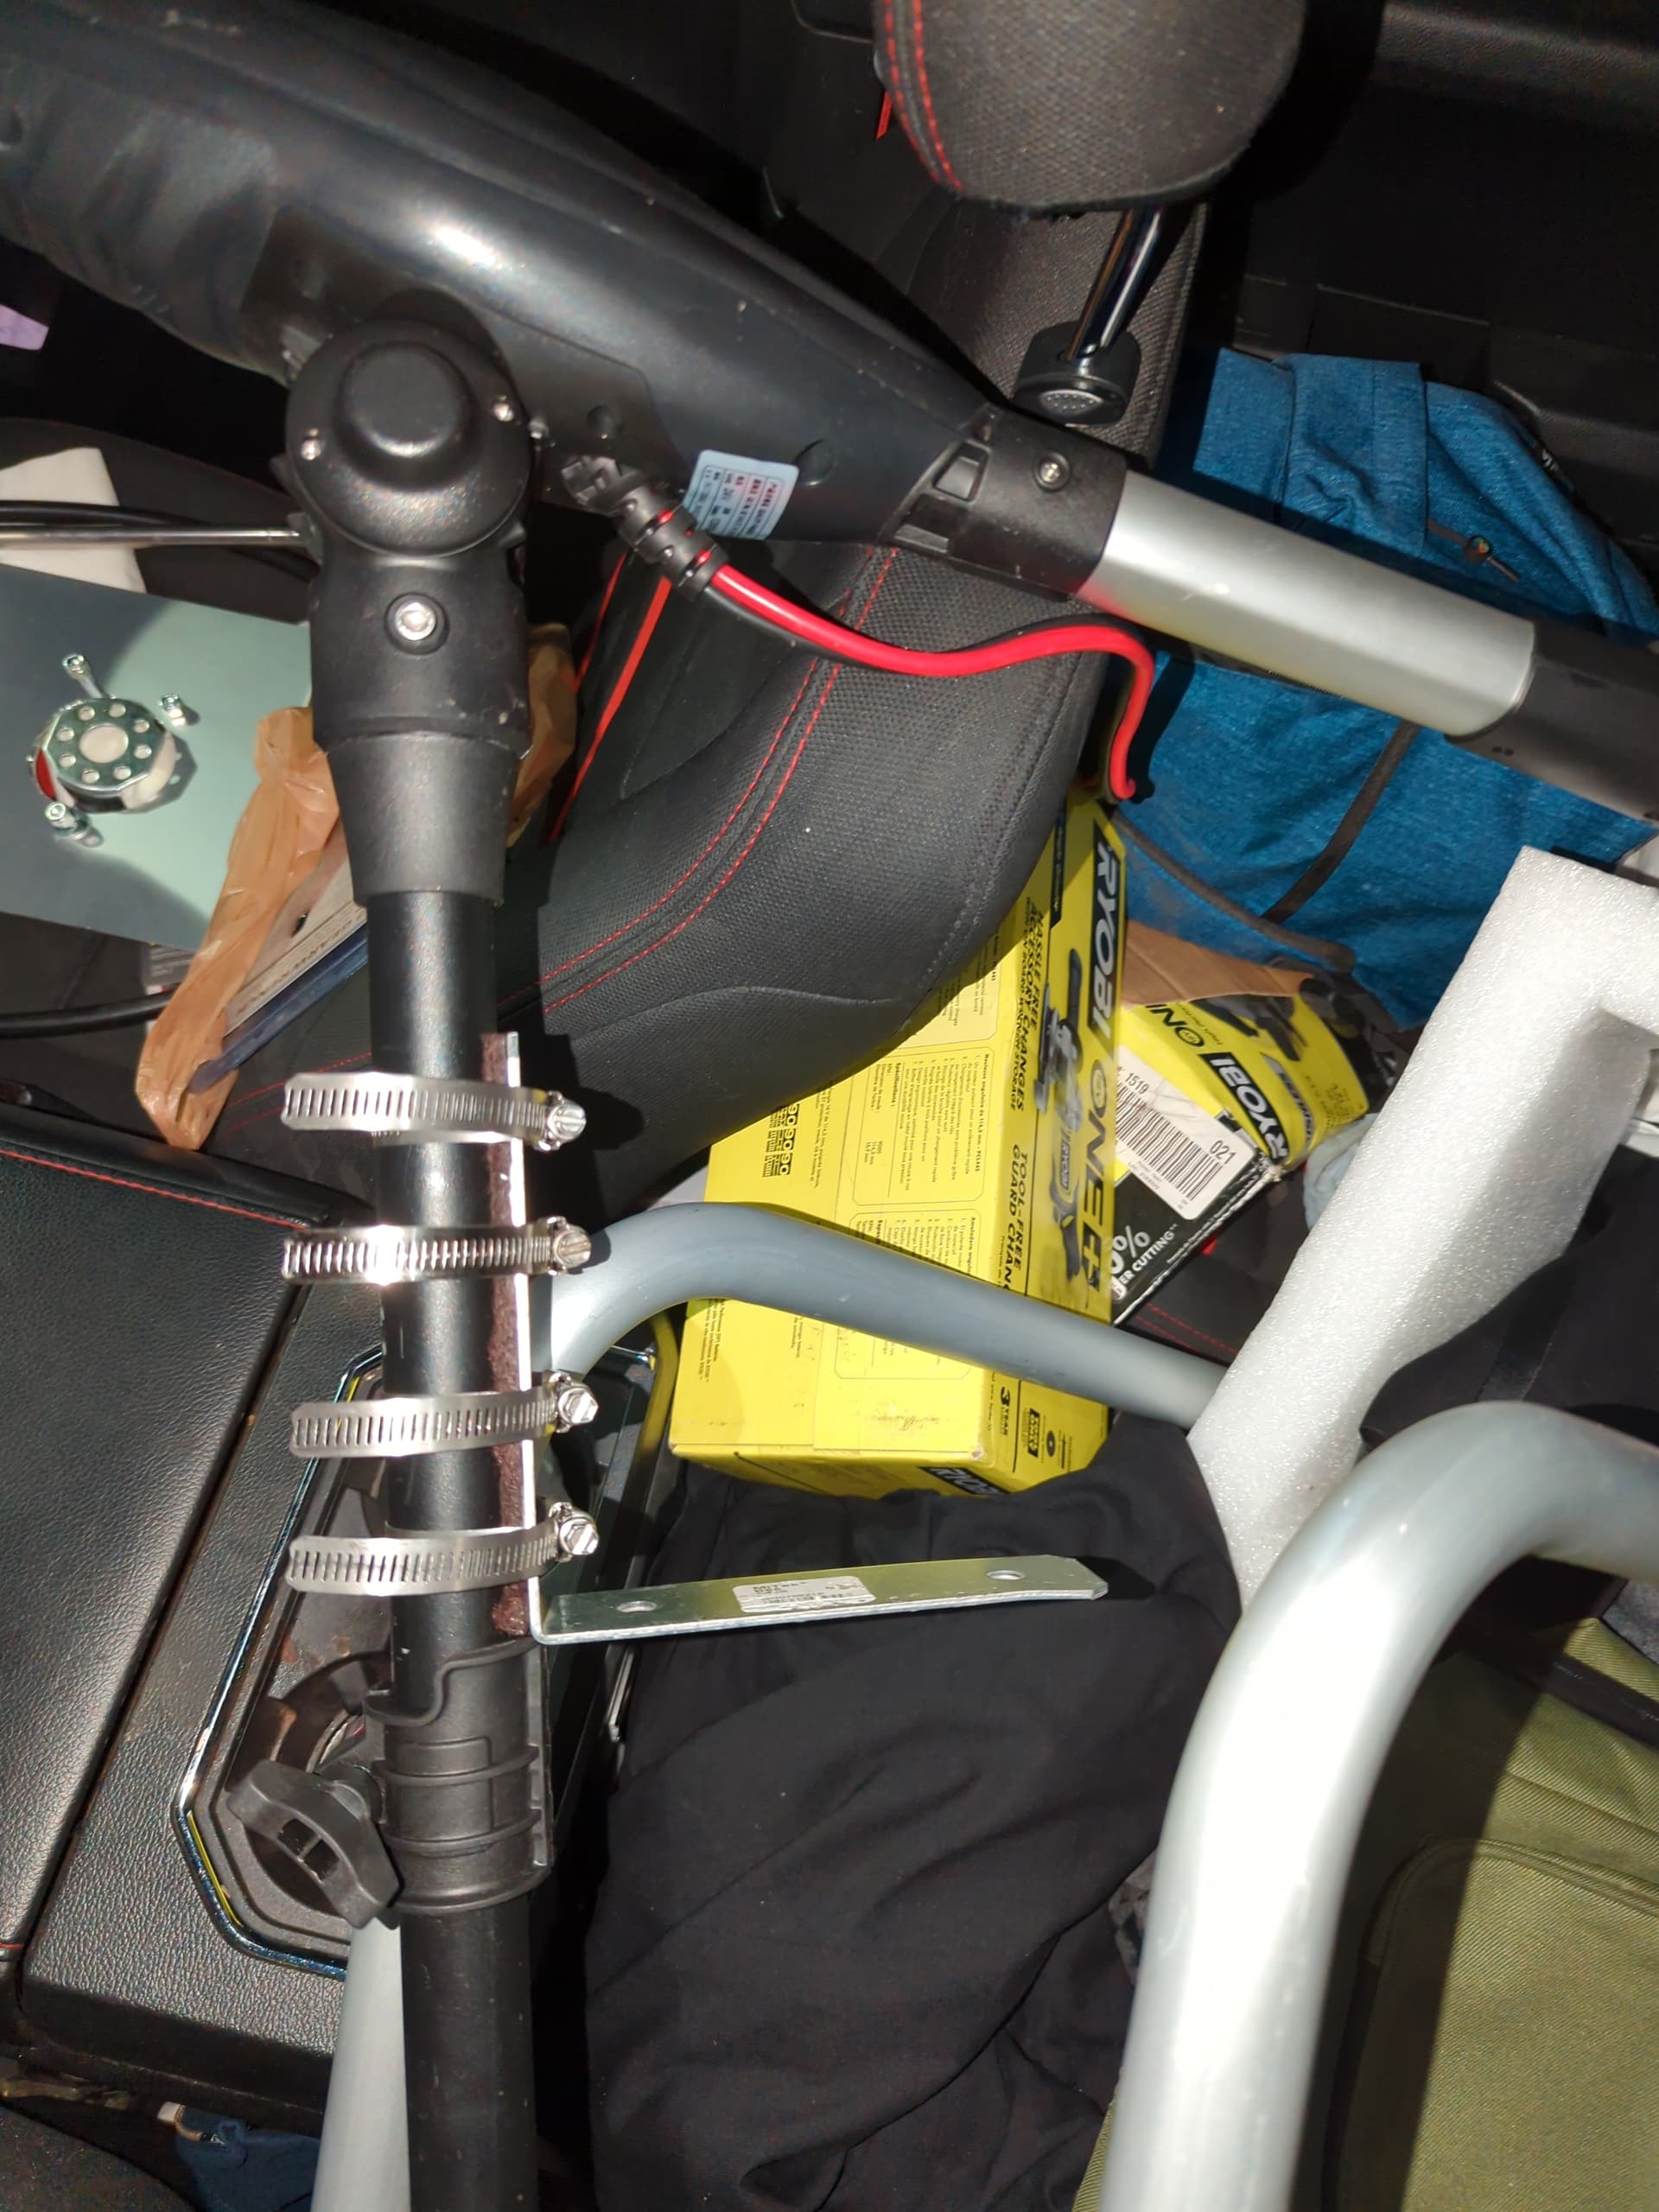
Helm cable steering on a boat with an outboard motor works like this: you have a cable connected both to a geared assembly on the steering wheel which converts turning force into linear force and to an armature at the other end of the cable that exerts that linear force to turn the motor back and forth. So, this means that you have to somehow construct your own armature assembly if you want to use your average trolling motor with cable steering, kind of like this guy: My homemade pontoon boat steering - YouTube That is what I’m trying to use this right-angle bracket for. You can see how I am attempting to sort of fake it here:
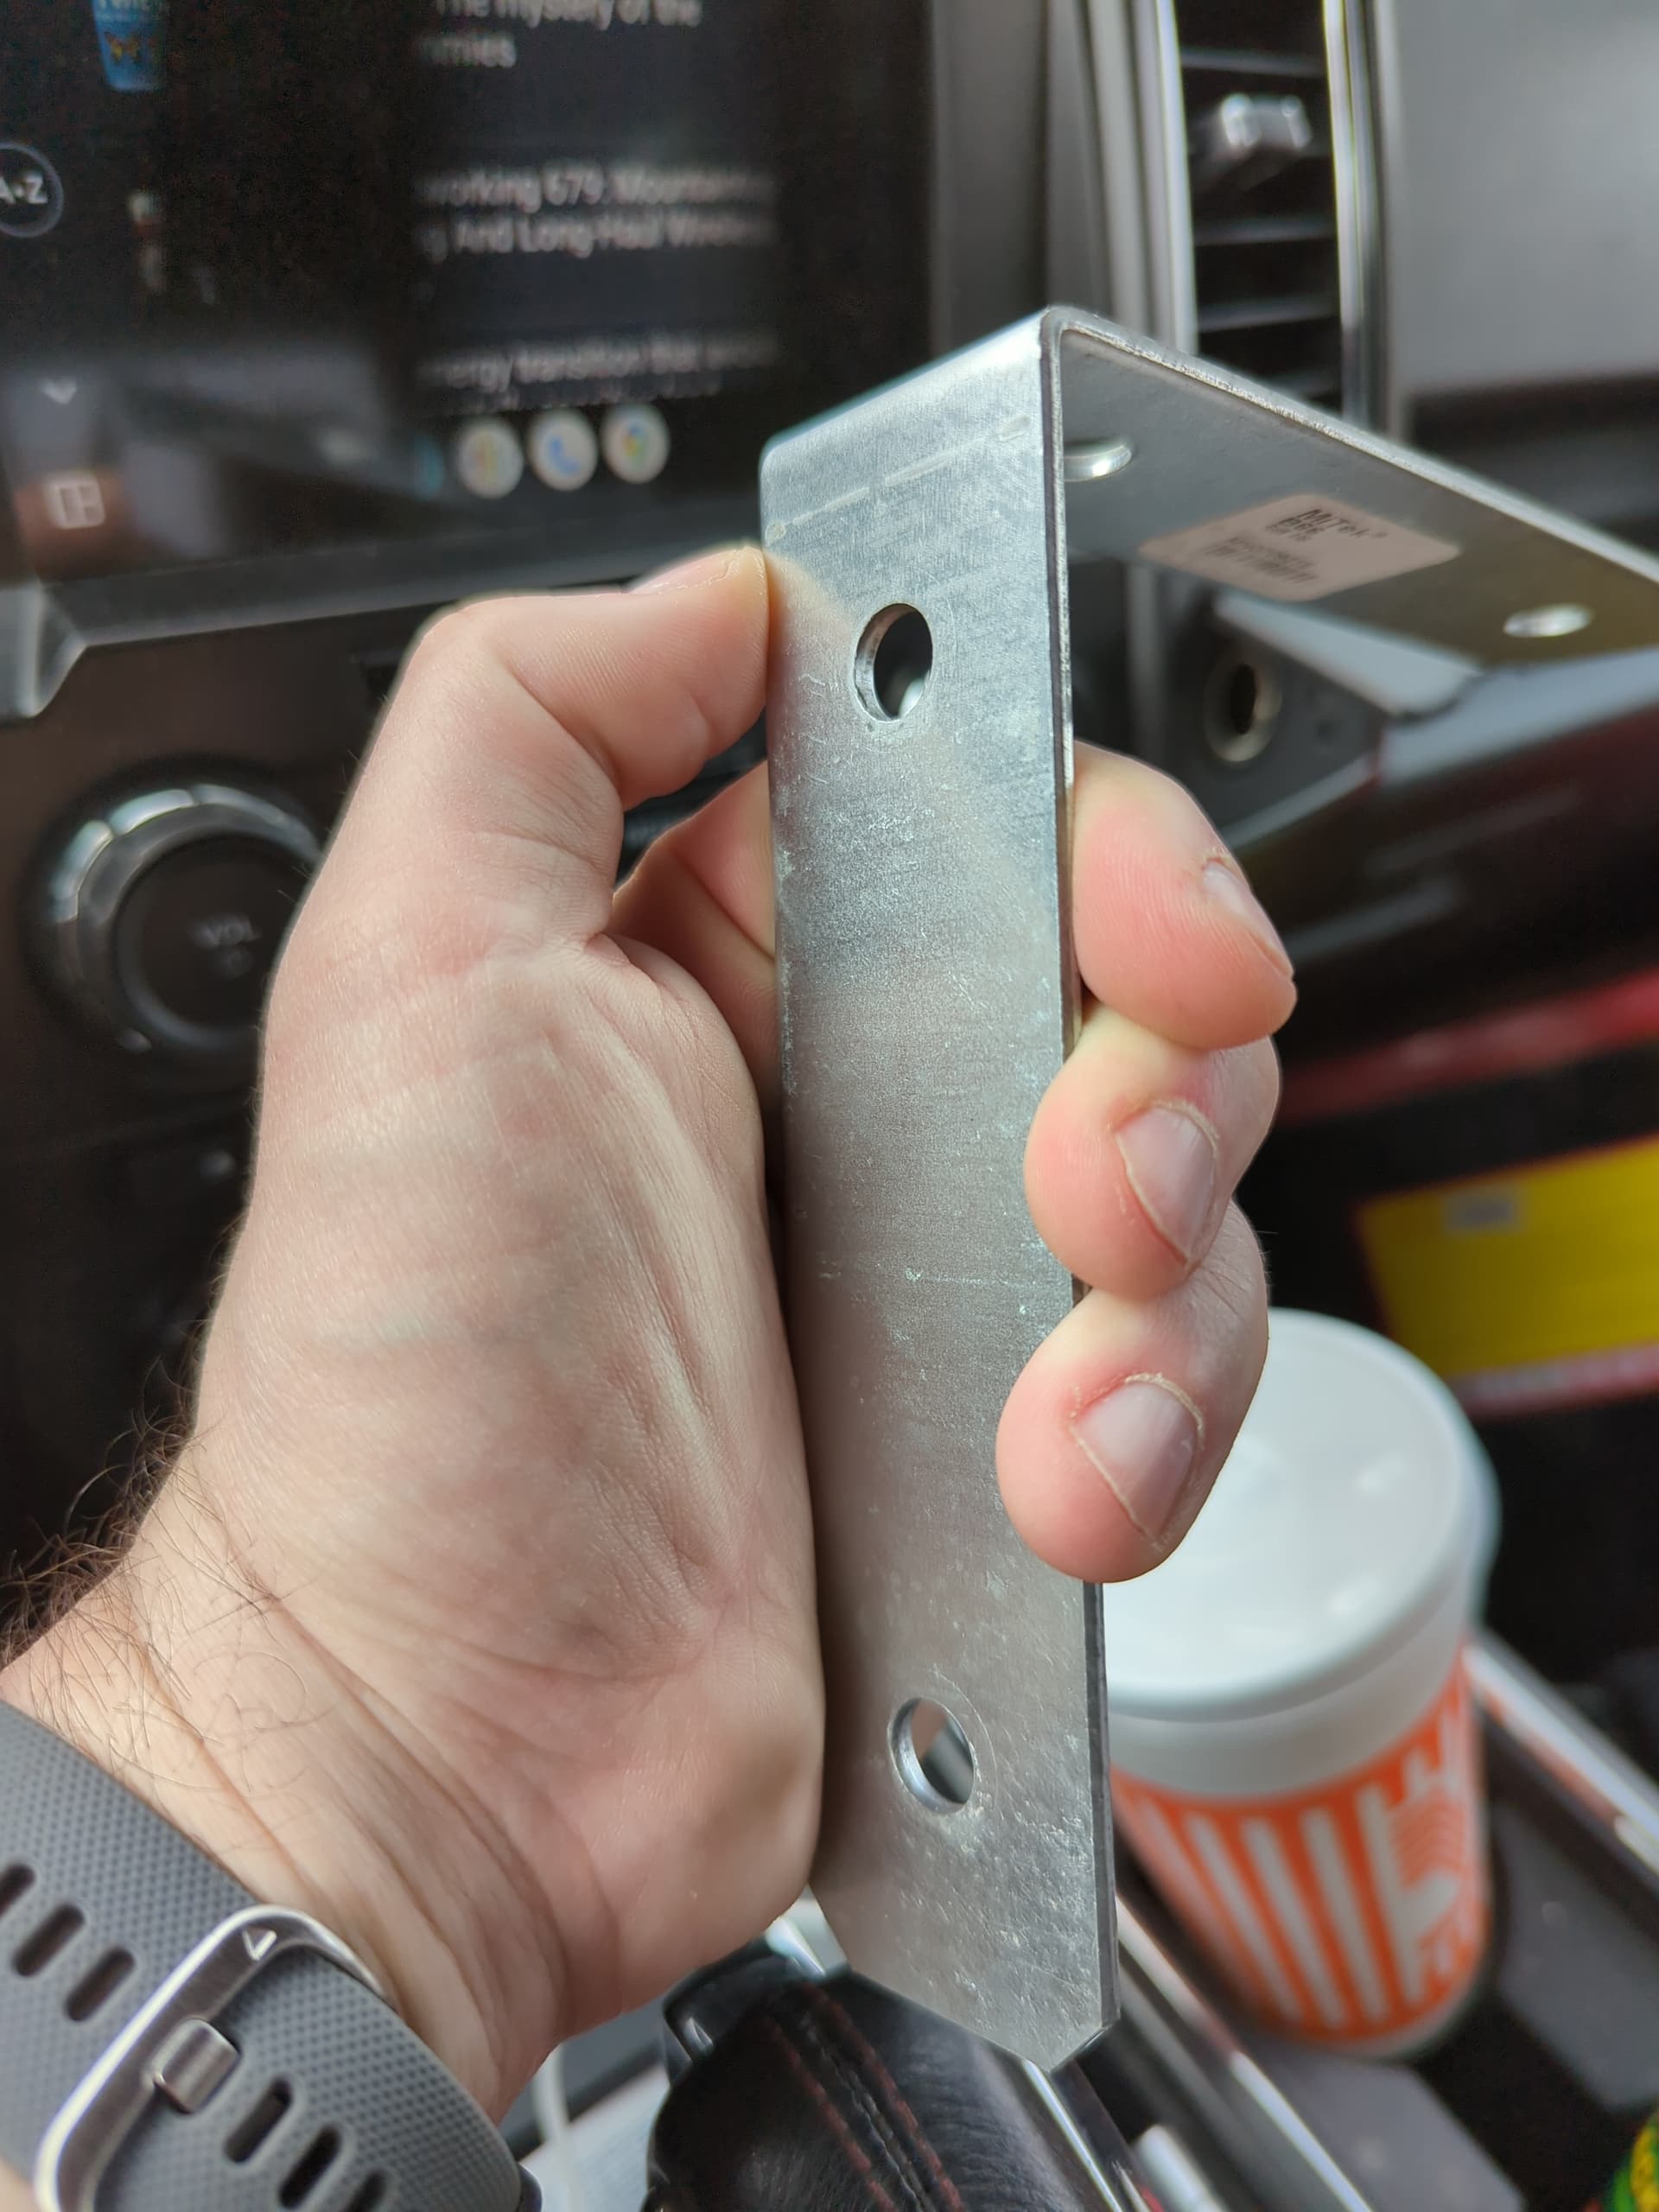
So I have four hose clamps trying to secure the bracket as firmly to the shaft as I can. The reason I can’t permanently attach the bracket somehow is that you need to be able to adjust the depth on the motor, so having this thing blocking movement up and down on the shaft that can’t be moved is a non-starter. But, at the end of the bracket is a pre-machined hole which should be the right size to accommodate the armature that attaches to the end of a steering cable, which is the reason I snagged it from Home Depot when I saw it.
At any rate, I hope that helps make things more clear.
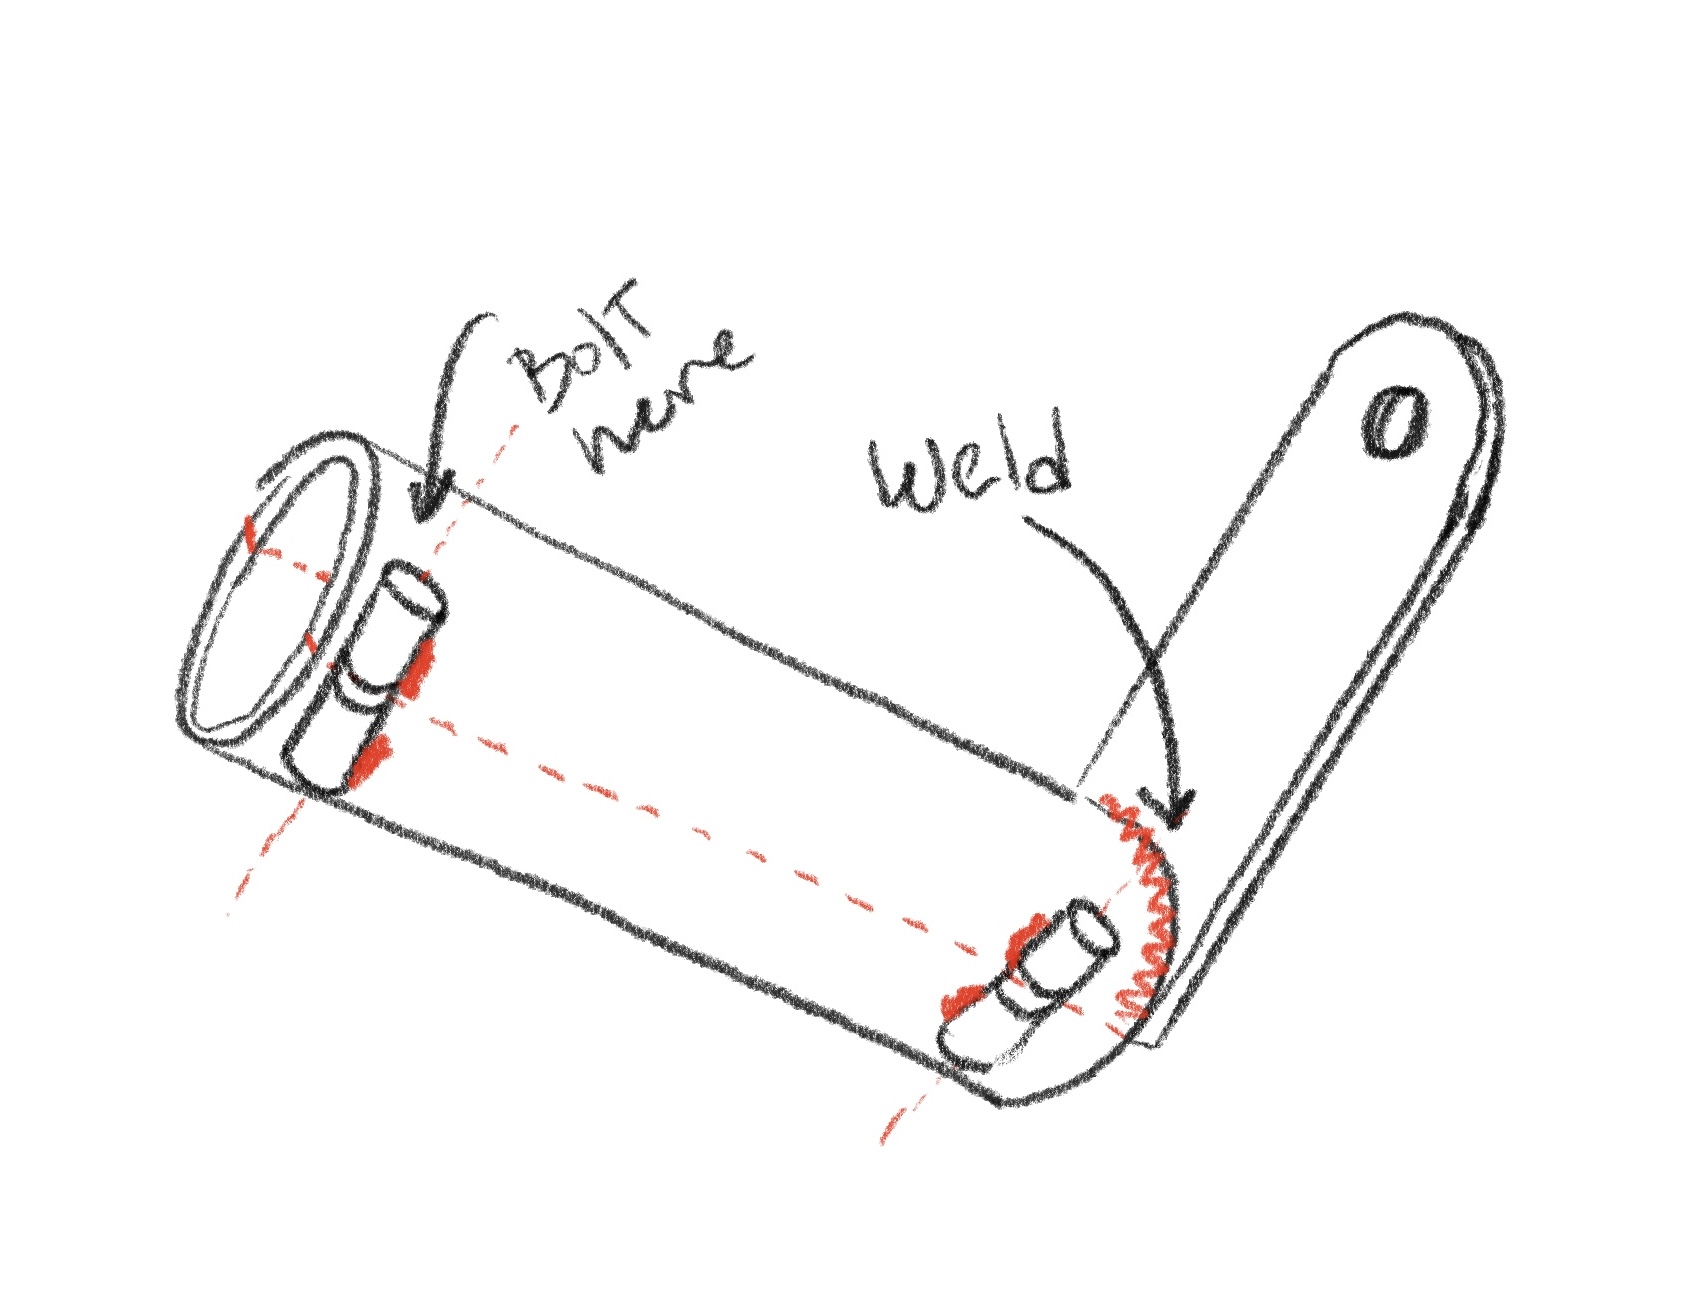
Can you cut some aluminum pipe or tubing of the correct size in half, and then weld it onto a flat section of aluminum stock? (using the angle bracket you have as the template for size)
I’d use a couple of split collars for this kind of bracket. And now that I see the kind of bend you’re attempting - it’s not super feasible.
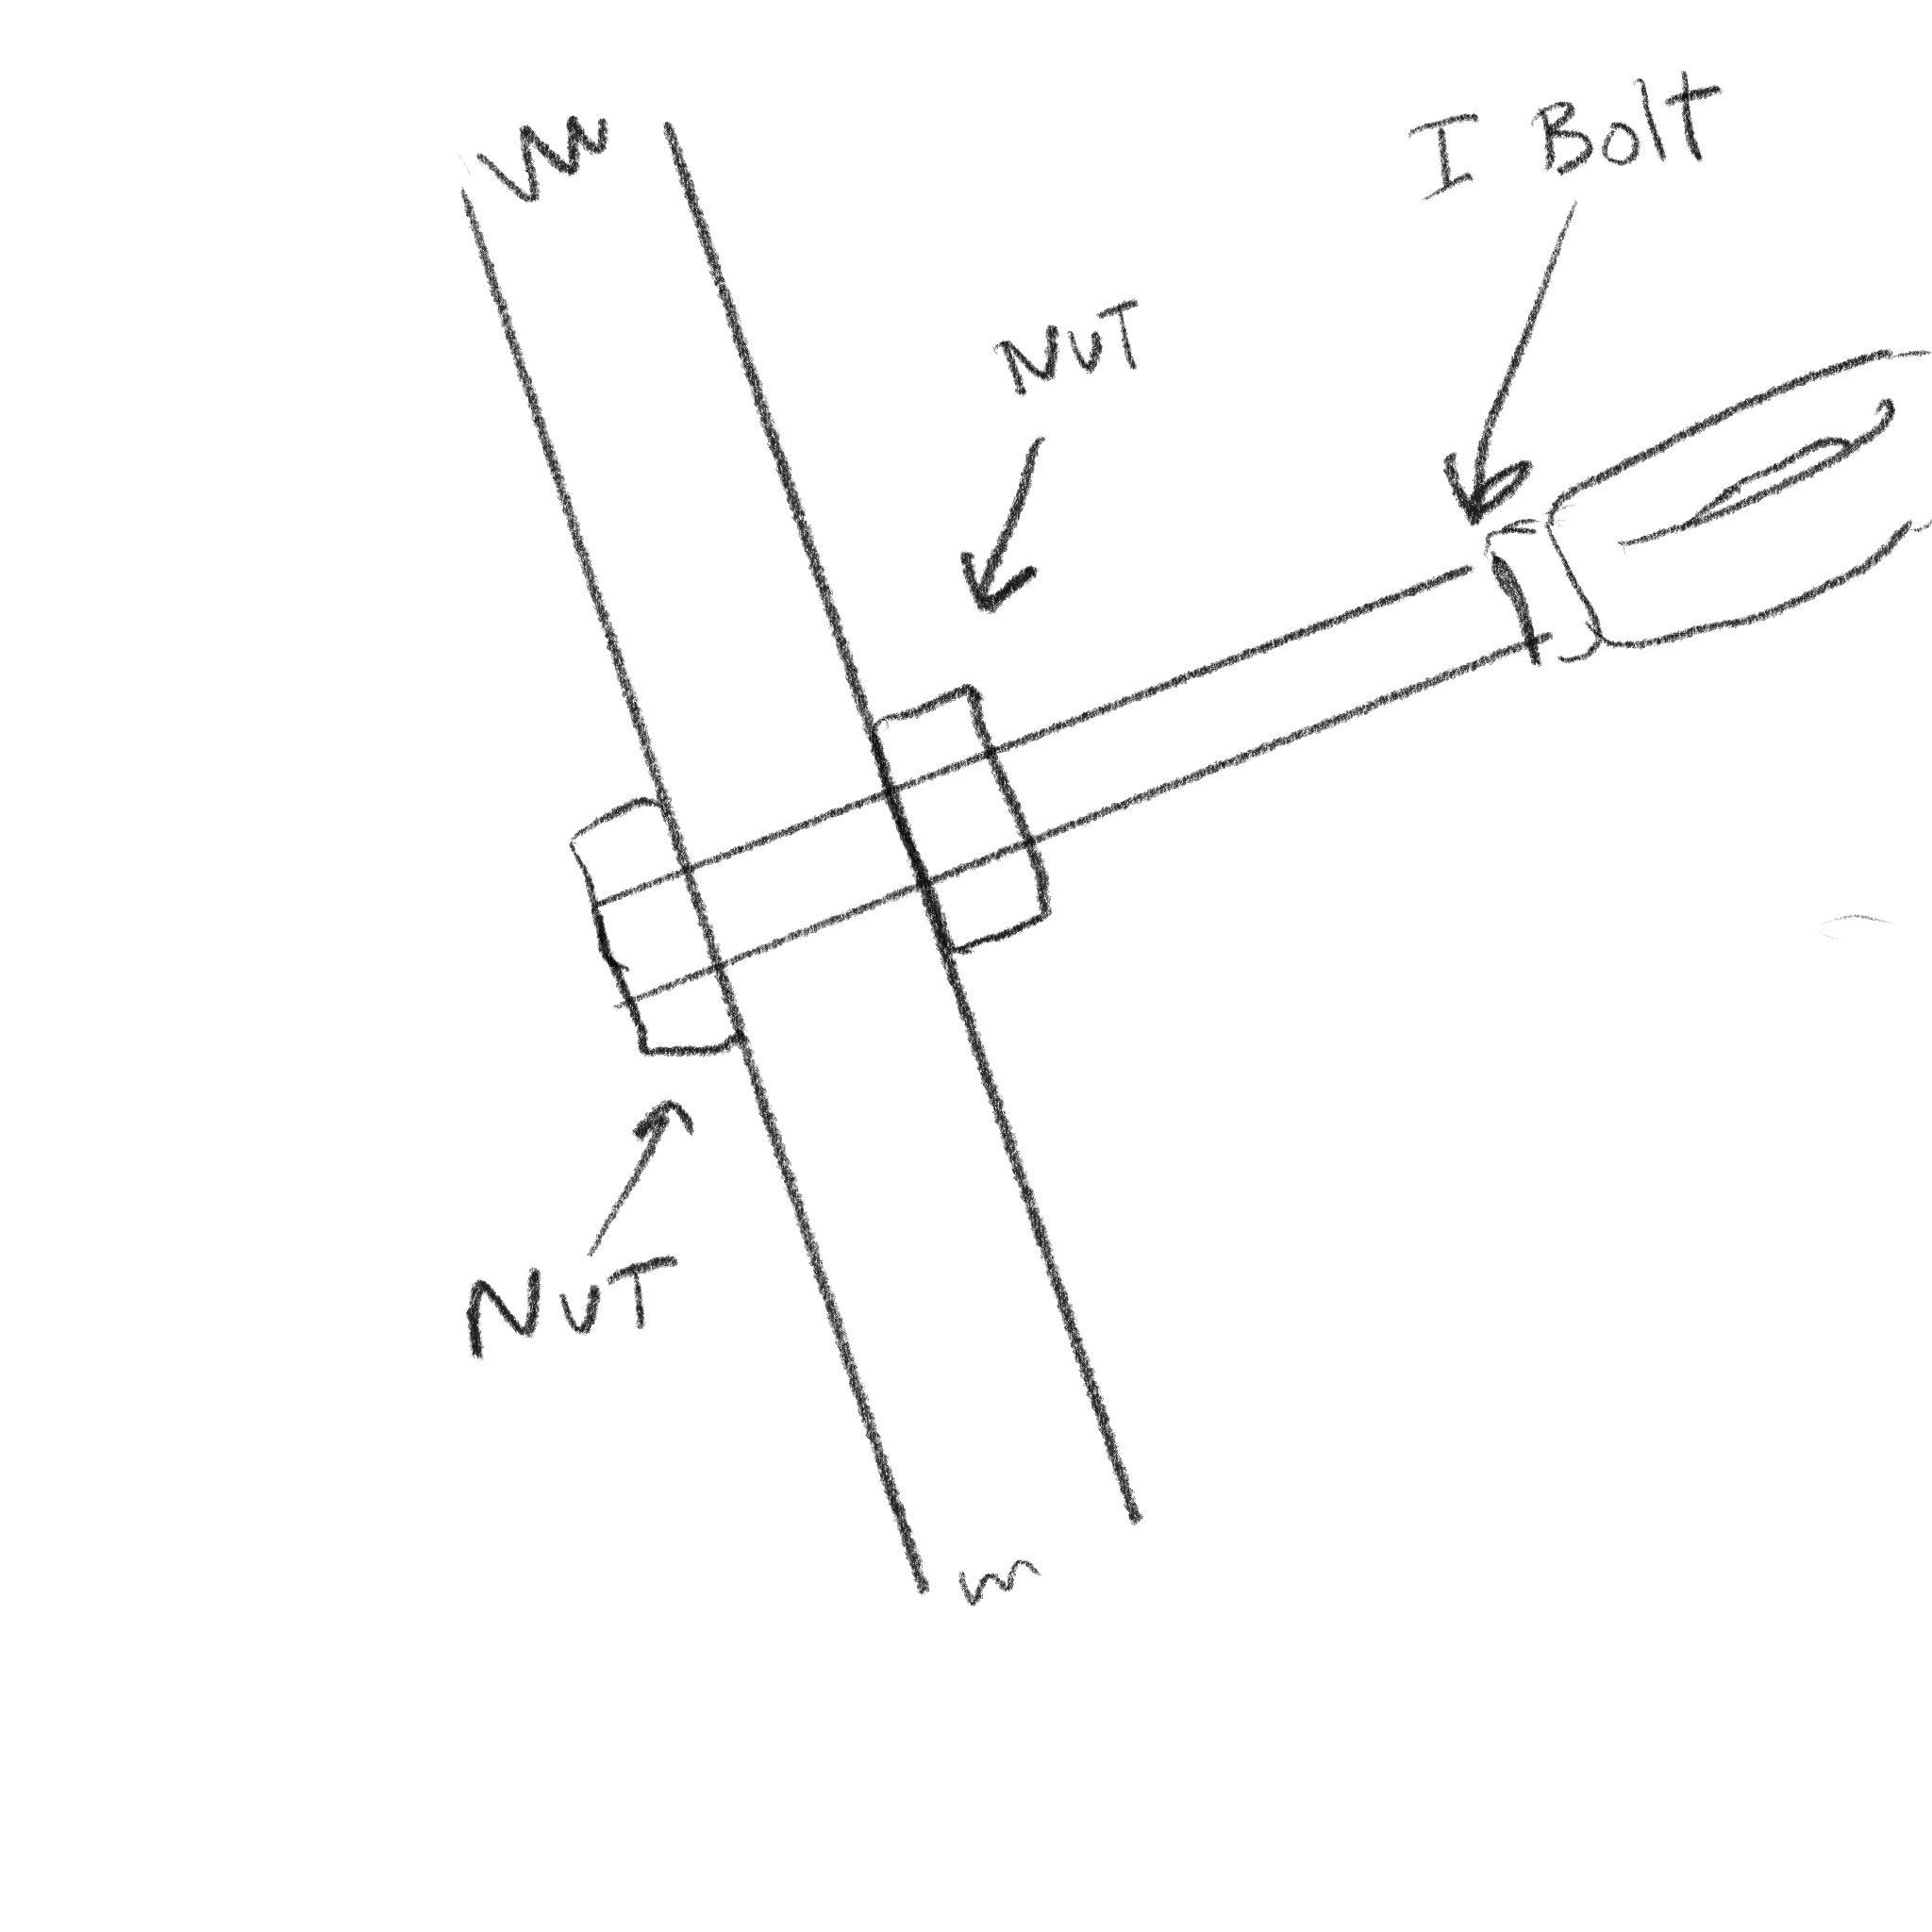
Baring split collars, I made a little drawing of what you can cobble together with a piece of tubing that has your desired inside diameter. Cut it lengthwise, and weld on some bolt receivers to make what is essentially a home made split collar.
AKIHISA 38-40mm ID Range Split Ring Hanger,2 PCS Stainless Steel-304 Wall/Ceiling Mount Pipe Bracket Clamp (1.5-1.57") https://a.co/d/5r2yJ56
Here’s a non-destructive way of doing the above. But no guarantee’s about how secure it will hold onto rod. Maybe you can find a similar slip collar that’s a bit more industrial.
so I have an update, and I may have to weld after all.
basically, these components are in the wrong places to work right, and one of them (the hastily-pressed-into-service L bracket) has a problem letting the armature move freely.
most of the implementations of this I can find in instruction manuals have two secure hold points for that aluminum tube used to hold the end of the steering cable, except for the one that that gold transom mount bracket came with, which has it just hanging to the left of the motor and directly connected to the motor’s swivel connection point rather than via an armature like this. I really didn’t know what to expect when I ordered these things because so much of it was unclear - I had thought the gold bracket had some mechanism for screwing down such that it would be firmly fixed in one position and unable to move. nope! I tried putting it together such that the end of the armature and the cable would be as close to the same plane as possible - the spot where the bracket is screwed into the transom is the highest point on the transom I could use.
so, problem one is that when you turn the wheel it just wobbles the bar at the end of the cable all over the place, probably because there is only one holding point for the tube. problem two is that at the spot where the bent armature meets the hole in the L-bracket, it can move only a quarter inch or so before it bumps up and stops against the part where the armature’s tube spreads back out to its full diameter. problem three is that the highest point up to which the gold bracket can hold the tube is still too low to line up with the end of the armature.
if I could find some way to secure the tube in the two spots at the top of the front of the black transom clamps rather than using the gold bracket at all, I would solve several of these problems simultaneously, but I don’t know if they’re the same metal (so don’t know if I can weld) and don’t know what the terms of art would be for something I could drill into the metal and use to hold clamps for the tube or whatever. I think I can just cut part of the end of the L-bracket to solve the “not enough space to turn” problem.
at any rate. WOW have I gotten myself into more than I bargained for, hahaha.