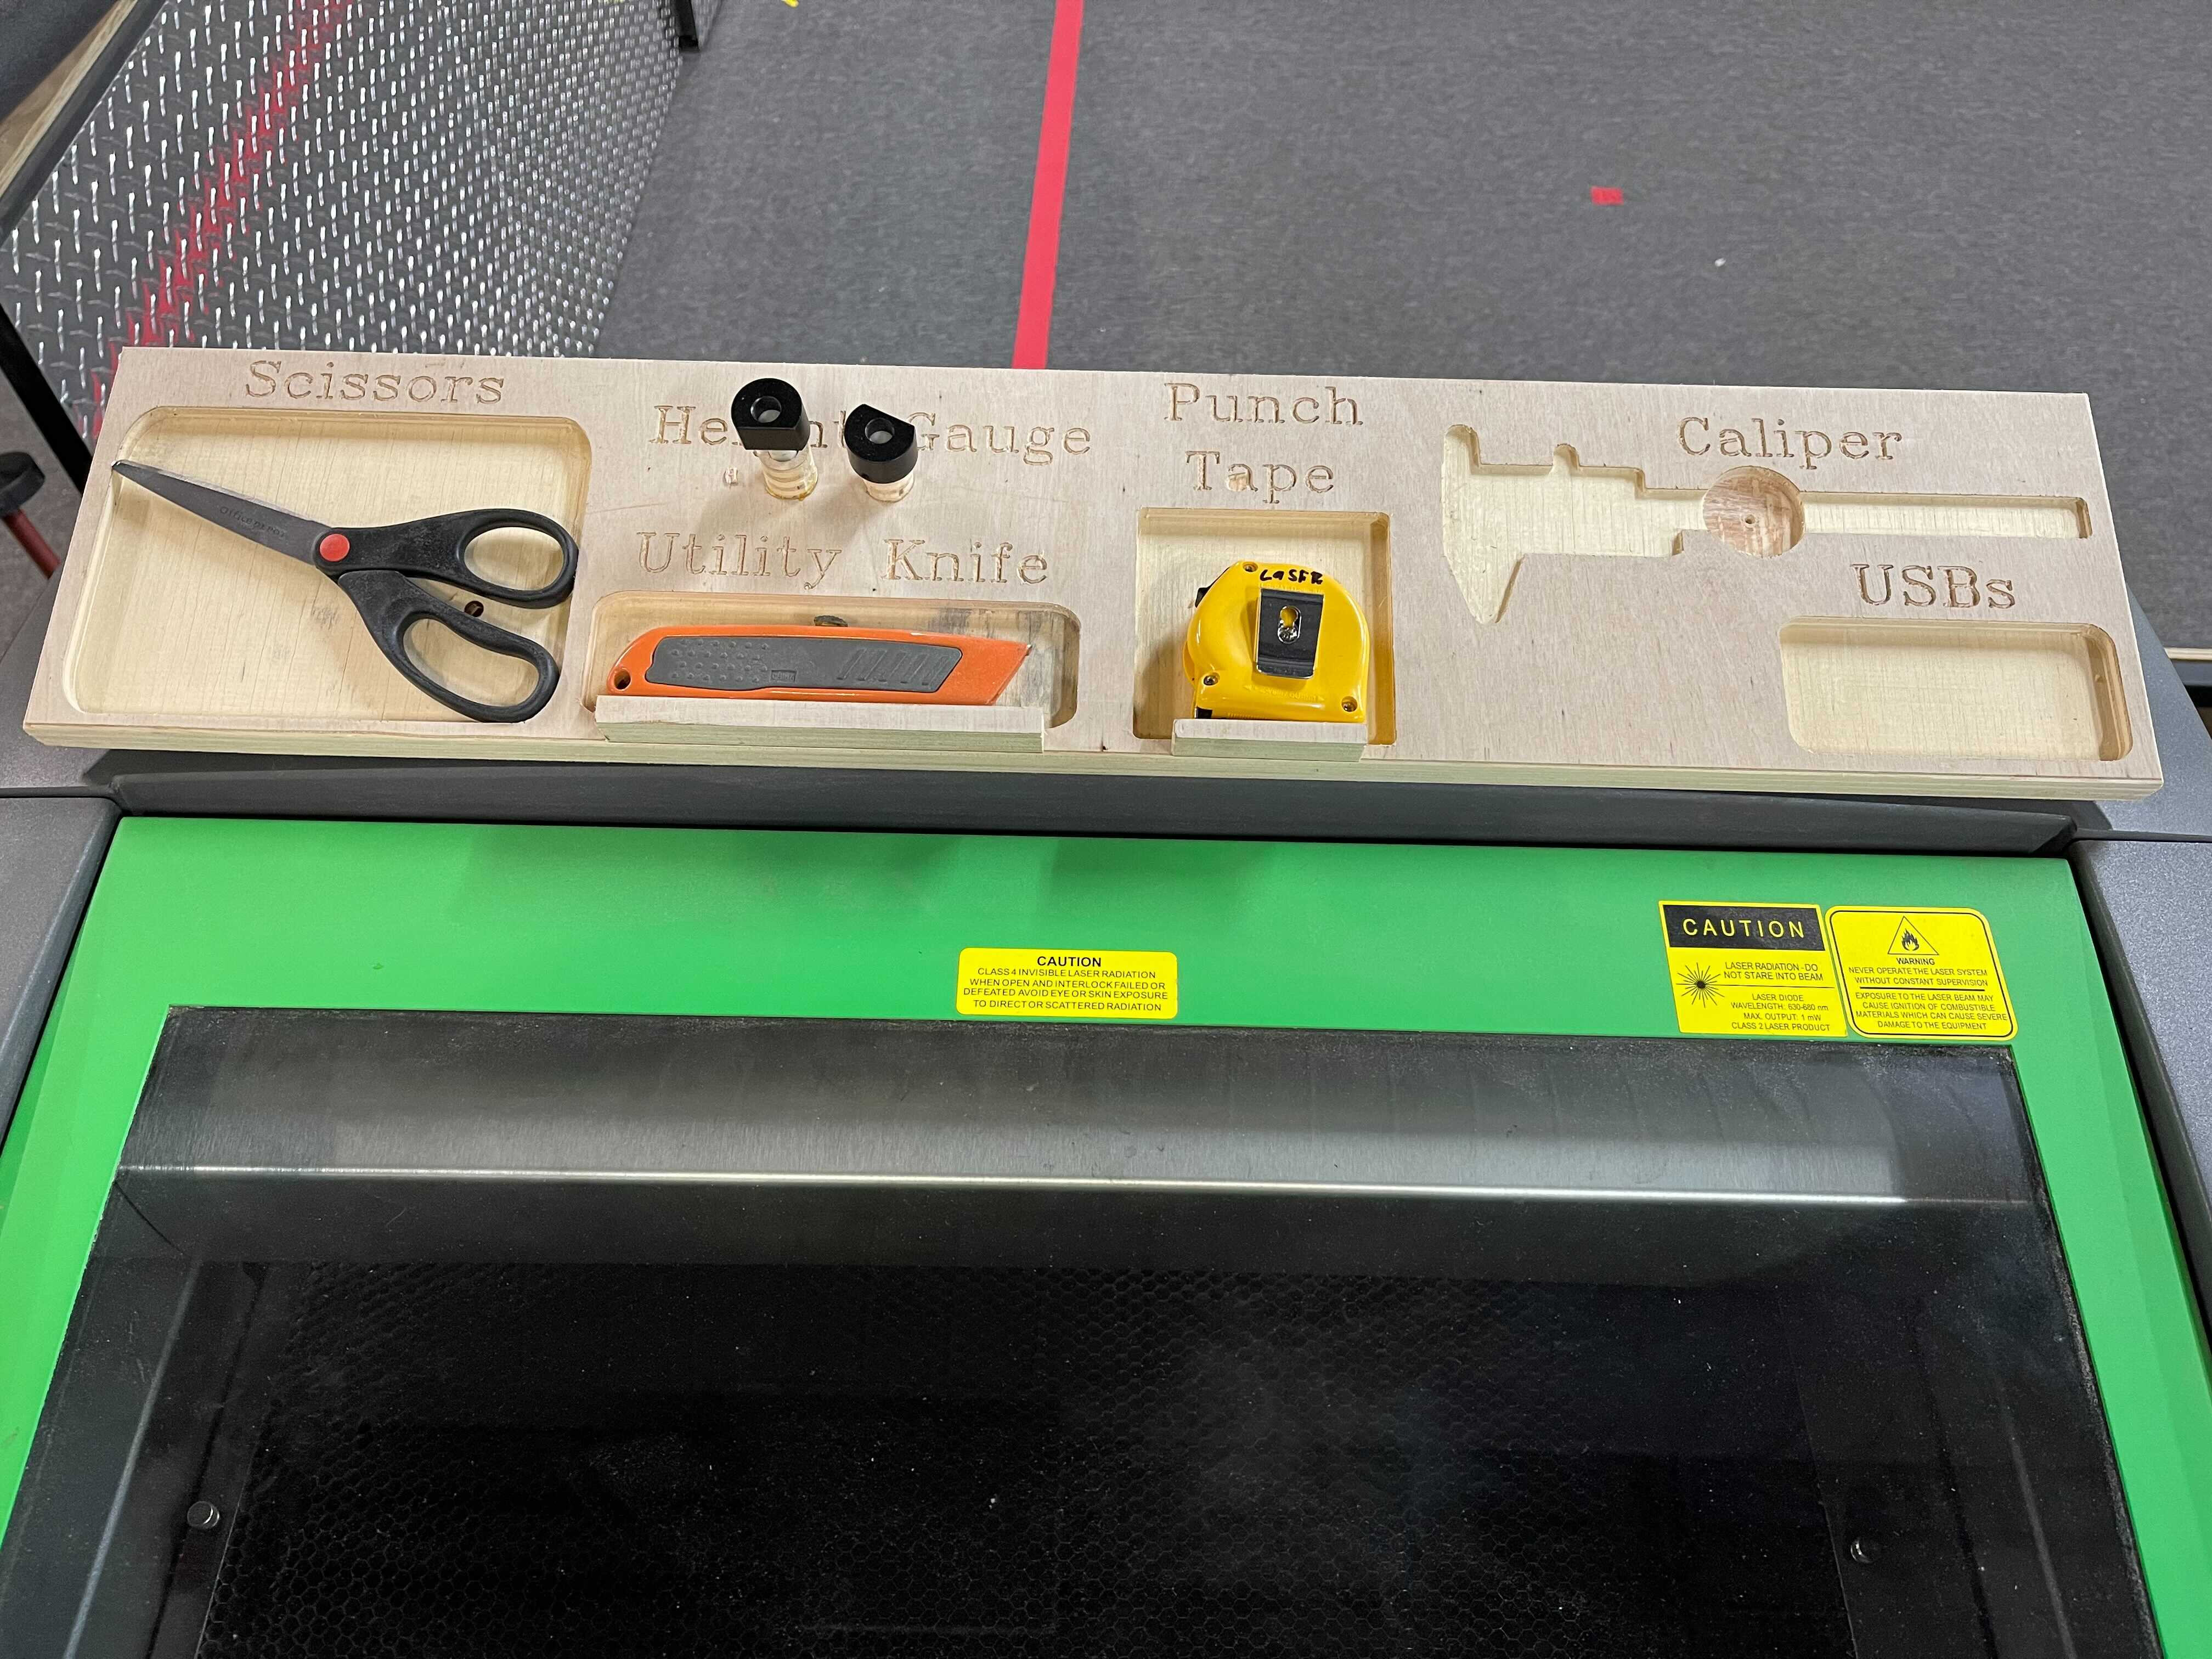
@JoeN made this cool organizer for tools that are handy to have for the laser and we’d like to make two for Asmbly – one each for Blue and Pearl (the other lasers are a bit big so will probably need something different for those).
Can someone who is trained on the CNC help build these? We have files here for the project. Underneath the cut plywood is an angled piece of wood to make it more visible sitting on the back part of the laser.
I believe this could actually be done on the laser. Just use two thin layers of plywood, rather than one thick one.
Start by cutting two rectangles from thin plywood, each with the outer dimensions of the pictured piece. On one, make cutouts for the items. Glue or screw it to the second piece, then on the bottom add the angled feet or whatever.
Calipers should not be stored like this, ideally. They belong with their case which needs to remain portable so you will tend to set it down where you’re working and always lay them back in their case. A cutout should hold the case, not the bare calipers.
We don’t provide USB drives so a “USBs” cutout would not be used, unless it’s supposed to be a lost-and-found? Not a bad idea since there are 2 lost drives left there now
We do need a place like this to put the Z-height stick. The hole inside of the frame under the gantry I think encountered a rare condition a few times where it shook out and stopped the axis.
The other stuff is fine to store this way, except if it’s placed on the rear of the machine as depicted, it’s an uncomfortable reach. The machine shown is not as deep as Blue/Pearl.
It seems like a wall mount hangar or a more compact table tray could be a better design.
Tarkin does have a definite need for a separator for the magnetoclamps. The “PLACE CLAMPS HERE” was a great start because sticking them to the frame is quite difficult to unstick, but they do sometimes get set down in a way that they stick together and, again, difficult to fix.
I’m not sure what form that would take. Maybe cutouts for the 4 binder clamps and the metal spring-finger clamps. The wood finger might be deprecated, it was the first design, but does anyone still use those 2?
The lightly sloped front face on the left could be used for additional tray space. It’s not being used for anything.
We can attach with double-sided tape. It will hold.
Mod the file how you want. I prefer that the caliper stays in the same spot. If they are portable then people move where ever. I’m looking at all of the places that need a caliper in the shop and placing one there. I don’t want floating around the shop.
TBH even I would not be able to use that caliper cutout. I move around and this needs to move with me, which is why I just move the caliper’s case from the PC table to the center table to the laser to the scrap bin etc. If we get rid of the case and only have a cutout, I would be abusing the calipers by placing them wherever with no case.
We do have more calipers around now, so this isn’t as big of an issue with them “walking away” to the wrong spot. I still don’t see a good way to mark them though, there’s not a sufficiently large surface which isn’t a functional part of a slide or ruler or whatever.
I think the floating cases are fine and the best solution. The cases can be marked as to where they go. I think we just need to reinforce the idea that calipers should not be set down outside their cases. That’s where making the fixed-mounted holder with a cutout and no case actually hurts keeping things organized and hurts following best practices, by creating a system where people will normally be moving them and setting them down anywhere without the case. Thus my strong pref to not do fixed cutouts like this for calipers.
Having a clear home/“this is where it goes when you’re done using it” is the aim here. I’m not opposed to that home base accommodating a caliper case, but I’m also not clear on what the problem is for storing without the case. There was a pair of calipers without a case that was stored in a bin of miscellaneous items next to one of the lasers for as long as I can remember. I never saw any issues with the functioning of those calipers.
Just a suggestion, not criticism or sticking point by any means. I get the desire for everything to have a home, but Danny’s comment that he uses some of these tools on the common table rings true for me also. Would it make sense to have the collection of tools have a home somewhere more common to the room, rather than at the individual lasers? Well, there’s probably an exception for the focus gauges and hold-downs that are nice to have at arms reach at the laser. But for me, the scissors, knife and calipers feel more like prep tools, which I might mainly use while preparing, inspecting or finishing my materials at the larger common table.
I think having some tools at the center worktable makes sense as well. We should consider what’s most relevant where. Still gets at the aim – everything has a home where you know you can find it. There’s also no reason why we can’t/shouldn’t have several pairs of calipers and other items as well. What one person primarily uses in one place may not be the same for others (e.g. I use the calipers regularly at the laser). We had 3 people using the lasers at once recently and once Dorian is online that could readily be 4. We want to have things set up nicely so that all 4 lasers can be in use with members always having what they need on hand to do their projects. I think having full sets of common tools within arms reach at each laser will help us get there.
Seems like one or two good pairs of scissors is plenty for the room. The calipers are more often used to confirm material going in, so those might actually be per-laser.
One thing I noted- mandalas are becoming popular. To do these, it’s a really good idea to glue them up as you go. It’s not just a timesaver so you can glue and layup one layer while the next is cutting, but the cut but unglued layers are fragile and can break or warp being moved. So it makes sense to do it here as you go…
After learning more about these making them for Christmas presents, I found it’s necessary to clamp while being glued with a sturdy, flat sheet of plywood or MDF and the heaviest thing I could find. It only needs a few minutes for wood glue to set enough to allow the next layer to be put on. Most mandalas are ~12x12, I have a 15x20 too. So a single clamping board is enough. I borrowed a bucked of shapecrete and one or two other dumb heavy objects and it pressed them great!
So, like a 16x21 1/2"-3/4" MDF or plywood board and a bucket or two of weight would be a great thing to have here to work with.