I plan to engrave some designs on my mallet, but I’ve only taken the laser class and this will be my first laser project, so I just want to get some tips from the pros before I go in this Saturday.
My designs are mostly line art(I did not draw them) that I turned into vectors, which sounds pretty straightforward to scan in my head, so I should be able to figure that out with some tests.
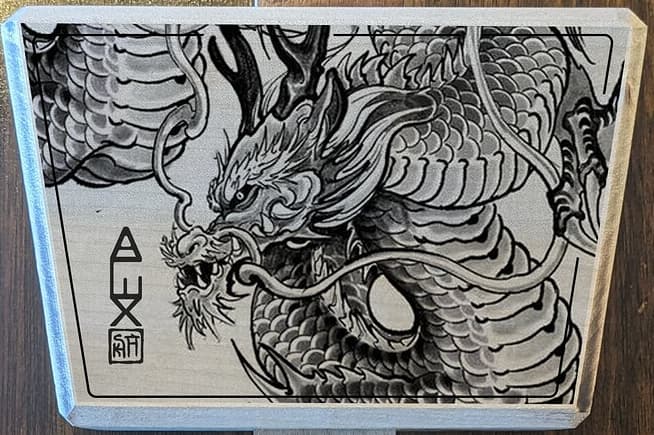
To learn as much as I can from the project I made a side with grayscale art, which I have no idea how to achieve. With some preliminary youtubing, it sounds like I should import the image jpeg directly into lightburn and use one of the dithering modes rather than gray scale. I’d love to get some tips from anyone who’s done similar stuff on wood. Thanks!
Use the center out for your origin on light burn. Find the center of the head of the mallet and place the red dot on it. Run the file only for the head part. Find center on handle and do the same. Make sure you do it with the mallet upside down just in case the laser head runs into the head of the mallet. Before running a file use the frame option. Encase the graphic in a tool box outline and run the frame option from lightburn it will follow the outline on the laser bed or your mallet. Use one of the fills in the library (library, scroll down to fill, six options). You can secure glass or thin piece of acrylic on to of your mallet run the file and see if you centered this way you would not do it directly on your mallet. There are couple of other options but takes long to explain and i have to go to work. Shoot me a message when you plan to do it and ill help you. Anytime after 4 tonight or this weekend.
Thanks Jose. That makes a lot of sense, I especially like the idea to scan on glass or acrylic first on top of the mallet, an extra step to ensure alignment.
I booked the laser at 10-noon this Saturday and will be there earlier to round off a few rough edges on the mallet. It’d be great if you could be there, but no pressure at all, I’m gonna take as much time as needed to get this right
A solution of Borax applied to the surface should be helpful in enhancing the contrast, although I’ll defer to others if there’s a better agent out there. Worked for me when I burned an image onto canvas bags.
If you do want to give Borax a shot, I can leave leave a ziploc bag with some for you on the Up For Grabs shelf tomorrow. I have a whole lot of it left over from my experiments.
What Danny is talking about is engraving or burning the image as a photo (samples are on the wall) which is very superficial and pretty much a one shot one kill, you either like it or sand it off and try again. A good thing is that is easy to sand as it is not very deep into the wood. Contrasting agents (Danny correct me if im wrong) can be a mix of Borax diluted with water, sodium bicabornate (baking soda) diluted in water, ferrous oxide (steel wool melted in vinegar), coffe, tea, and vinegar. Pretty much what you are doing is a chemical reaction, the agent activates the tannins in the wood and darkens it or weathers it thus changing the contrast. Personally i do not like any of them as it introduces water into the fibers. But this opinion is very biased as i do not like photos on wood either. The instructions i have suggested are for rastering which will be deeper and sharper. Happy wood burning!
In the past what I’ve done is to laser engrave, then airbrush black paint in a thin layer over the whole piece and then sand over the whole thing. This made my etched parts nice and dark, and I needed to sand off some of the surface around the artwork because of the wood sap anyways, so it worked out.
Since airbrushing is kind of a pain you could probably do a layer of acrylic paint over the etch, and then wipe off the surface while it’s still wet, leaving the etched parts saturated but the rest of the piece has a thin enough layer to be easily sanded off.
But definitely use a dithering pattern for your gray scale stuff. I’ve gotten much better results that way, and to echo what everyone else has said, practice on some scrap that’s as close to the wood you used as possible.