I’m relatively new to woodworking and looking for advice or help on a project.
The project is a lounge chair that includes a slatted seat and back panels attached with a miter joint. I cut both panels to equal width on the table saw, but when I glued them up, the joint was offset by about 1/32". The next step in the project is to attach a side frame to the panels, but because of the offset, there would be a 1/32" gap between the side frame and the panels (at the seat panel on one side, and the back panel on the other side). The offset was small enough that I thought careful sanding with a random orbital sander might fix the offset, but I still have a gap (still about 1/32" but now less even due to the sanding) between the side frame and the panels.
Does anyone have advice on the best way to get the edges of the panels back to flat while keeping the two edges parallel to each other? I thought some kind of hand plane (jointer plane or jack plane?) might be the best option, but I haven’t done much hand planning and it seems like I could easily make the problem worse if I don’t do it right.
Would anyone with more woodworking experience be willing to take a look with me in the shop? I’m happy to pay for an hour or so of coaching if that would make a difference.
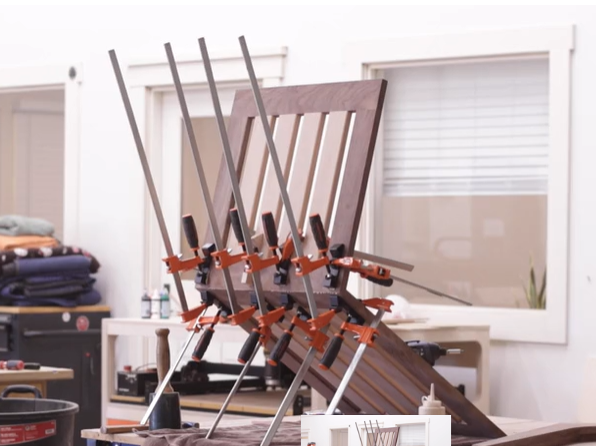
Photo of the miter glue up, showing the 2 panels that were cut to the exact same width, but then offset by 1/32" along the mitered edge during the glue up by mistake.
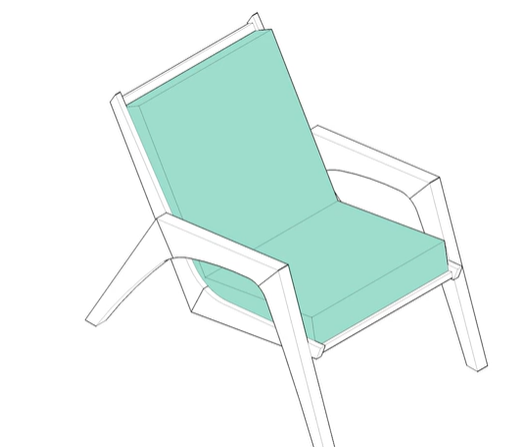
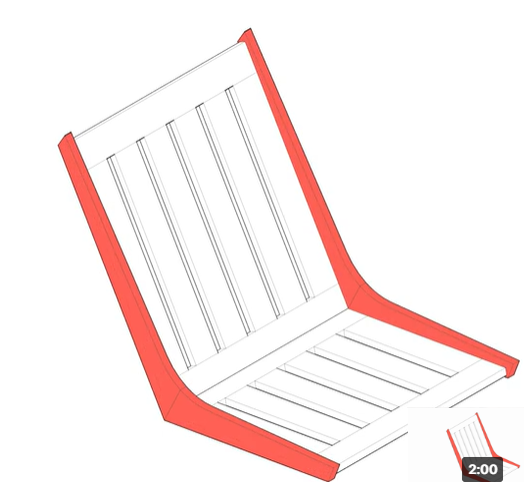
Drawing showing how the side frames (red) attach to the bottom and back panel. These would be attached using dominos and glue. I’m trying to figure out how to make the sides of the panel assembly flat and parallel to each other to make a tight joint with the red side panels.
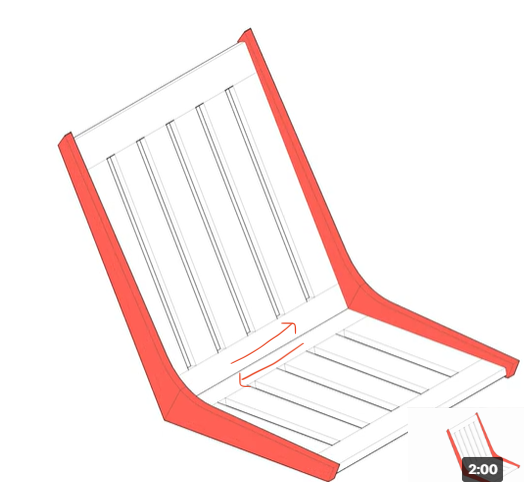
Thanks for the images, I think I understand now. So you’re saying that the seat back and seat bottom are shifted left/right by 1/32" in these directions (or the opposite, either way)?:
If I’m understanding correctly, I see a few options, I’m sure there are many others:
Use a hand plane. If you go this route, I’d draw a marking guage or pencil line to give you a reference for where you need to stop planing. This may be difficult to do evenly if you’re not familiar with using hand planes.
Draw a similar line as #1, then double-sided tape a straight edge along that line and use a flush-trim router bit to ride along the straight edge.
@trevor your chair design looks similar to the one @David and @tomthm are building with the Shaper – Shaper Chair Project. They are doing it as an open build for any and all to come check out while they work on it. Hit them up in that thread if you want to connect with them next time they are working on it.
Thanks for the replies Chris and Chase. Yes, you’re understanding it correctly with the red arrows you added to my drawing. I’d be interested in trying the hand plane with some coaching, but am worried I could end up making it worse and chasing my tail since I haven’t used hand planes before. I like the straight edge router idea, or could do the same with a circular saw. I have a nice 26 inch square I could either clamp to the back of the chair as the straight edge, or to draw the reference lines for another straight edge. Track saw sounds like a good option too, although I haven’t attended the track saw training yet.
@trevor I can swing by some time to help you plane or otherwise cut it on the table saw or use my track saw.
Send me a message and we’ll coordinate a time.
9498706514
P.S. I recognize that chair from Four Eyes (The Glen right?). I’m curious how those plans are. They make great furniture and I assume their plans are equally as good.
That sounds great, thanks Chase. Yes it’s the Glen chair from Four Eyes. The plans are great, especially for a relative beginner like me. They have very detailed and clear step-by-step videos that come with the plan. I highly recommend them. I’ll shoot you a text to figure out a time to meet at the shop and I can show you the Four Eyes plans and videos when we meet up. Thank you!