Hot dang, everyone is posting some incredibly cool stuff!
lol i thought up the idea of a 3d printed rotary large-bowl adapter out of the blue one day. great to see it actually worked as planned!
3 Likes
Good looking chair! Looks comfier than the one I made a while back haha
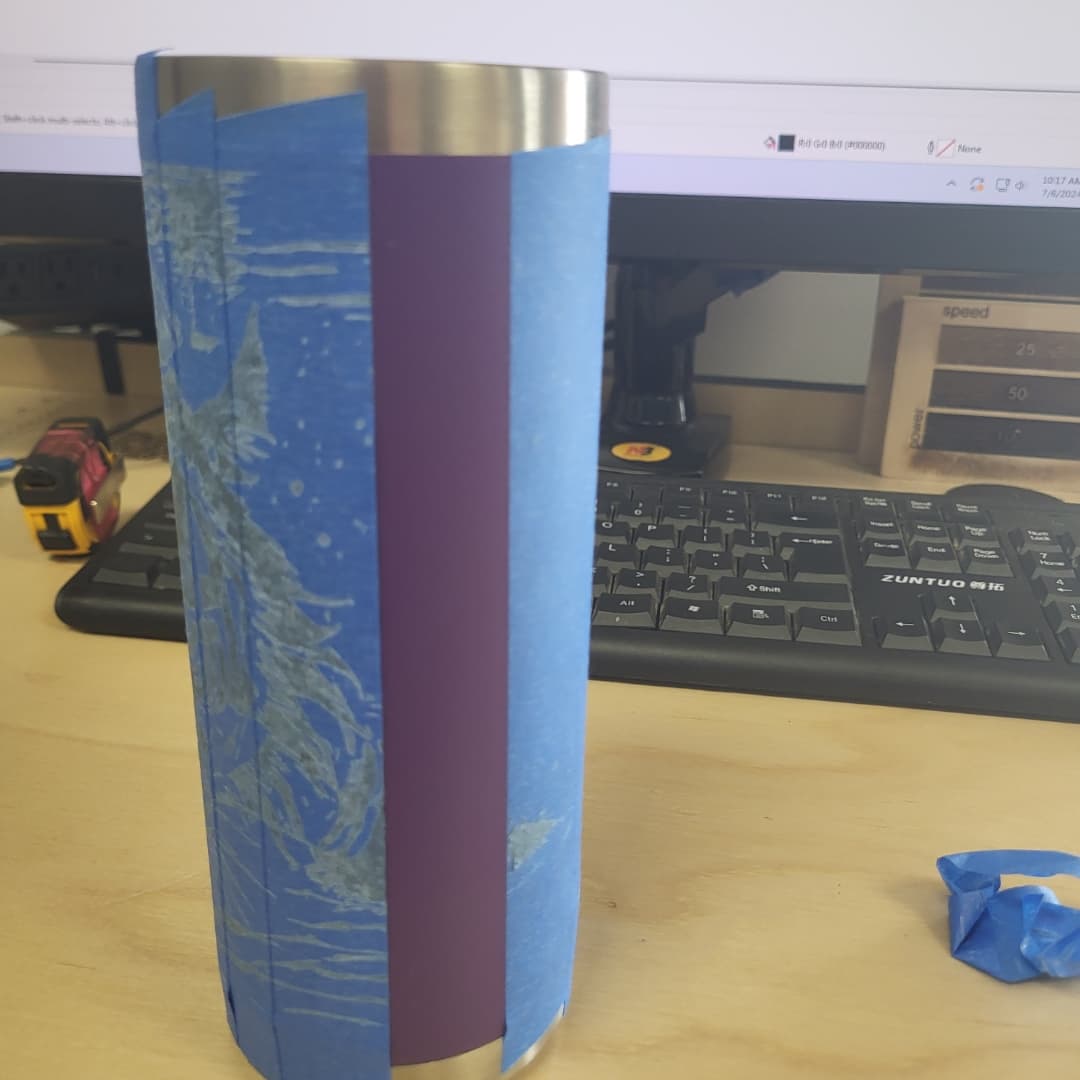
If you cover your " art/stuff" with masking tape (painters blue or similar, at least 2 layers), and use 100 speed, 15 to 20 power, 3 to 4 quality, you get to laser the tape and see what you otherwise would on your project without damaging or even touching the surface. If not happy on the first run, slap another piece of tape, make adjustments run again. Once you reach perfection, remove tape and run at normal speed power (on Pearl, 100 power, 80 speeds gives a very good definition on most hardwoods). Few more points, use two or three slim pieces of tape from your piece to the metal cone, but do not go into the black parts as it would tear the tape and skip the rotation. This will keep your piece from sliding during rotation. Works better if you use top to bottom engraving, your piece does not rotate upon the start of the laser making it more acurate. But if youre lasering acrylic or ceramic you must laser from bottom to top as the machine or lasering action will clean the zoot as it goes along and you will not leave a stain in the lasered area. Tape works on anything as long as it can stay adhered flat on the surface of your project. I use it all the time on Yeti stuff, flashlight bodies, and glasses that have a wrap around patterns. Have fun with this useful technique!
4 Likes
2 Likes
Thanks! @drew.hynes I did upholster it, the first time I tried sewing anything. And incidentally, its not comfortable at all ![]() needs some different foam I think.
needs some different foam I think.
3 Likes
Robby, can you do a class on this? It is absolutely awesome. Thanks for sharing and I’m not kidding about the class.
Kathy
1 Like
Hey Kathy, I don’t know if you have seen the Big Laser: Rotary Techniques class, but it shows you how to set up the rotary tools to achieve laser etching/engraving on round objects like this! We will be having a session coming up in September that will be on the calendar soon.
2 Likes
Yep the bowls lathe class + a rotary laser class is all you need! For this one I used Perl, which is explained in the “Small Laser: Rotary Engraving Techniques” class. I think it would be cool if maybe one of those classes included a bit of info/demo of the other tool, since they complement each other quite well, although it could be challenging to fit everything in during one session. But I’m open to helping out with that if there’s interest! (cc @JohnWickham @Jordanva2)
2 Likes
Thank you. I’ll push to get something going. I really like your bowl!
Kathy
1 Like
Thanks for the tip, I’ll look for the class. I do think we should take advantage of Robby’s example of that great bowl with the laser work. It would be a great class, and I agree, its not a one day gig. K
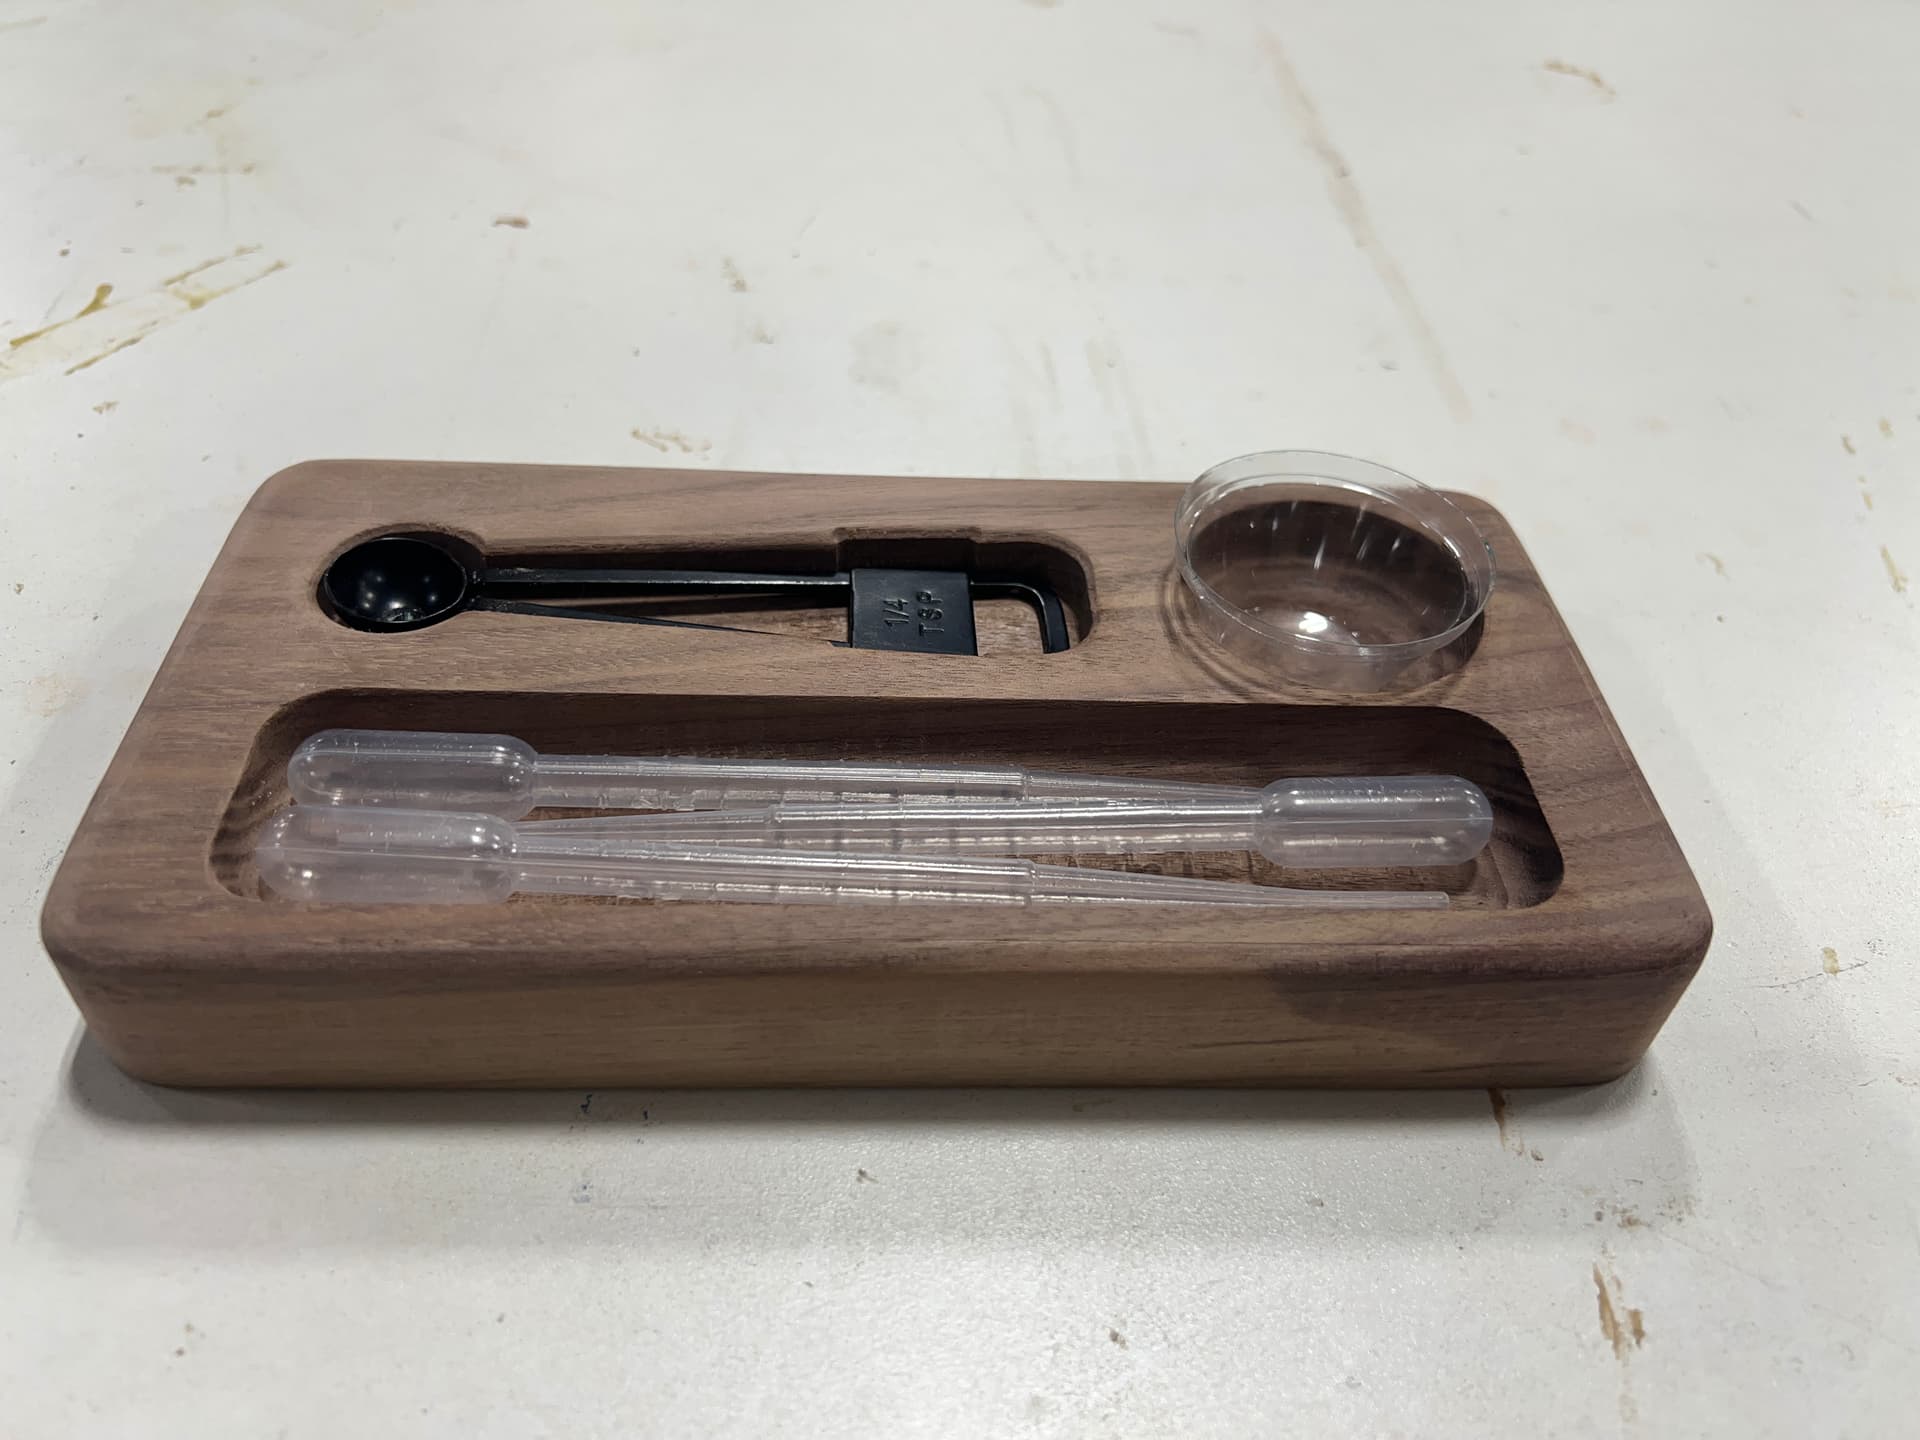

I needed a tray for some wet hydroponics accessories. A perfect project for that “I can make something from that” scrap wood.
9 Likes
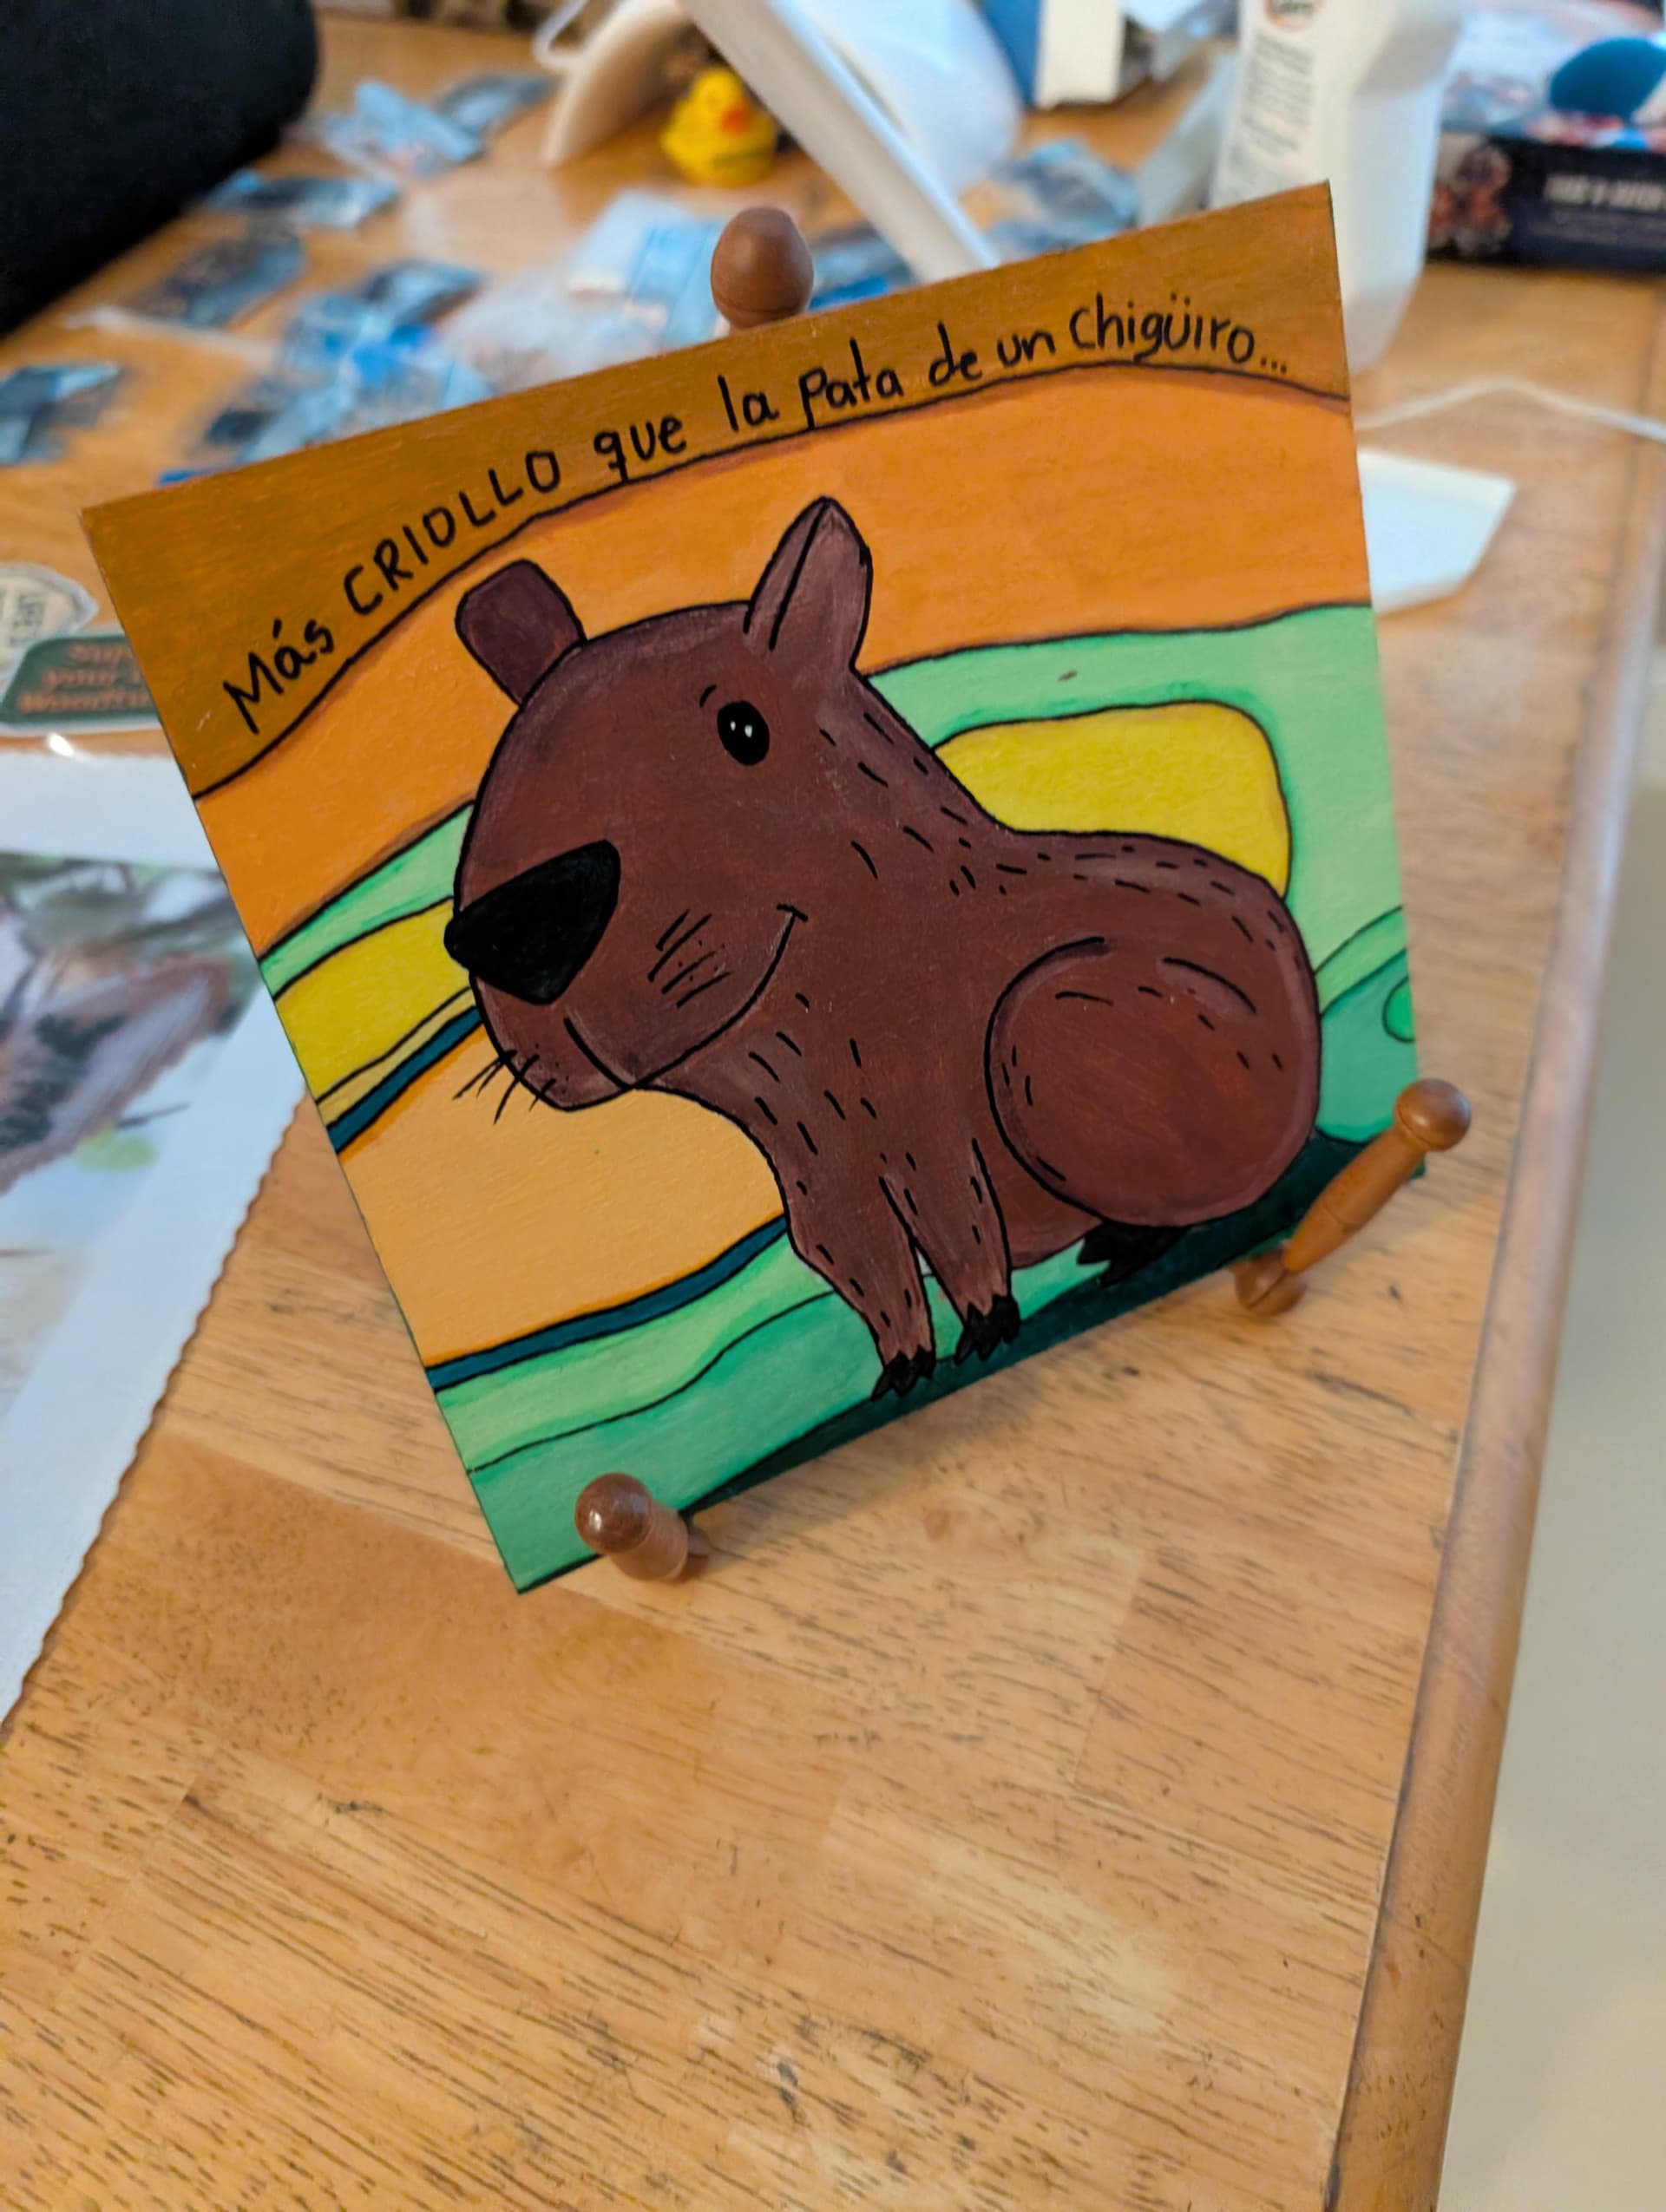
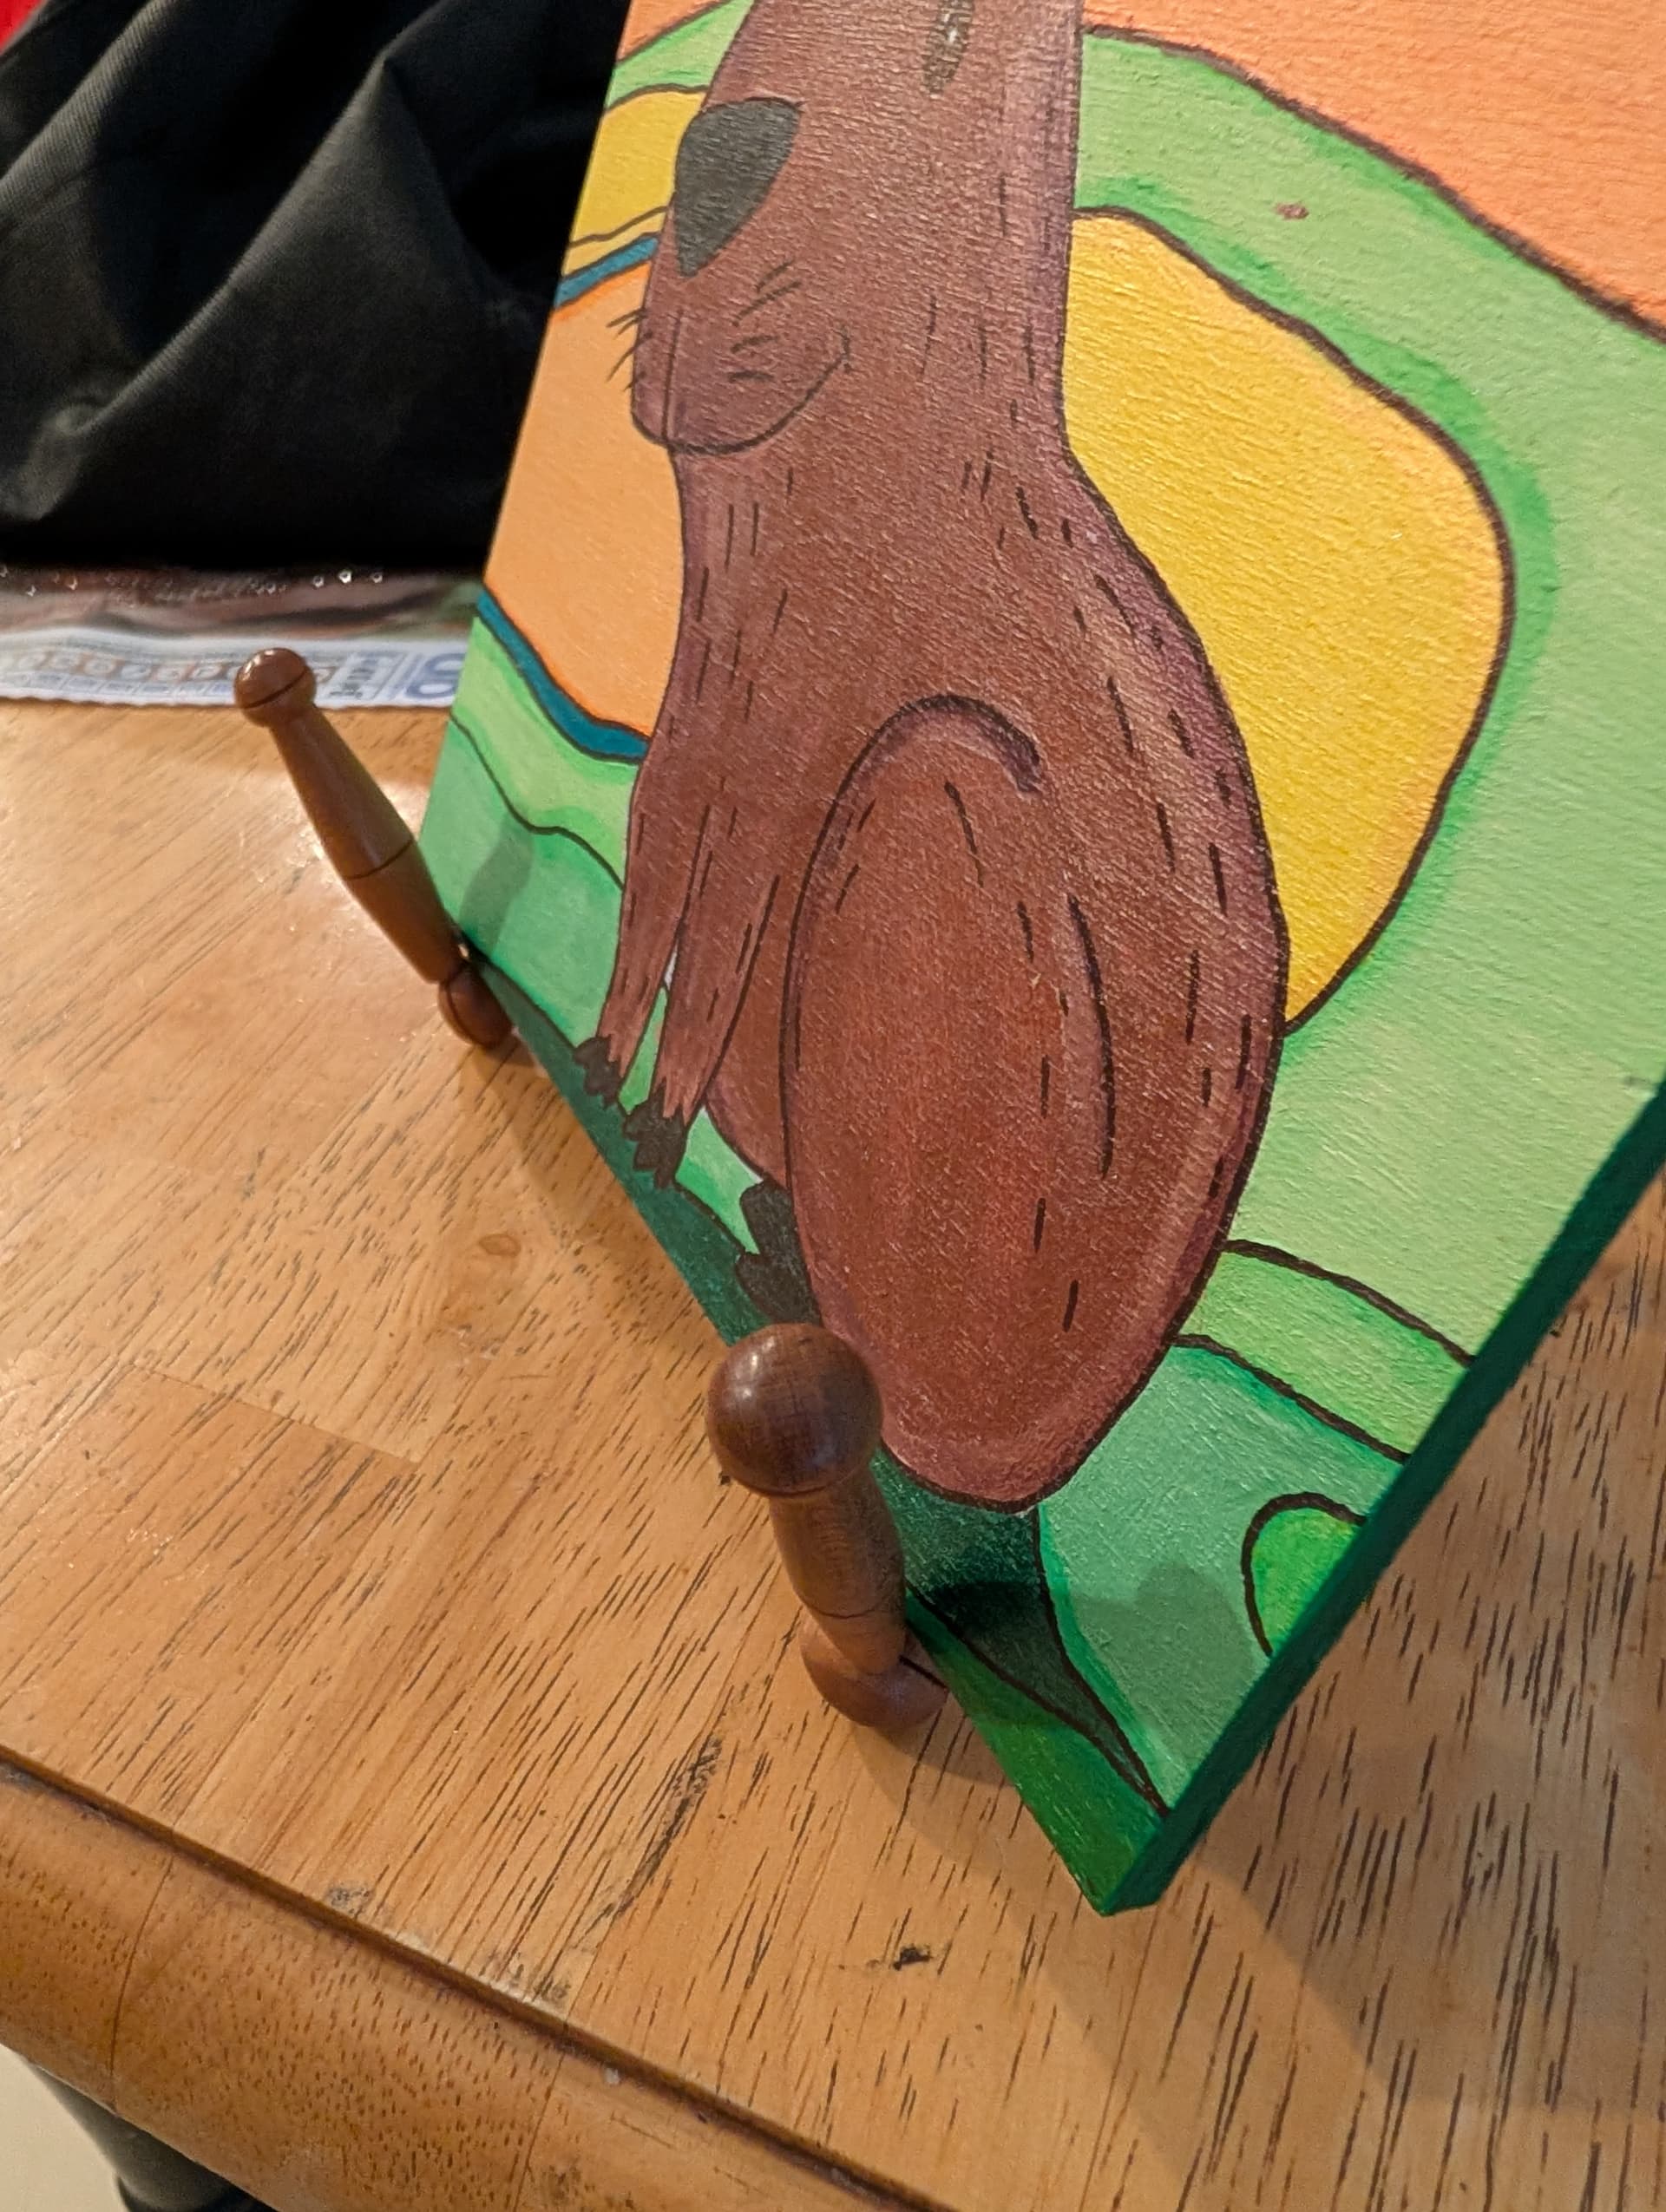
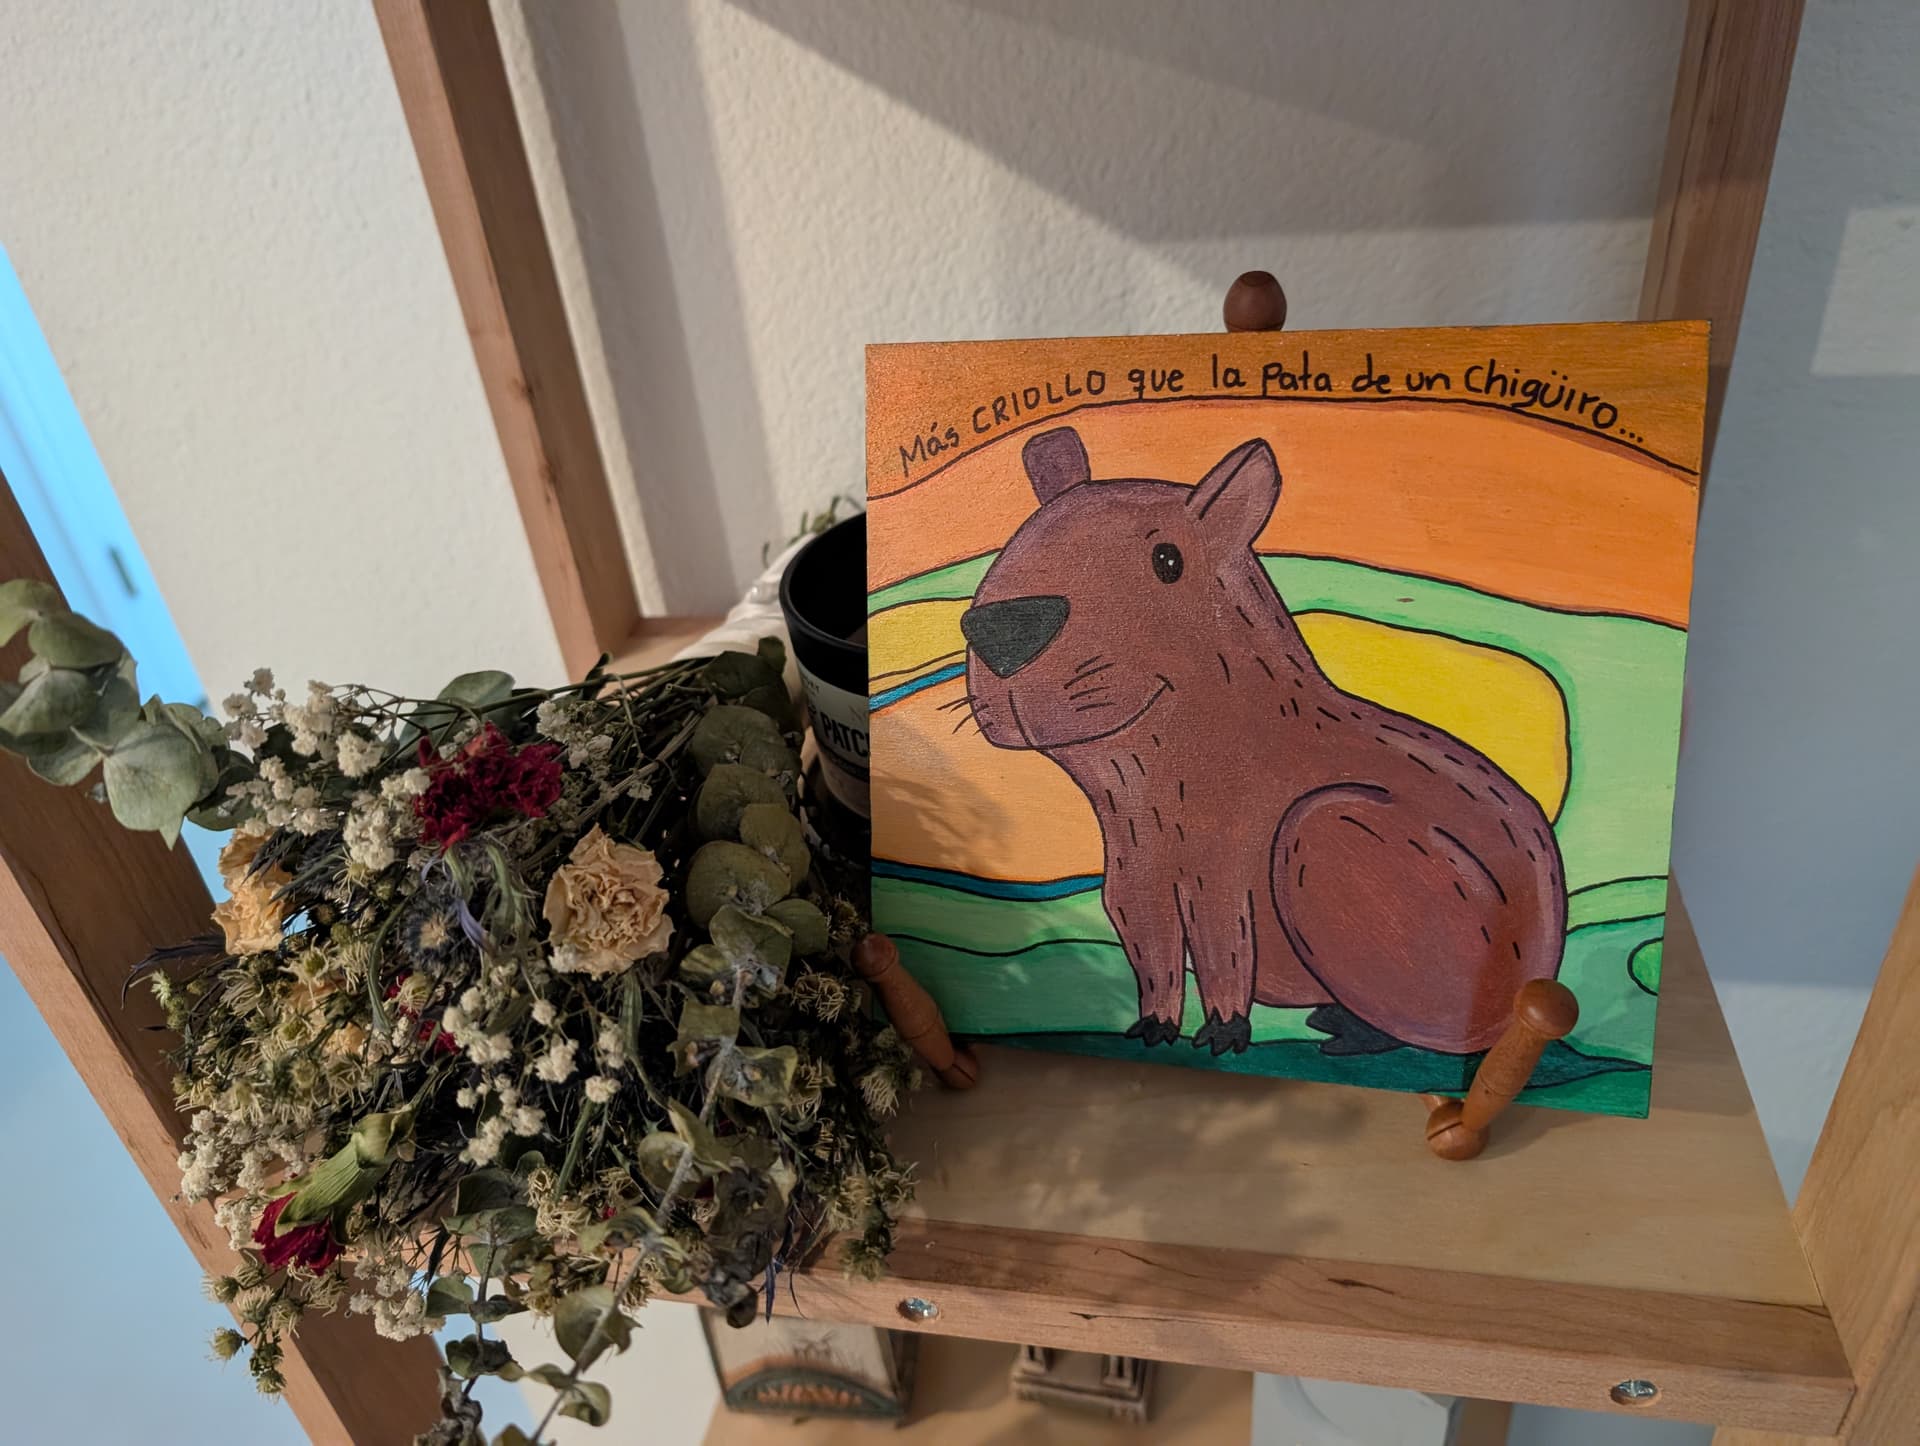
@Duckie and I got to work with Gary Roberts, a well renown woodturner. At 93 years young on the lathe, he helped us make this picture display stand out of Cherry wood. Finally have something to do with all those extra pen blanks I have!
Diana also did the painting of a capybara (ahem… Chiguiro).

8 Likes
That is some very intricate turning and joining Rolo, Duckie’s painting is awesome!
2 Likes
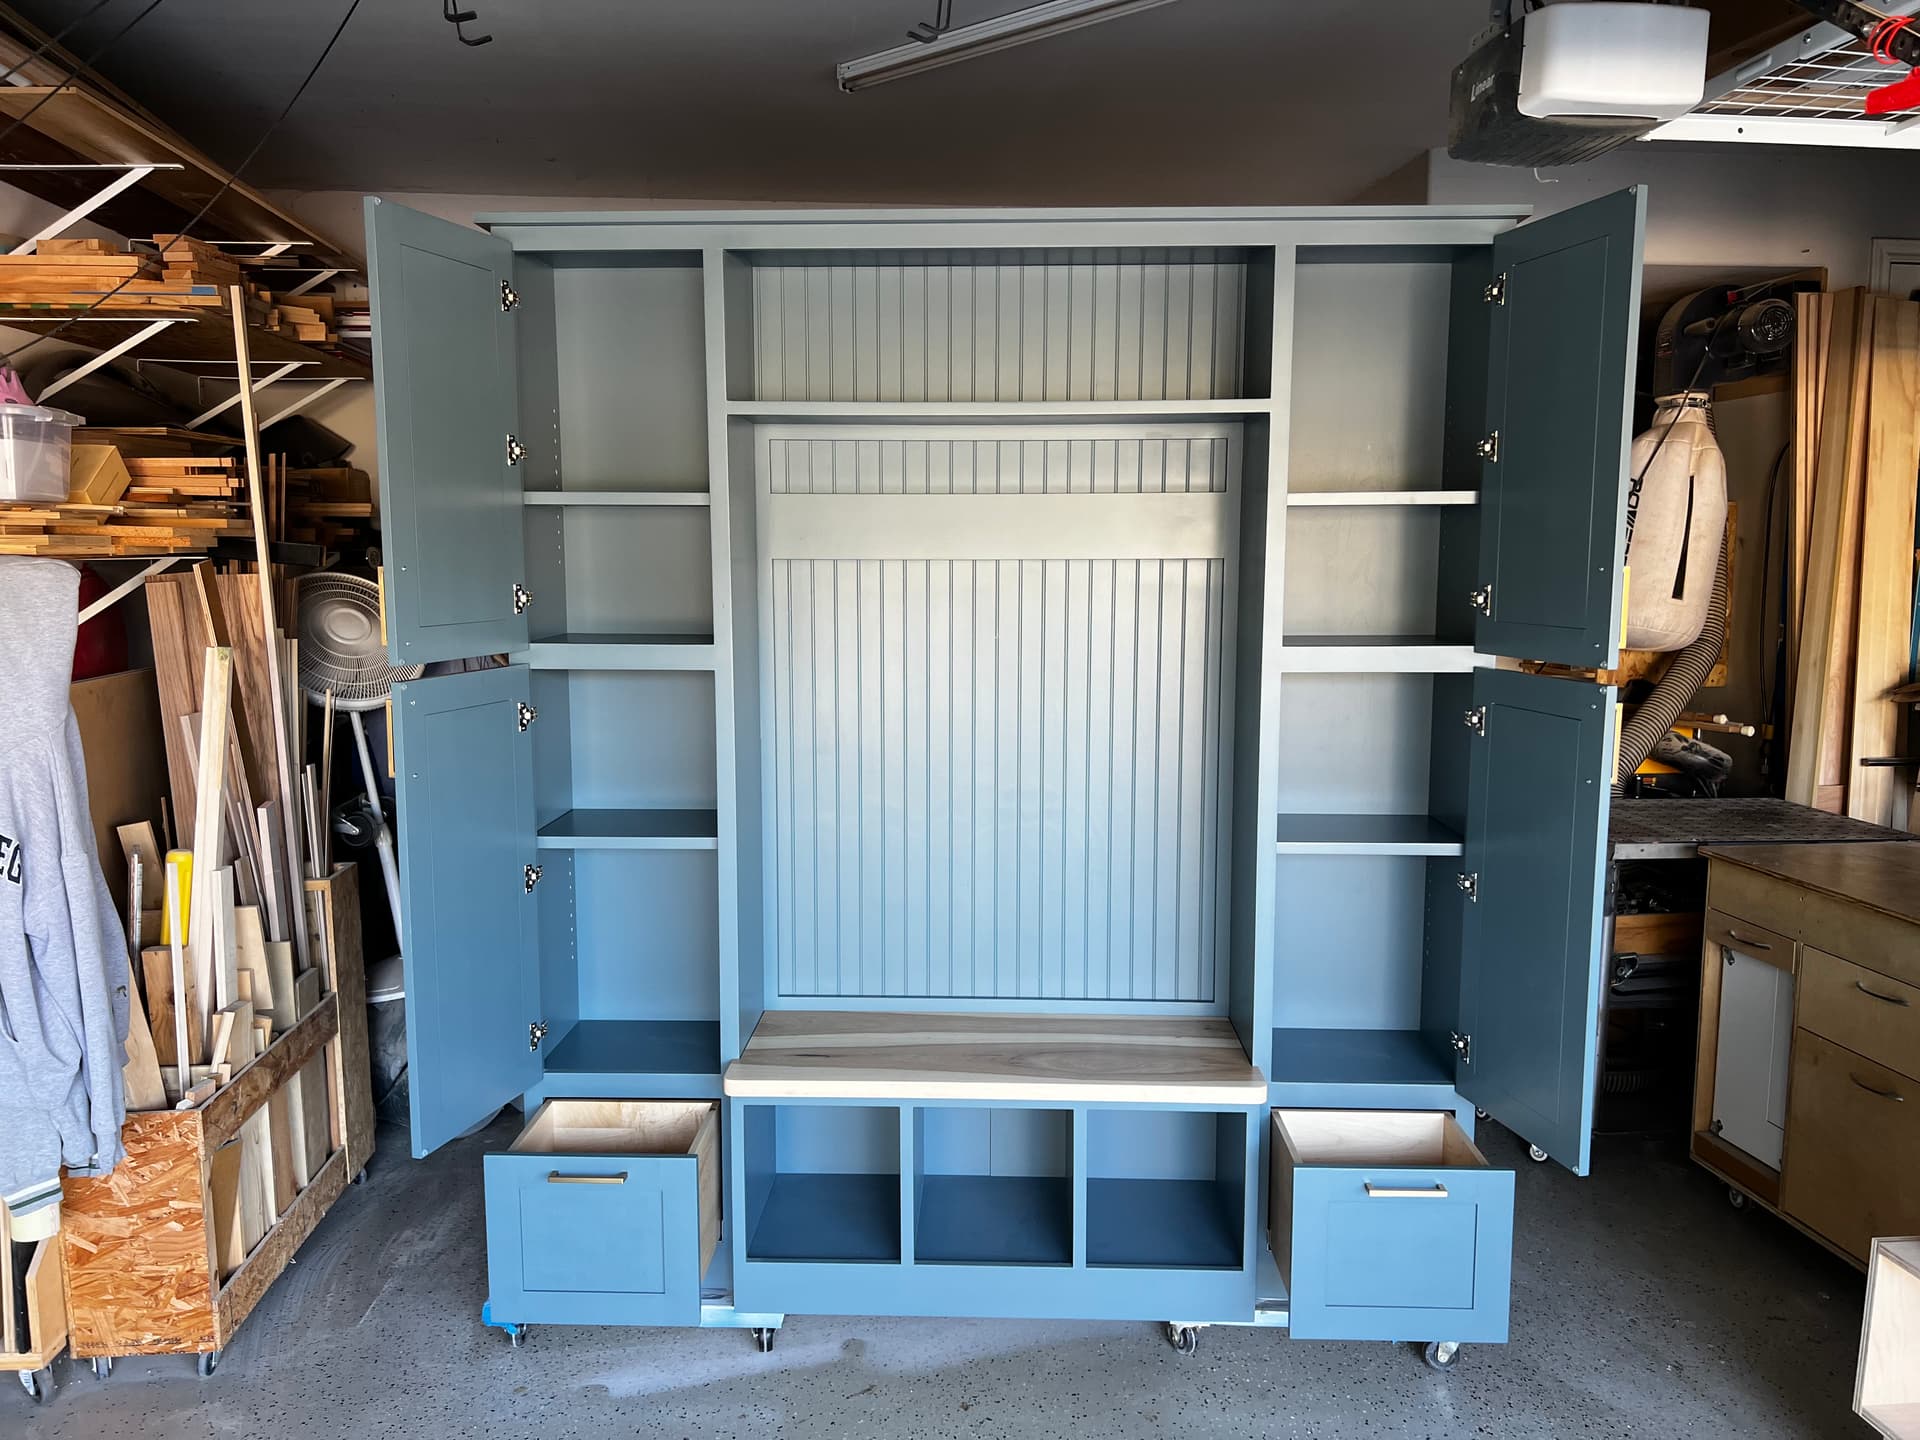
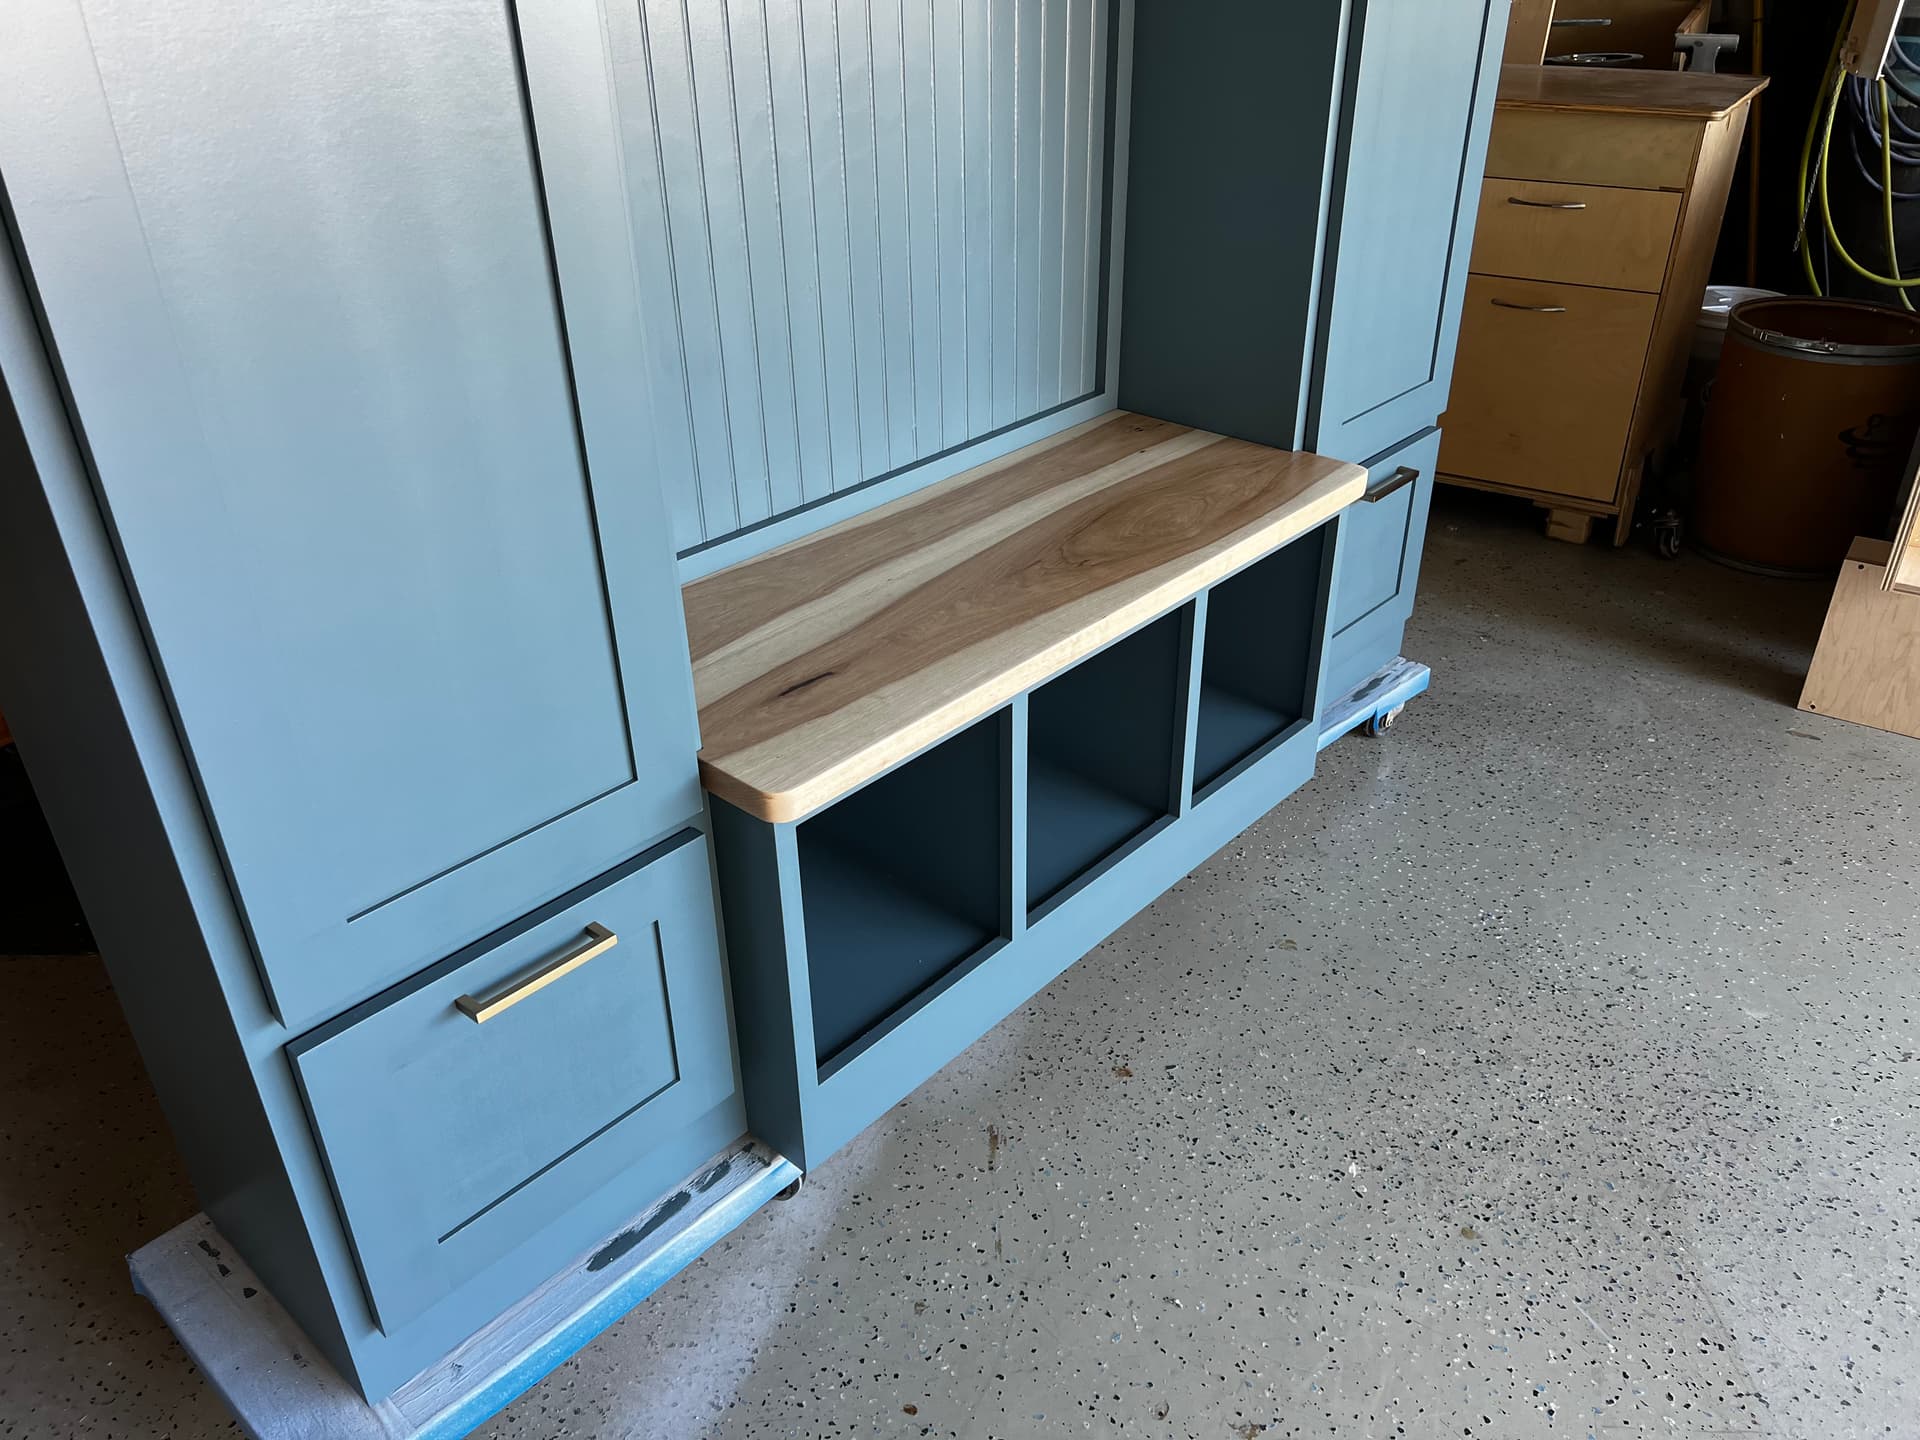


Hall Tree 76” wide x 84” tall x 13/18” deep.
Commission for neighbors on my block. Took all summer long due to building something just a bit too big for easily working on in my garage.
15 Likes
WOW! Sweet!
Holy moly @sknodl! I’m going to be remembering this piece if some of our house projects get to the “we have too many things let’s commission this off” state ![]()
1 Like
That’s downright stunning! ![]()
Thanks yall.
This thing really whooped me. I’d say some thing a third the size is manageable in my space.