This question is a little bit specifically aimed at @TravisGood because he happened to show a particularly good example of the effect I’m curious about earlier today when we presented to the CNC SIG meeting on the topic of inlays and marquetry… but really it’s a general question about finishing techniques, so figured would post here and maybe other folks can chime in and/or learn.
(Incidentally, huge thanks to Travis for the excellent presentation this morning – good info and lovely examples all around.)
Anyway: I’ve had various projects where I want a nice thick clear protective layer on the fine-detail woodwork/etching/whatever. I have a general understanding that the effect can be done with epoxy resin forming a crowned “bubble” on top of the work piece. But of course I imagine the devils are in the details, and/or perhaps there are better/easier ways to achieve something similar?
I don’t know what the common terminology might be for this effect, either. And of course I forgot to take a photo of any of your example pieces today, @TravisGood, but I do remember that one nice example was the “Birdy”… perhaps you have a photo handy?
As for the effect I think you’re asking about, in general terms it’s called a “flood coat”. It’s where a layer of tabletop epoxy is poured atop a project. However, the “crowned bubble” effect results from how you pour.
In the case of Birdy the trick was to pour while guiding resin to the edges of the project without going over. This will result in a clean “mounding” on the surface but if the surface tension is broken at the edges then it will stream off. It’s a delicate touch as once the perimeter is pierced the resin flows.
While I’ve not tried, it seems reasonable that the “crowned bubble” effect could also be achieved with a higher viscosity resin, using something like deep pour. It naturally mounds higher. With a properly prepared underside the resulting drips could be easily removed. Blue tape or liquid latex applied to the bottom could speed clean-up.
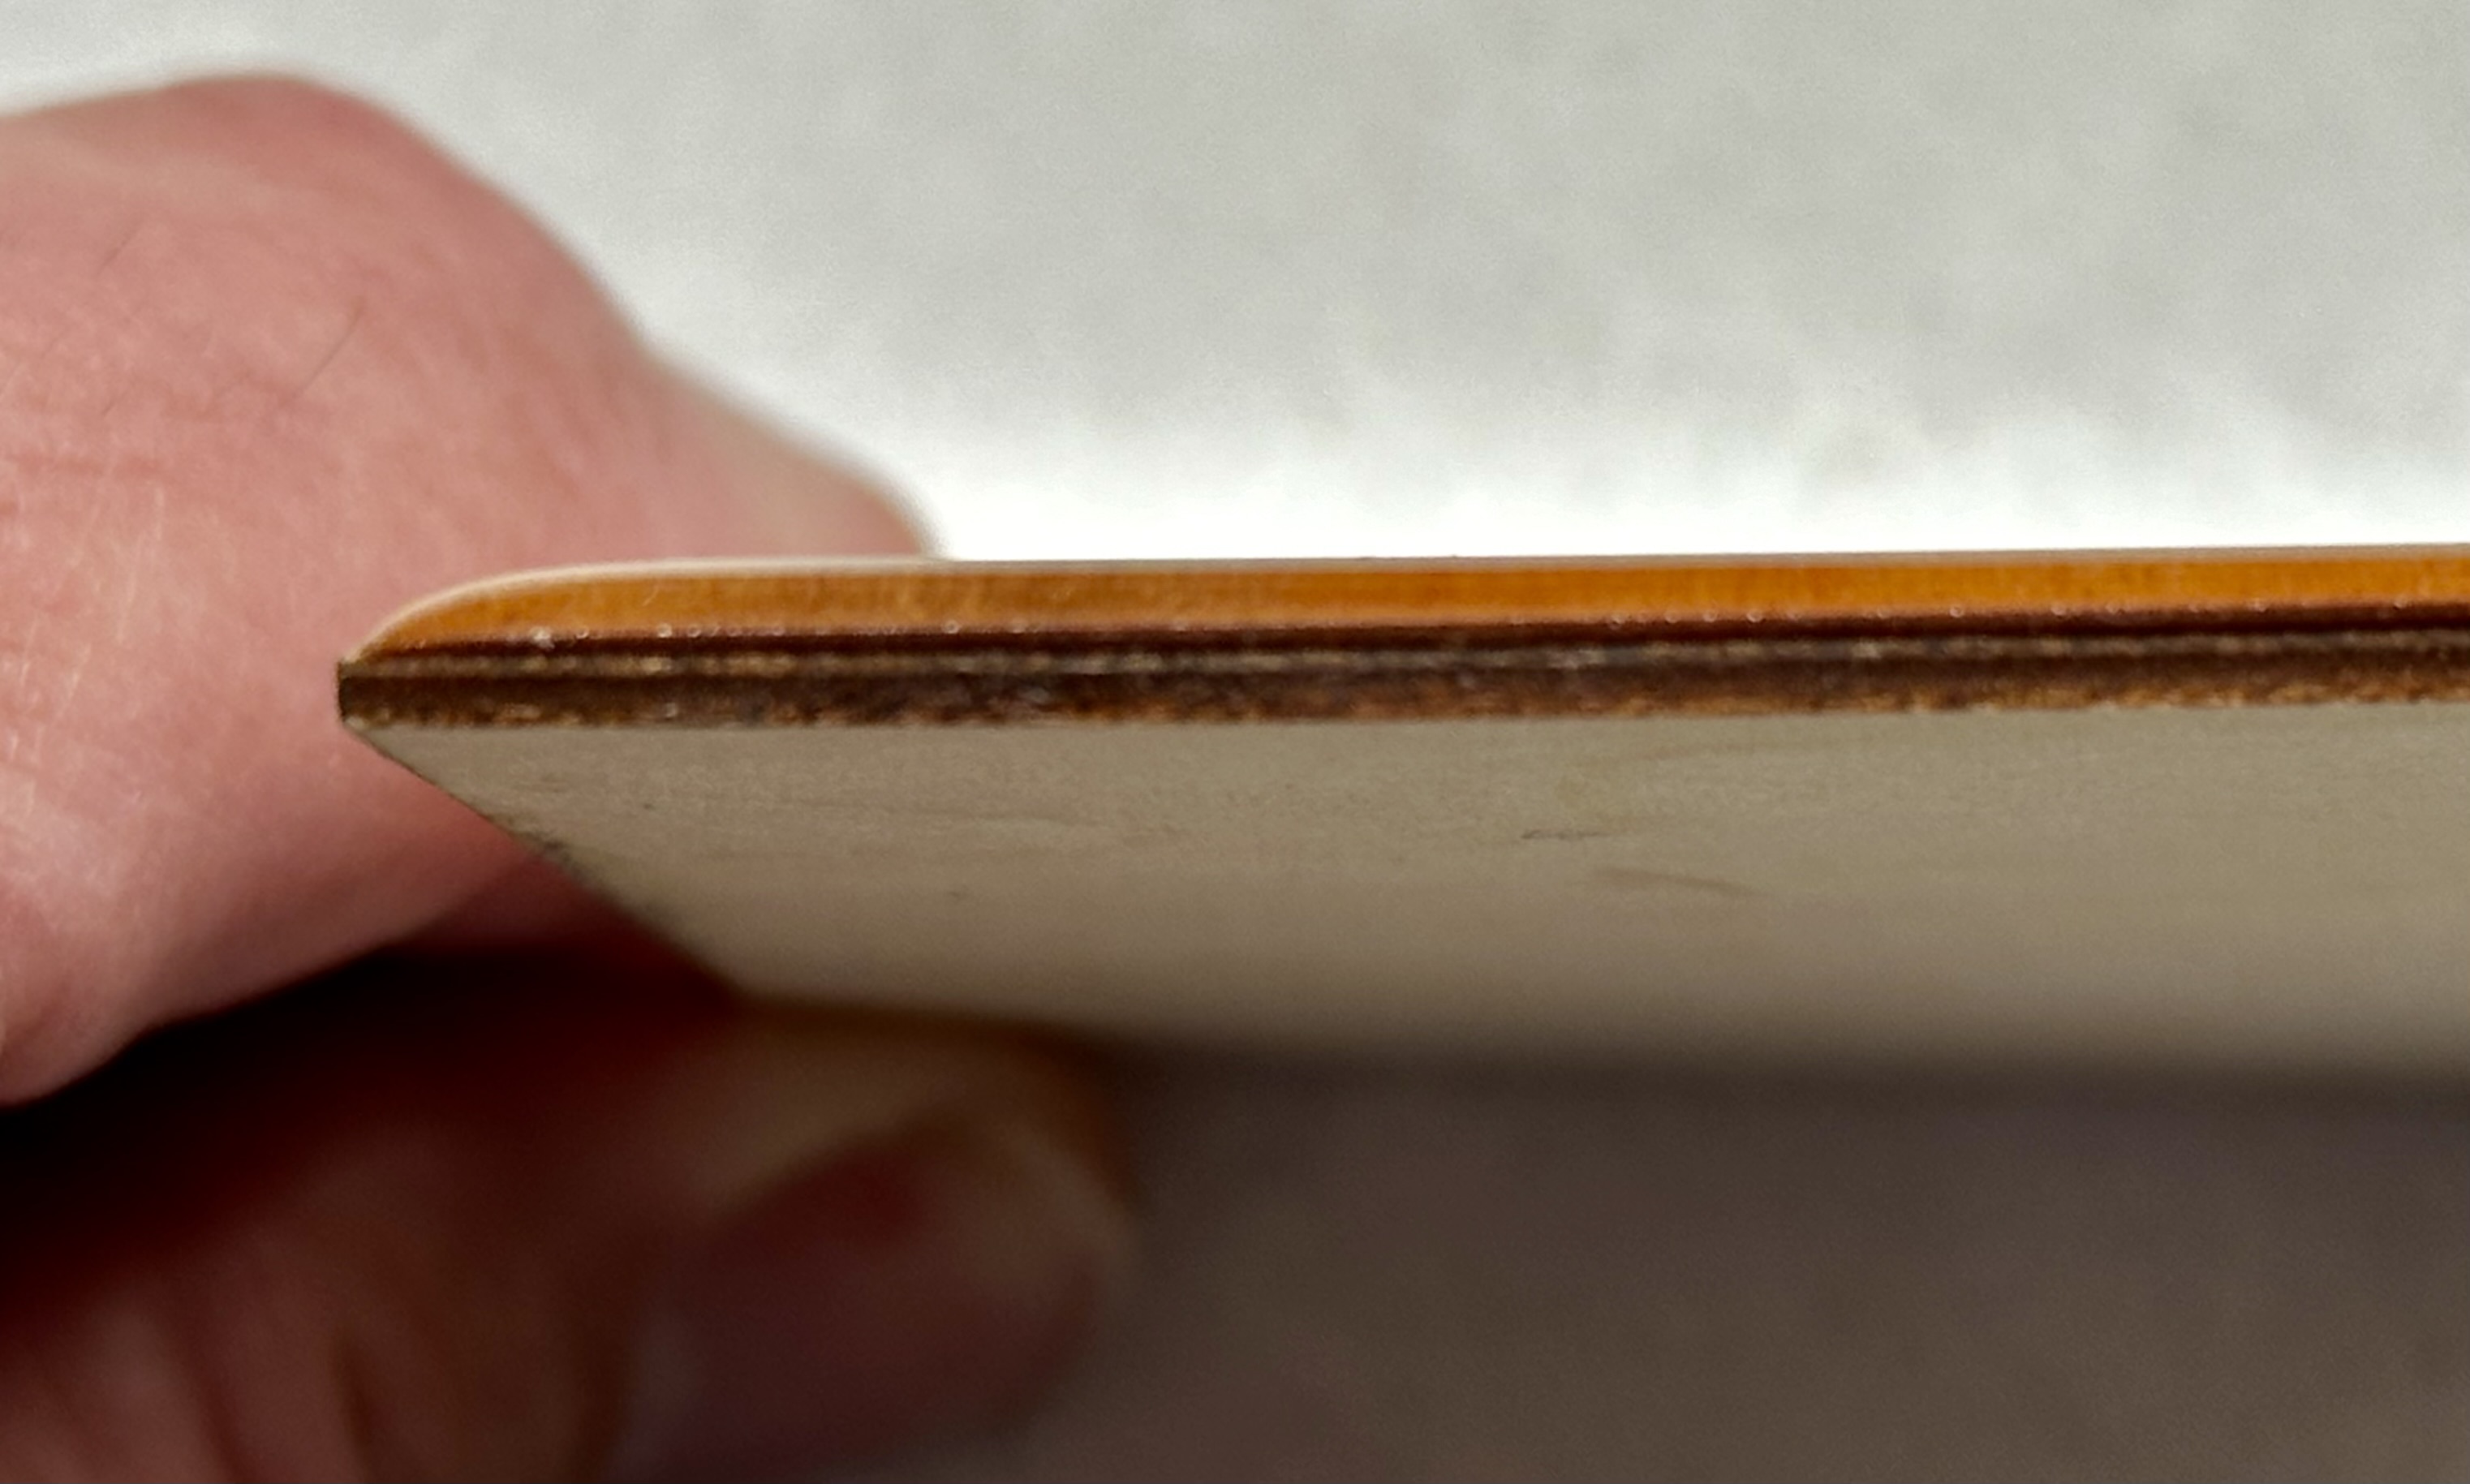
For those who can’t envision what we’re talking about, here’s a profile shot of the edge of Birdy. You can see how epoxy is mounded on top. The surface tension at the edge was never broken and it cured as a raised surface.
Sorry, I’m not well versed in resin brand options.
For this technique I’m not sure it’d make a difference.
Just so long as the A/B mix and curing temps are right.
This process is all about spread and surface tension.
I’ve never tried this effect, but I don’t think you’d want a deep pour for this. It’s actually lower viscosity and would take forever to cure in such a low volume. I would stick with a “Table Top” epoxy.
what stephanie said. also make sure your table top epoxy is warm (put your cup in an outer cup of warm water) to help with the spread. And as Travis recommended - put some blue tape along the bottom side inset from the lip a smidge. Will help to clean off the drips that will accumulate there. And it is imperative to keep it in a dust free environment for this. Multiple thin coats are better than one thick coat in this application.
It brings up one more follow-up that’s a bit more general for epoxy resin: does 2-part epoxy go bad if (purely hypothetically!) forgotten in a garage for say 2 years or so? I bought a gallon of each back when I was young and naive about how easy epoxy resin would be to work with.
The resin is of the right viscosity that you can move it around (e.g. with a toothpick) and achieve good coverage and shape, and the surface tension is such that it doesn’t want to just flow off the edge. Once you hit it with UV light it cures very quickly.
That said: this was on a very small object, only a couple of inches in length. I honestly have no idea how the resin would behave on something larger or atop a different material.
Nice, I liked that end result as well. I’ve seen some similar “domed” stickers where the clear dome is fairly flexible and rubbery. Is that what you get out of the UV-cure resin?
Hmm, I’d say they were somewhat flexible, although I didn’t stress them much. They’re now stuck in place so I’m afraid I can’t test them out, but I imagine the flexibility varies by how thick the resin was.
To answer some common q’s on epoxy shelf-life/usage based on my experience:
Epoxy doesn’t like oxygen or repeated temperature changes. Depending on the brand, it can also have light sensitivity - hence why some ship in dark bottles. That is why some people store their extra epoxy in the house hidden in a cabinet. I am not one of those people. I store my epoxy along with my Titebond out in the garage year round. Bring on the hate.
Ways to tell epoxy is bad - it solidifies, looks browner than usual (depends on the brand but some have hardeners that start out brown), separates further or smells even worse than usual (once again, depends on the manufacturer).
I have had non-thick pour epoxy solidify over the winter than come back to life in the bottle for usage over the summer. It has mixed properly and hardened just fine. What is likely to happen is that it would dry more yellow/brown if I wasn’t adding pigment to it.
If you are going for a clear table top epoxy, buy some fresh stuff. Based on this thread that would be my recommendation.
If you are adding pigment for a thin inlay pour, I’d say cut a test piece and go for it. You might be pleasantly surprised.