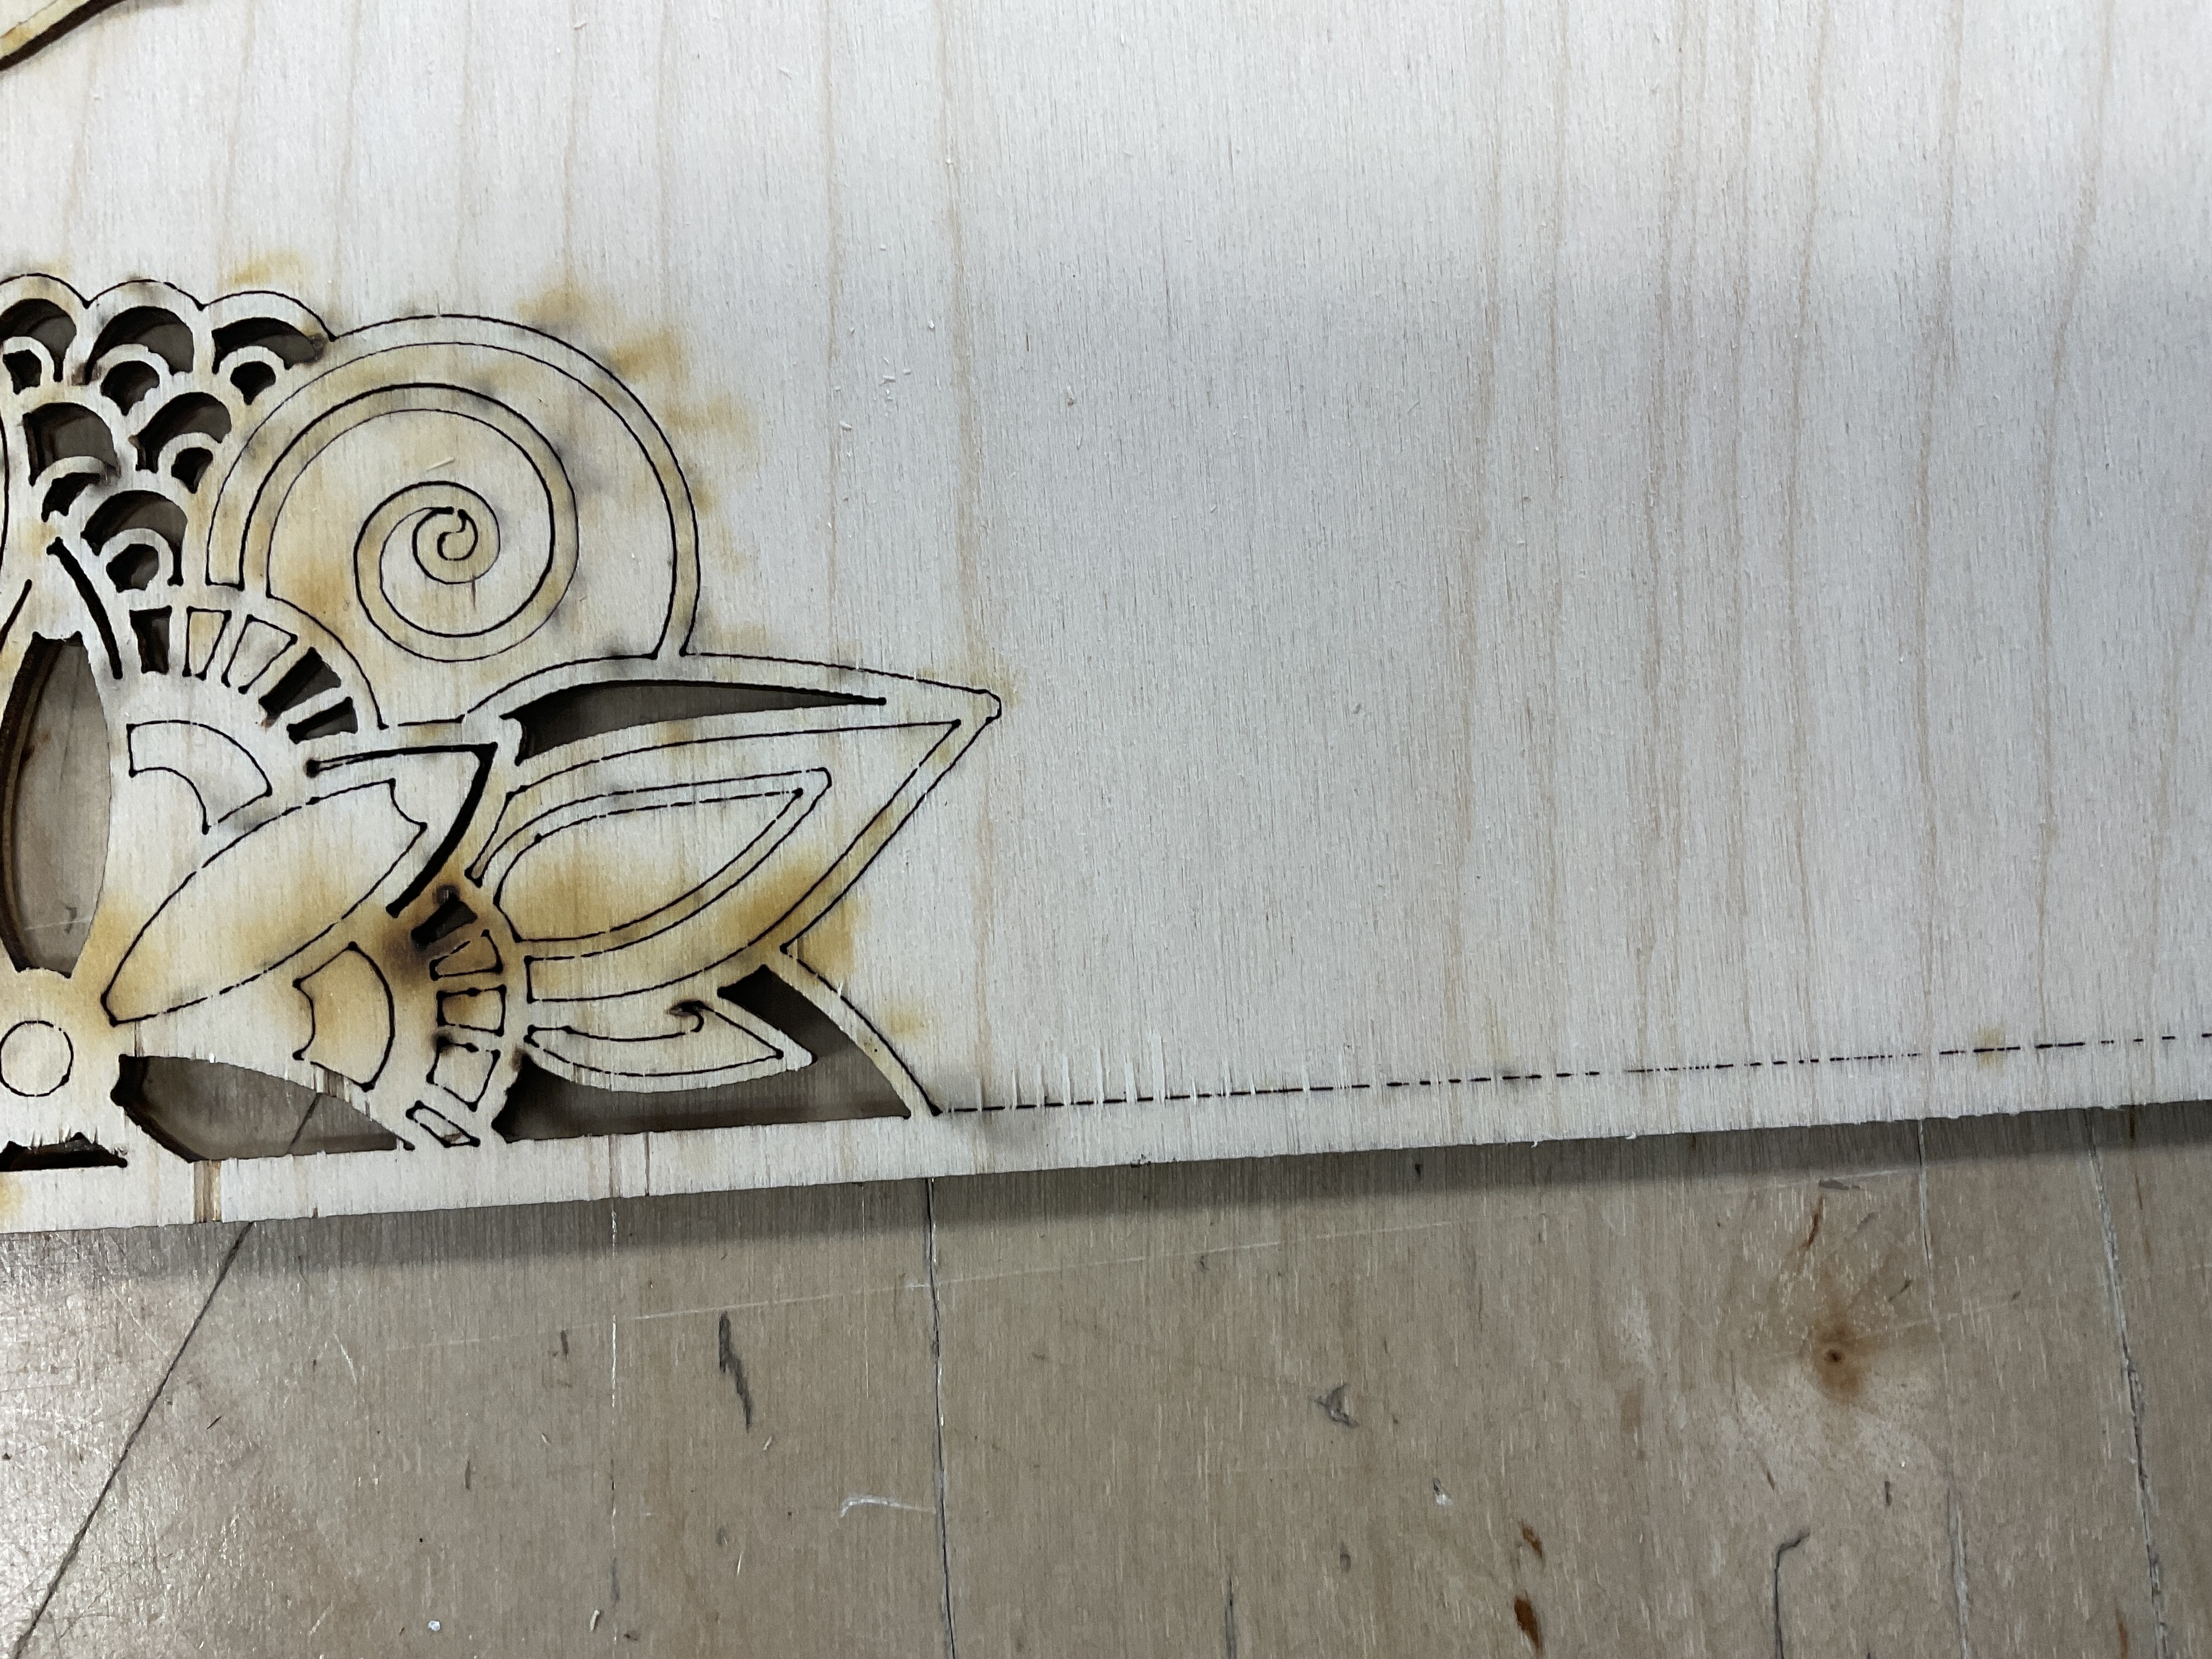
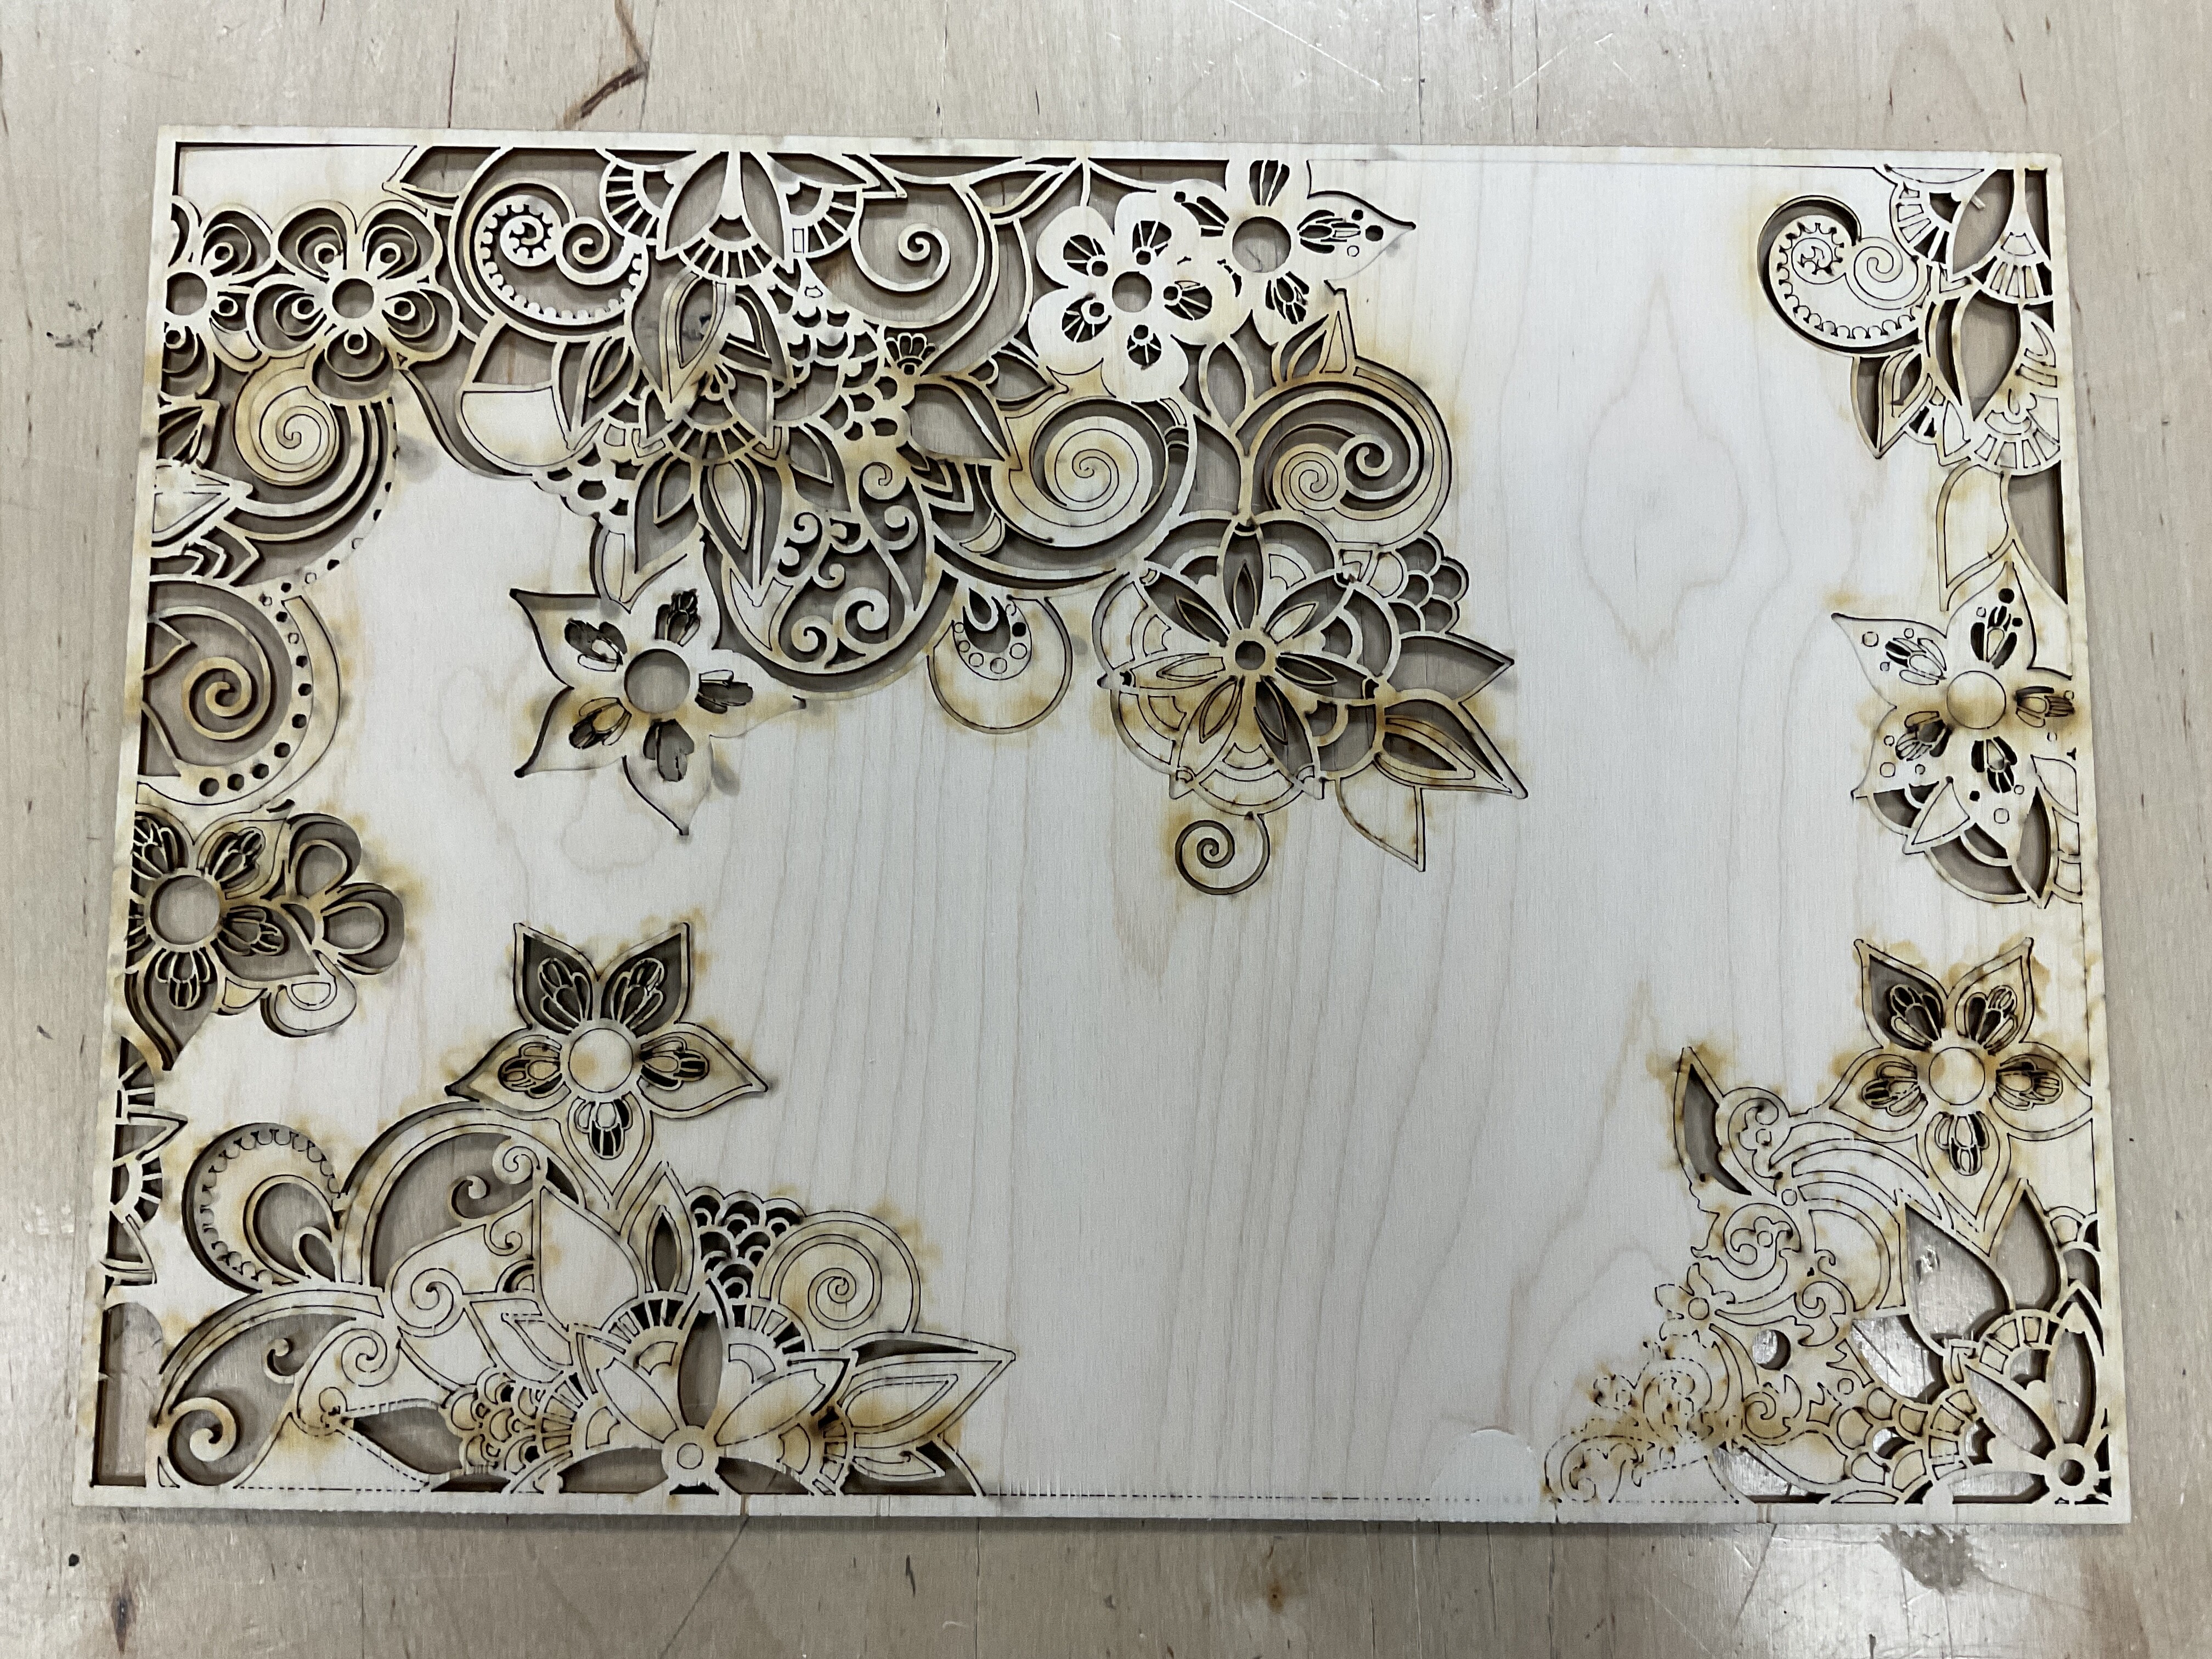
I just used the Tarkin to cut some intricate cuts on 1/8” birch.i aligned the lens to the correct height using the blue thingy, I used magnets to ensure the board was flat. Ran it a couple of times at good speed/power. Each time, it cut the piece like butter except for one area. It gave me the little dot dot dots where it did not cut through. A lot of flashback, but that can be for a number of reasons. So, is it me? Or is it lens out of alignment or honeycomb not level?
I’m going to try attaching the photos to show you the non cut area. I noticed the same issue in another post from 2022, about the same 1/8” birch and the bottom quadrant.
1 Like
In the future, before moving your workpiece, test all areas. Where ever it didn’t go through you can cut just those areas again. Simply use the Start Here function in the Preview window. Generally you’ll find that getting consistent cut performance is difficult across such a large bed as Tarkin’s.
I appreciate our quick response, but the problem still remains? This was not a big piece at all. If you look at the pattern where it didn’t cut through, it didn’t even go through a little. So I’m not sure cutting over and over would have even worked. I wonder if Felipe has to do what you are describing. This is the same thing he makes, just on a much smaller size scale.
Tarkin has been exceptionally consistent across the entire bed, but misalignment is possible
Plywood is not always consistent, a sheet can sometimes hide patched areas on internal plies that contain a lot of glue and require more power to cut.
That might be the case, but what’s shown here doesn’t correlate to a machine prob like that, maybe not a stock prob either. Looking closer at it, it does seem more like the user’s cut settings might be incorrect. What settings were used? It kind of looks like Min Power was set to 100% when it should be 0, and then the feed got set too high
The bed is heavily used with people putting items of various weights so it will have subtle variations. However, 1/8" should not be a problem unless it was flexing while being cut. What settings were you using?
I checked recently and the bed’s height variations were still minimal across the bed
There was a prob briefly where the bed had been removed and put back in place without removing debris from the rails, so one side was being propped up on a small piece of plywood debris
Speed was 30 and power was 30. I did try a few small circles at 20/30, 30/40 to test out. And I did three different sheets of plywood. Same issue in about the same area.
30 speed and 30 power. I varied that a bit when I first set up to test. I used the magnets so the sheets were secured and flat, and, this piece, the rest of it was flawless and lifted up. So originally I thought the focal distance might have been off, but because 90% of it cut perfectly I don’t think that’s it, I will keep trying to solve the mystery, and yes, a thin piece like that should not be an issue to cut.
To answer the min question… usually I set the minimum to be half of the maximum. So it would have been 15.
What’s the rationale for these unusual settings? That will make the power drop on straightaways, so detail may cut but not straight runs, which appears to be occurring. And why set power at only 30%?
Conventional would be 100% max, 0% min, and maybe 70 mm/s.
Wow! I use lasers a lot at home, which are only 80 watt, I have never used more than 60% max power. You’re saying 100%? On a 220 watt machine? I guess I will try it, but this is a radical idea to me and I thought it would yield a black charred piece. I even followed the little wood ramp test block laying there by the computer that pretty much says use 10 speed and 40 power, so based on that I was experimenting around. I “thought” the theory is if you power to 100% you will wear out your tube and overall it’s unnecessary. I’m willing to learn something new. I will try this next week.
1 Like
Most machines that use laser glass tubes are already set up where the output is 80% as your 100%. In other words theyre optimized for best performance and the user does not have to factor those settings during normal use. The library settings for Tarkin should be your starting point and not the laser at home. Normally, i cut 1/8" baltic birch plywood, 100 power, 40 speed, and no minimum power on Tarkin with a normal focus. In Pearl same plywood, 100 power, 6.5 speed, 100 dpi. At home i have a 150 wt laser (Nova 51/Thunder), i use 100 power, 60 speed. I don’t use minimum power as from what i understand the ruida controller or lightburn automatically slows down on curves or detail. Also from what i understand minimum power is mostly for inside corner detail. But im not an expert nor a professional. I do agree with you the cuts in the photos are atrocious.
1 Like
Short answer is yes, you should be using 100% Max Power 0% Min Power on Tarkin or Dorian. Any HVDC excited tube machine should be tuned to work right at 100% but you do need to tune the machine first. More power does not char, quite the opposite, it creates a cleaner cut. Using less power will not improve your tube life, and can actually reduce it.
Dorian has one of the common HVDC excited CO2 tubes in it. They are common because they are cheap initially, but come with a number of performance issues and actually end up being more expensive to operate in the long run. Being DC, the tungsten electrode inside the tube sputters off and irreversibly fogs the tube’s internal optics. That happens exponentially faster with excess current which is why the HVDC supply needs to be tuned so “100%” only drives out the mfg’s long-life rating. Dorian uses a Reci W6/C6 with a recommended current of 26mA and the supply is tuned so 100% drives 26mA. 100% power is the best operating point.
Technically the tube’s average lifetime in hrs does increase below that point as well, but that’s not the bottom line. If you run at 30% power, you will need to put over 3x the operating hrs on the tube for the same workload. And due to the dynamics of cutting, half the actual beam power actually needs to be run at somewhat less than half the cutting speed which is where you end up potentially reducing the net tube life by running at reduced power.
Tarkin, Pearl, and Blue are high quality RF CO2 lasers. RF performs much better on many fronts that matter to the user, but also RF does not have the tungsten sputter problem and actually cheaper to operate long term. They don’t have a current adjustment and don’t need it. They should ideally be run at full power all the time.
More power just means you run the axes faster. A faster cut means there is less time for heat to bleed away from the cut zone and yields a cleaner cut.
Min Power should usually be set to 0%. Otherwise it distorts the power scaling mechanism and causes overburning in starts/stops, corners and detail curves. It looks like you’ve throttled it back even further to try to use the overburn to work for the detail, but then it reduces power on straight long runs and won’t be able to cut there. Setting min power higher actually WILL reduce the tube life in the long run too
This is extremely interesting! I can’t wait to go back and try. For 1/8” birch, what would you recommend for speed? And just to go over this again, looking at the photo, any chance that I was out of focus? Thank you for taking the time to provide this really illuminating answer. ![]()
Signs of being off-focus: When rastering, the graphics look wide, blurry, and does not engrave as deep. Vector line looks wide and often has a ghost line on one or both edges. If you look at the red dot, if the focus is optimal or close to it, the point looks bright and condensed or narrow. Off-focus, it looks dull and blurry. A word of caution though, at times if the lens is dirty, the dot will also look dull and blurry, or you would not see it at all. Your project looks like it was focused right but the lines look a bit shaky but that could be a bad angle of the photo, the charred edges could also be the culprit. If you look at the library, 1/8" baltic birch has the settings of 100 power, 60 or 70 speed. You have a lot of close radius curves so i would go with 100/40 maybe even 100/30 so you get consistent through cuts. Thats what i use.
You shouldn’t need to change speeds based on content. If it cuts all the way through at 70mm/s, that’s the speed to use. Doesn’t matter if it has detail or long lines.
I’m coming in this weekend to try all this out. Really appreciate the input.
Well, true, but have you tried in Tarkin Danny? Over time i have cut a lot if intricate patterns on Tarkin. If the the lines are mostly straight (as in boxes) i can go 100 power 50-60 speed and is consistent as long as you stay on the center of the table. But if the pattern has tight inside curves, i have to go down to 100/40 some times even 100/30 because it doesnt cut through when transitioning from curve to straight line. I tried using minimum power without changing speeds. I tried focusing to the center of the material. And the only way is consistent is 100/40-30. I also thought it was the lines in the graphic which i did clean up but the problem remained. I have wasted probably around three sheets of plywood looking for a fix to cut faster and take less time. So for me the above settings work and are consistent. Now if you go to the far left (as you stand in front of the machine)of the table it doesnt cut worth a crap on any setting. If you go from let to right the first 6 to 8 inches and from the middle to the top of the table is the area im talking about. I have not cut hardly anything since you change the tube. But for me when i try that area is always the same since the beginning of Tarkin and you have changed tubes several times. The above is using baltic birch 1/8"
1 Like
Can you share the settings you used and for some reason that doesn’t look like 1/8" baltic birch, maybe because is so full of smoke residue?