Hey folks,
There’s been a large increase in folks over in ceramics, so I figured that I would make this post. It’s going to be broken up into two parts: basic etiquette, and then proper use of the sponge mop
Basic etiquette:
The main issue we’re seeing is people not cleaning up their mop after using it, or not ensuring it is fully saturated with water before using it. These two issues are kind of one and the same, if someone does not clean their mop off after using it’ll become a very hard rock that doesn’t like to absorb water, see exhibit a:
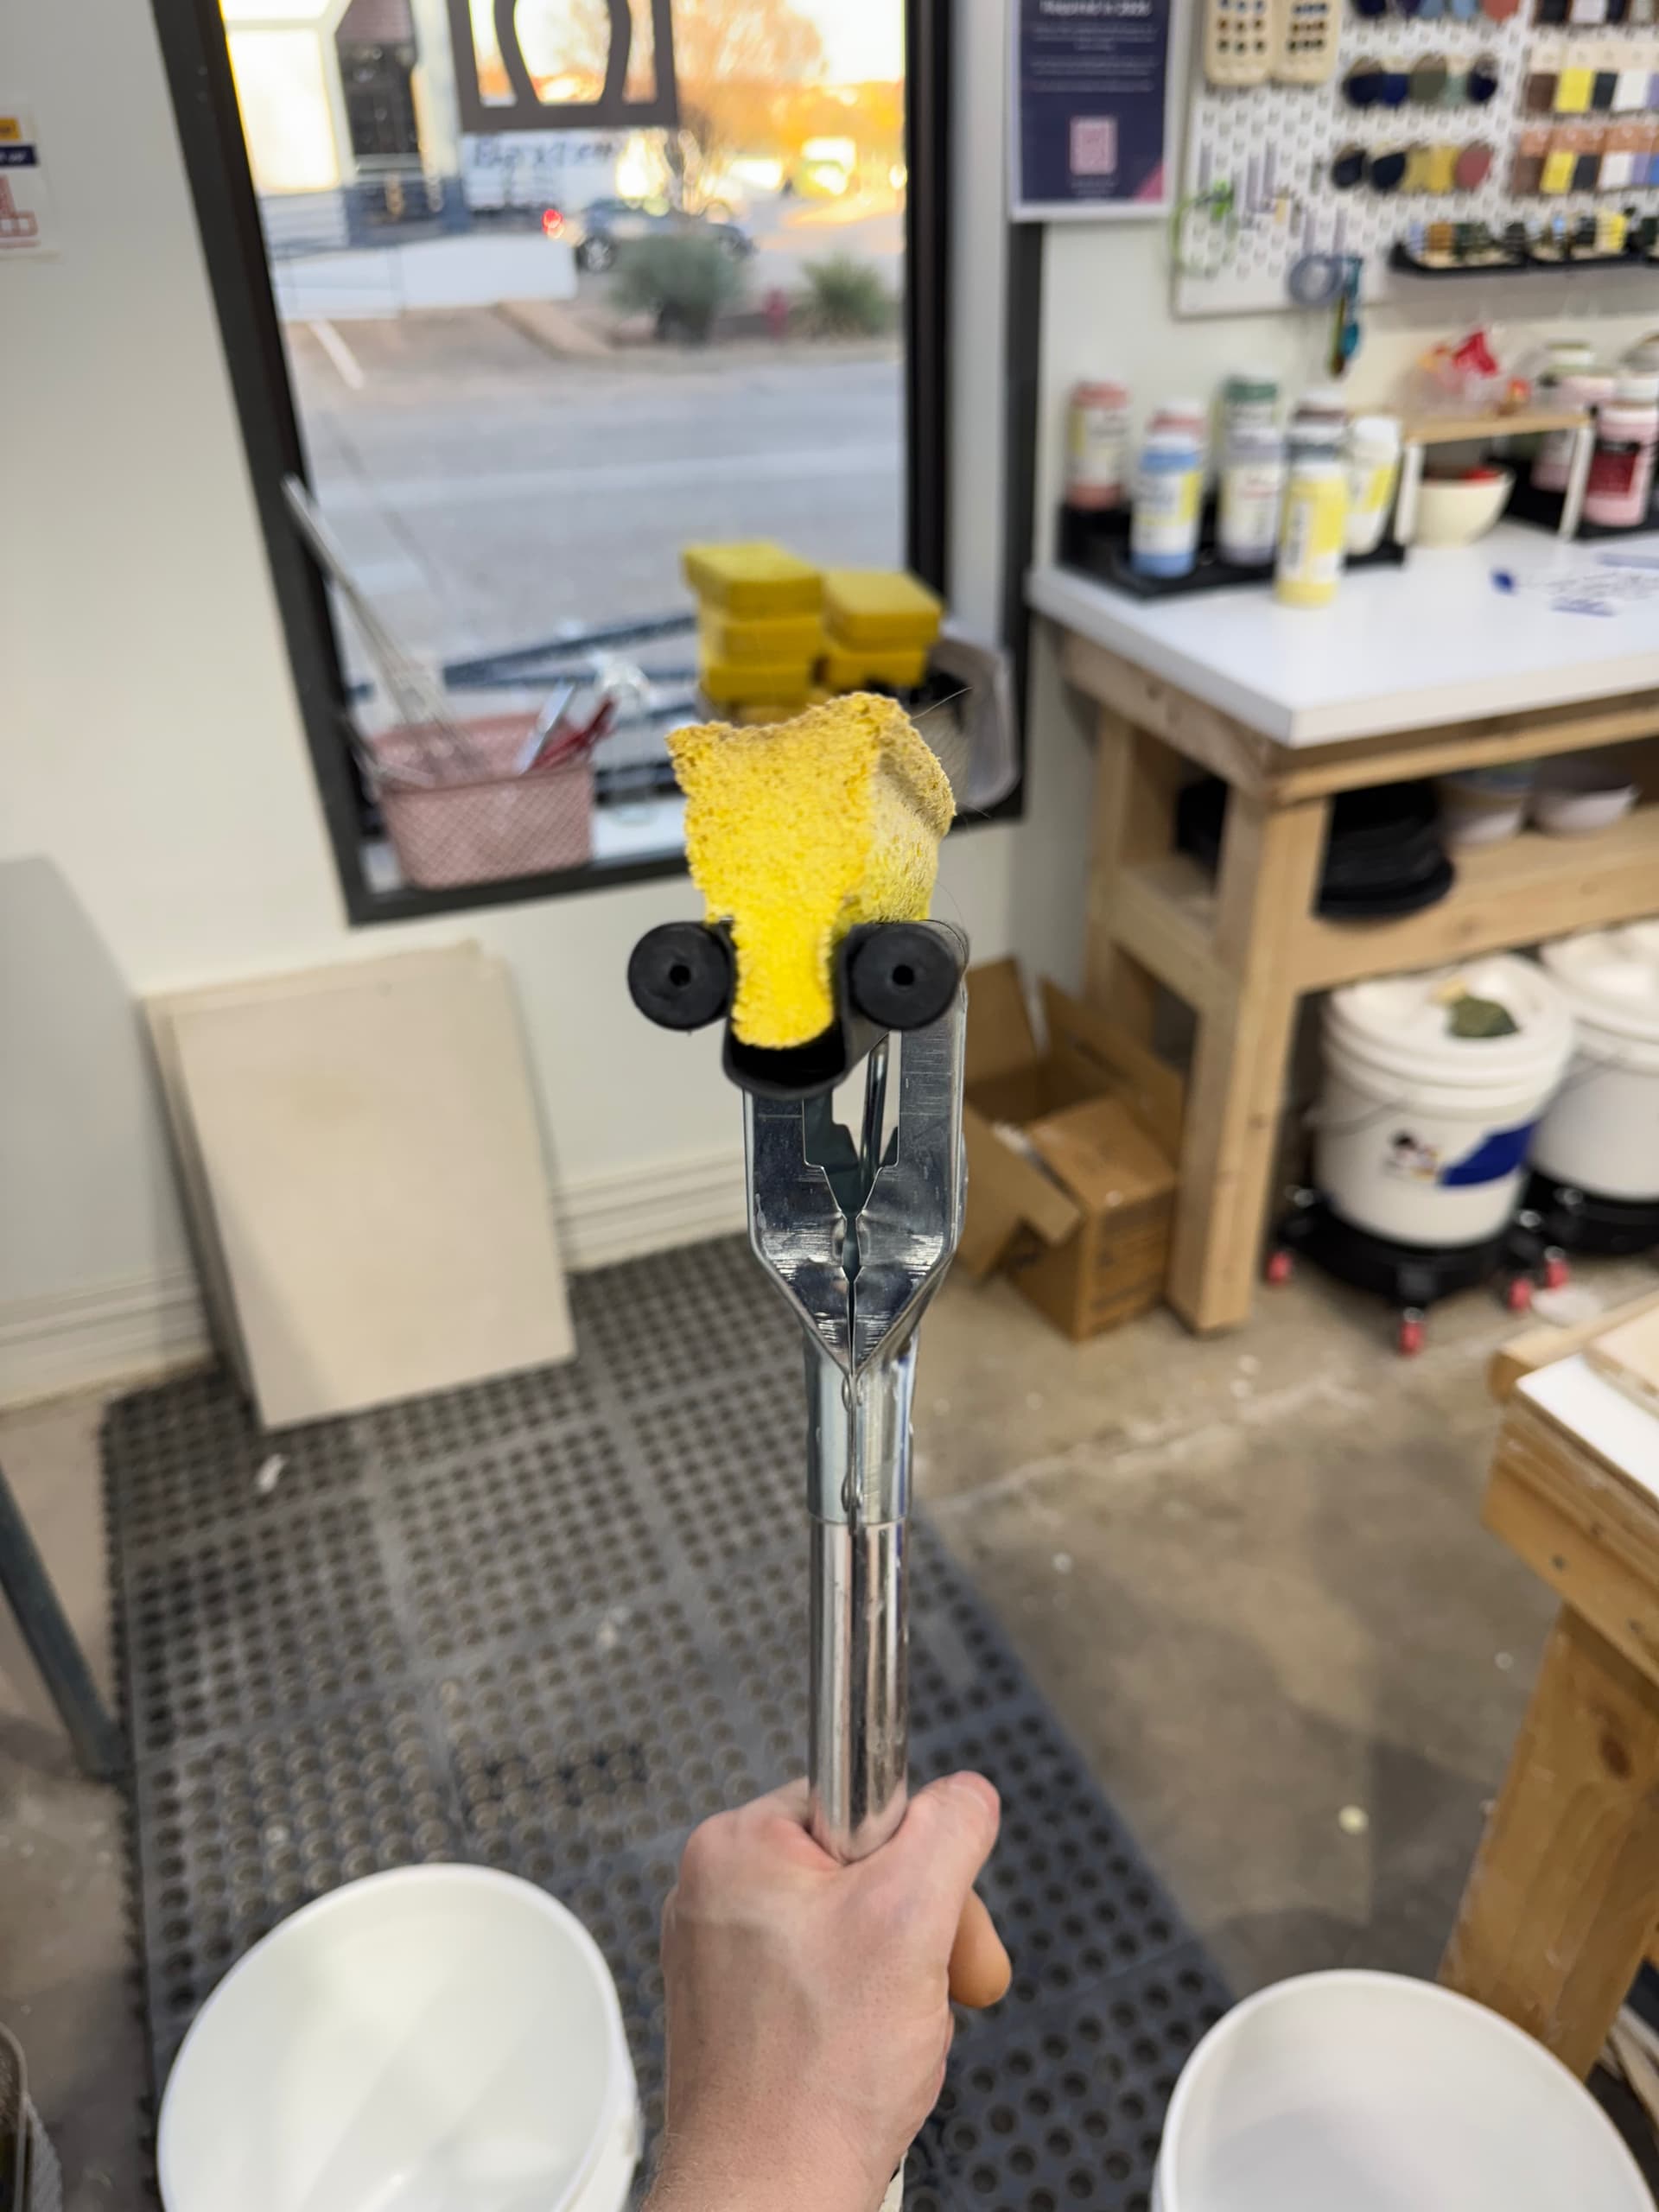
The now rock-sponge will tear out of the holder placed within the mop if it is not properly saturated before you use the crank on the side of the mop. These mop heads aren’t cheap, please try to take care of them
Proper use of sponge mops in a ceramic studio:
As mentioned previously, our first step is going to be to wet the mop in the sink until the sponge is fully saturated. The easiest way to do this is to turn the sink on and allow the water to run around the rear sides of the sponge, this will fully saturate the middle of the sponge.
Once saturated, crank the handle on the mop to get rid of excess water in the sponger.
Begin your first pass: If there is a lot of clay stuck on the ground, you may need to scrub back-and-forth with the mop. However, in general, you should not rub a sponge mop back-and-forth two directions on the floor. The sponge is held in the mop in a way that there are two sides that can make contact with the ground based on if the map is moving forwards or backwards. If there aren’t gloves of Clay, you should utilize this to your advantage by only moving them up in one direction on your first pass, and then changing directions for your second pass. This will allow a clean section of the mop to run over the same area without you having to return to the sink.
Once you have made your first (and possibly second) pass, it’s time to return to the sink. Ensure the sponge is saturated before cranking the mop to remove clay from the sponge. Repeat this process until the water coming from the mop is clean. if you are having issues getting the sponge clean, use the sprayer to remove larger particles (see attached video for an example of how well the sprayer can clean a sponge vs just the faucet).
Repeat this entire process at least one more time, until there is not a visible cast of clay when the water dries. We shouldn’t be able to tell what clay body was used if you mopped properly.
Here’s a quick video showing the entire process with some very easy to see black glaze I’d spilled- https://youtube.com/shorts/kigbigJJcpw?si=_XzwcTENepaDZYza
Misc notes
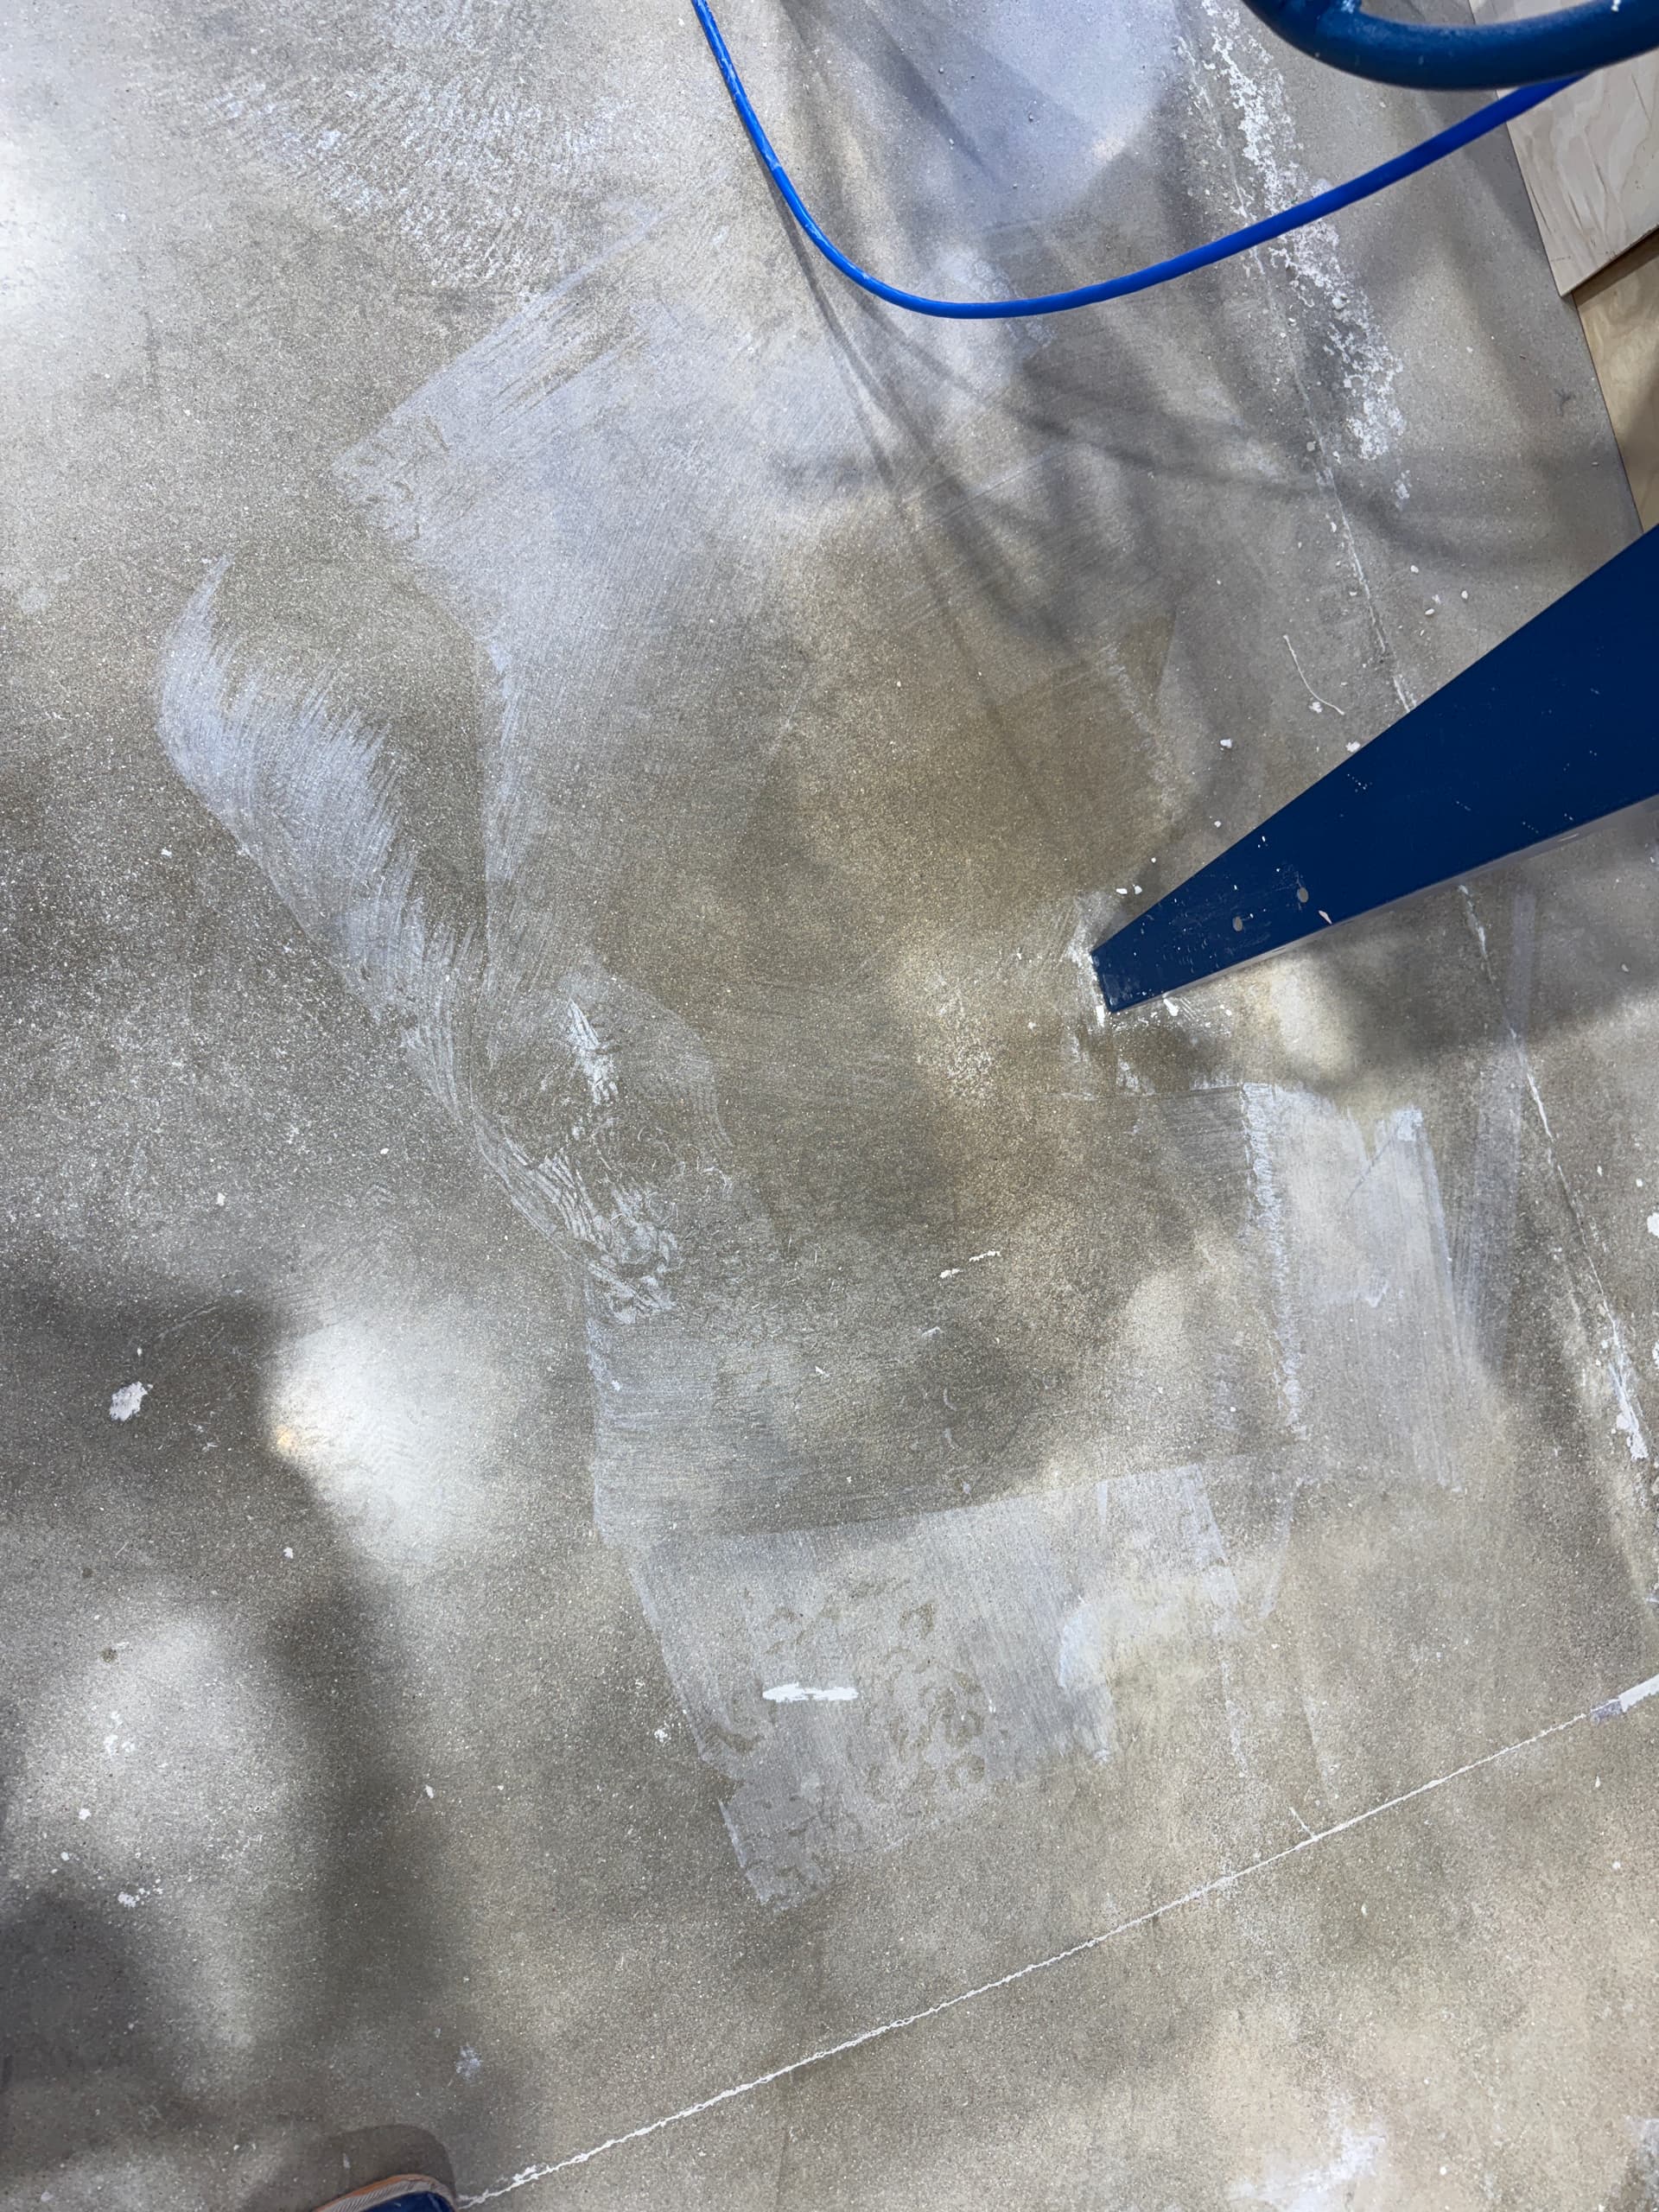
There is no need to use a bucket when mopping in ceramics. No matter where you stand, there is a sink within 20 paces.
Clay is tiny particles of mud. Tiny particles float in water, making your bucket useless after a first pass. Use the sink instead. As an example, here’s a photo I took today after someone mopped with a bucket-