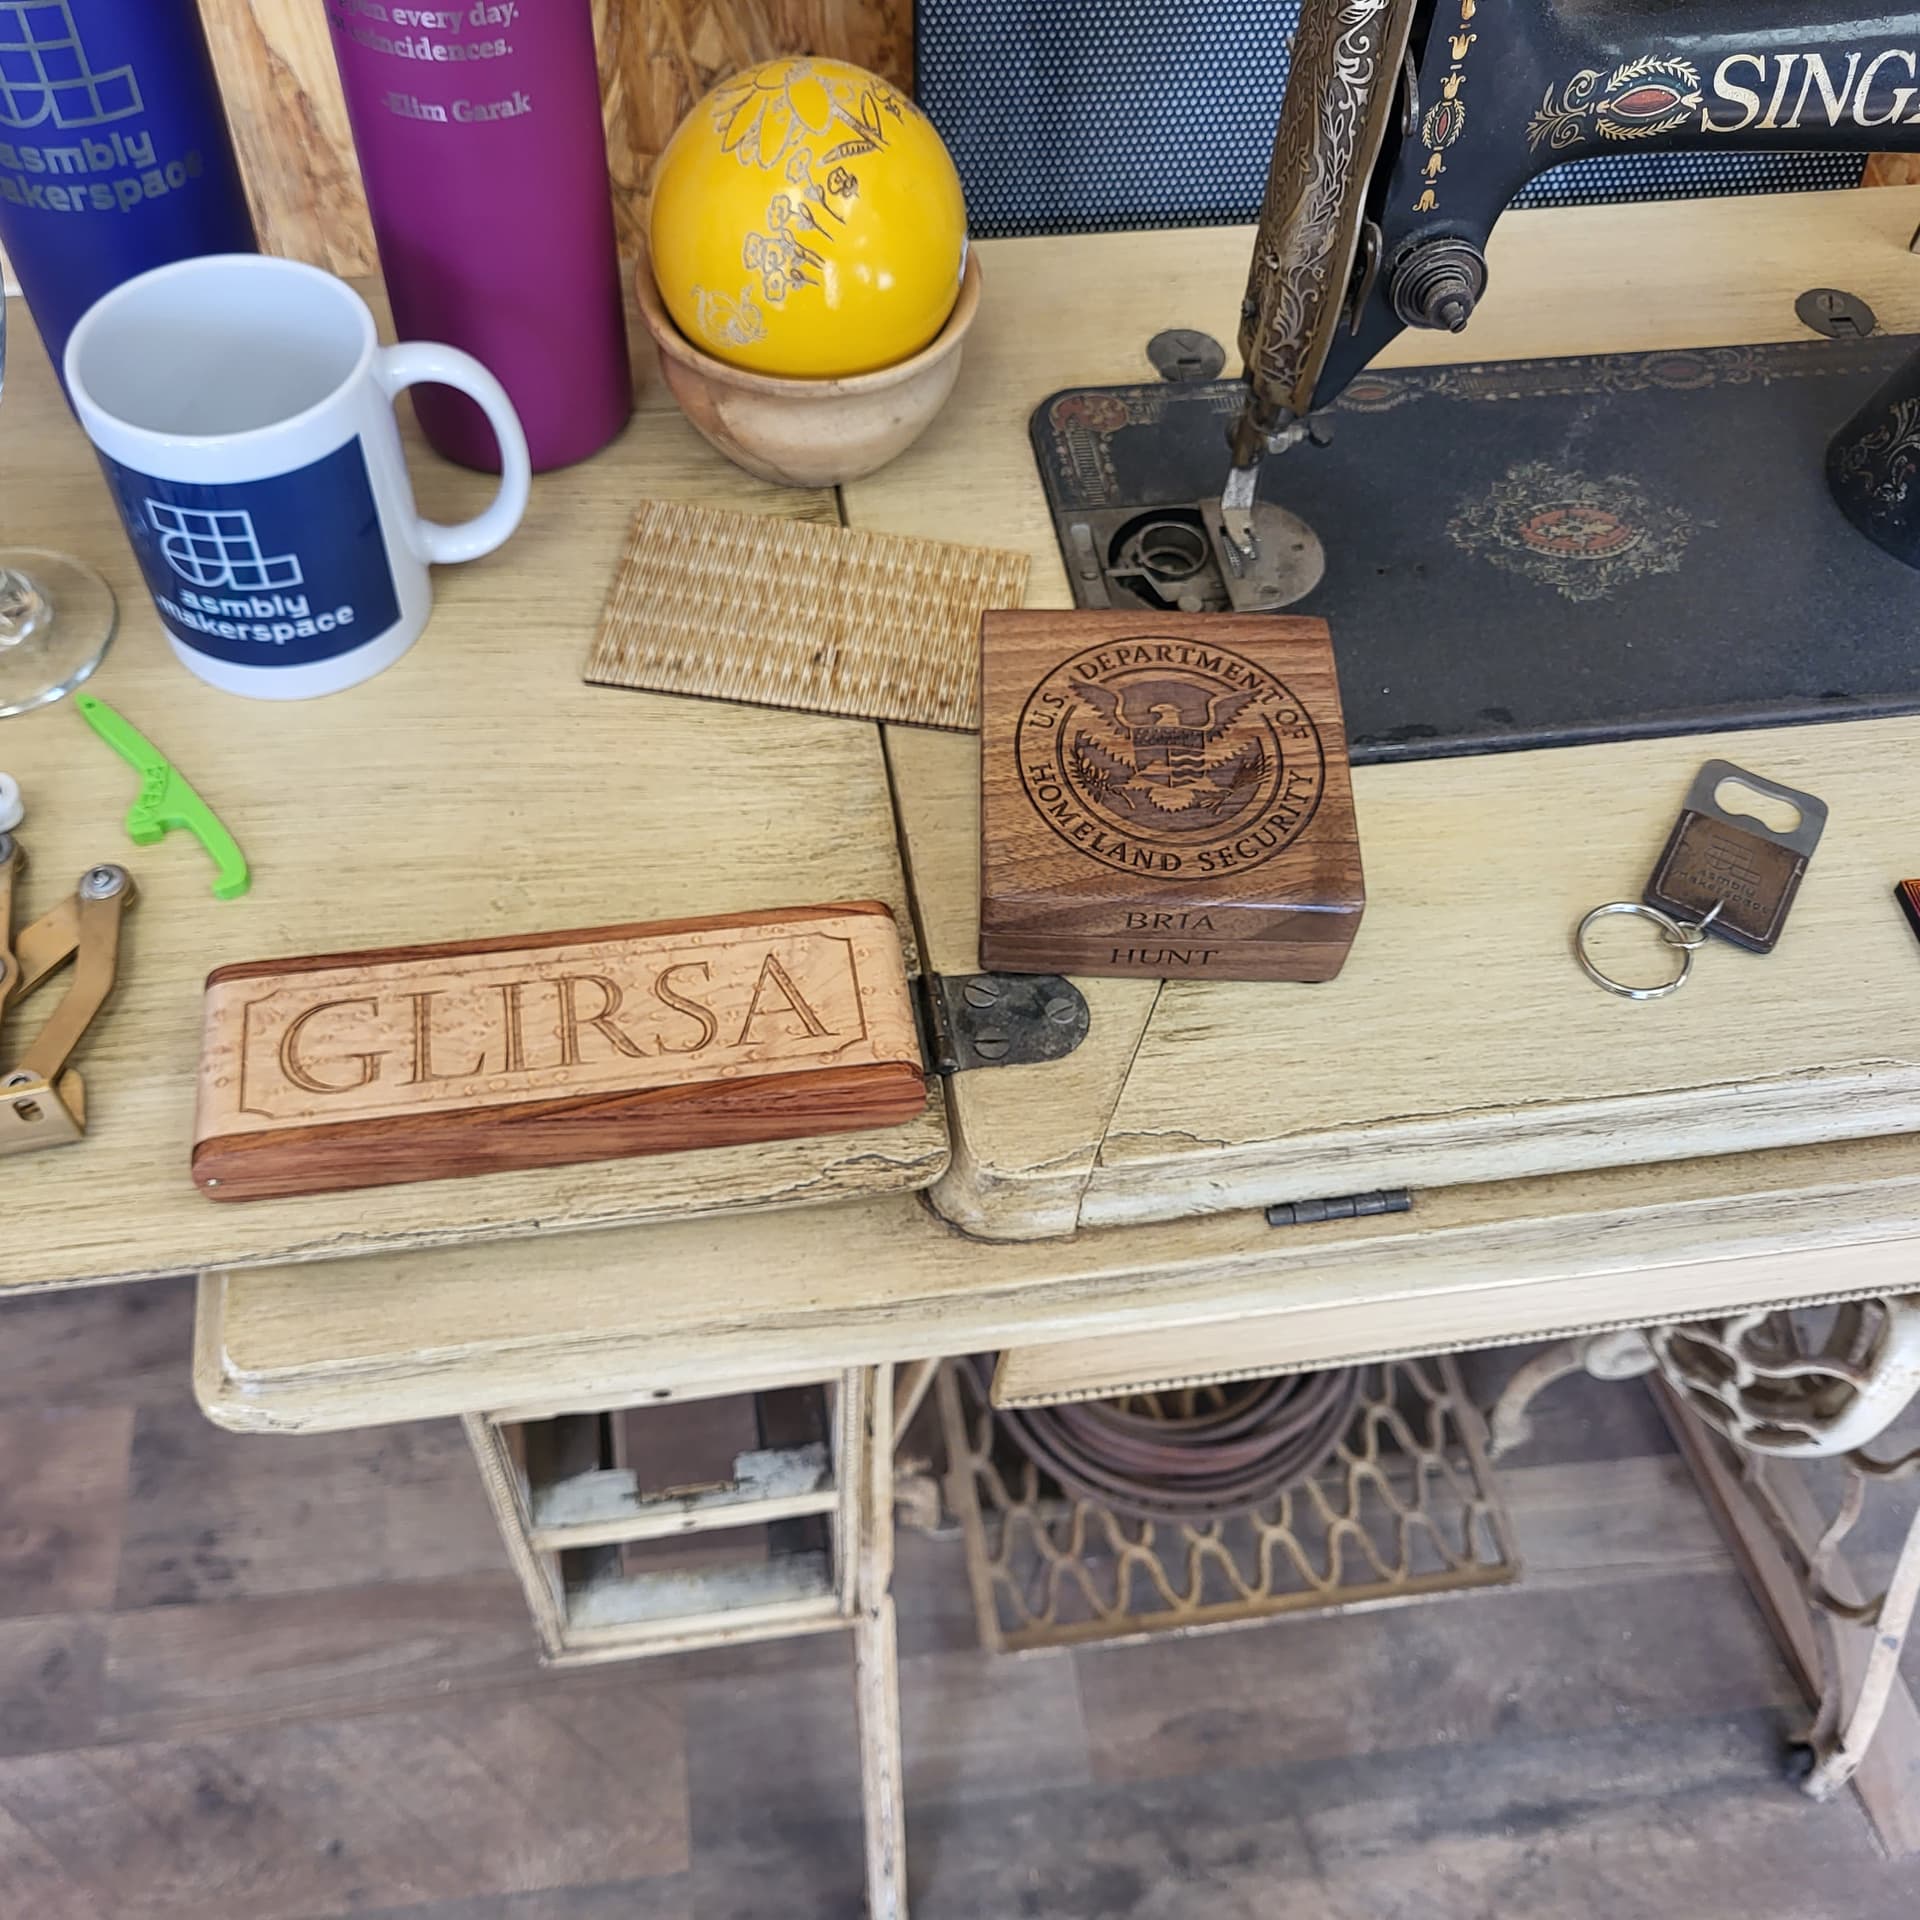
Hey all, been a long while since I’ve posted or even checked the forums due to constantly traveling. Completed a few projects recently and thought I’d show off one I’m particularly proud of.
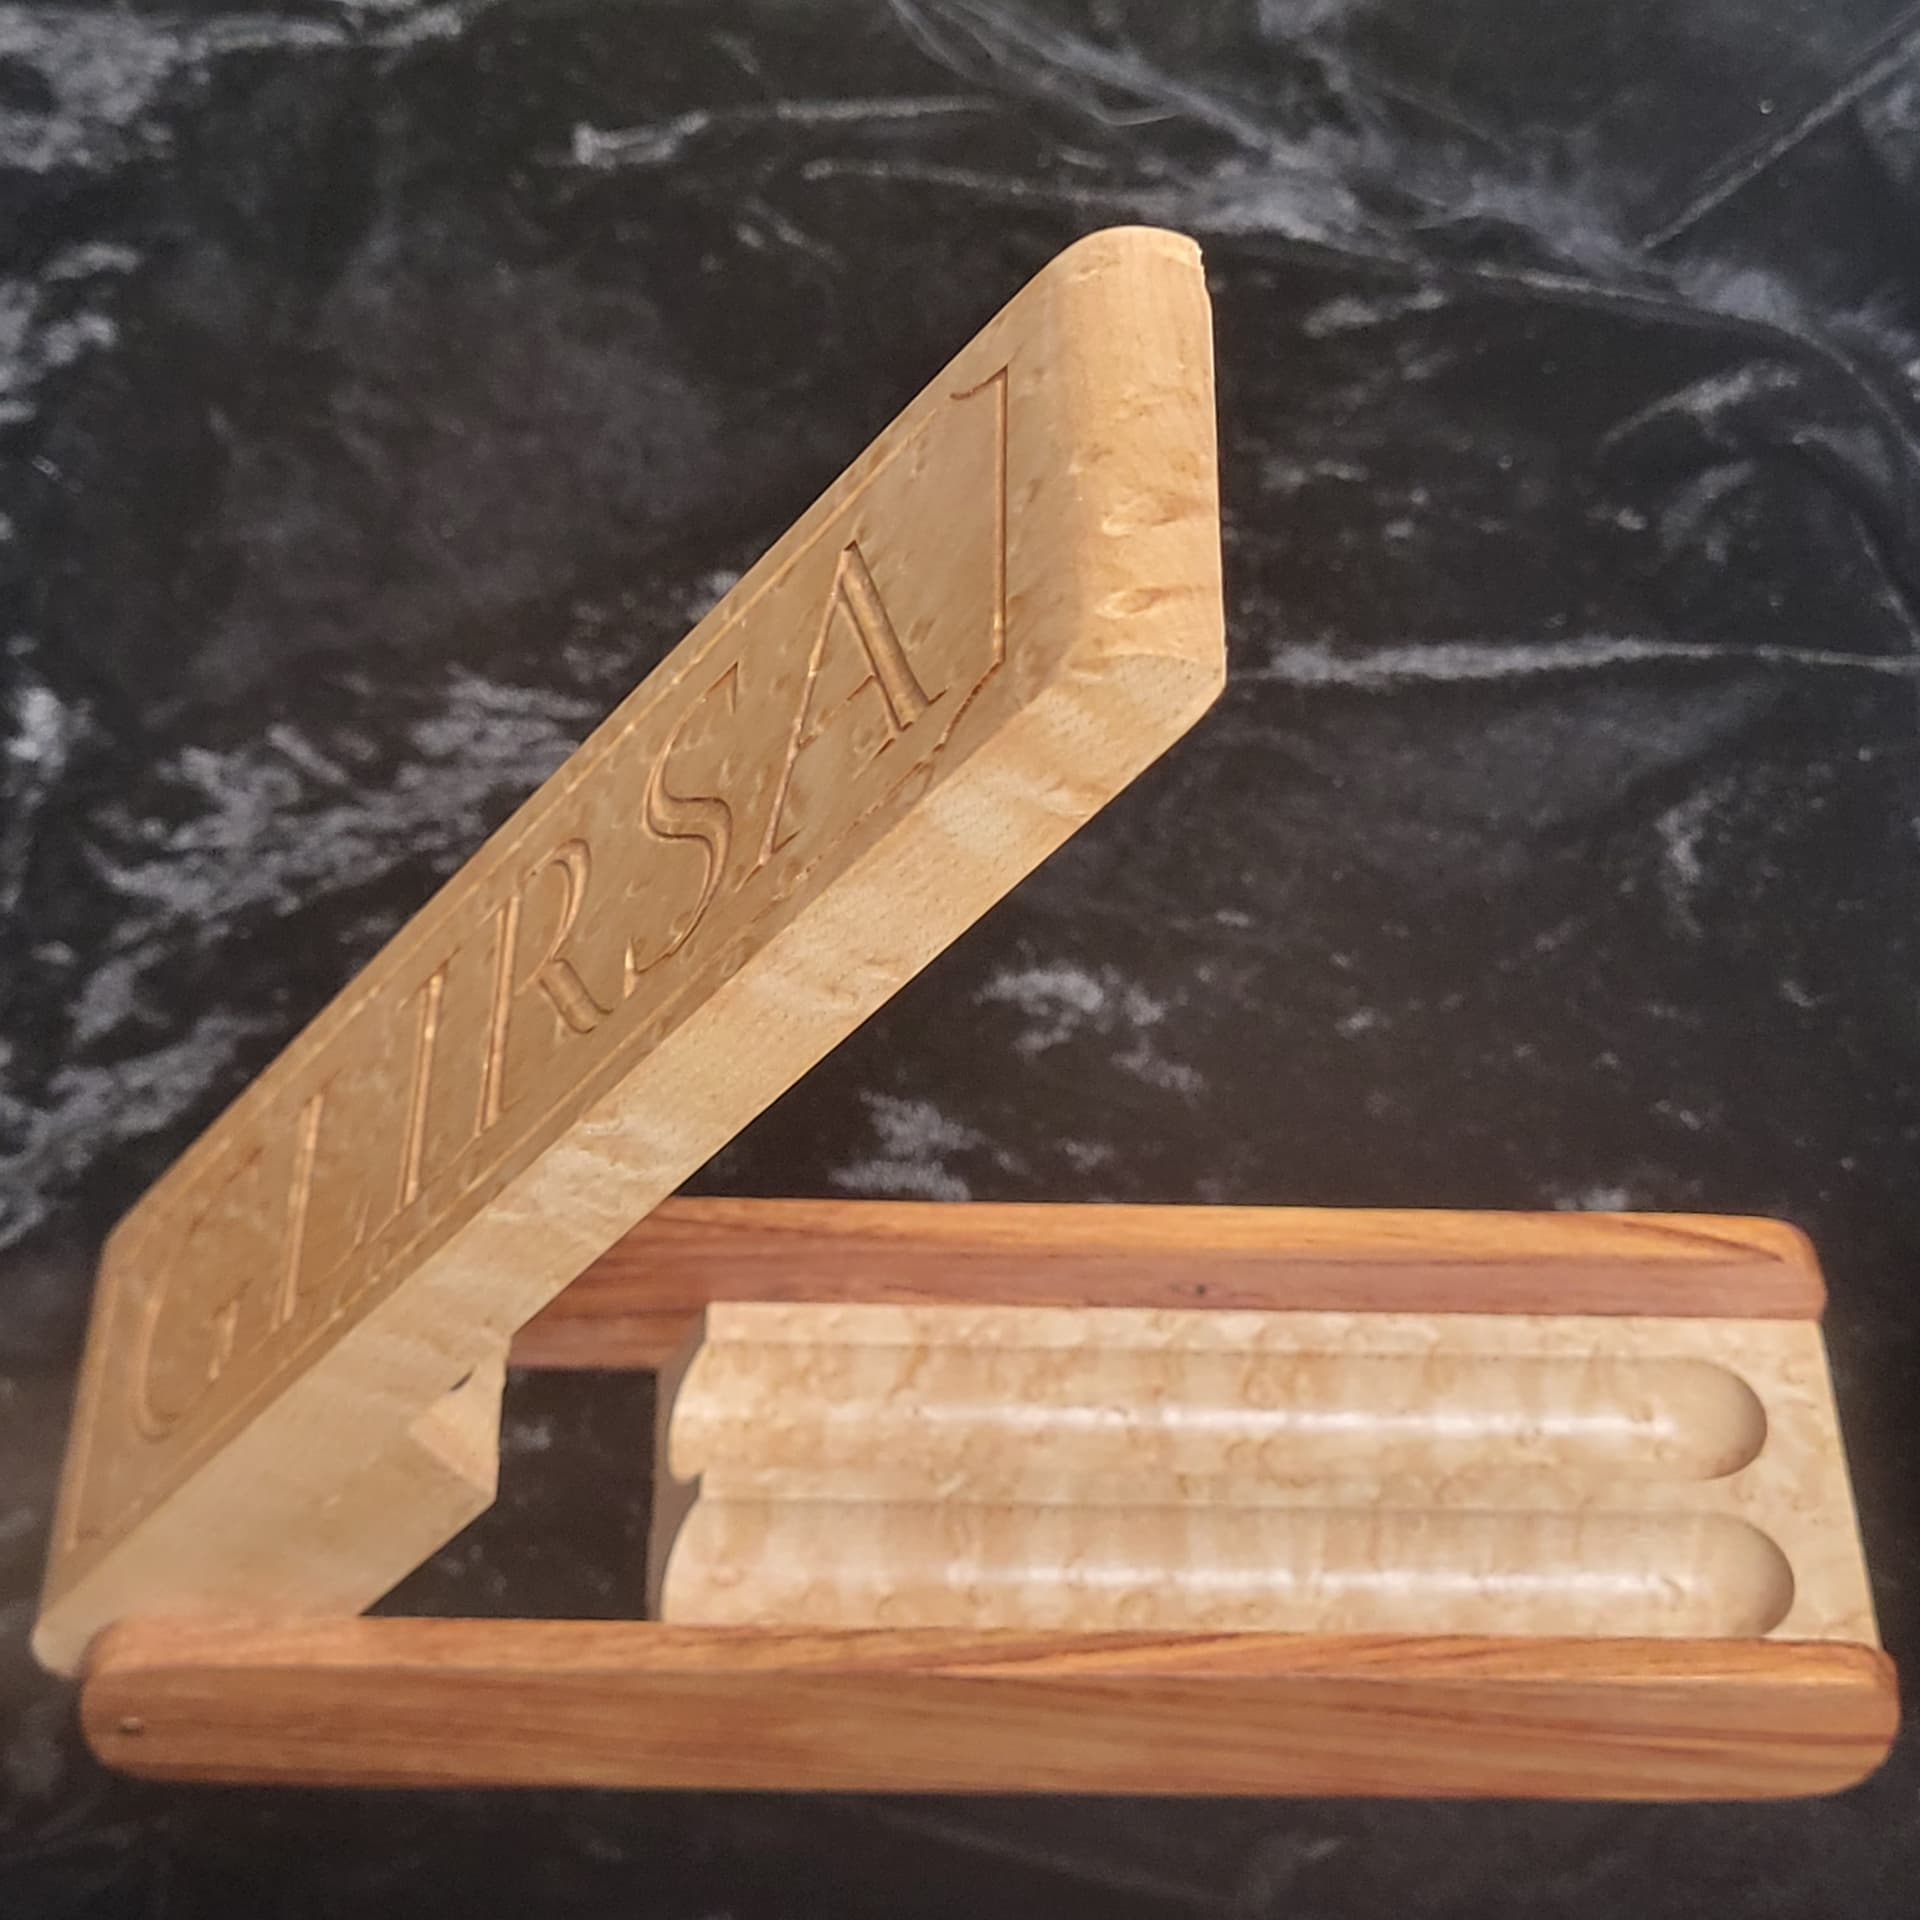
I recently made this fountain pen out of spalted tamarind, as well as pen case from rosewood for a dear friend of mine as a Christmas gift. I was originally planning on using a pre-made case that I laser engraved and lined with felt, but due to Shane’s encouragement, I decided that manufacturer wasn’t good enough for a gift and that I’d be making the pen case myself.
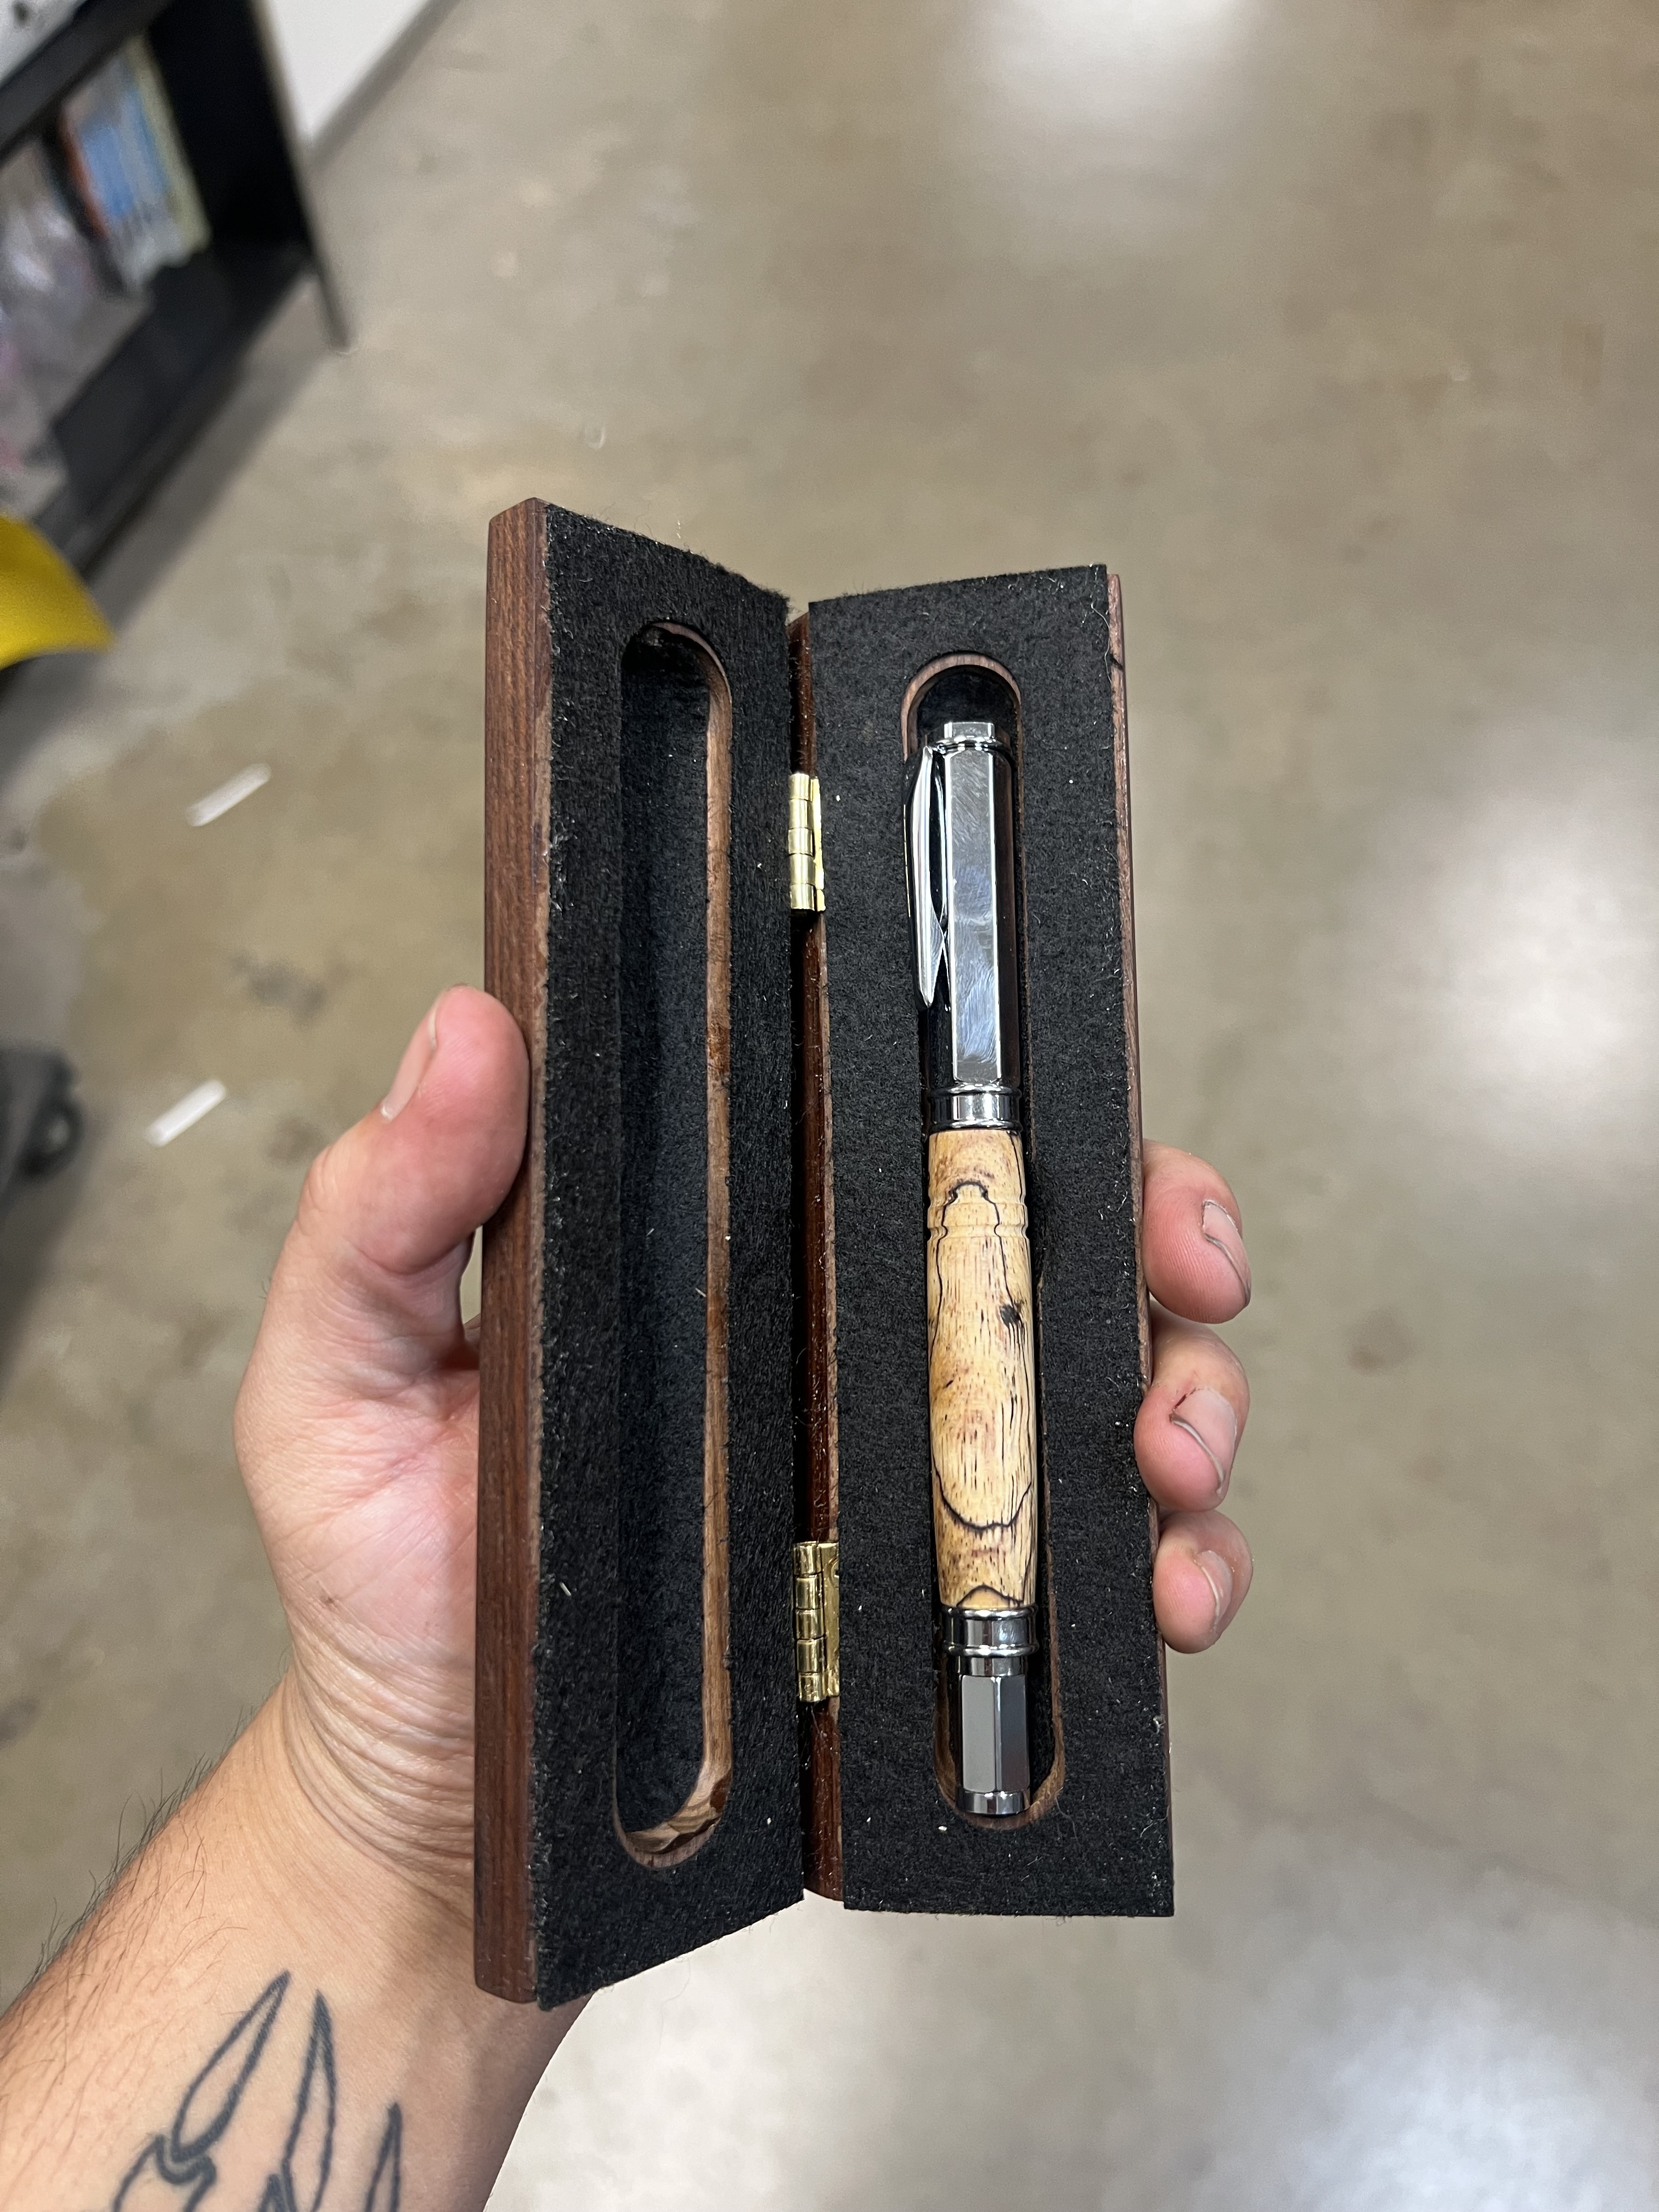
This was my first time making any kind of box, and was especially difficult due to both the size and specialized nature of a pen case (groove to hold the pen). There was a lot I had to learn along the way, and it was problematic at just about every step of the way. Unfortunately, I didn’t take many pictures, but I’ll be sure to document the process more thoroughly in the future when I attempt a second box.
First thing, I had no clue how to go about constructing the case, and I actually hadn’t even used the router table outside of one time almost a year ago for a basic chamfer. So, I took some pine, and worked on practicing my chamfers. The chamfers went alright, so then I got Bill to teach me how to make the groove using the routing table, but it turns out that I didn’t have the proper size bit. Once I got that, I learned how to ramp on since the bit wasn’t carbide tipped, and got some decent results on the test pine. First major mistake came when first swapping to the rosewood, which I had squared, planed, and cut to size. Not accounting for the density of the rosewood, I started out cutting at the final depth, and should have done multiple shallower passes. One side was pretty rough, and the other side had one chipped out part due to some kickback from the routing table. The pic below doesn’t show the ugly side, but you can see the chip out here.
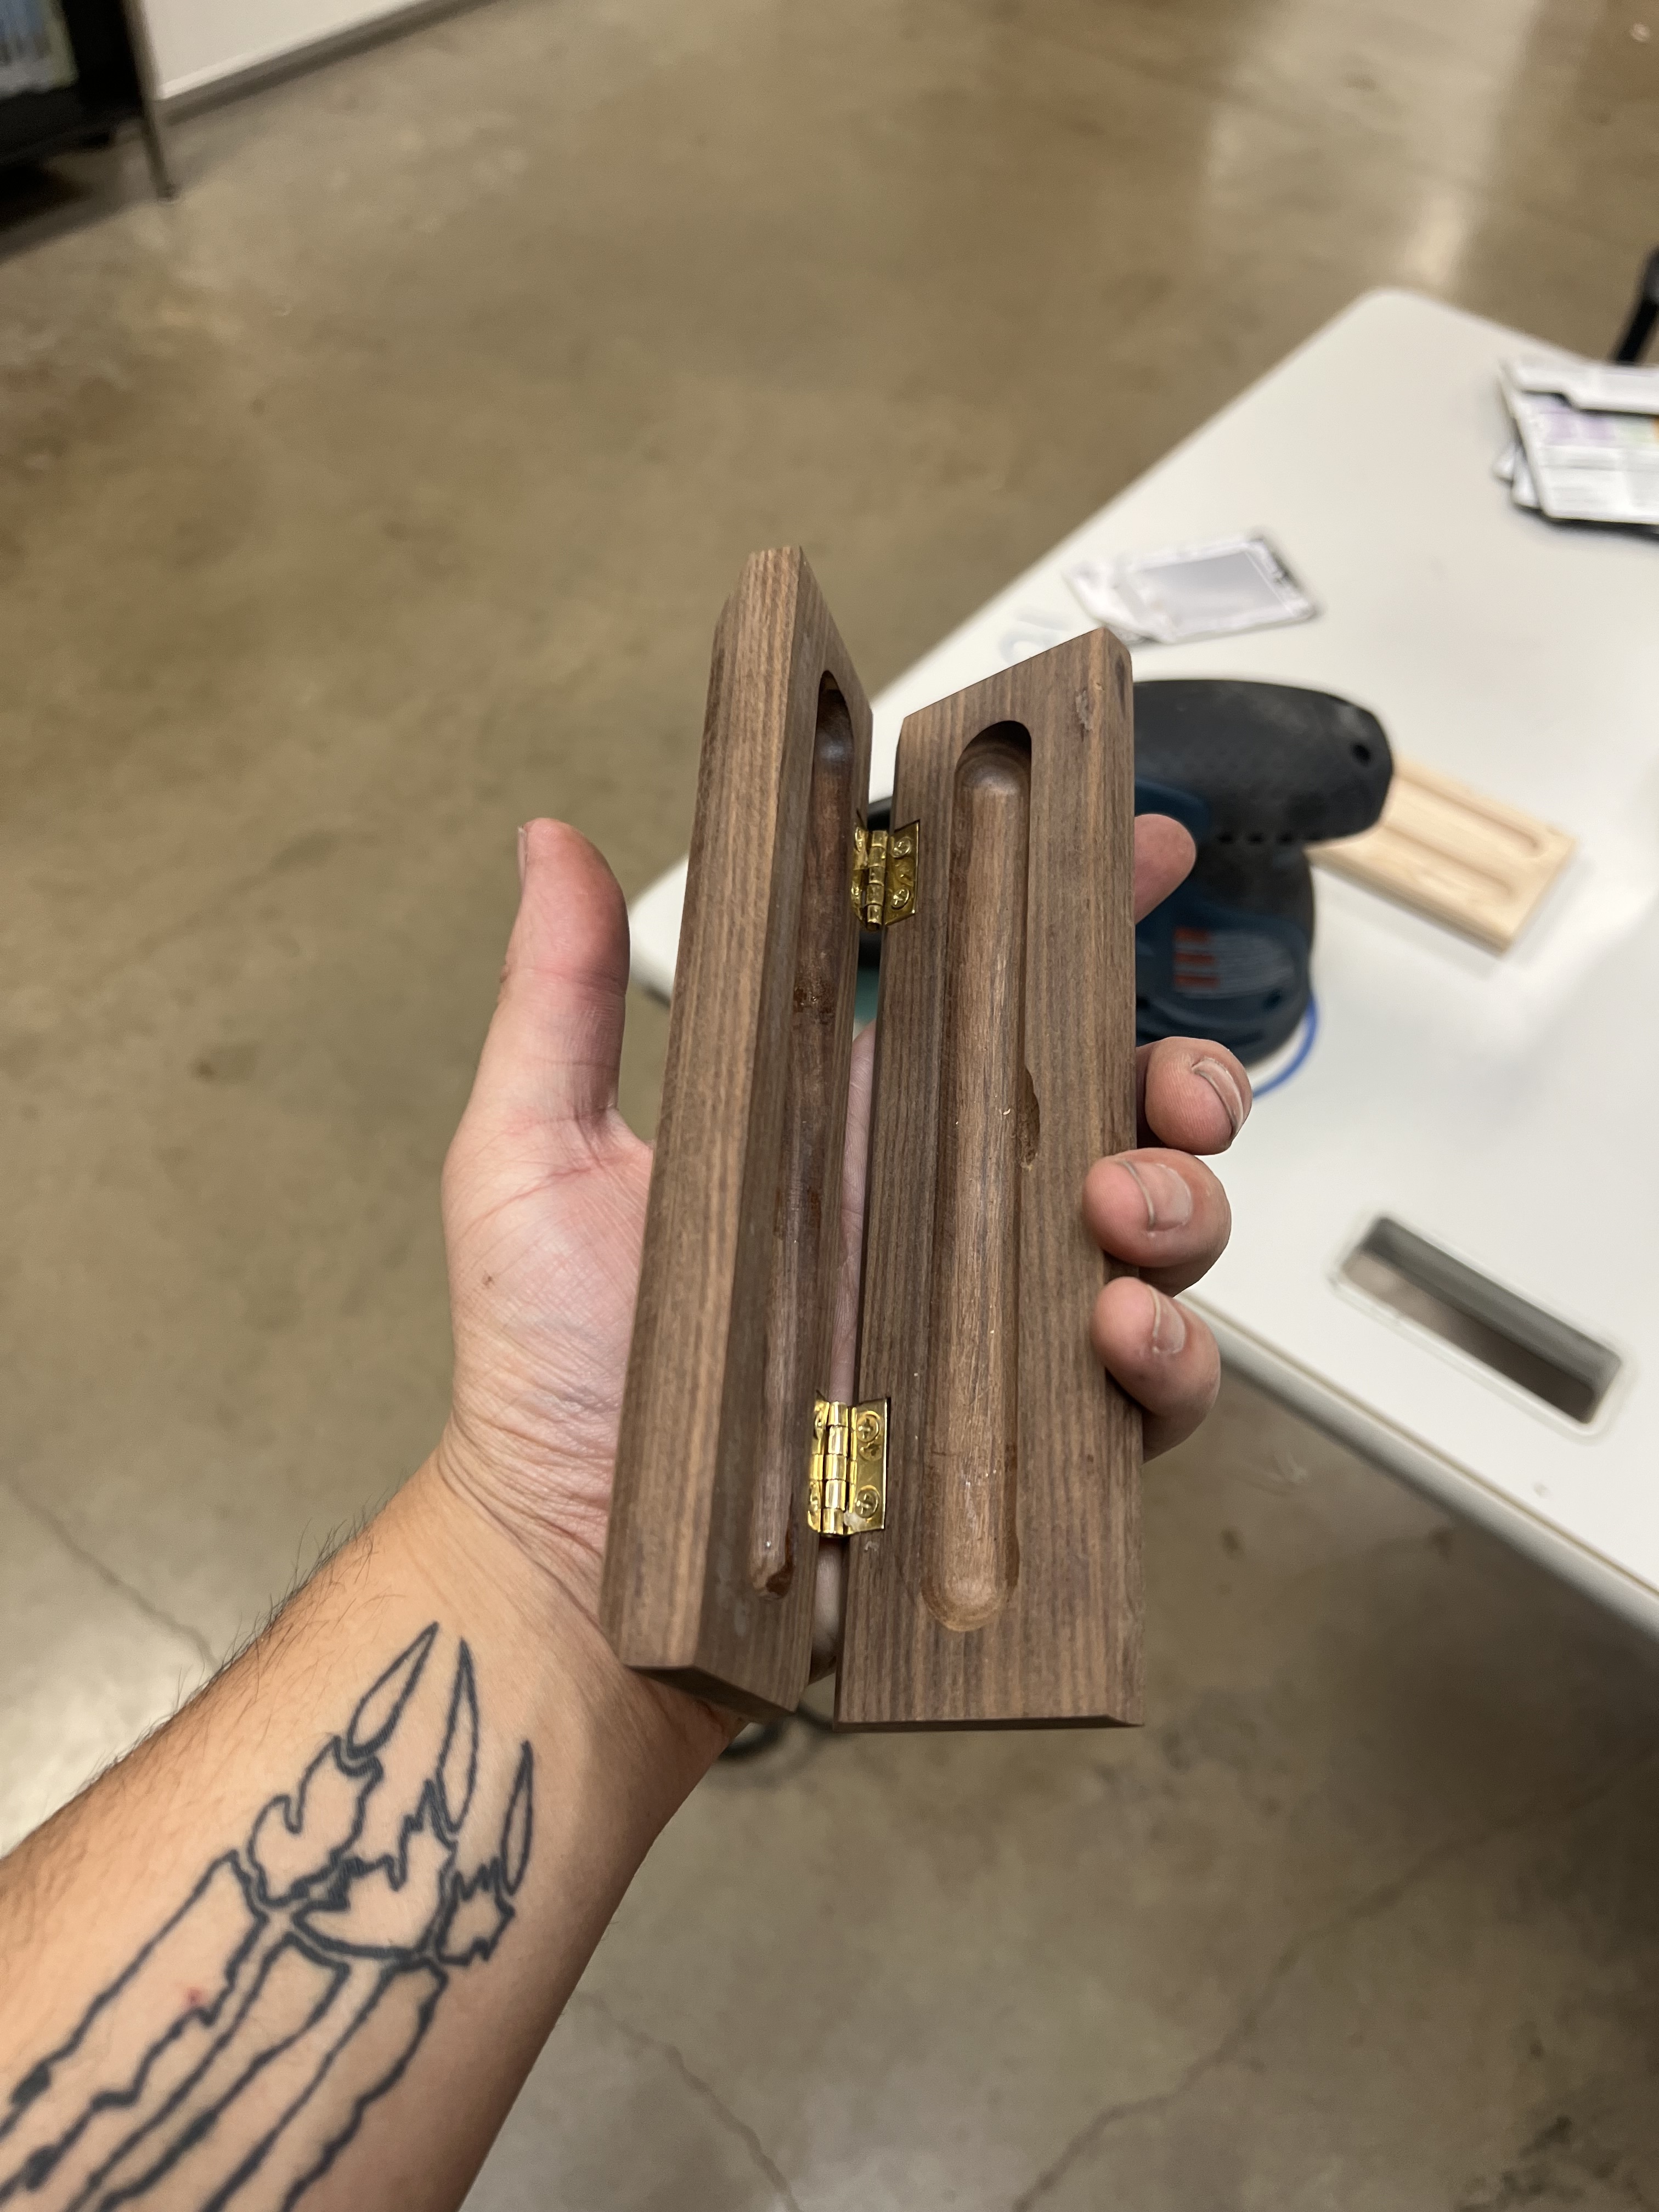
In order to fix the groove, after getting some advice, I just widened it, and it turned out looking fairly natural. Unless you were paying super close attention, you could barely tell.
After that, I chamfered my two sides on the routing table, then went to drill for the barrel hinges which i had extracted from the premade pen case that I was originally planning on using before. The next big mistake came here (not only were the barrel hinges slightly misaligned (fixable), but the holes were slightly too deep. I had checked, but hadn’t pushed the hinges far enough in, so I didn’t realize that. I tried using five minute epoxy to create a layer for them to sit on, and that somewhat worked, but then I put the barrel hinges in only for them to snap due to being poor quality. At that point, my project was a mess from epoxy and had broken hinges. So, I took pliers to pull the hinges out, then used a table saw to slice off the messed up edge. I then recharged it, and went and bought nice brass box hinges in the smallest size I could find.
After rechamfering the edge on both sides where the hinges were, I needed to make some cutouts for the hinges to sit flush, but I haven’t used a chisel much, and I was rusty with the shaper at the time, so, I had to be creative. I realized that I could take precise measurements with calipers, so, I actually used tarkin and did filled rectangles at a bit higher power in order to great the cutouts I need, which I then cleaned out with files (I of course covered the surrounding wood in blue tape to avoid scorching). These cutouts were precise enough that I was able to tension fit the hinges, which I then clammed in place to make the holes with the drill press.
Once that was done, I assembled the box, and predrilled for the brass screws, but didn’t have small enough steel screws to put those in place first and avoid too much material material to dig through, so instead, I coated them in wax and use a hand screwdriver.
After that, I disassembled the box, sanded the whole thing to approx. 220 grit with an orbital sander, gave it a gentle wipe down using microfiber rags and acetone, then reassembled the box.
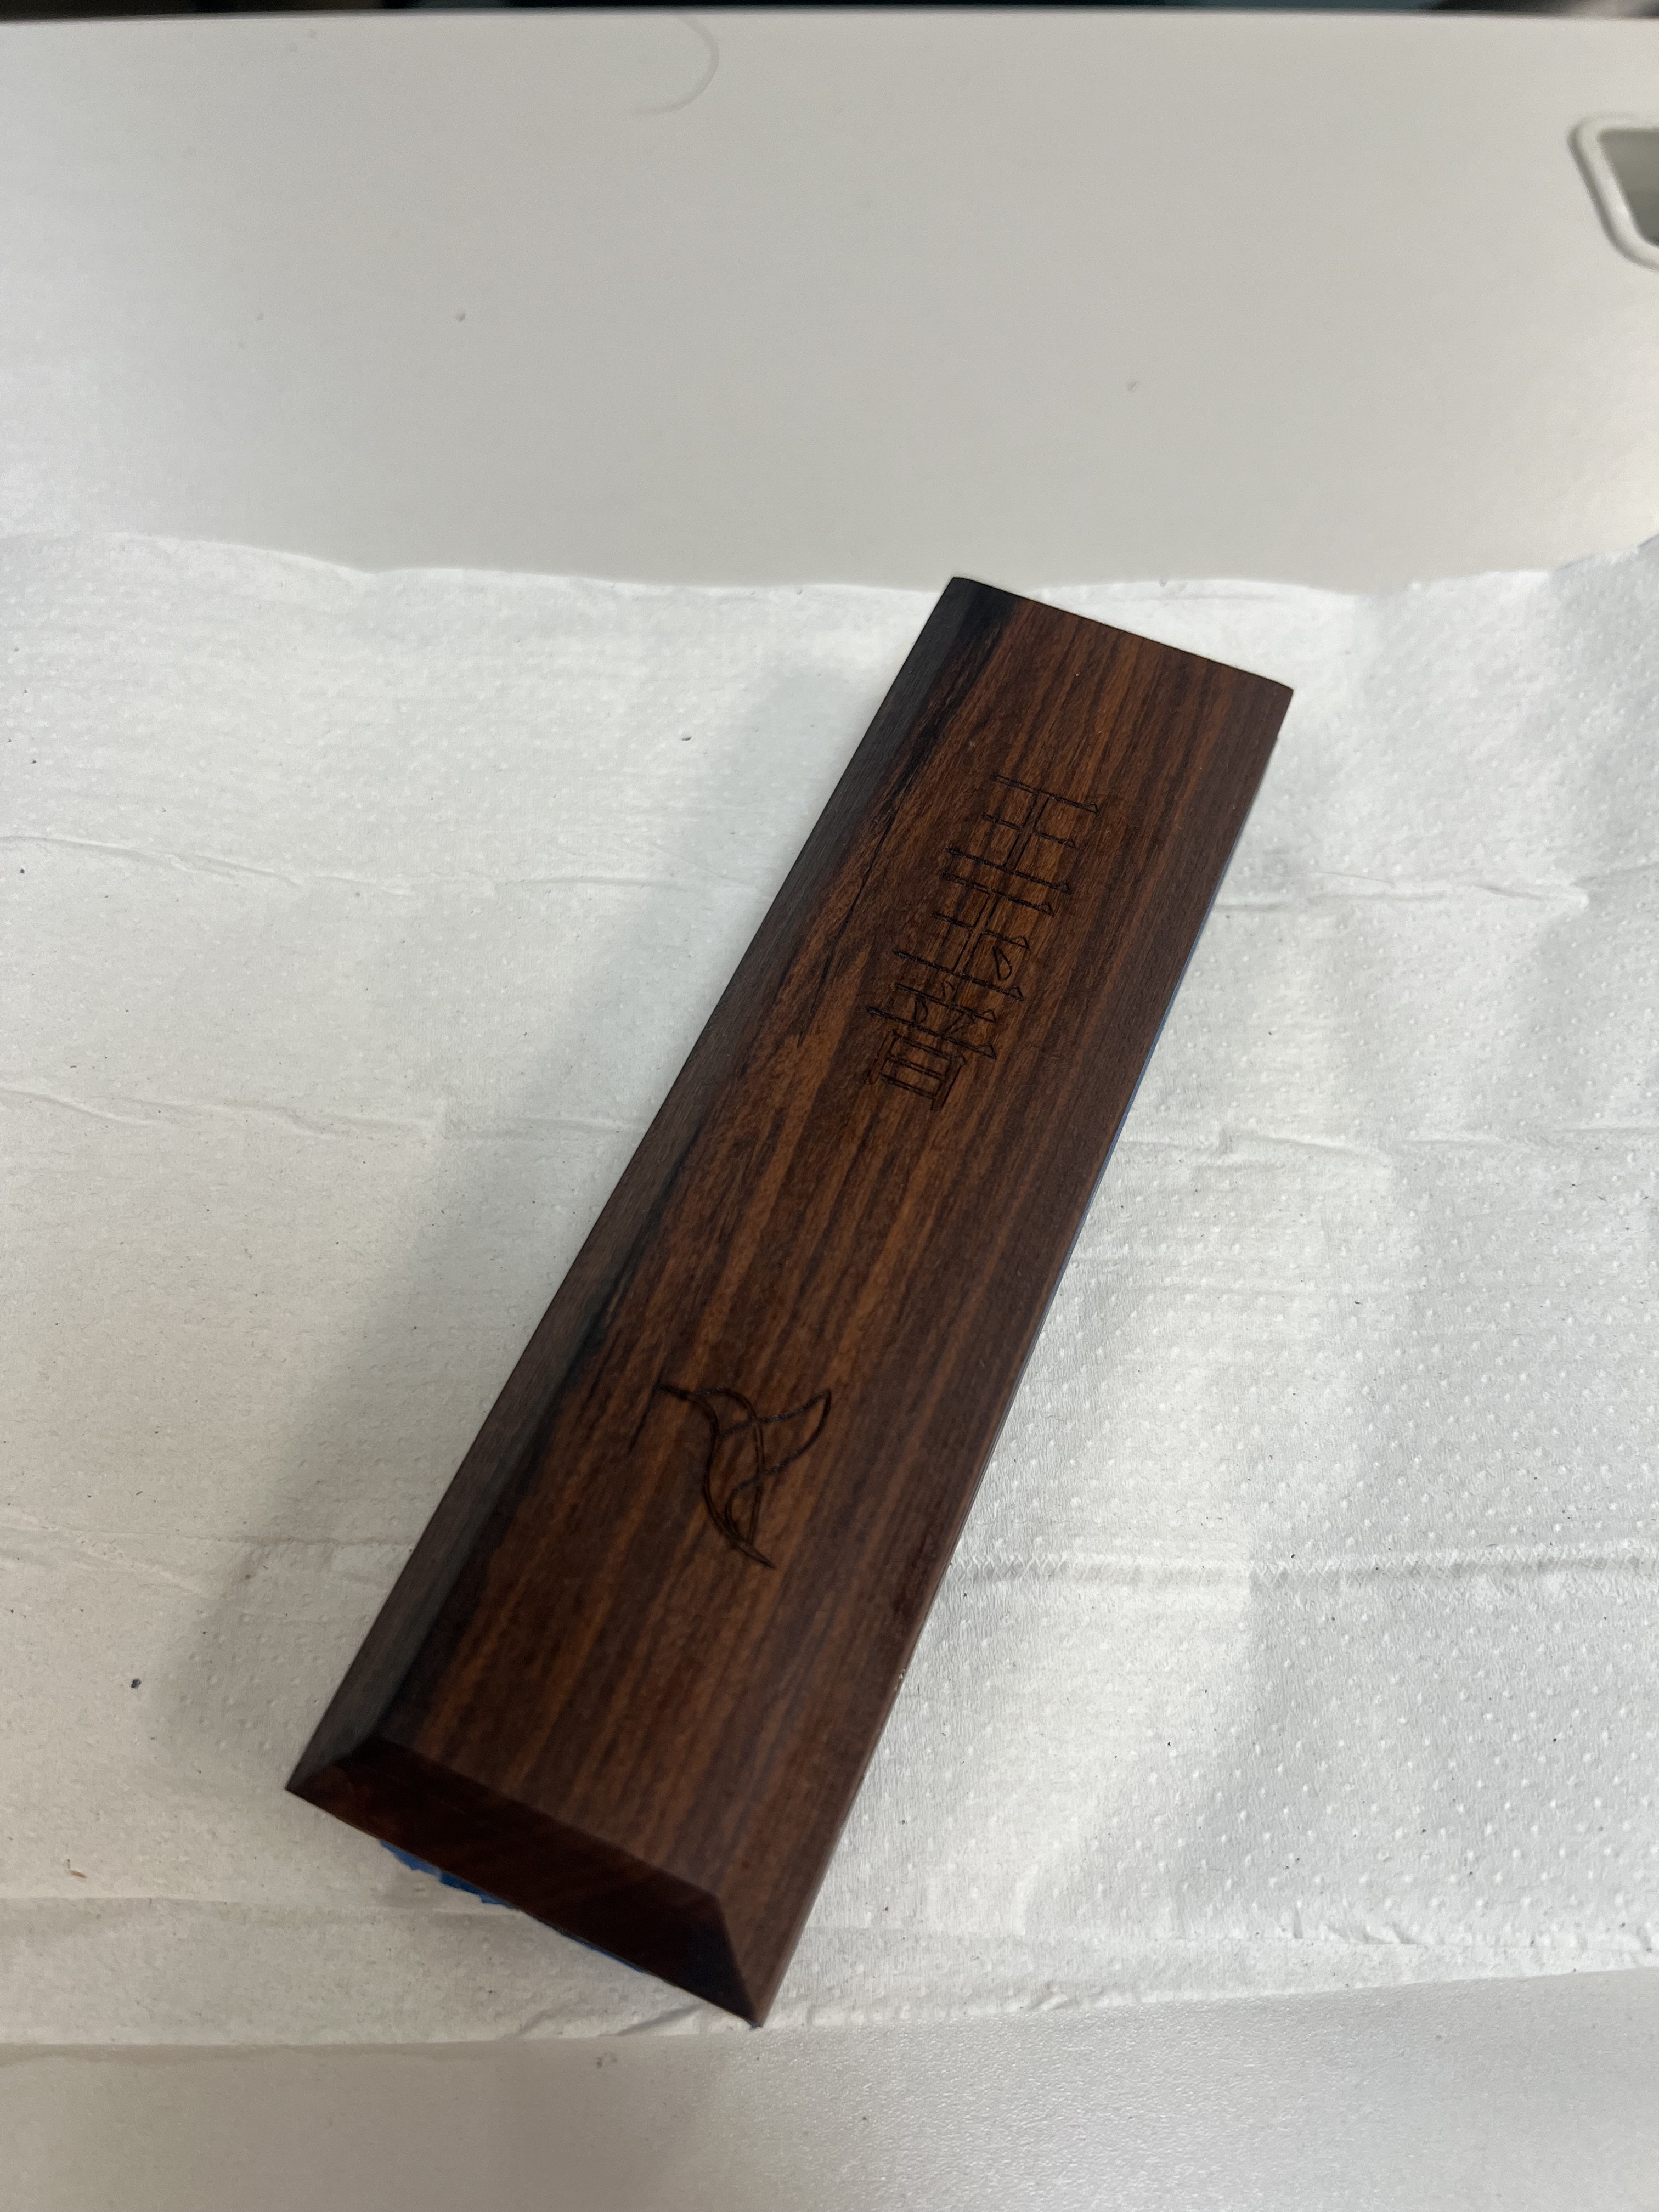
When all of this was done, I shimmed the center of the box which had a slight gap (to account for the felt) and put it back on the laser to be engraved with my friend’s name and a little bird art symbol I came up with (I didn’t want to risk the felt catching on fire due to different setting. The area I engraved was taped up, and I was able to set the laser settings in a manner that didn’t leave any scorching for the shallow engraving.
Next, I taped up the inside of the box to avoid finish getting where the felt would be, and gave the entire thing a generous coat of tru-oil (it’s gun stock finish, blend of linseed and other natural oils, works great on a lot of stuff), then wiped off the excess. I then opened the box and set it taped side down and waiting for the box to be dry to the touch (~10 minutes).
Once the tru-oil was dry to the touch, I removed the tape and measure as precisely as I could with the imperfections on the inside of the case. I then used this to create a mockup that was cut out of the felt using paper cutting settings (2 passes though) using Dorian. Any more powerful and I risked fusing the adhesive backing to the peel and stick felt at the edges. I then peel the felt to line the groove, pressed that into place, then peeled the outer and pressed that in the areas of the box surrounding the groove, after that, I took a small pair of scissors and trimmed the edges that were hanging over.
Once I finished with the felt, 45 more minutes had passed, which meant an hour since the initial Tru-Oil coat. That was in line with what the instructions specified for time between coats, but I was happy with where it was, so buffed the pen case with 000 steel wool, went and got a wine bottle gift bag and some wrapping paper, and then gave it to my friend this past Saturday.
In the end, she absolutely loved it. They were surprised I gave them a gift like that, and were wondering why I didn’t sell it instead, but that particular person is very deserving of a gift that’s as special as them. Thanks to David for the wood, Shane for pushing me to challenge myself, Tommy for the felt, and Bill for all the advice along the way and teaching me ideas and techniques for how I could proceed. I couldn’t have made this without your help.
I know I didn’t talk much about the pen, but for that, it’s relatively simple, and I recommend you take the class that David teaches on it. For a spark notes summary though, you essentially take a small blank, drill a hole for the pen tube through it, glue the tube into place, make the blank flush with the tube and somewhat squared up, mount that on the correct size mandrels, turn that to your desired pen shape/size, then using the lathe as a press, assembling it with your various other pen components (doing any kind of sanding/finishing first of course).
Feel free to ask anything you want about the process. And I do plan on making similar cases in the future (with more pictures and less words) documenting how I made it. I probably won’t do anything that’s a copy - the engraving though, as I feel it would cheapen the uniqueness of this particular case I gave my friend. There will be at least some other variation to it.