I took the class a couple months ago, and couldn’t remember the solution for things that are larger in diameter. I wanted to use the rotary on some glass vases, but the clamp is smaller in diameter. I think it has something to do with the stairstep tool, but I still couldn’t figure it out.
I didn’t find anything on the wiki or in discourse and was hoping someone might be able to shed some light on the technique.
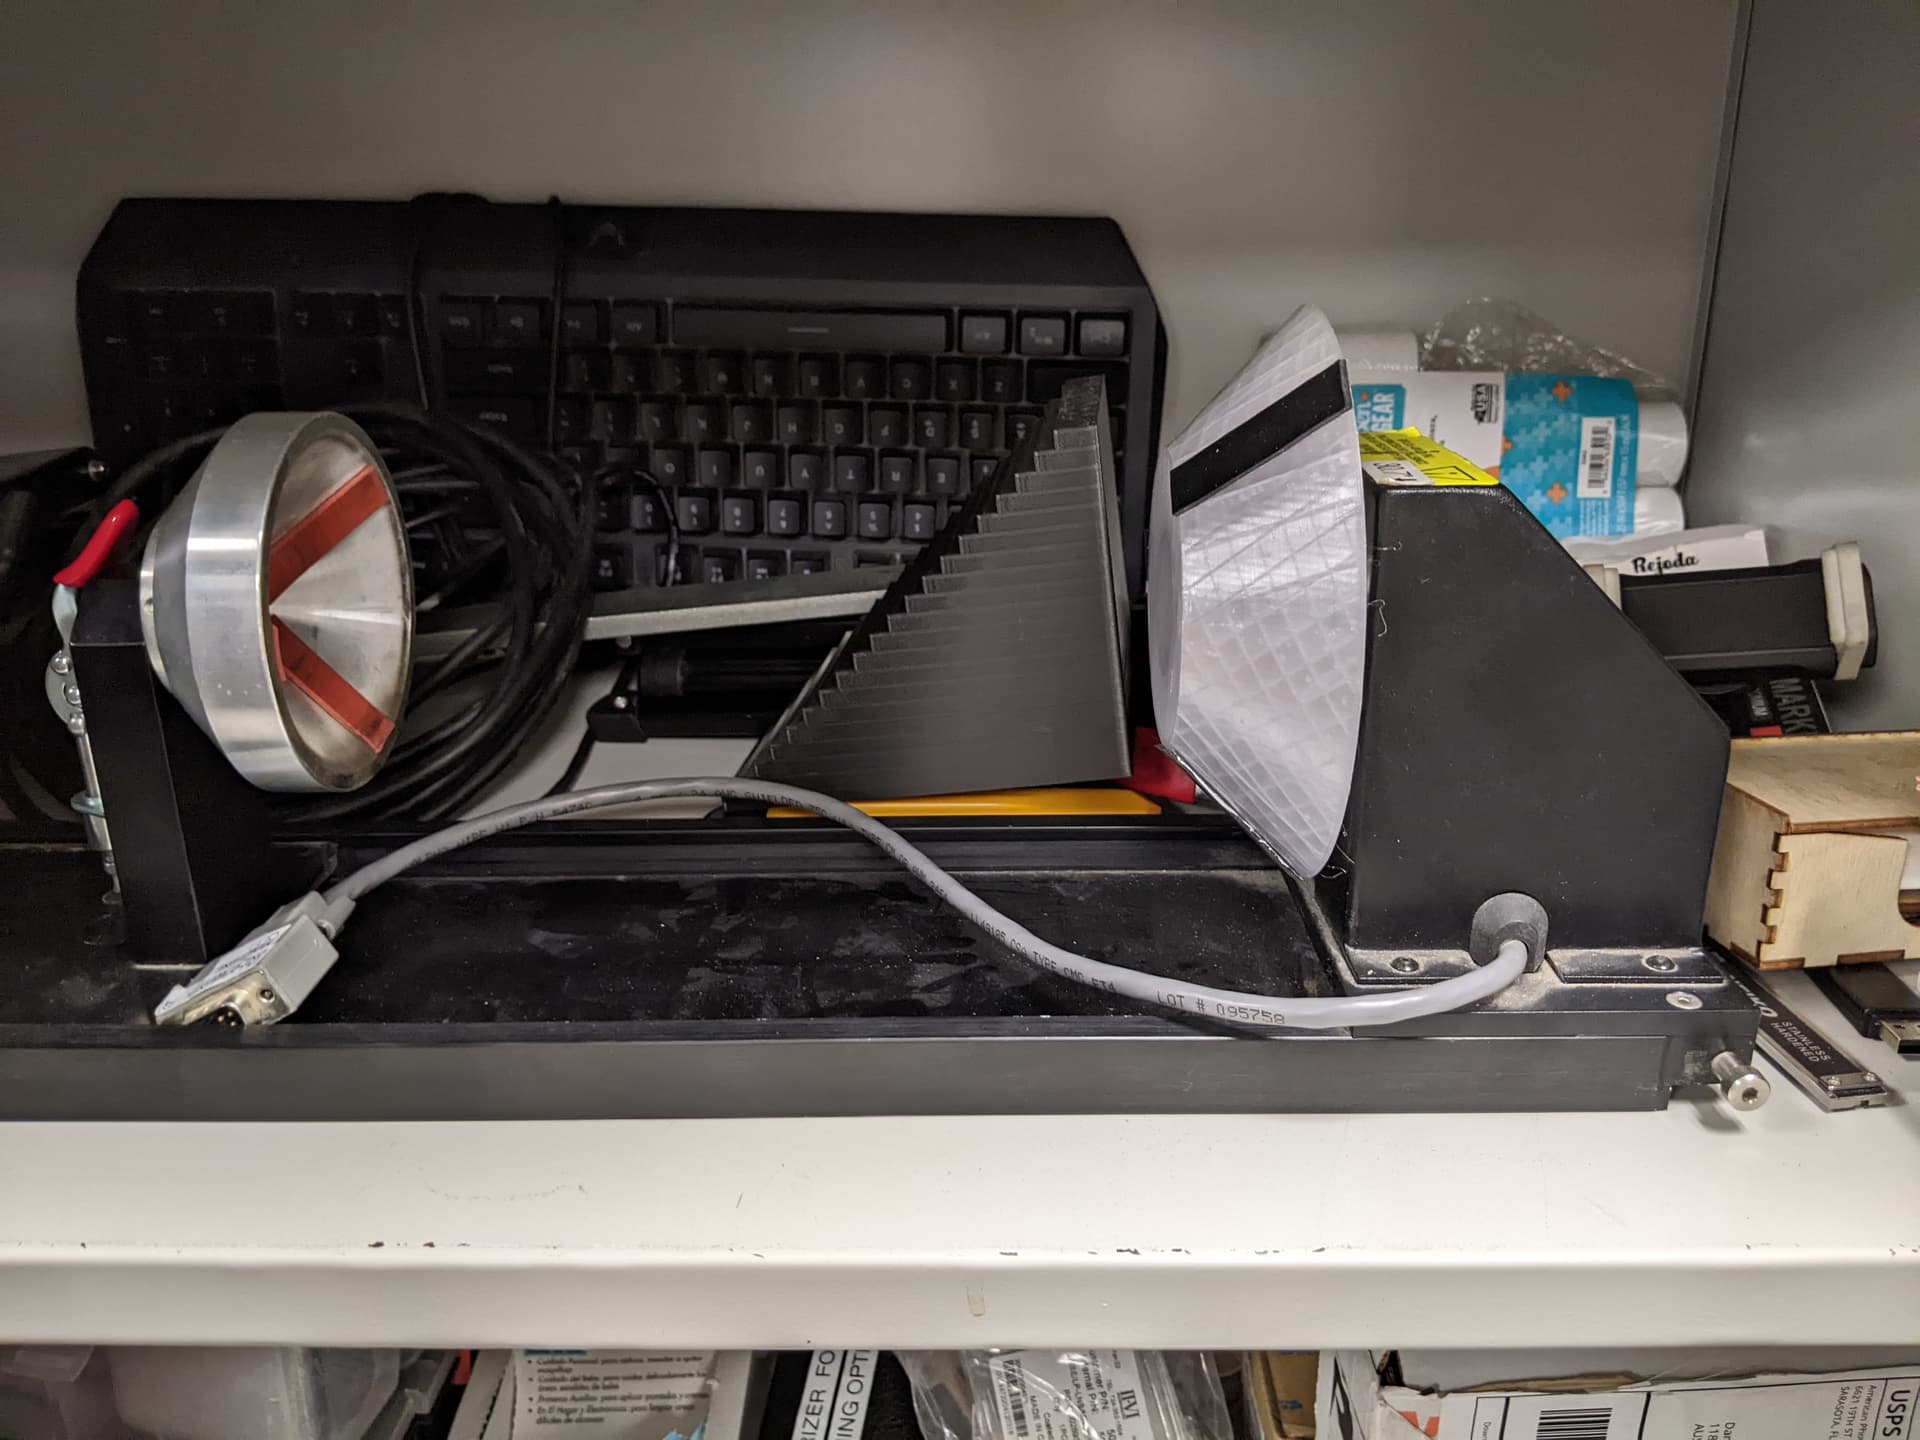
I also cleaned and organized your cabinet next to pearl and noticed the correct rotary tool in there, but it’s not for the pearl. It must be for one of the larger lasers, but we didn’t cover rotary during the large laser class when I took it.
The other rotary can go on Dorian, but it’s a “traction roller” rotary, as opposed to the “chuck style” in Pearl. Technically the traction types don’t have a diameter limit, but they don’t handle most items very well and the probs get worse with large dia.
Traction rotaries turn rollers the item just rests on. It’s not held in place on the fixture. They always slip a bit on each step, and if you have a vector graphic that goes around one way and turns back, it won’t line up exactly on the later vectors. It can’t handle mug handles and any irregularity in the exterior where it contacts the roller will change the spacing of lines on the top side where it’s engraving.
Dorian used an HVDC-excited tube, this isn’t a great choice for raster engraving overall, as the beam has a 3 millisecond response time. So if you’re trying to raster at 300 mm/s, where the design goes from a white pixel to a black pixel it actually takes 0.9mm to turn off completely and then 0.9mm to turn back on. This can reduce the crispness of edges. If you were rastering out blocky features, this may not be noticeable. And glass tends to either etch or not etch with no in-between, so it may still show a crisp transition at some point as the power is ramping in this 3ms response.
But smaller features and rastering dithered graphics may not give good results on Dorian’s type of laser source. This is true for regular 2D stuff too.
Pearl, Blue, and Tarkin are RF-CO2 and have near instant response times, roughly 100x faster turn-on and turn-off periods and thus much more capable of fine engraving at high speeds.
The traction roller rotary type just has so many accuracy problems there wasn’t much interest in it since Pearl’s chuck type is available. And the traction will only work on Dorian right now. There is one notable difference in using a traction rotary- you don’t need to specify your work’s diameter. The stepper steps the roller a certain fraction of a degree, the circumference of the roller is built into the jig, and the work’s surface is supposed to turn with the roller, so the amount of linear spacing on the work surface per step would be known.
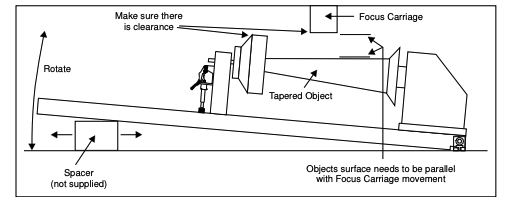
This doesn’t change the way it would handle conical items, though. A vertical rectangle on a martini glass will be narrower at the bottom when measured with a tape measure around the glass’s circumference, same as a chuck-style rotary.
Ah. So you don’t have an OD problem, you have an ID problem.
Easiest fix would be to 3D print a conical adapter for the drive side. The cone on the jig will fit into a similarly sized recess in the adapter, and the exterior cone will be at the same angle but larger dia.
It wouldn’t even need to be offset, the adapter can just go around the existing cone where it is and start engraving at a similar point on the X axis. It’s 3D printed plastic and this highly susceptible to damage if you laser off the side of the work. It could be shielded with foil tape or probably just not bother, we’d just reprint it if too much damage occurred. No laser energy from a CO2 laser will make it through glass to affect the cone inside the work. Glass is totally opaque to CO2 wavelengths, all its energy will be expended at the outer surface.
I’ll 3D print some adapter cones to do this when I get back from Thanksgiving. I can see the fixture’s cone could use some replacement of its self-adhesive rubber grippers, I can replace that while making these cone adapters to adapt to larger ID things which will also need rubber grippers.
I wonder if some similar sort of adapters might be useful for the tailstock end, to accommodate other shapes? If you have a cylinder open on both ends, the tailstock might be better with a convex cone instead of concave, and that’s easy to print, although I don’t know if anyone’s actually needed that.
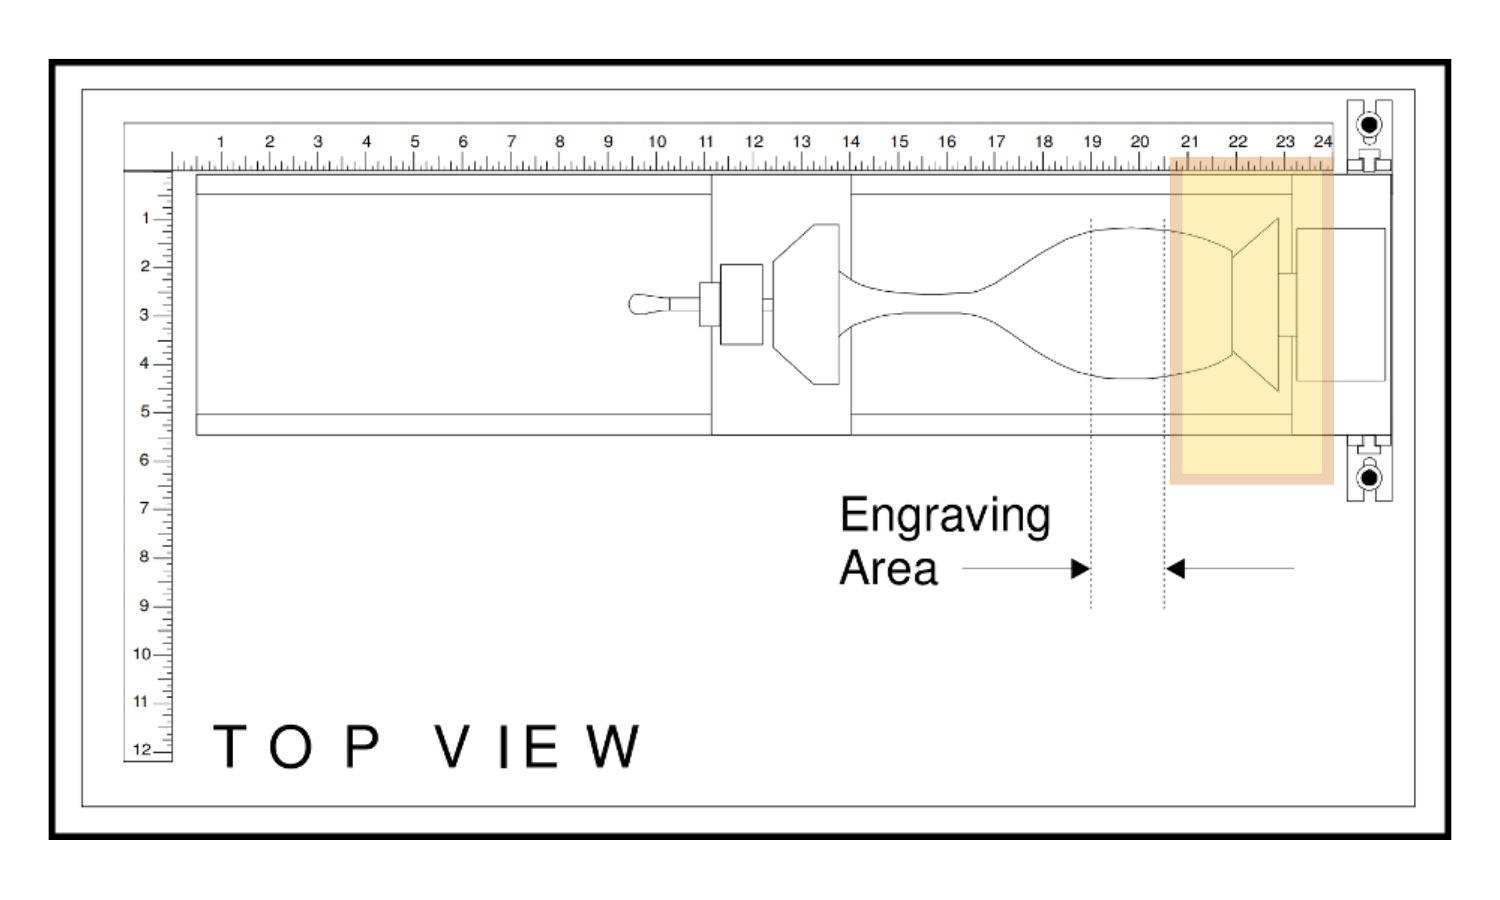
The jig itself looks like it could go up to 200mm dia. I’m making yet another cone which can fit to that limit
Similar tailstock adapters might be of use too, but making those may be less straightforward. There’s a decision whether to leave the center clear and extend forward off the existing tailstock, which would compromise the jig’s max length, or build to the side of the existing cone with minimal extension from the existing tailstock which would keep reduction of the jig’s length capacity to a minimum but then it may not be able to hold some convex surfaces.