Hi everyone, I wanted to detail my journey in turning epoxy and prepping epoxy blanks. I am by no means an expert in this process, but feel free to reach out with any questions and I will try my best!
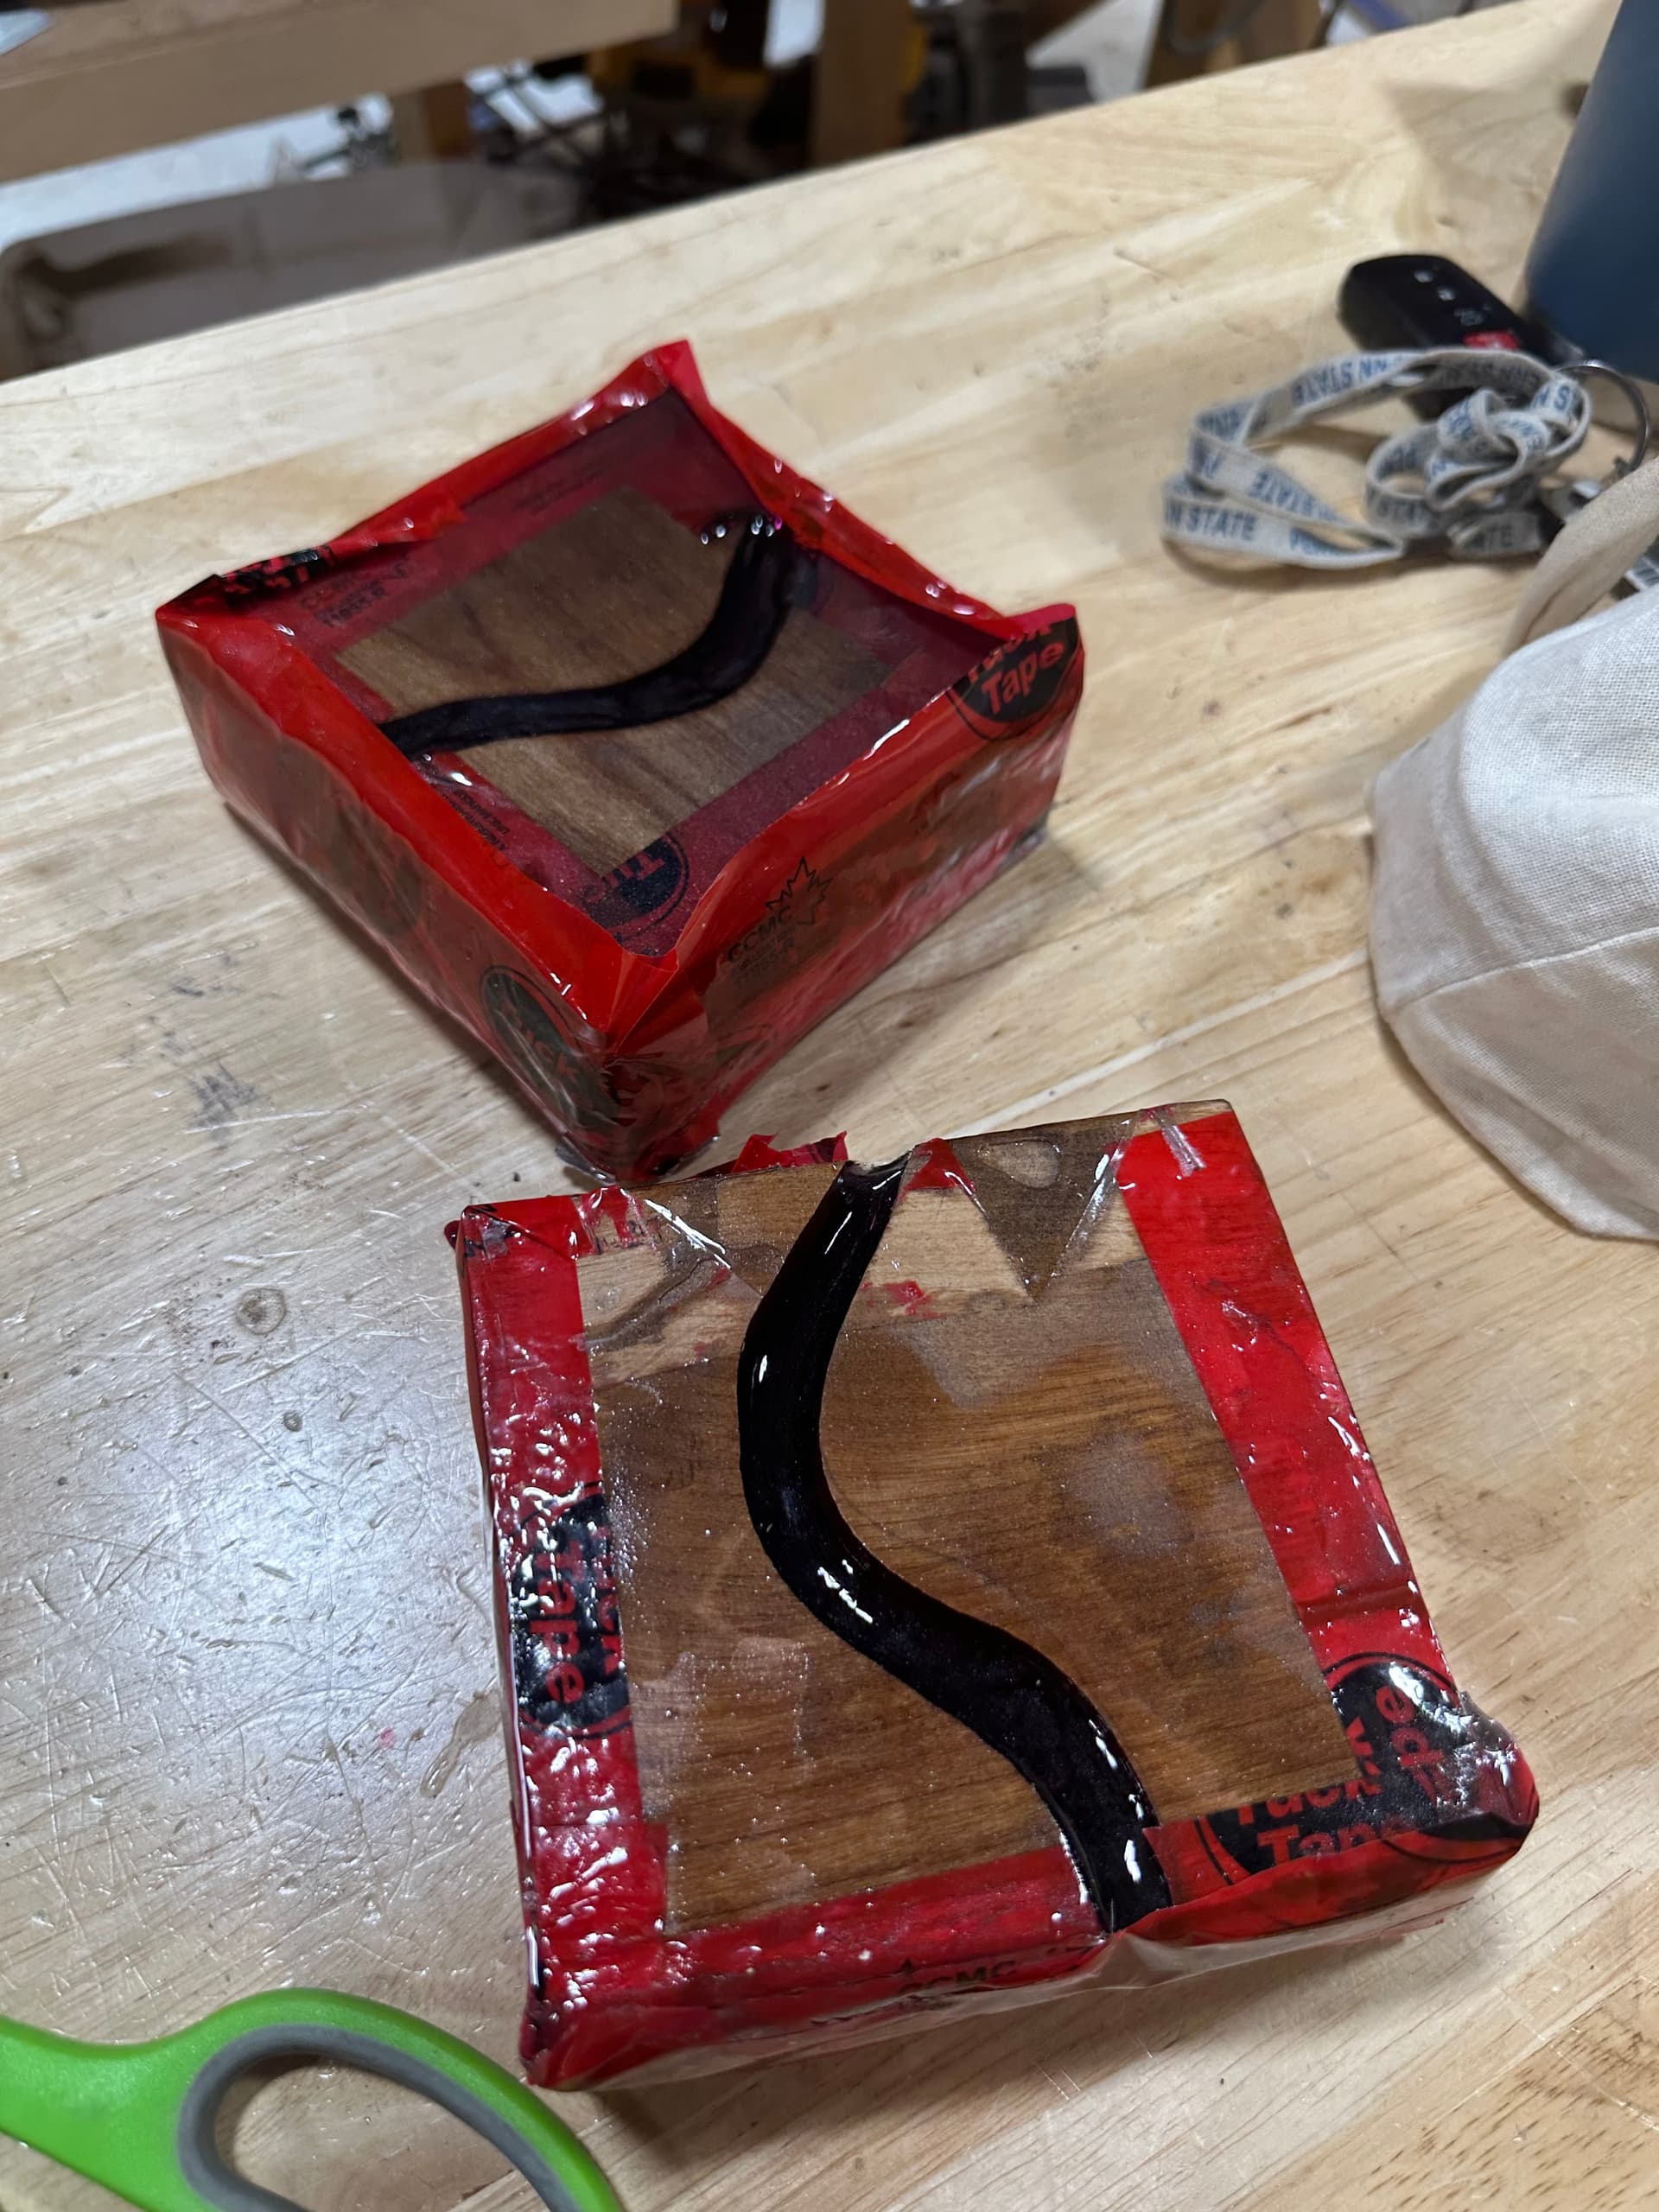
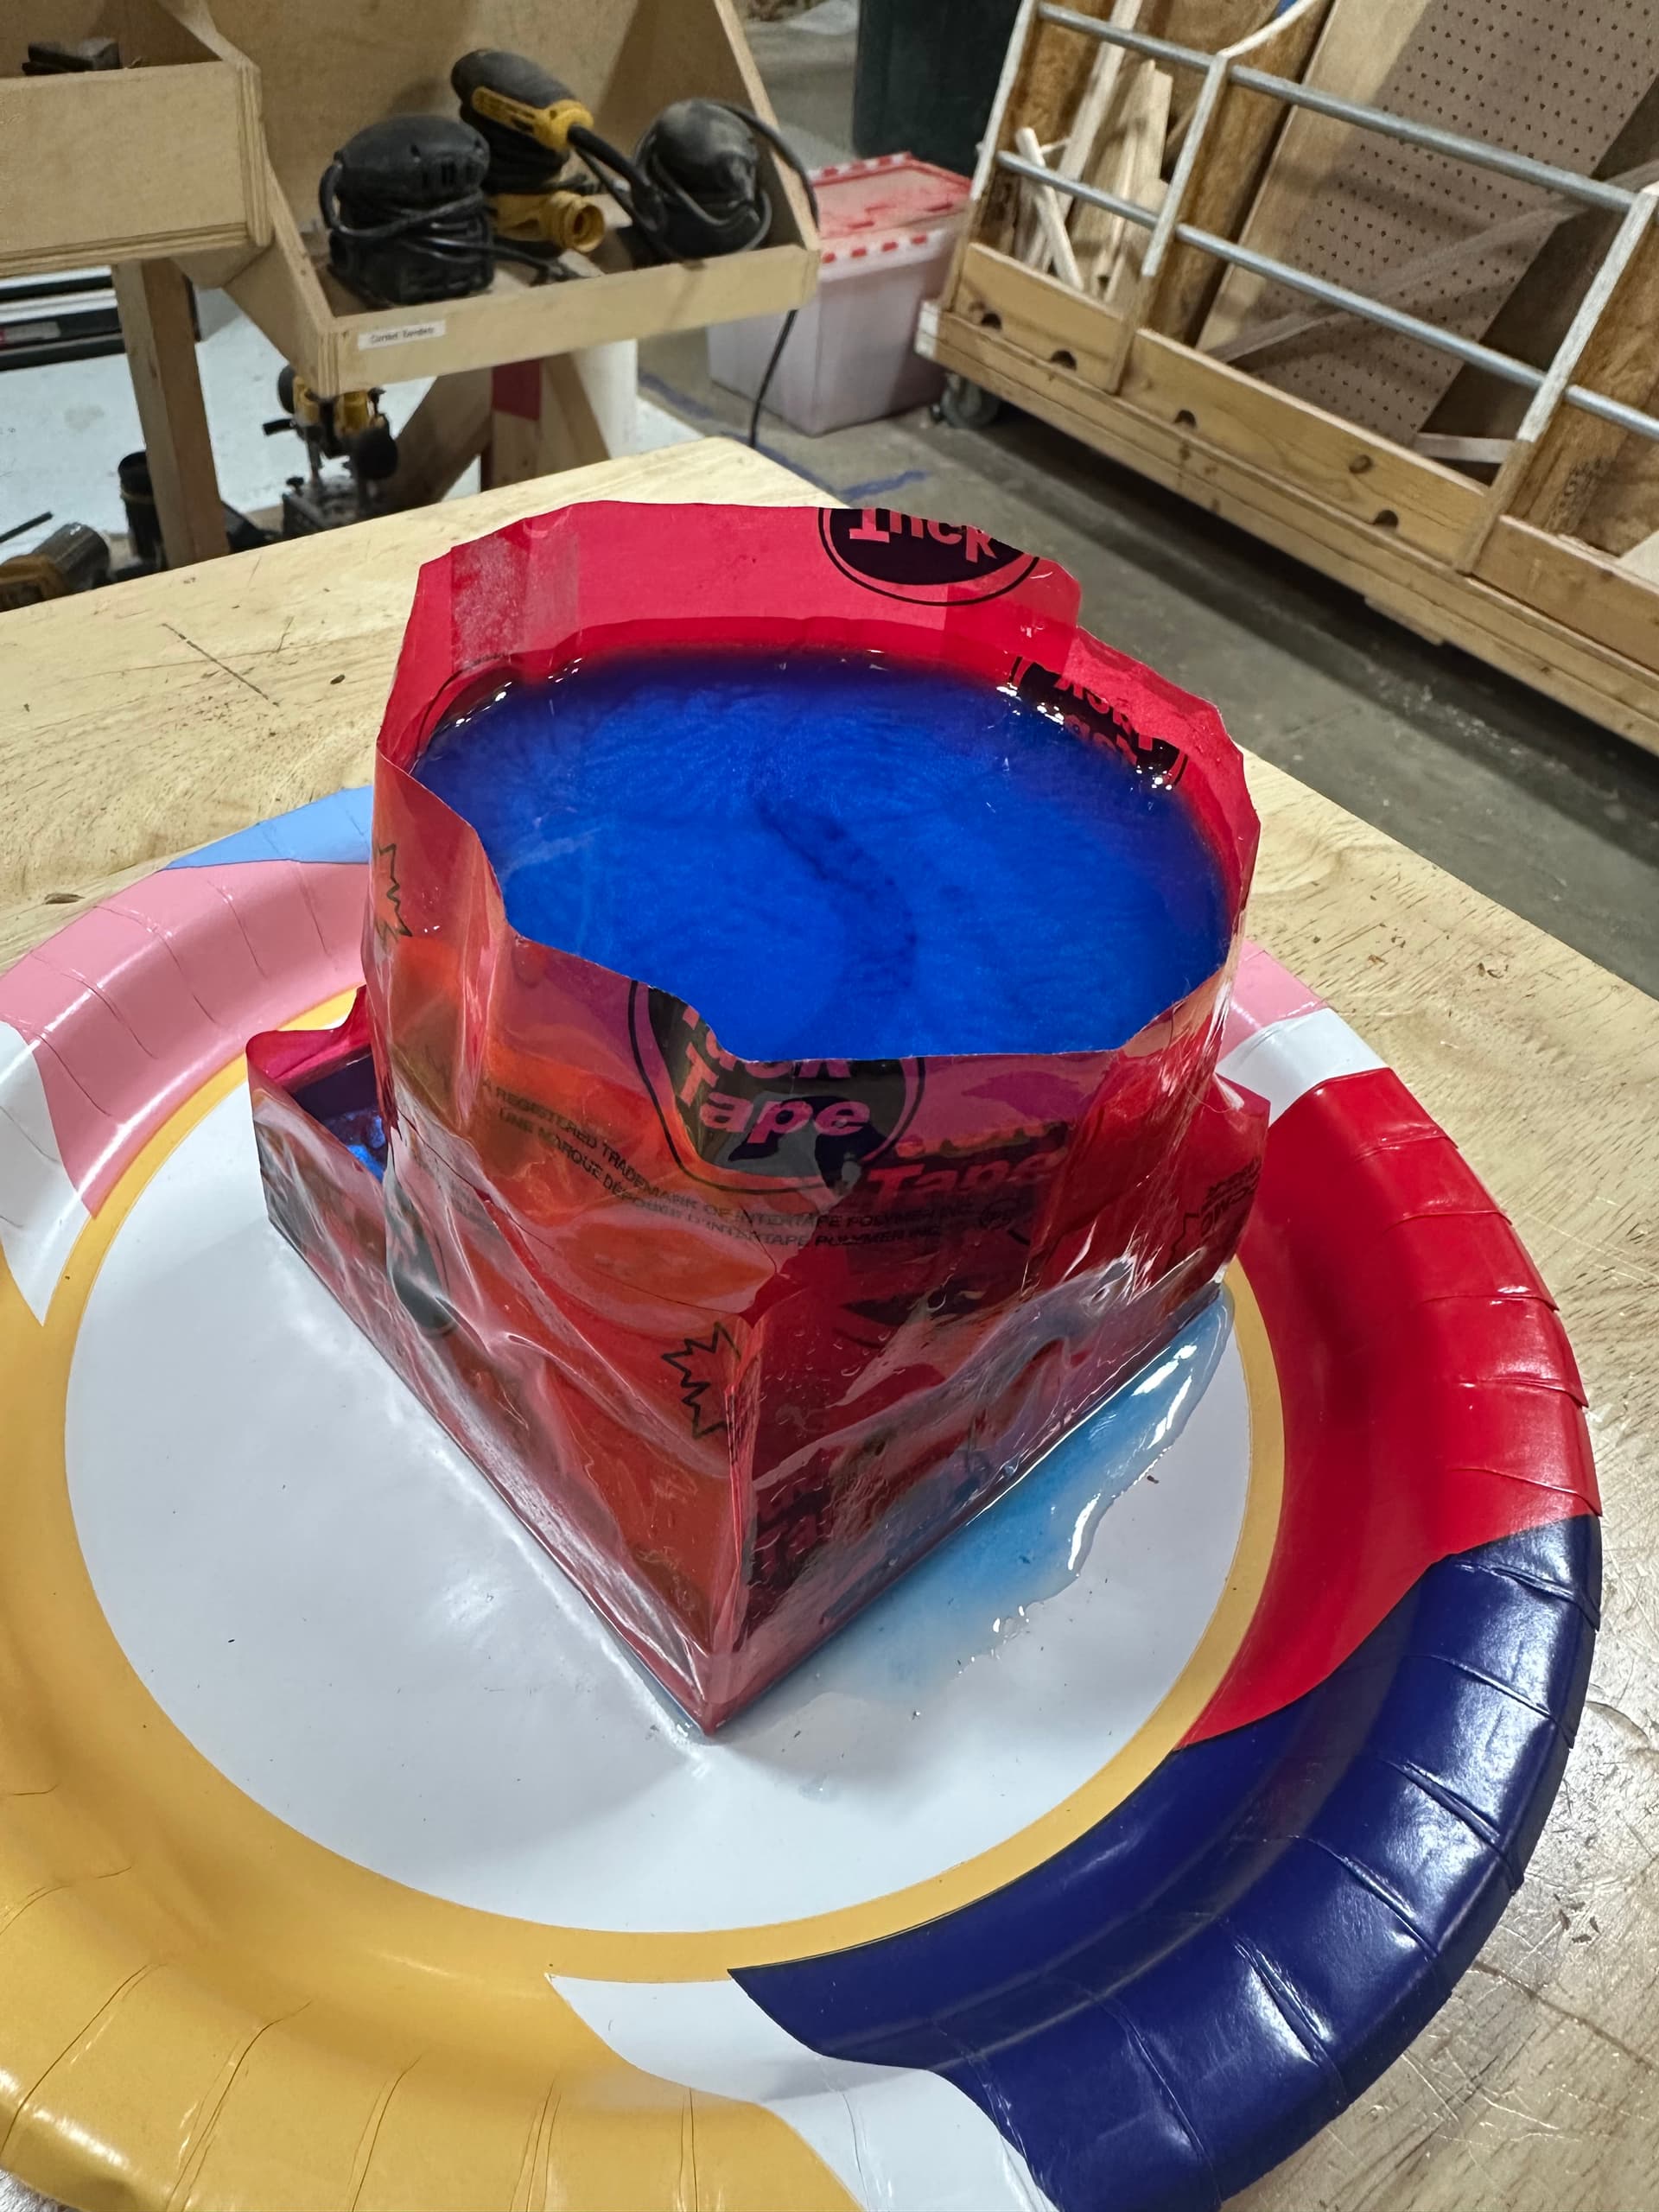
Iteration 1: I prepped two blanks using a block of wood from the turning wood scrap pile. I used the bandsaw to cut out a little squiggle for the epoxy. I then taped the piece with tuck tape, attempting to seal off any openings, but I did end up getting some leaks. I used deep pour epoxy I bought off Amazon and put the pieces in the pressure pot. The pressure pot instructions are great and easy to follow. I left the pieces in the pressure pot for about 5 days (that was the earliest I could get back to the shop) and the epoxy was well set by then.
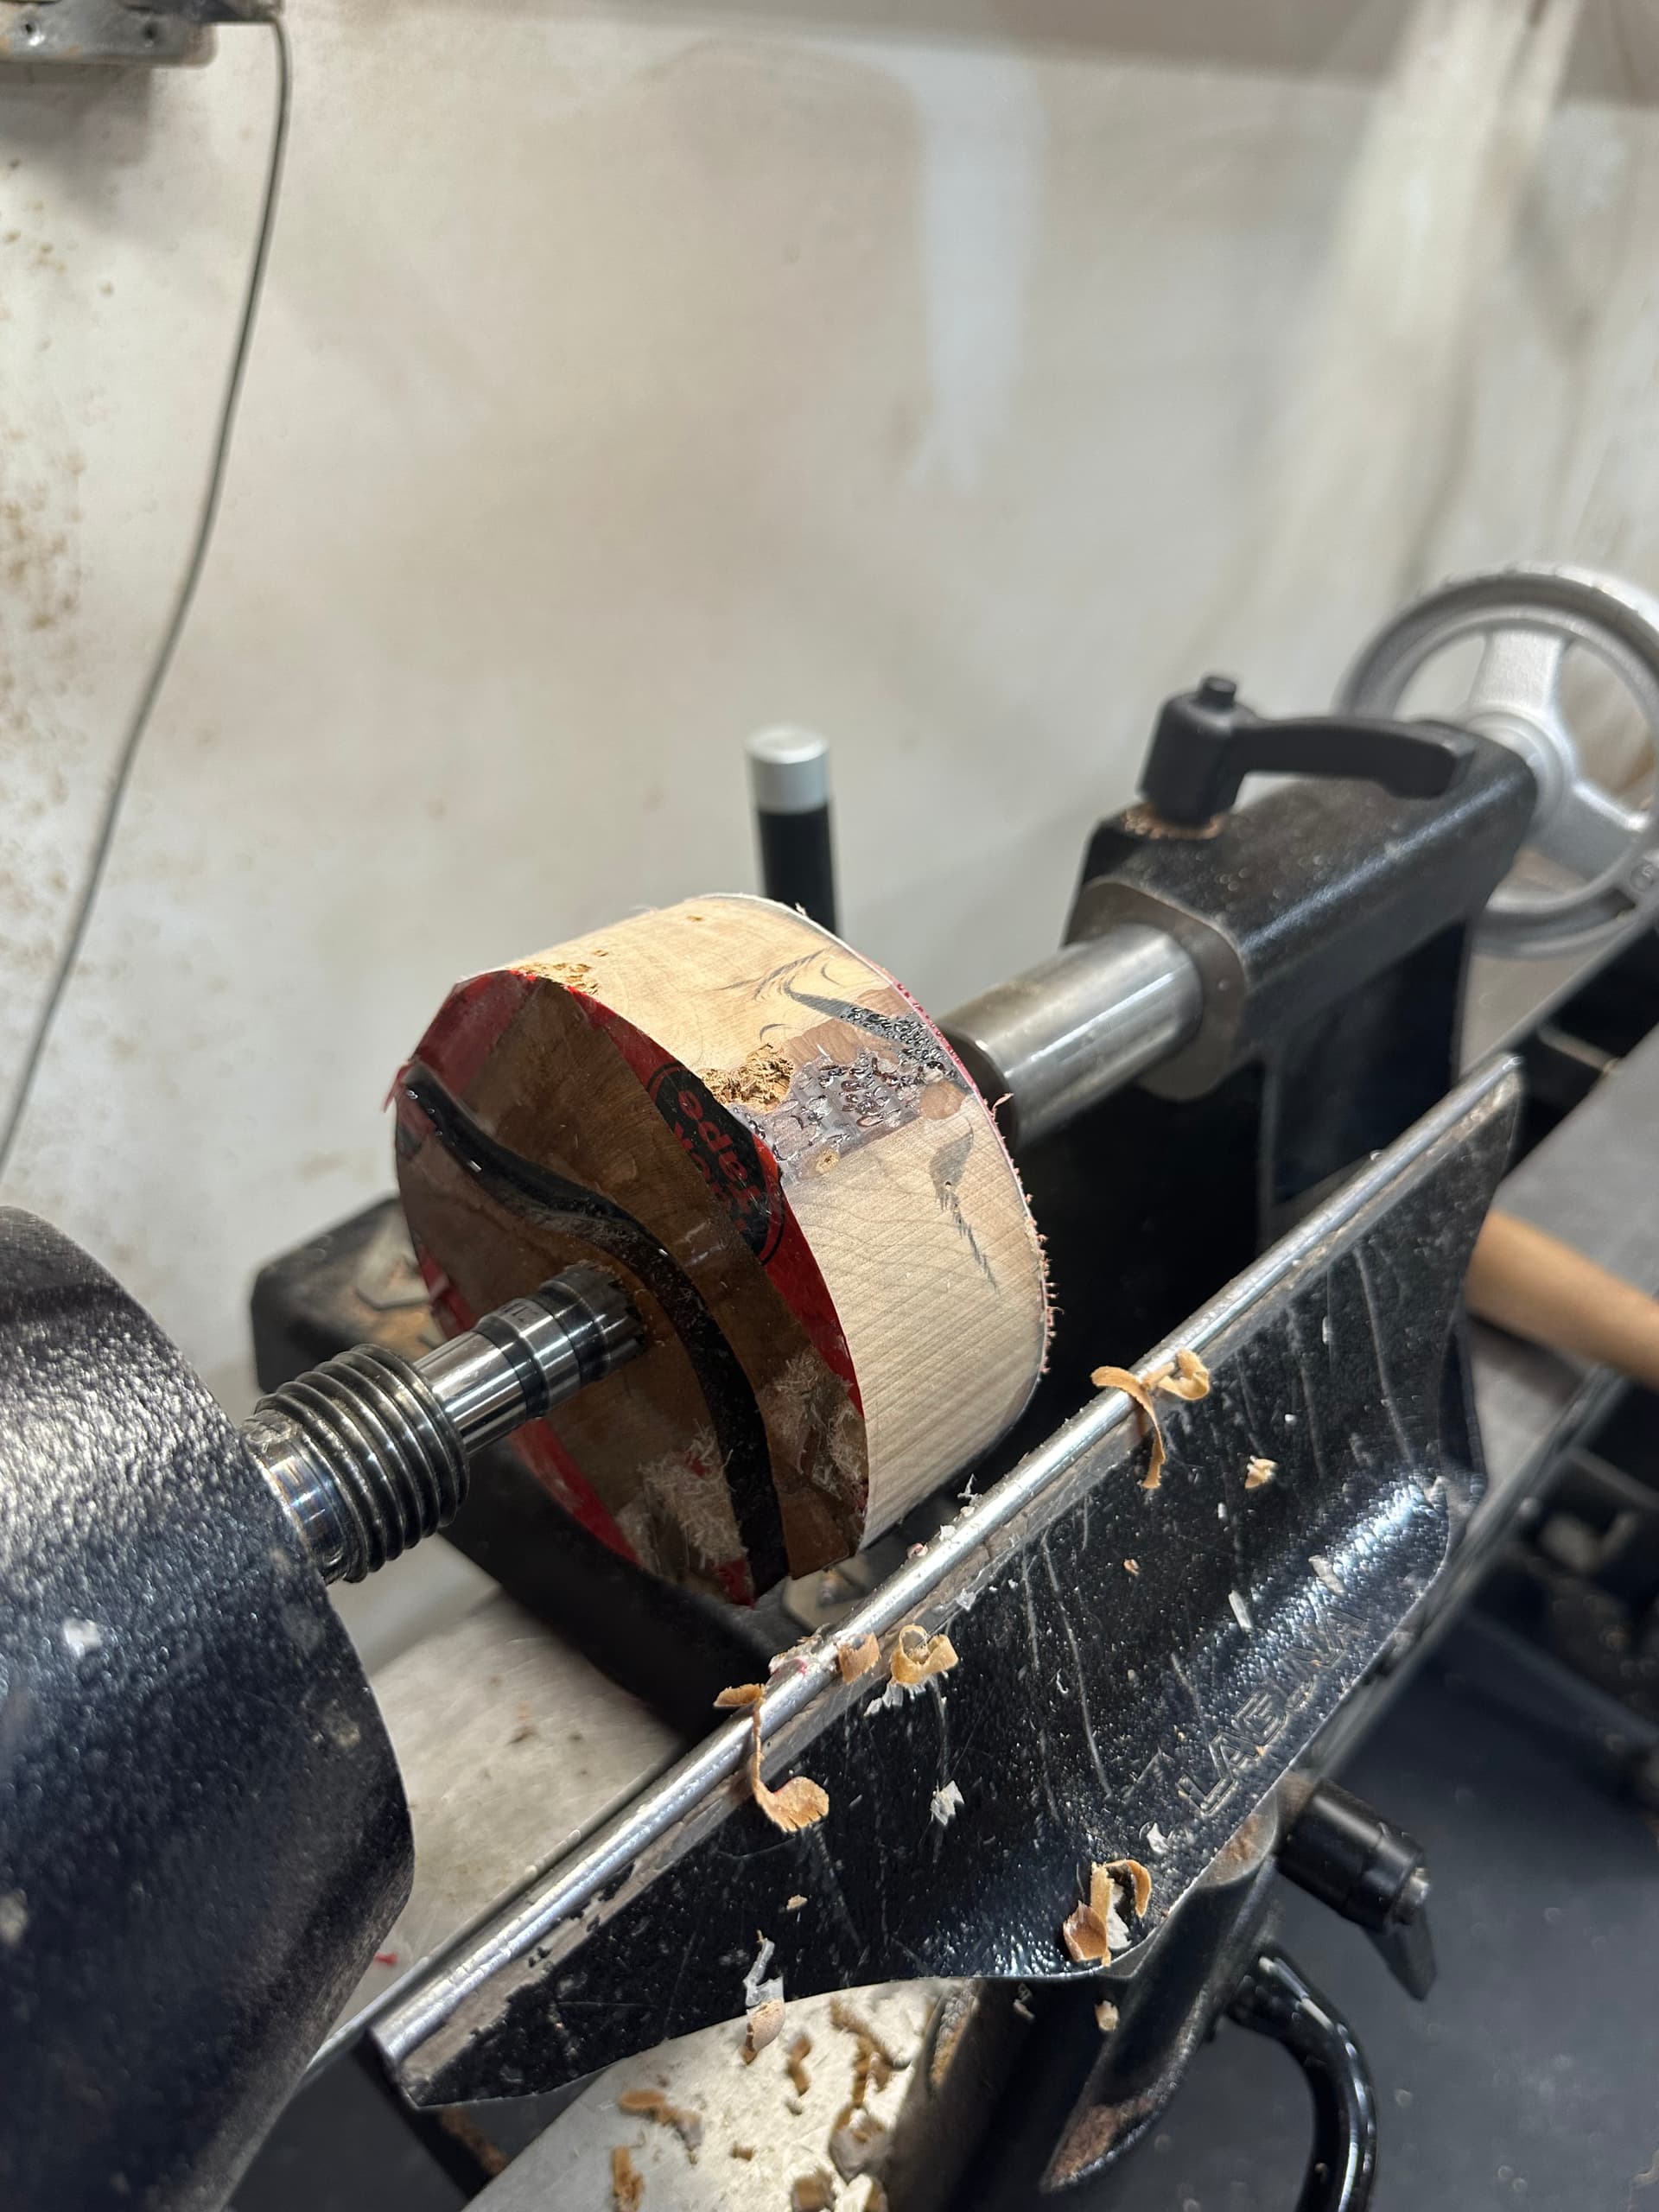
I then mounted the piece between centers and turned as normal. I wanted to make some coasters, but I learned that getting the bottom of the coaster flat was difficult to do on the lathe. Next time I would probably round the piece out on the lathe but then just take it to the bandsaw or something to cut the individual coasters. But overall, turning the epoxy was easy. The pressure pot prevented any bubbles from forming and there was minimal tear out.
Iteration 2: Same process as the first time, I prepped the wood blanks on the bandsaw, covered the piece with tuck tape, filled with epoxy, and left in the pressure pot. This time I came back after 1.5 days and the epoxy had not fully set, so I put it back in the pressure pot and left it for a few more days. Looks like it needs at least 2 days (maybe more) for the epoxy to fully set (maybe someone who is more familiar with epoxy pours can comment? Do deeper pours need longer to set??).
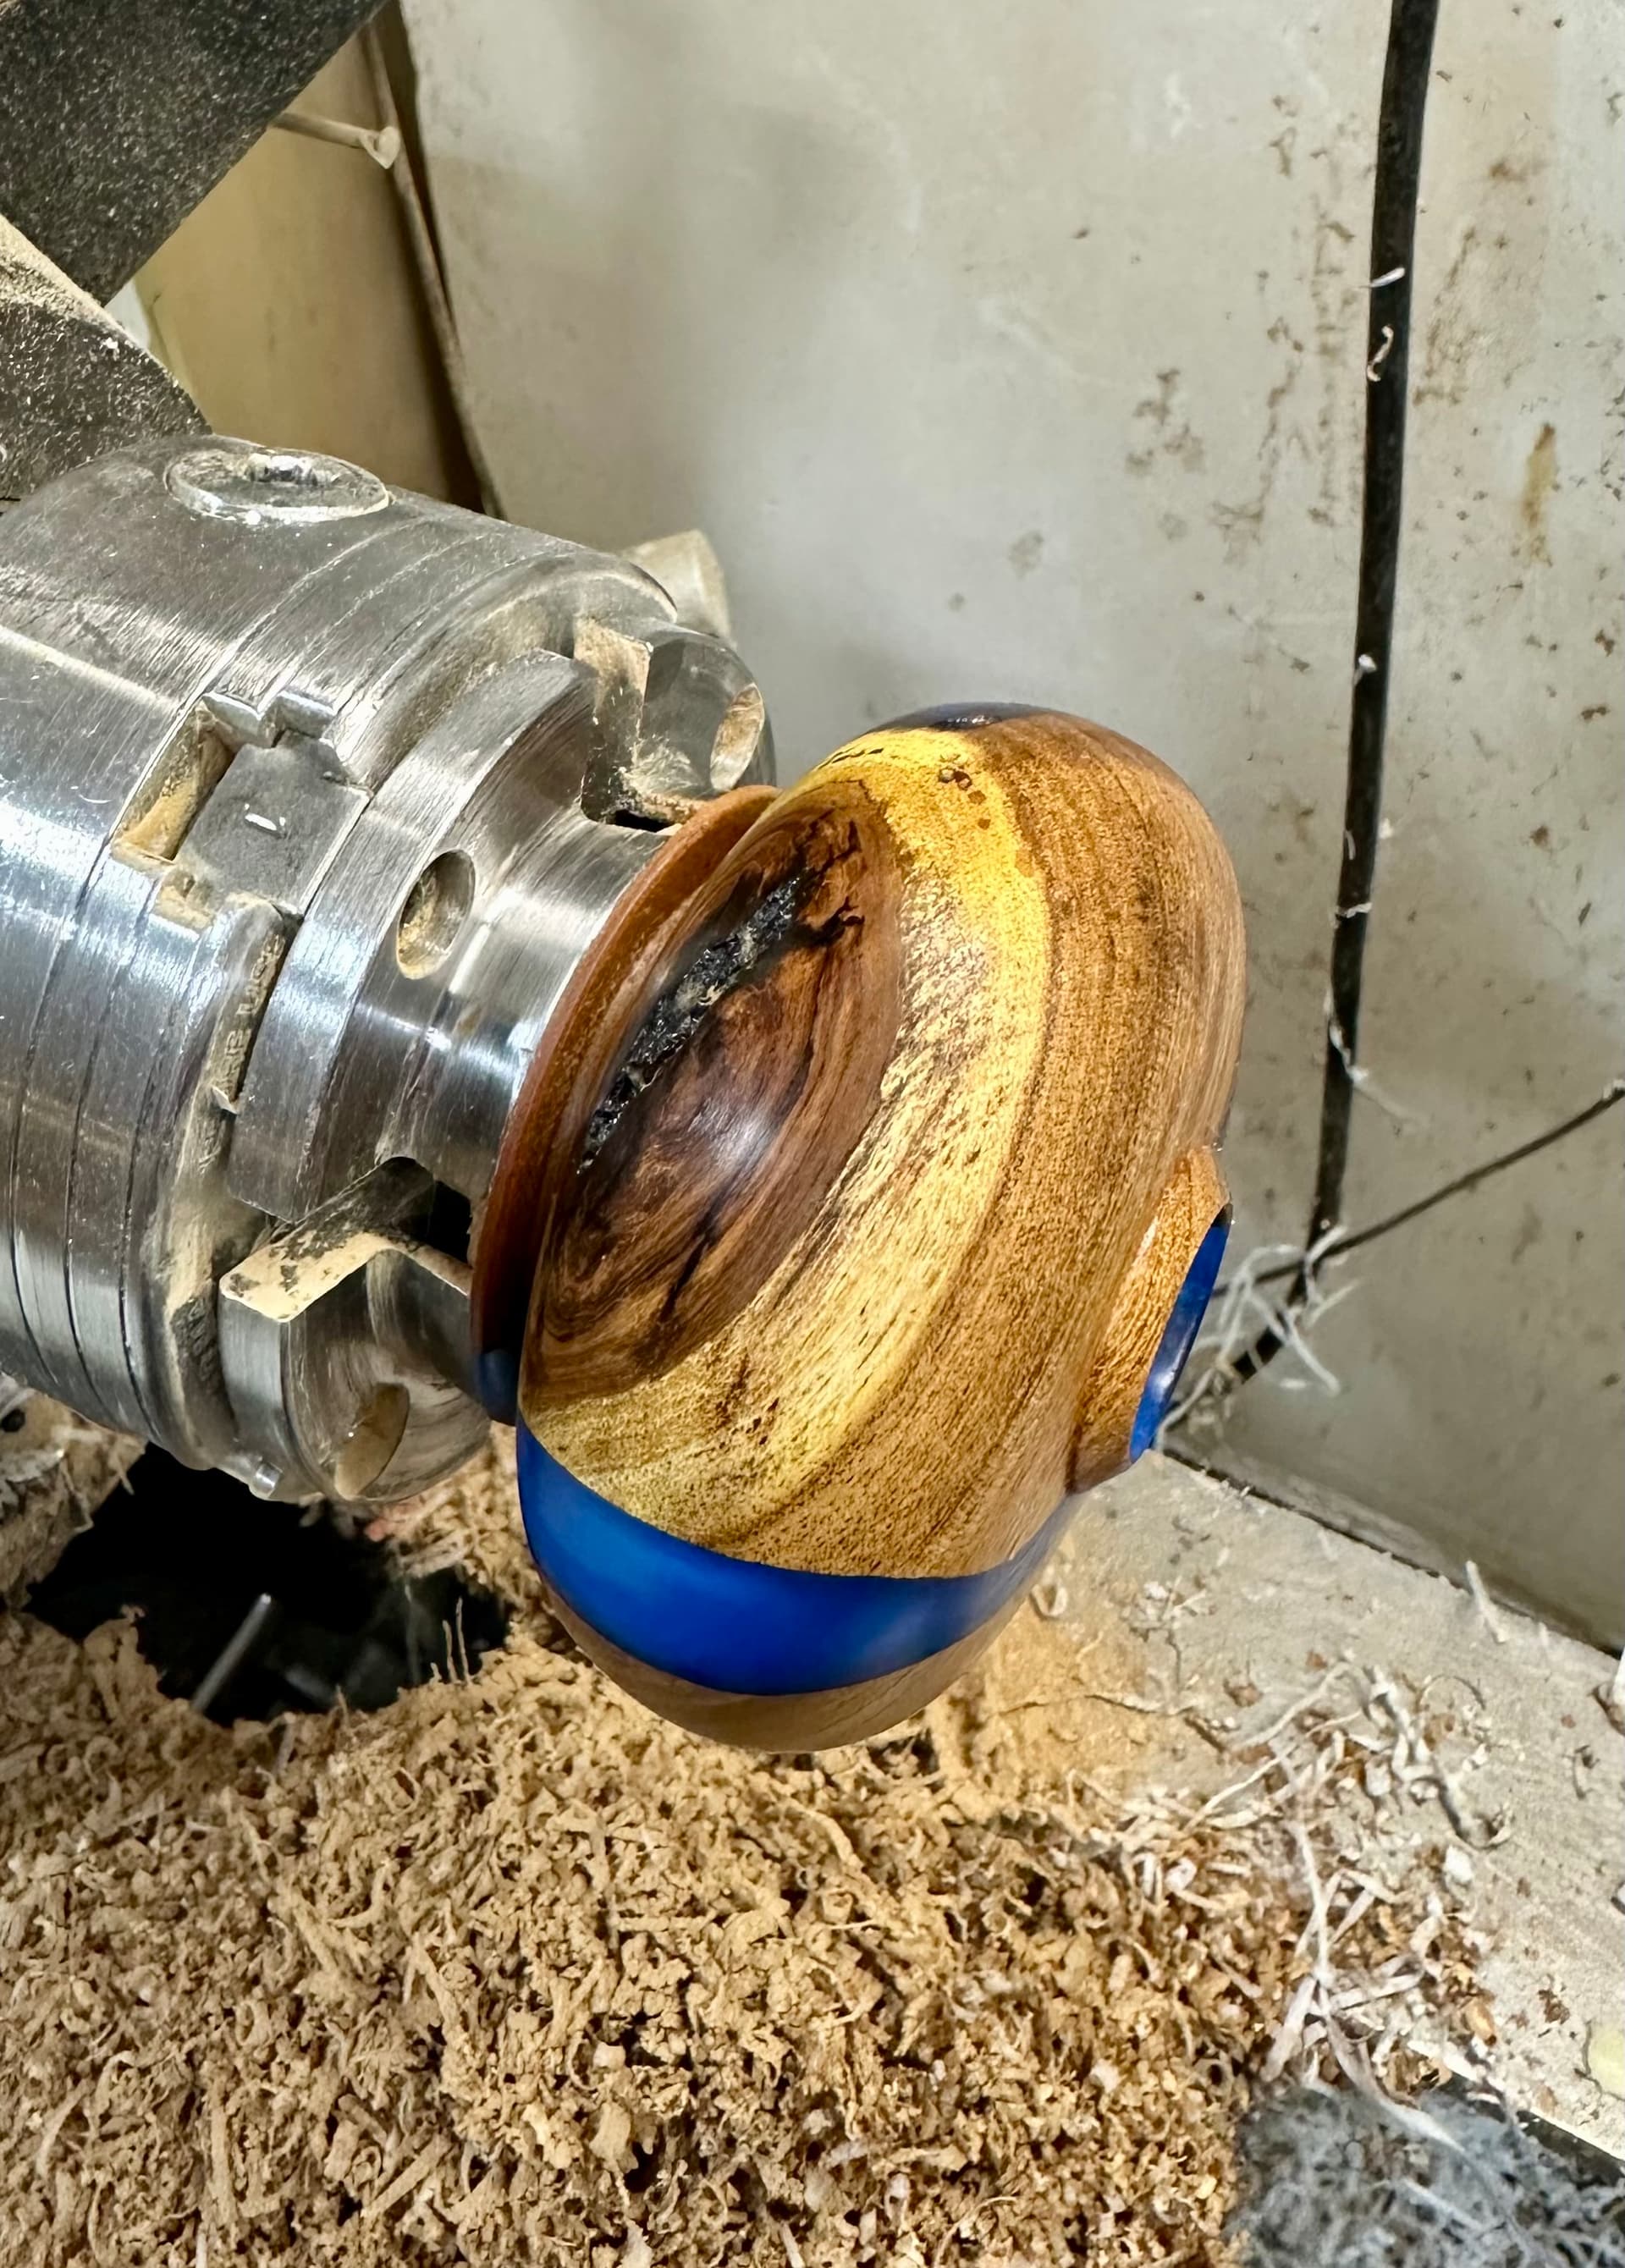
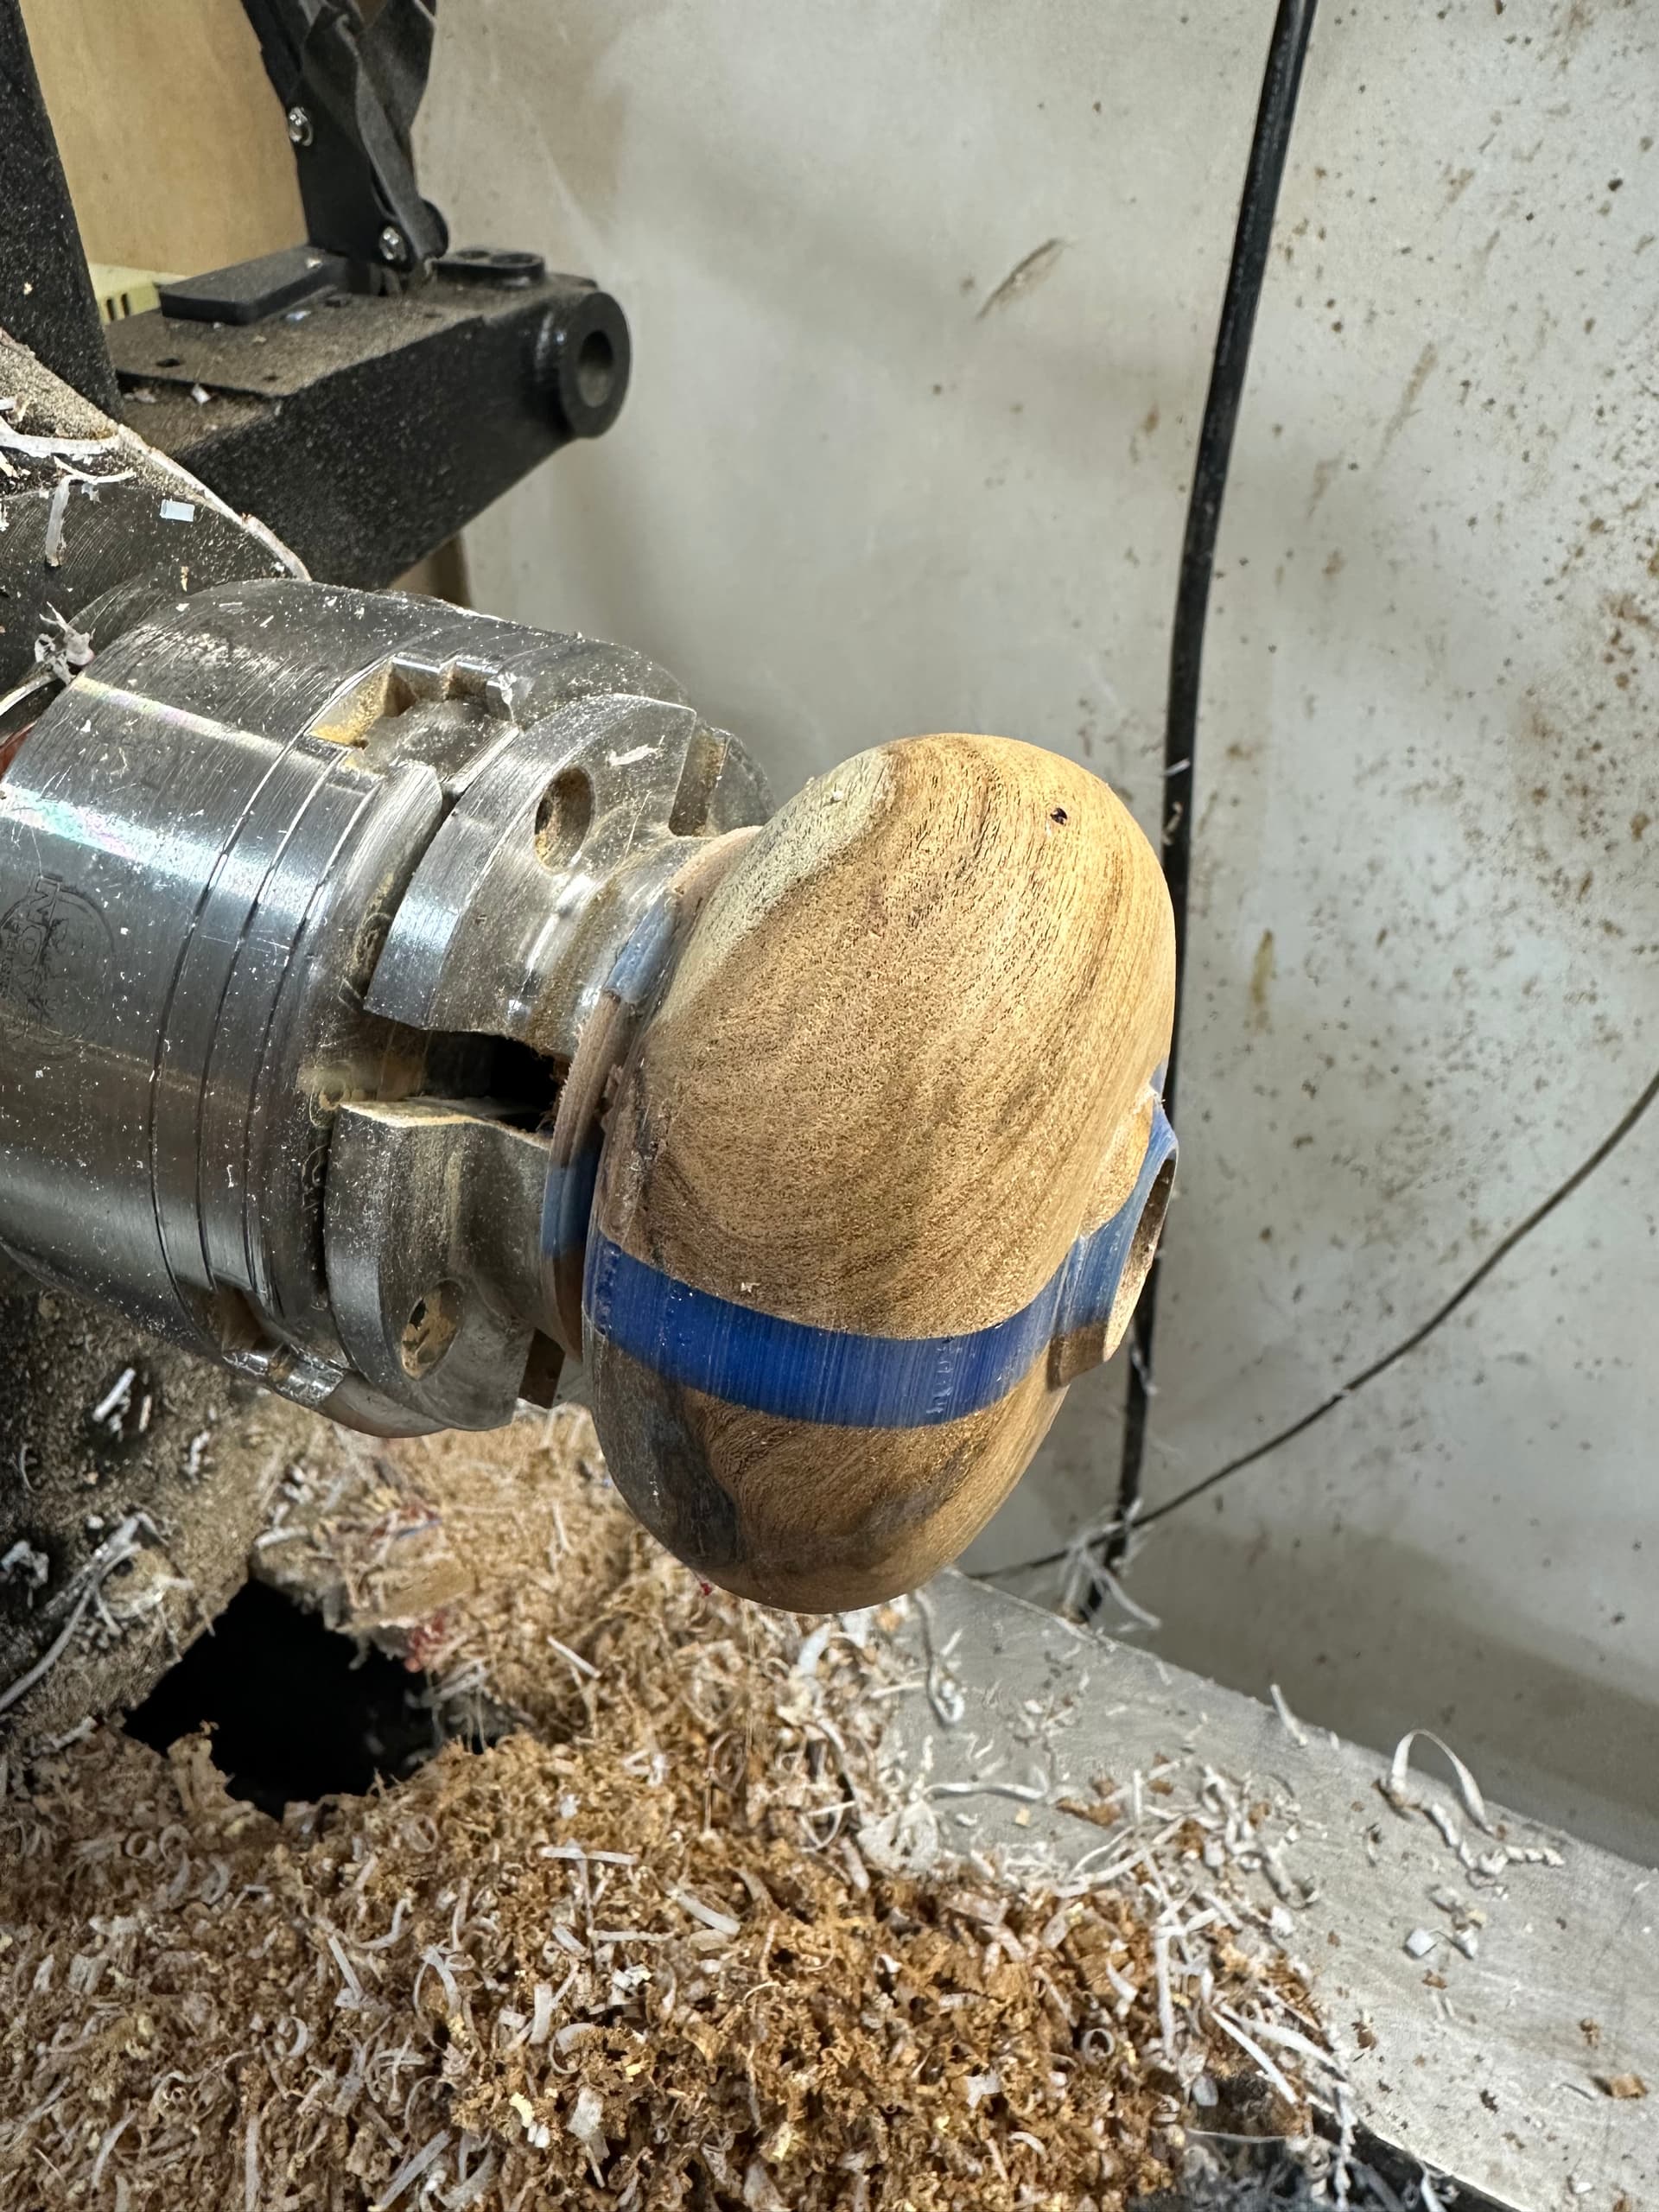
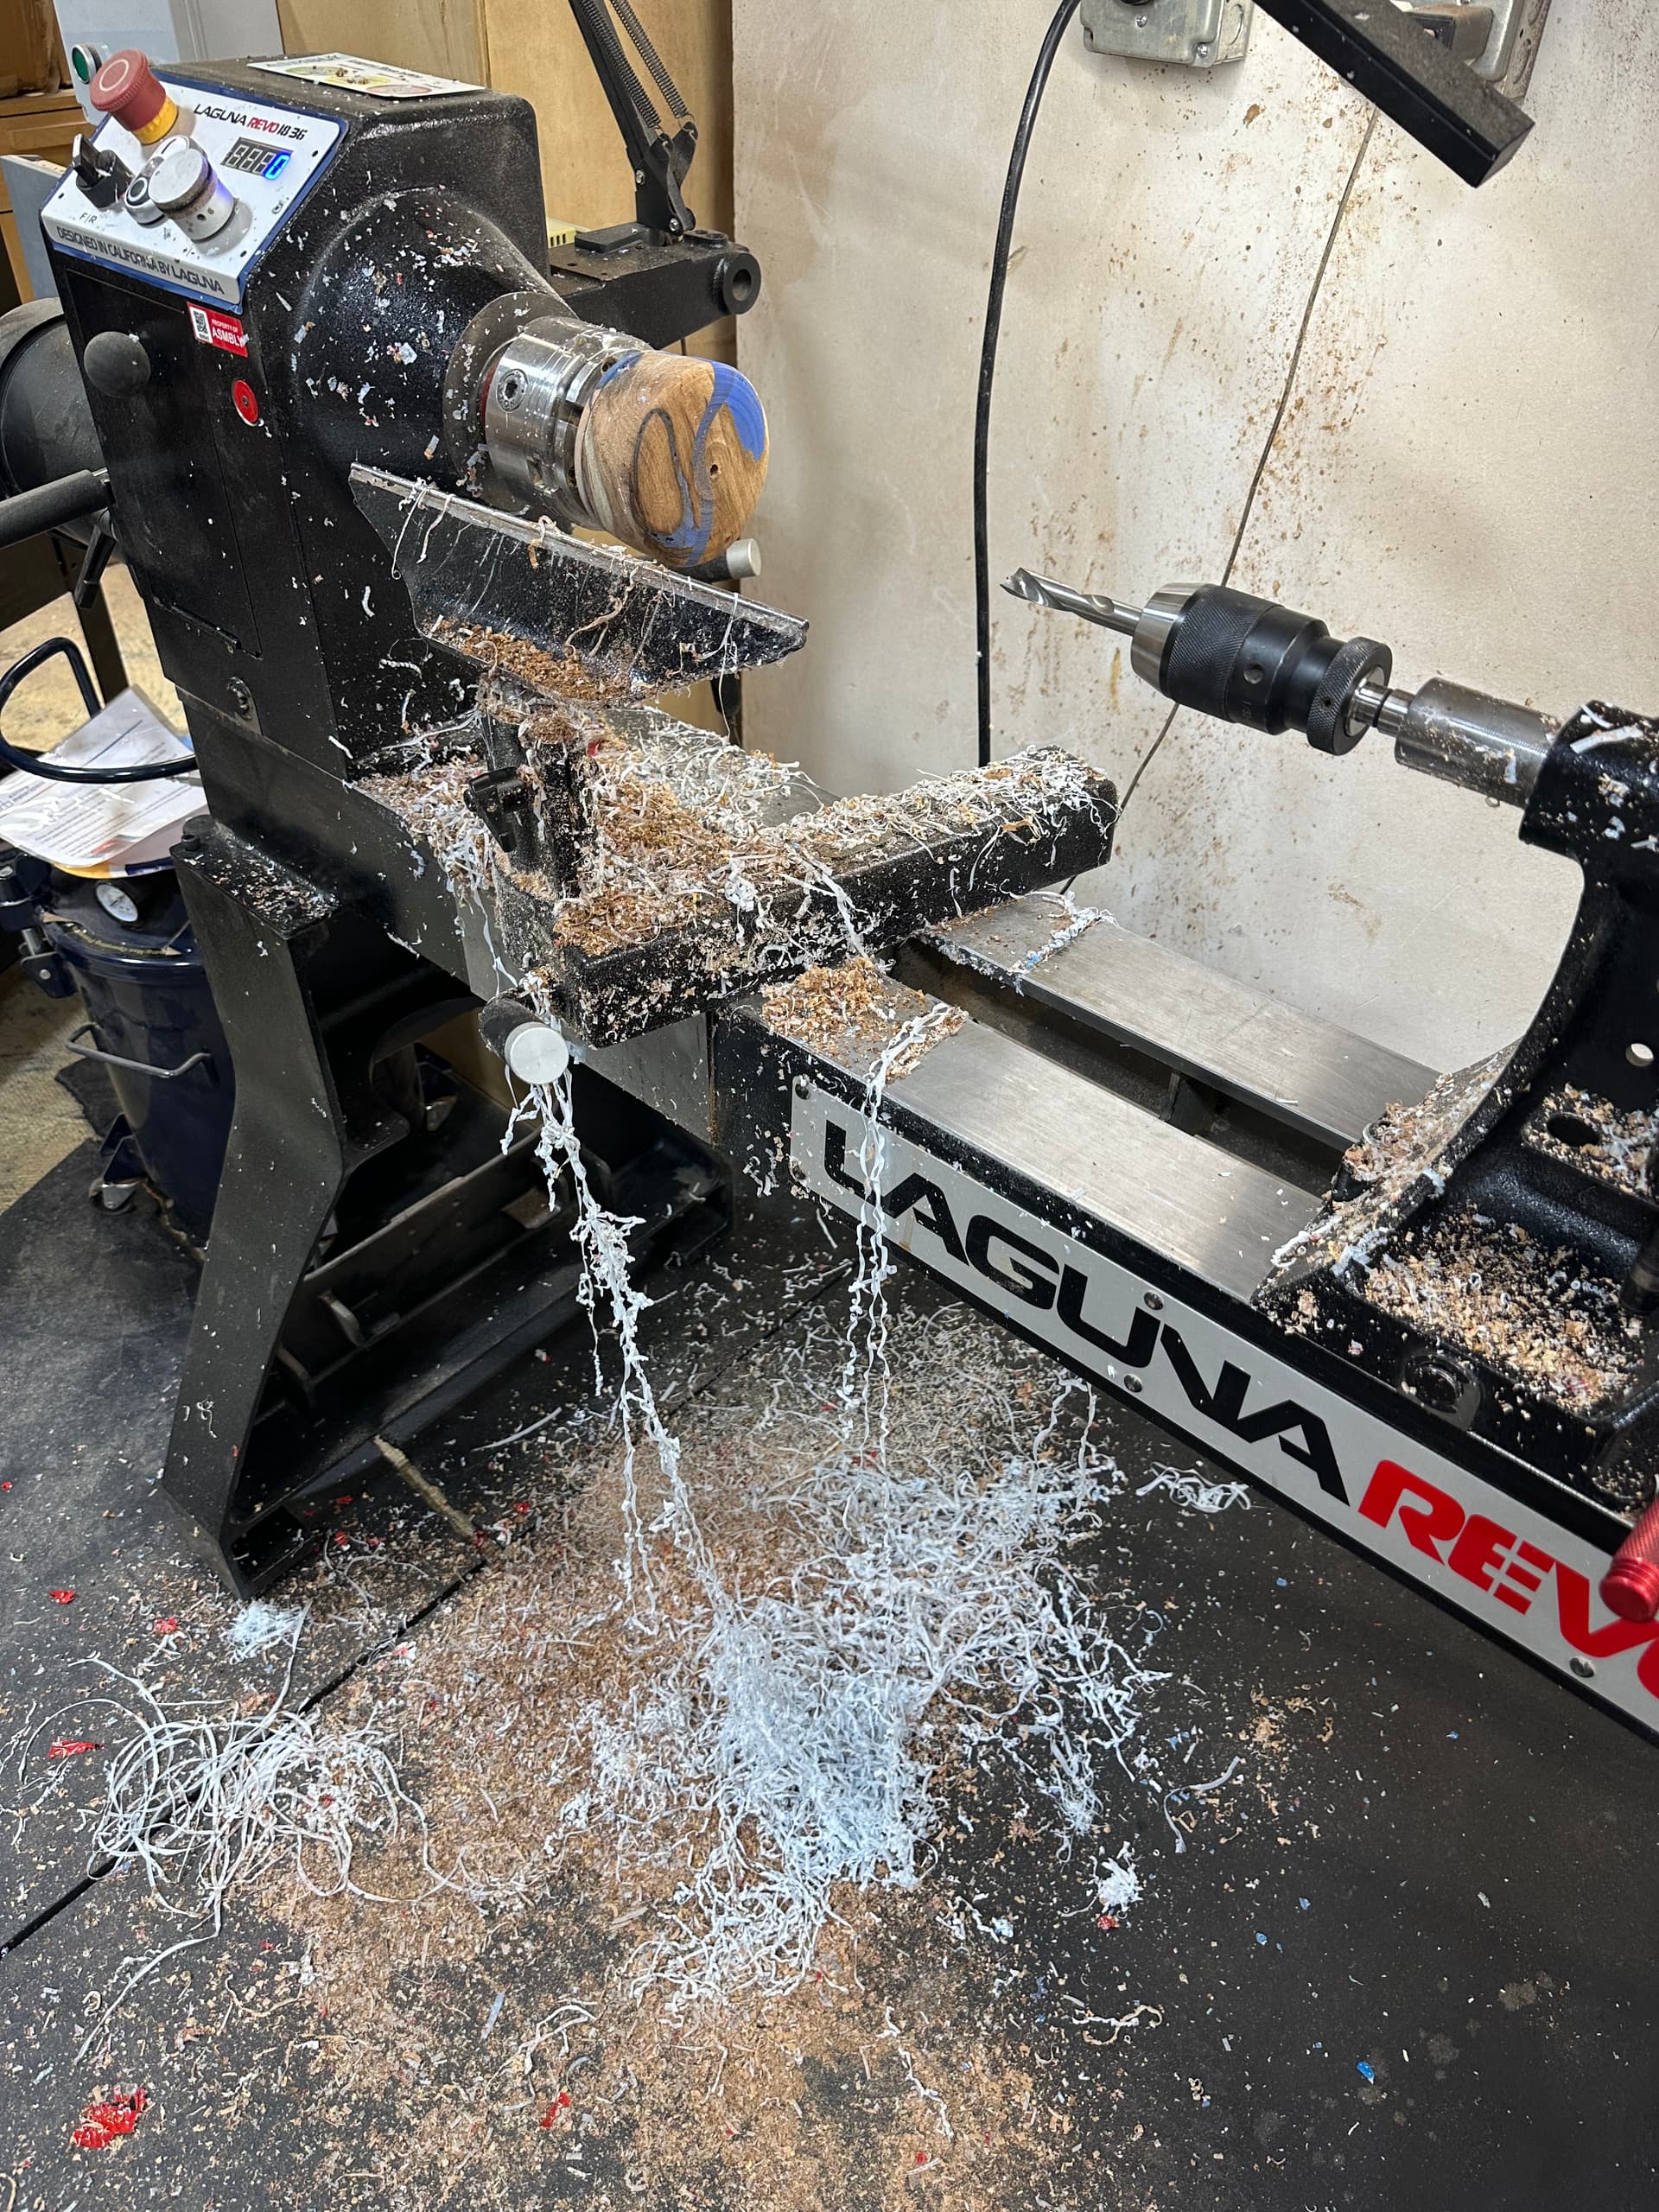
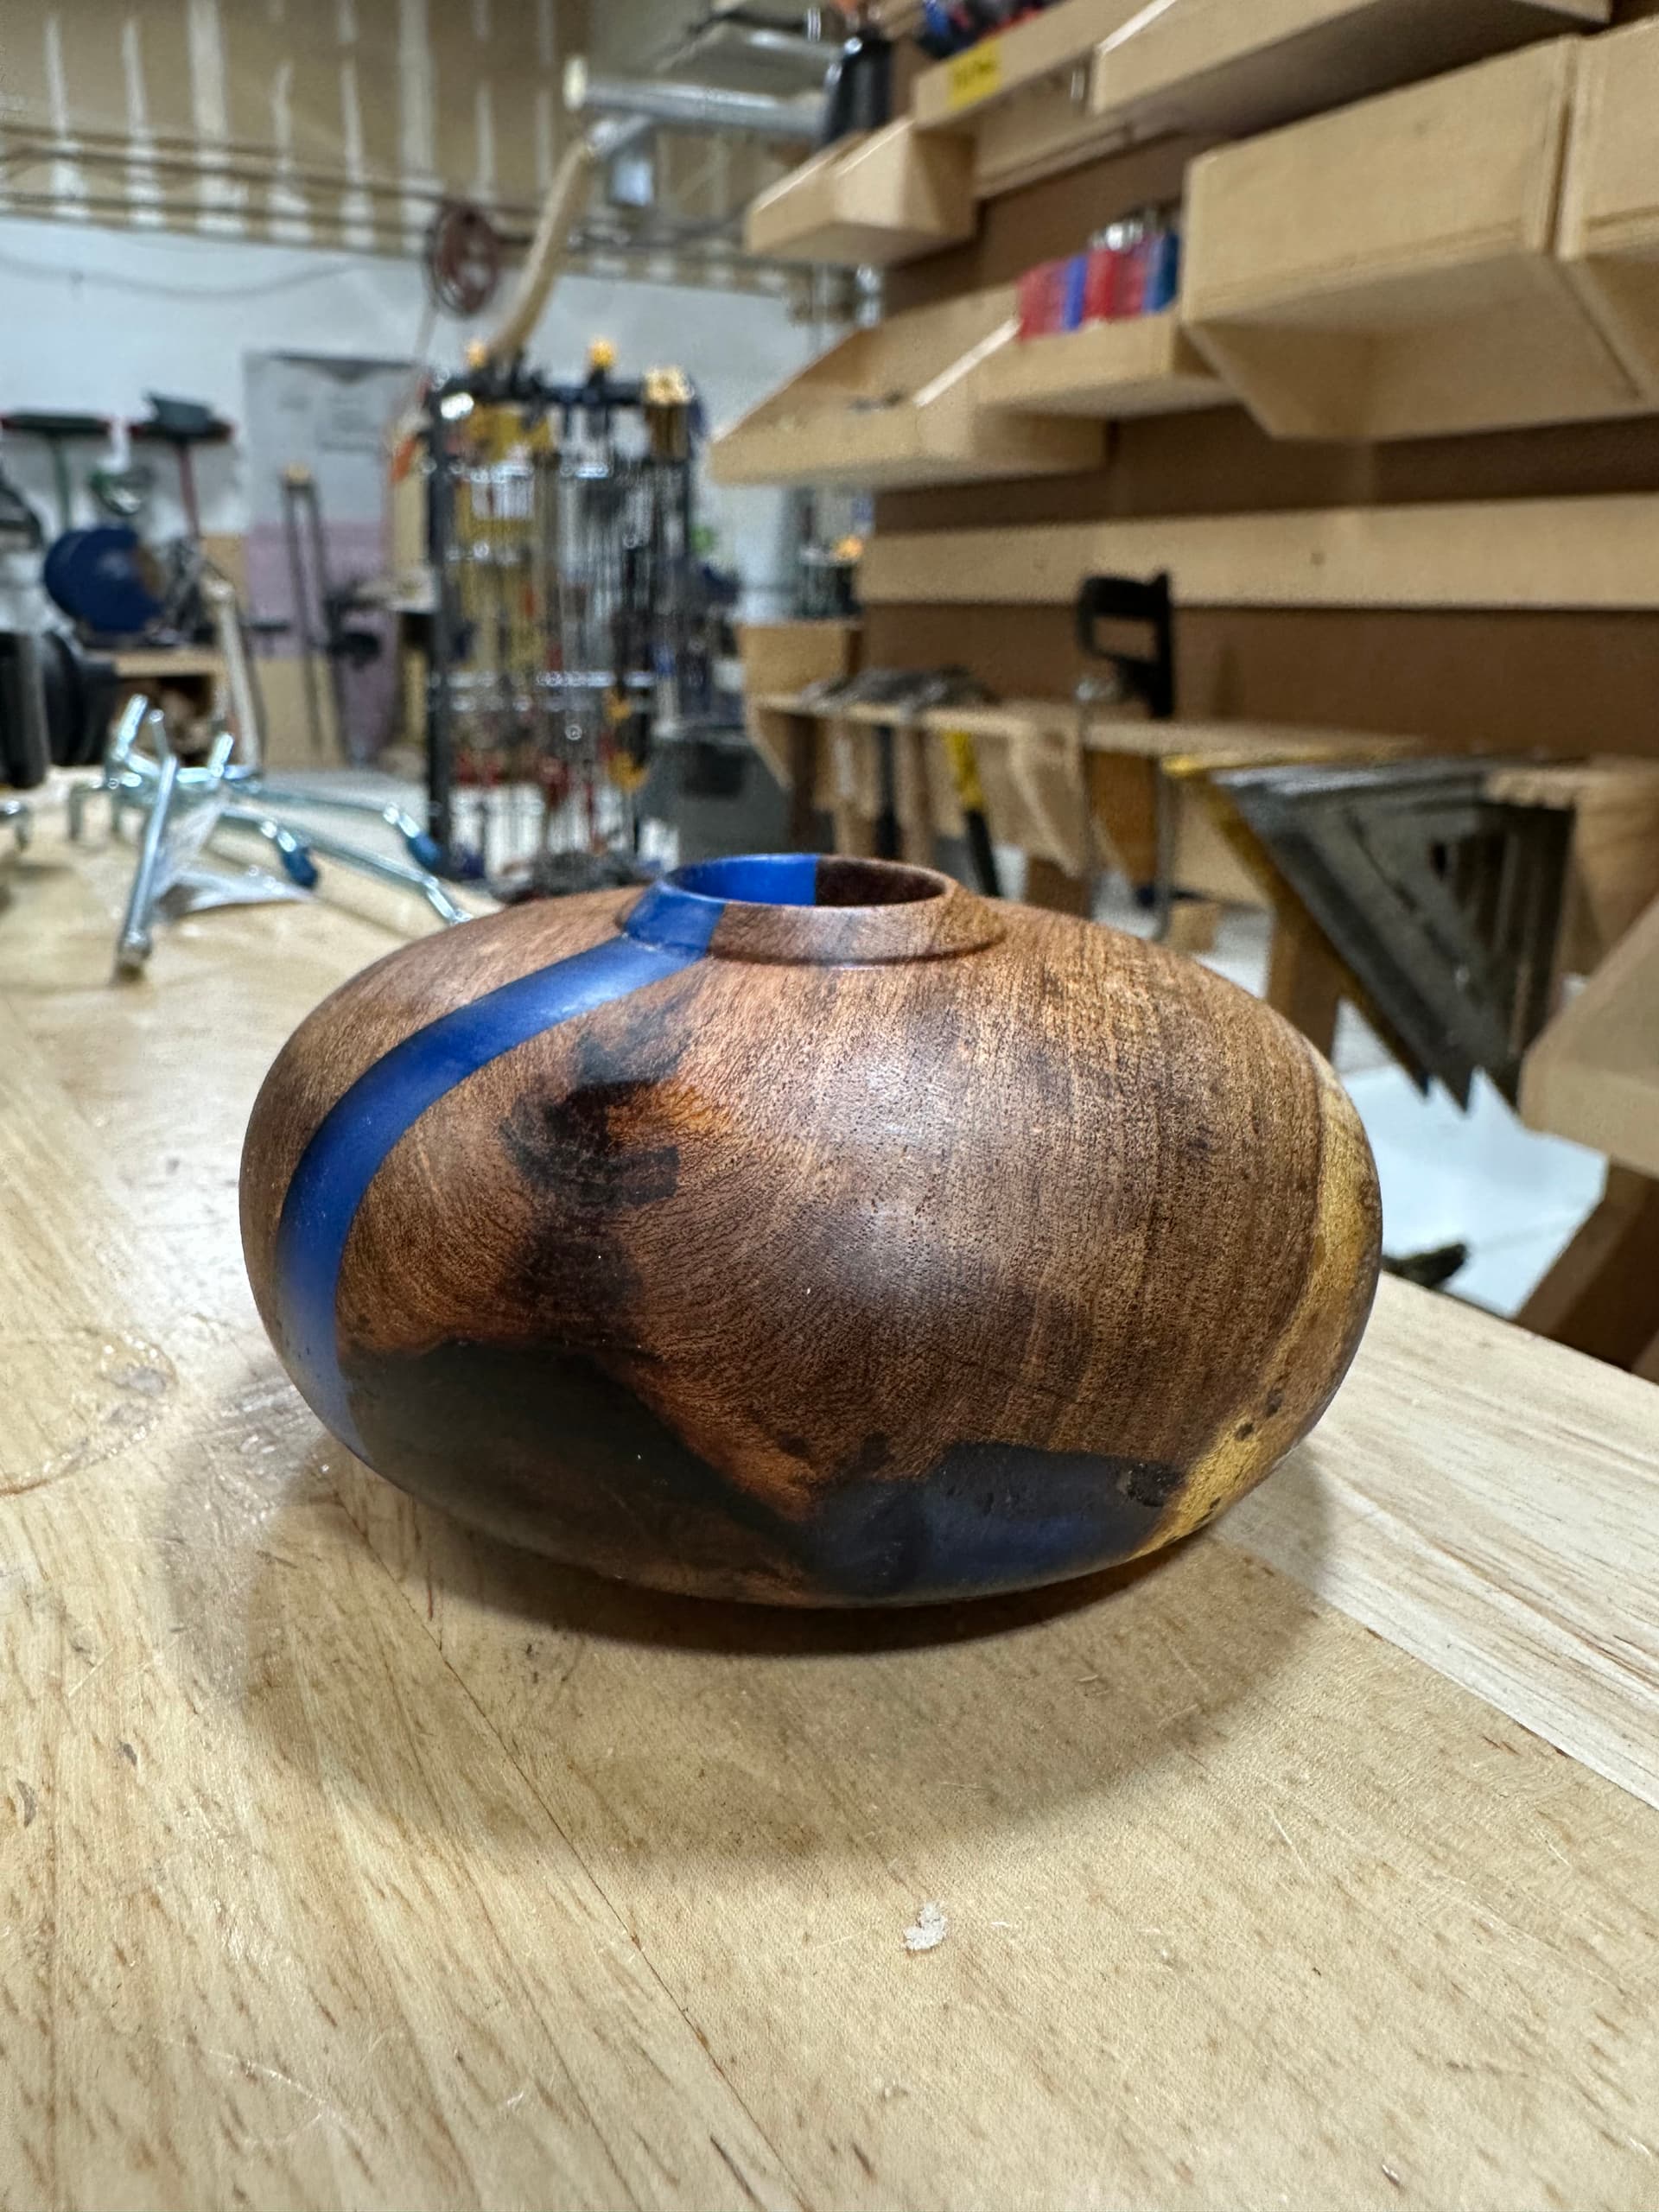
I took the blank to the bandsaw to round out the edges and then mounted on the lathe. I was kind of put off on the coaster idea since the last iteration so I decided to do a small vase. This required more shaping of the piece and I found that I had more tear out this time. I was using the roughing and spindle gouges, but I tried the carbide tools and honestly those worked great, definitely less tear out. I turned the rest of the piece with carbide and then made a couple passes with the scraper to smooth things out.
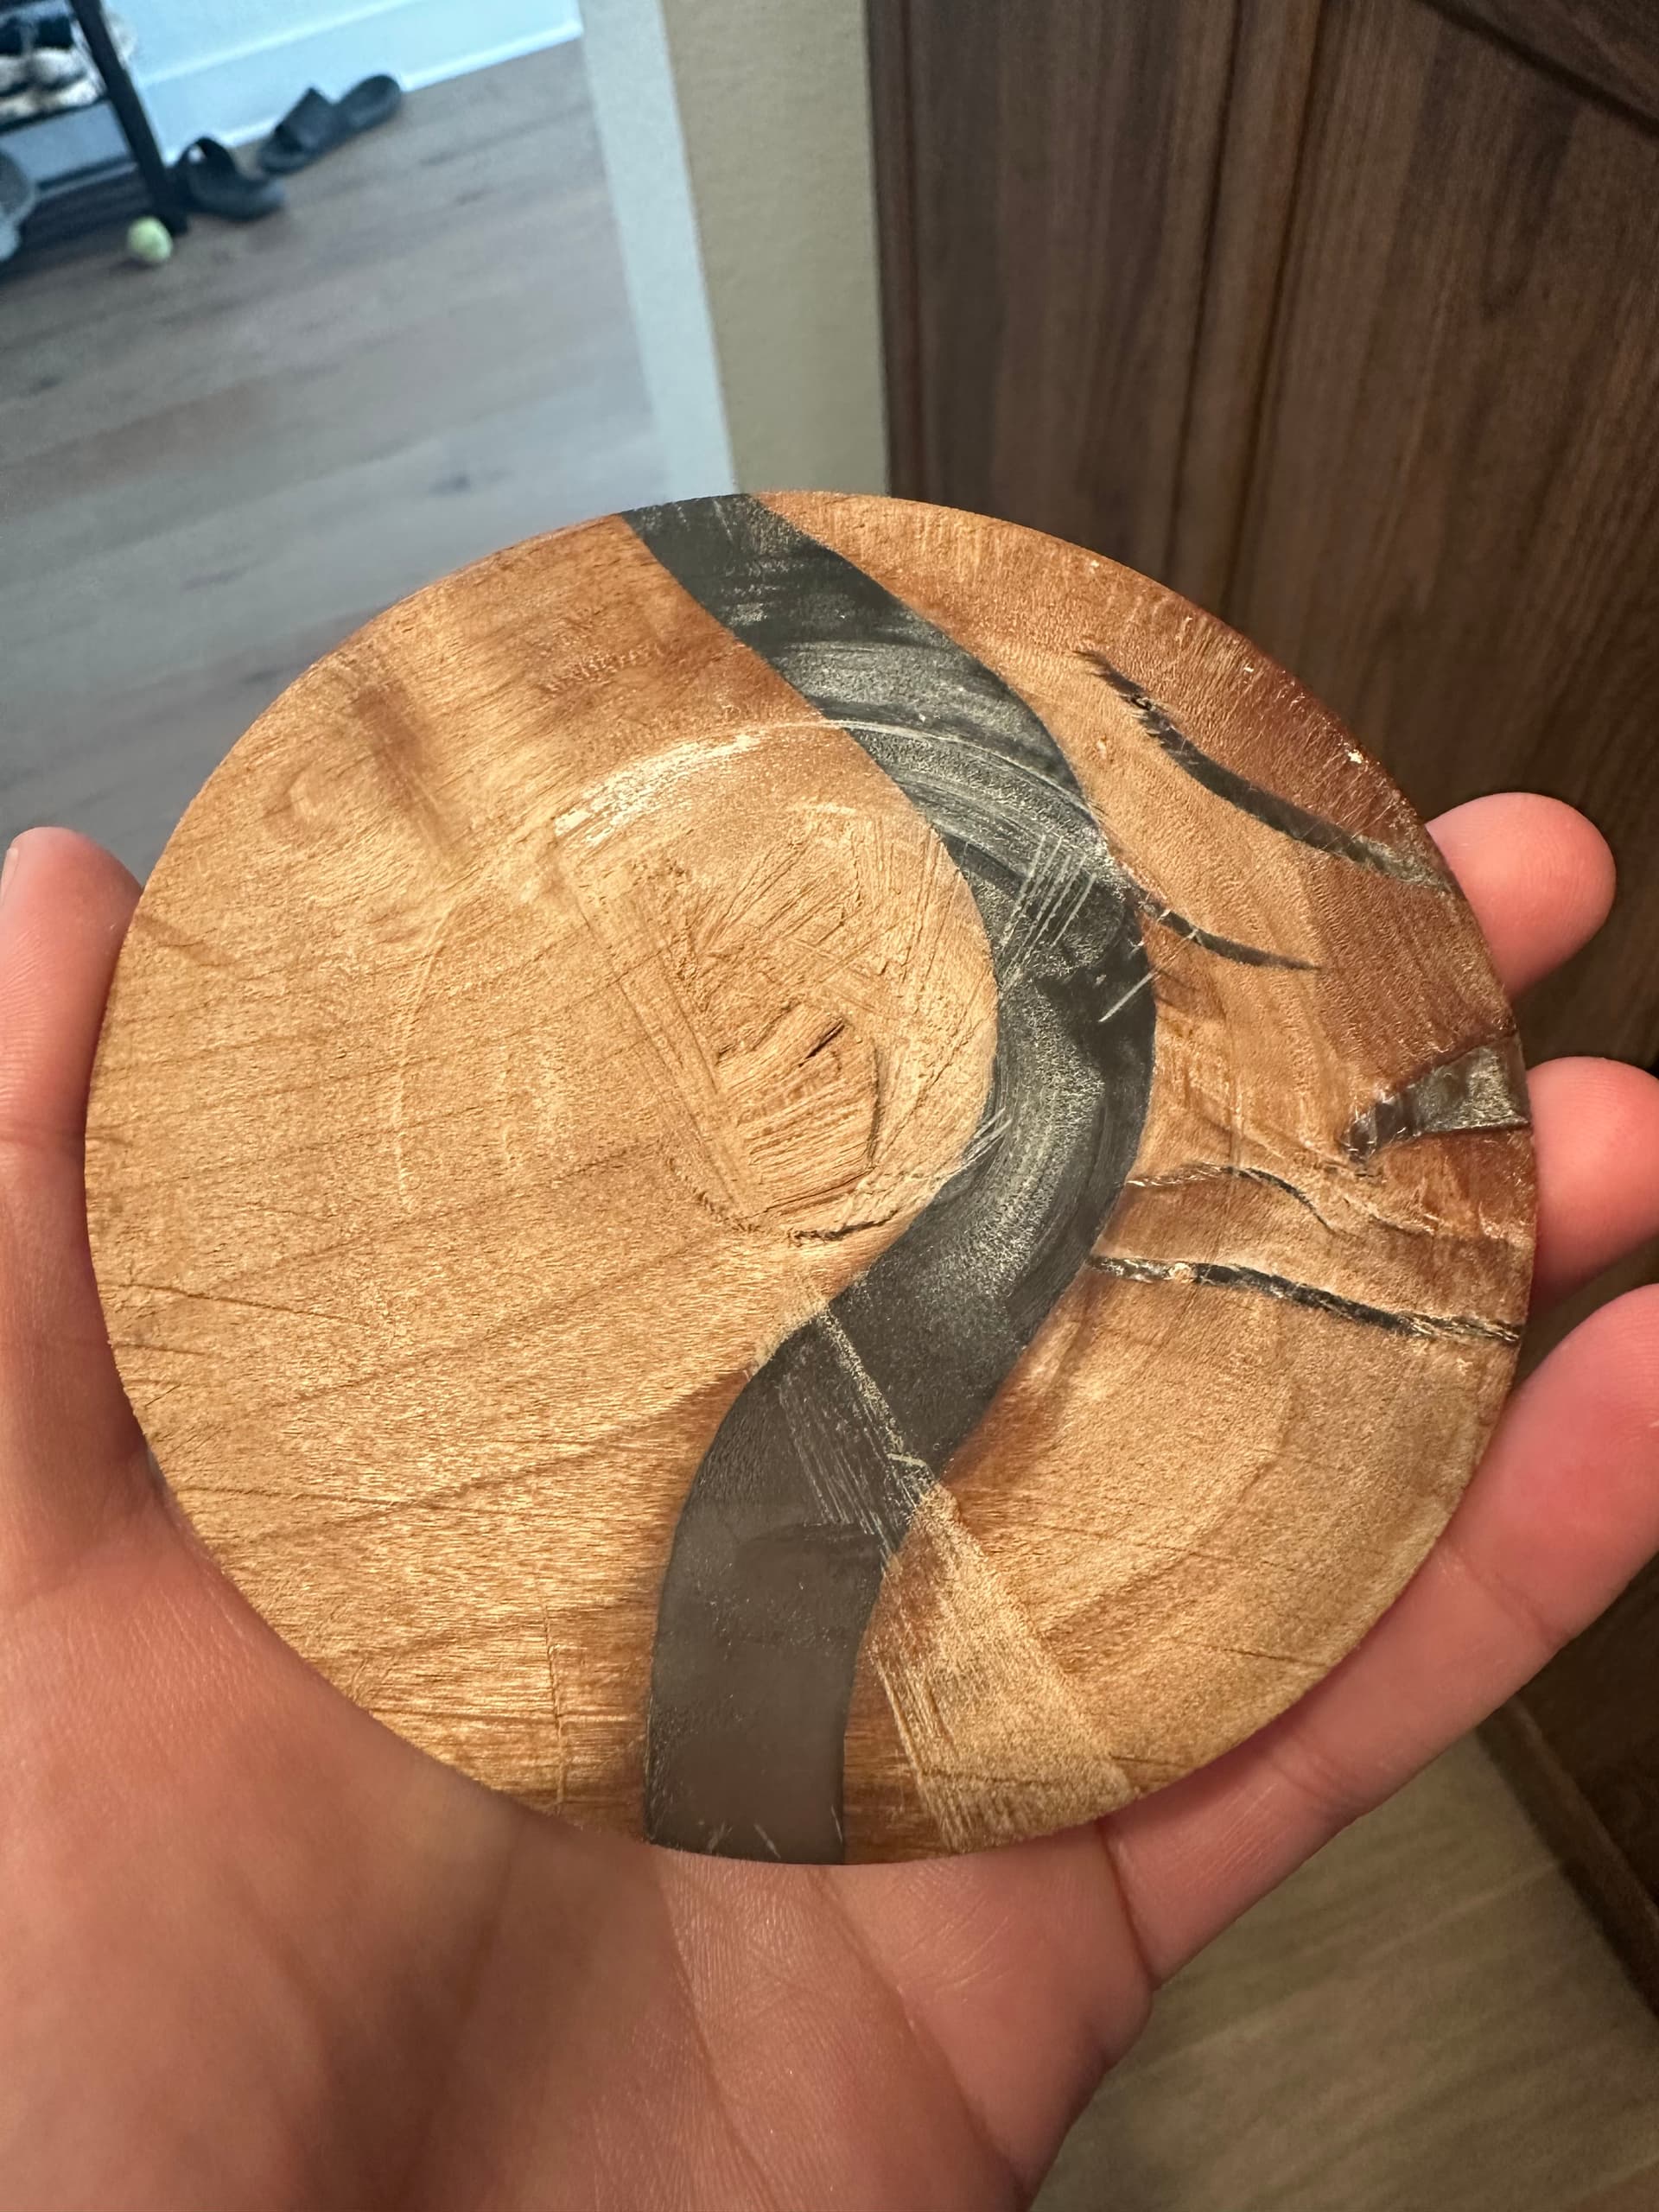
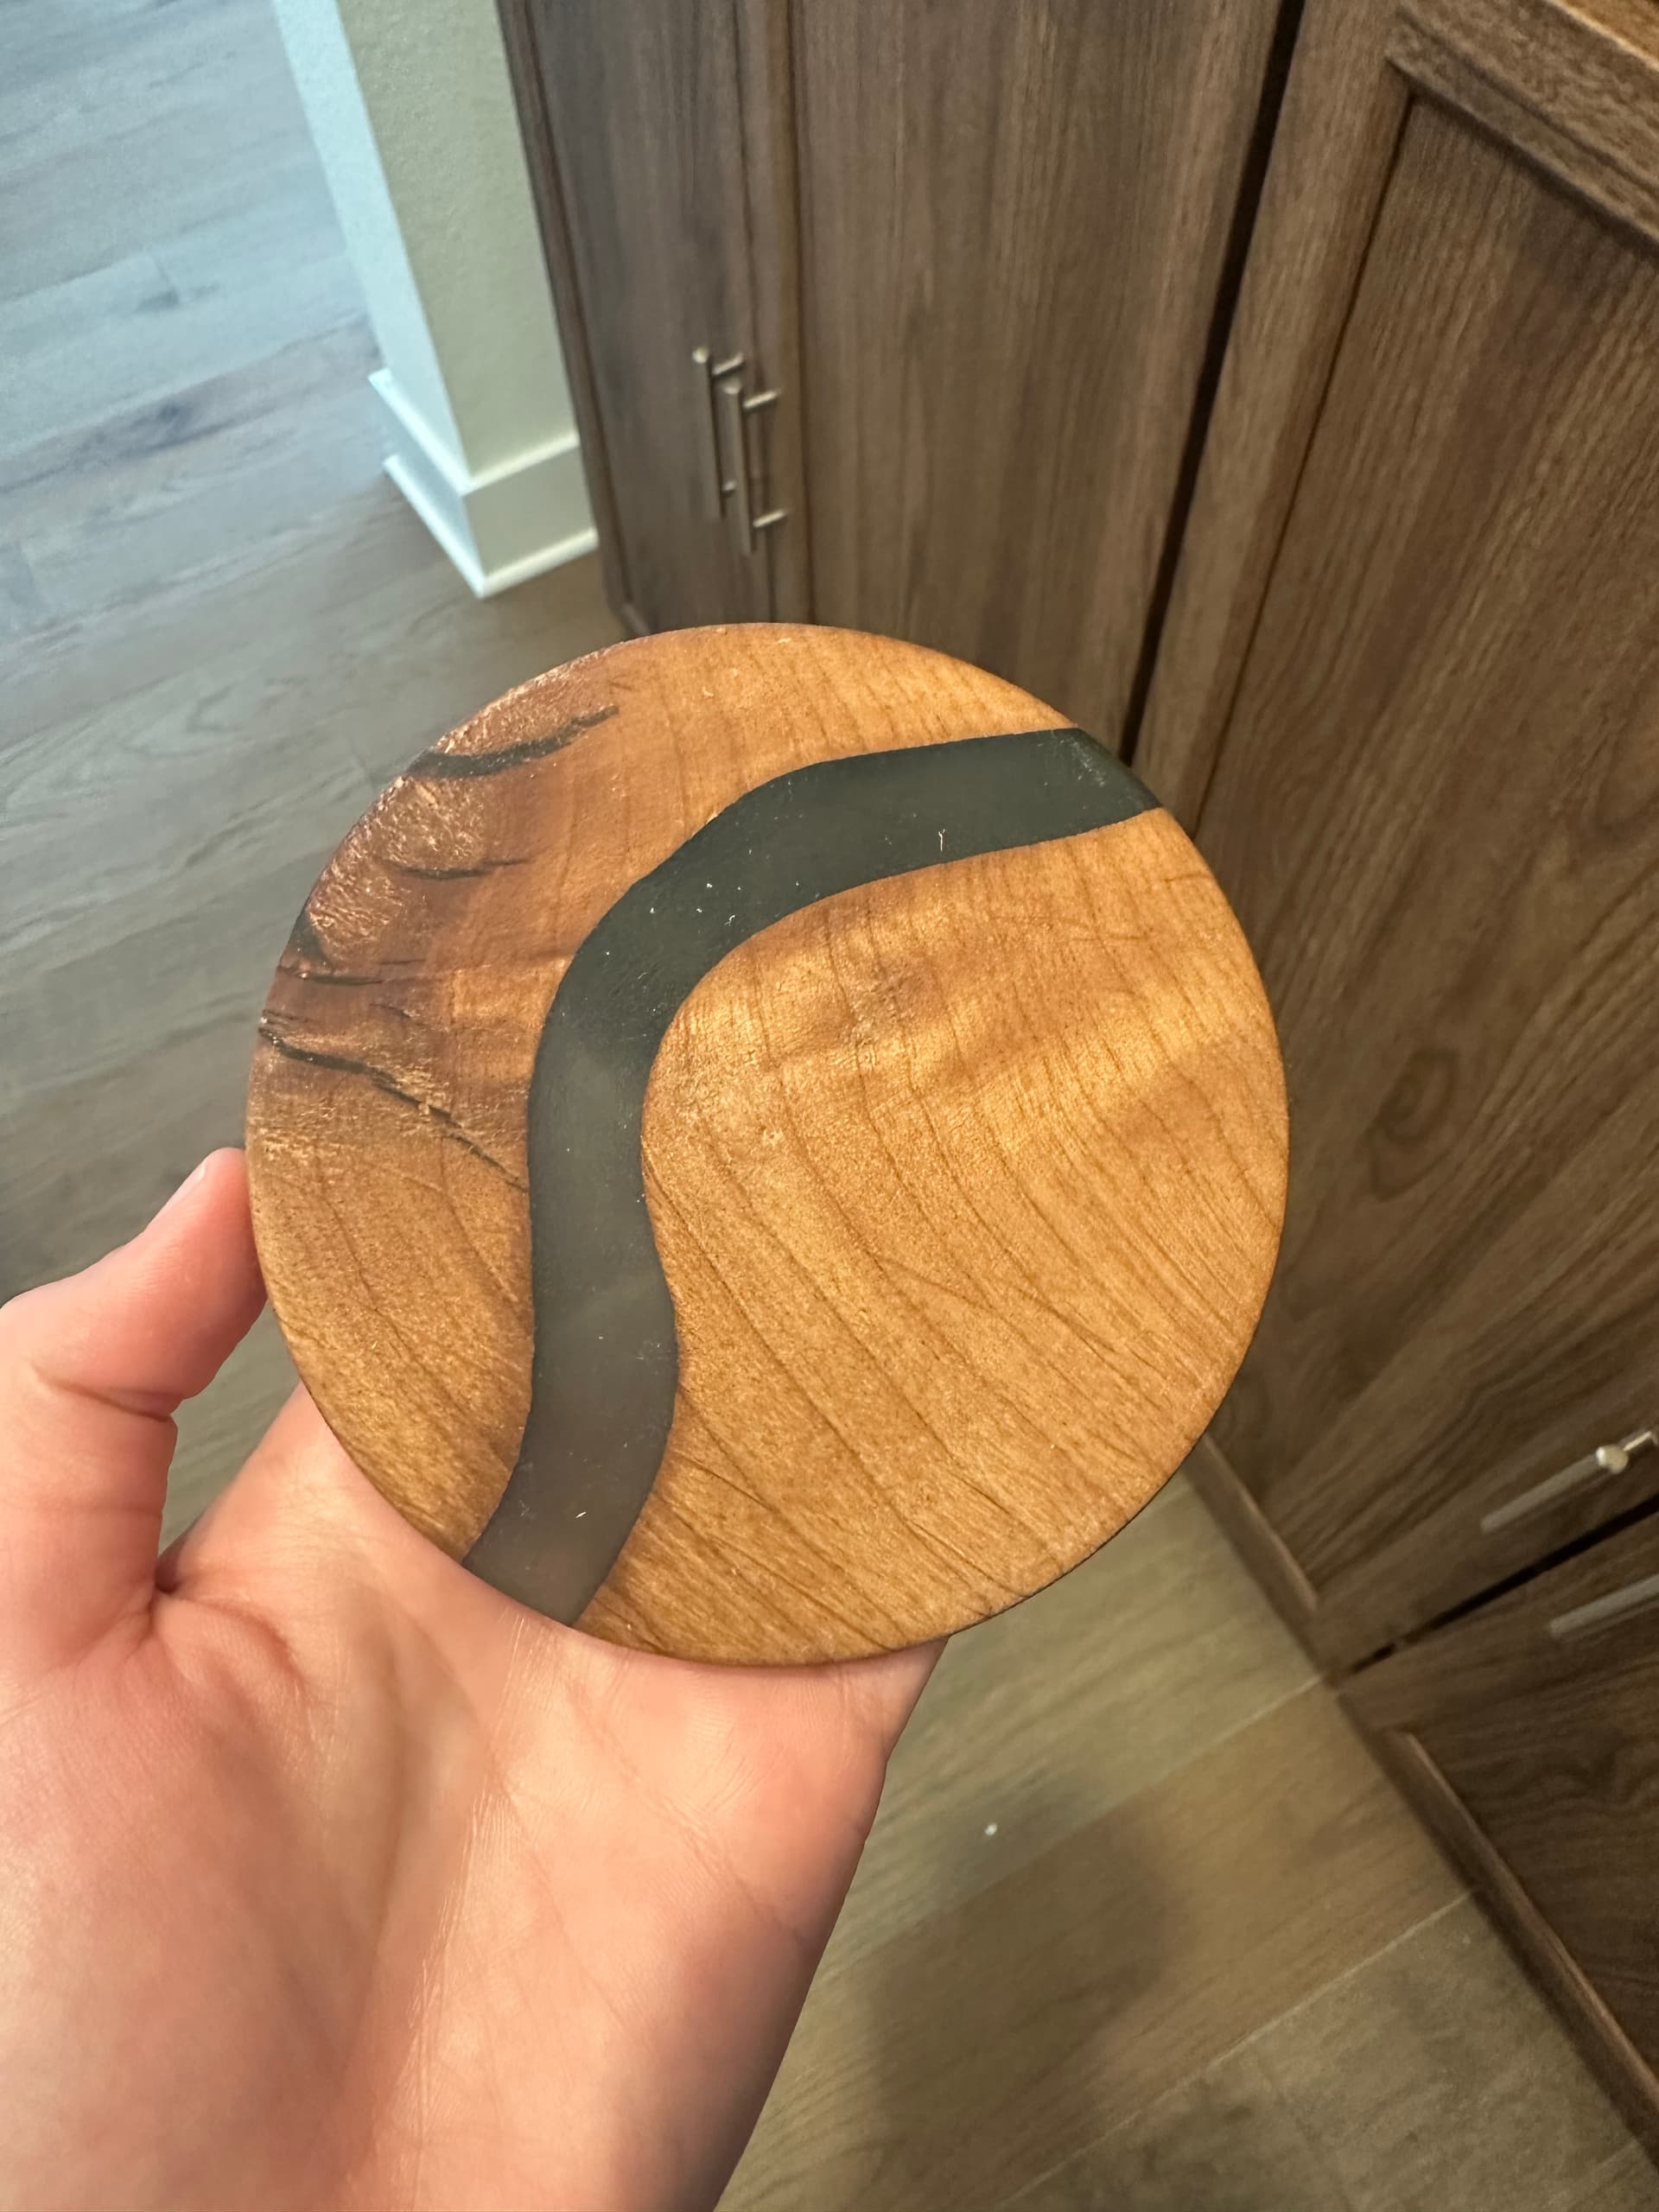
Nothing special with the finish, I sanded up to 600 grit, then finished using Dr Kirk’s scratch free and a beeswax-mineral oil finish.
I’m super happy with the finished piece. My general tips for turning epoxy - use the pressure pot to prevent bubbles, tape your piece well before pour epoxy (double check for any leaks and add tape as necessary) and turn with carbide tools to get the rough shape.
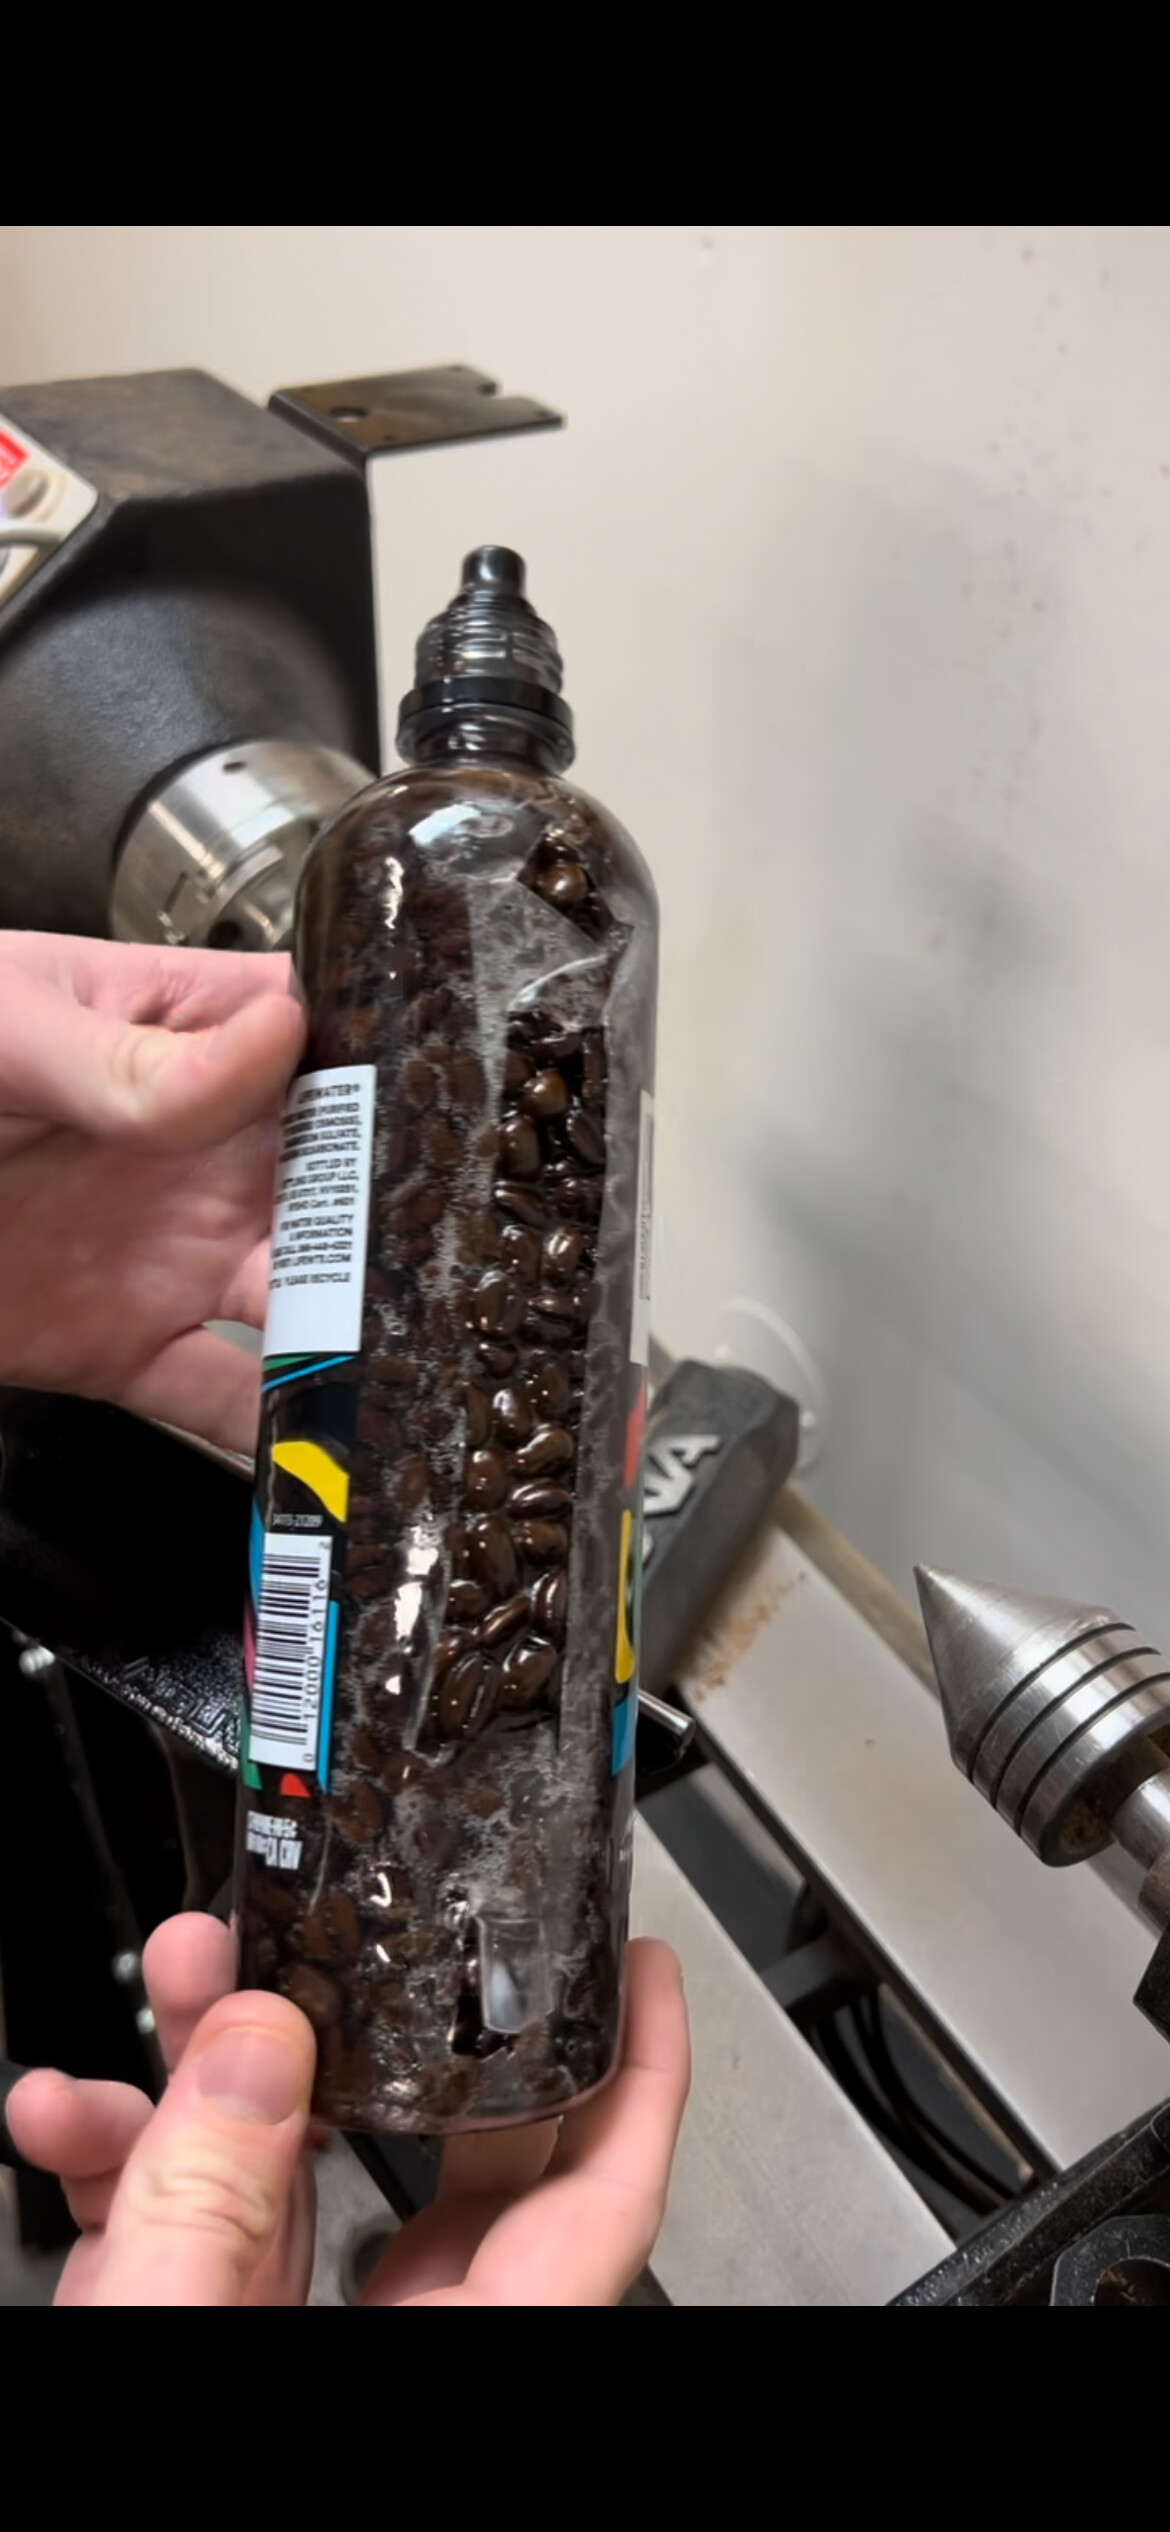
This reminds me of that fever dream back in 2022 when I, for reasons I cannot explain, stuffed an old water bottle with coffee beans and resin and tried turning it into a tap handle for my cold brew. It snapped in half due to the air bubbles and uneven distribution of coffee and resin, not to mention that the resin didn’t really penetrate the beans at all. I don’t think I ever finished it lol. But sure could’ve used a pressure pot or a vacuum chamber then! Good work and happy experimenting
Looks awesome! Thanks for sharing. The steps look great and the results are even better.
“Do deep pours need more time?” Yes they generally do. It also depends on the epoxy type. Some set quicker than others.
Cutting Coasters on the Bandsaw: Remember to have a stable and flat reference before cutting anything round (like coasters or giant log cookies) on the bandsaw. Otherwise the blade can catch and make it a much less fun experience.
Getting the bottoms flat. Next time you may consider adding some extra waste to one side of the piece. Enough that when you mount between centers, you can add a tenon to grab onto. This will allow you to work on one side without the live center, making it much easier to make things flat. You can also undercut slightly, so instead of making it perfectly flat, make sure the edges are flat and the center is concave just enough. That way when it sits on the table you have no issues of a completely flat surface. This would mean you have to have a top and bottom to your coaster.
As for the vase, wow this is great! The wood, the epoxy pattern, everything looks clean and shaped well. If you’re interested in hollowing out a piece like this completely, let me know. It can be done with most of the tools on the shelf and I keep an extra hook-type hollowing tool around for projects like that.