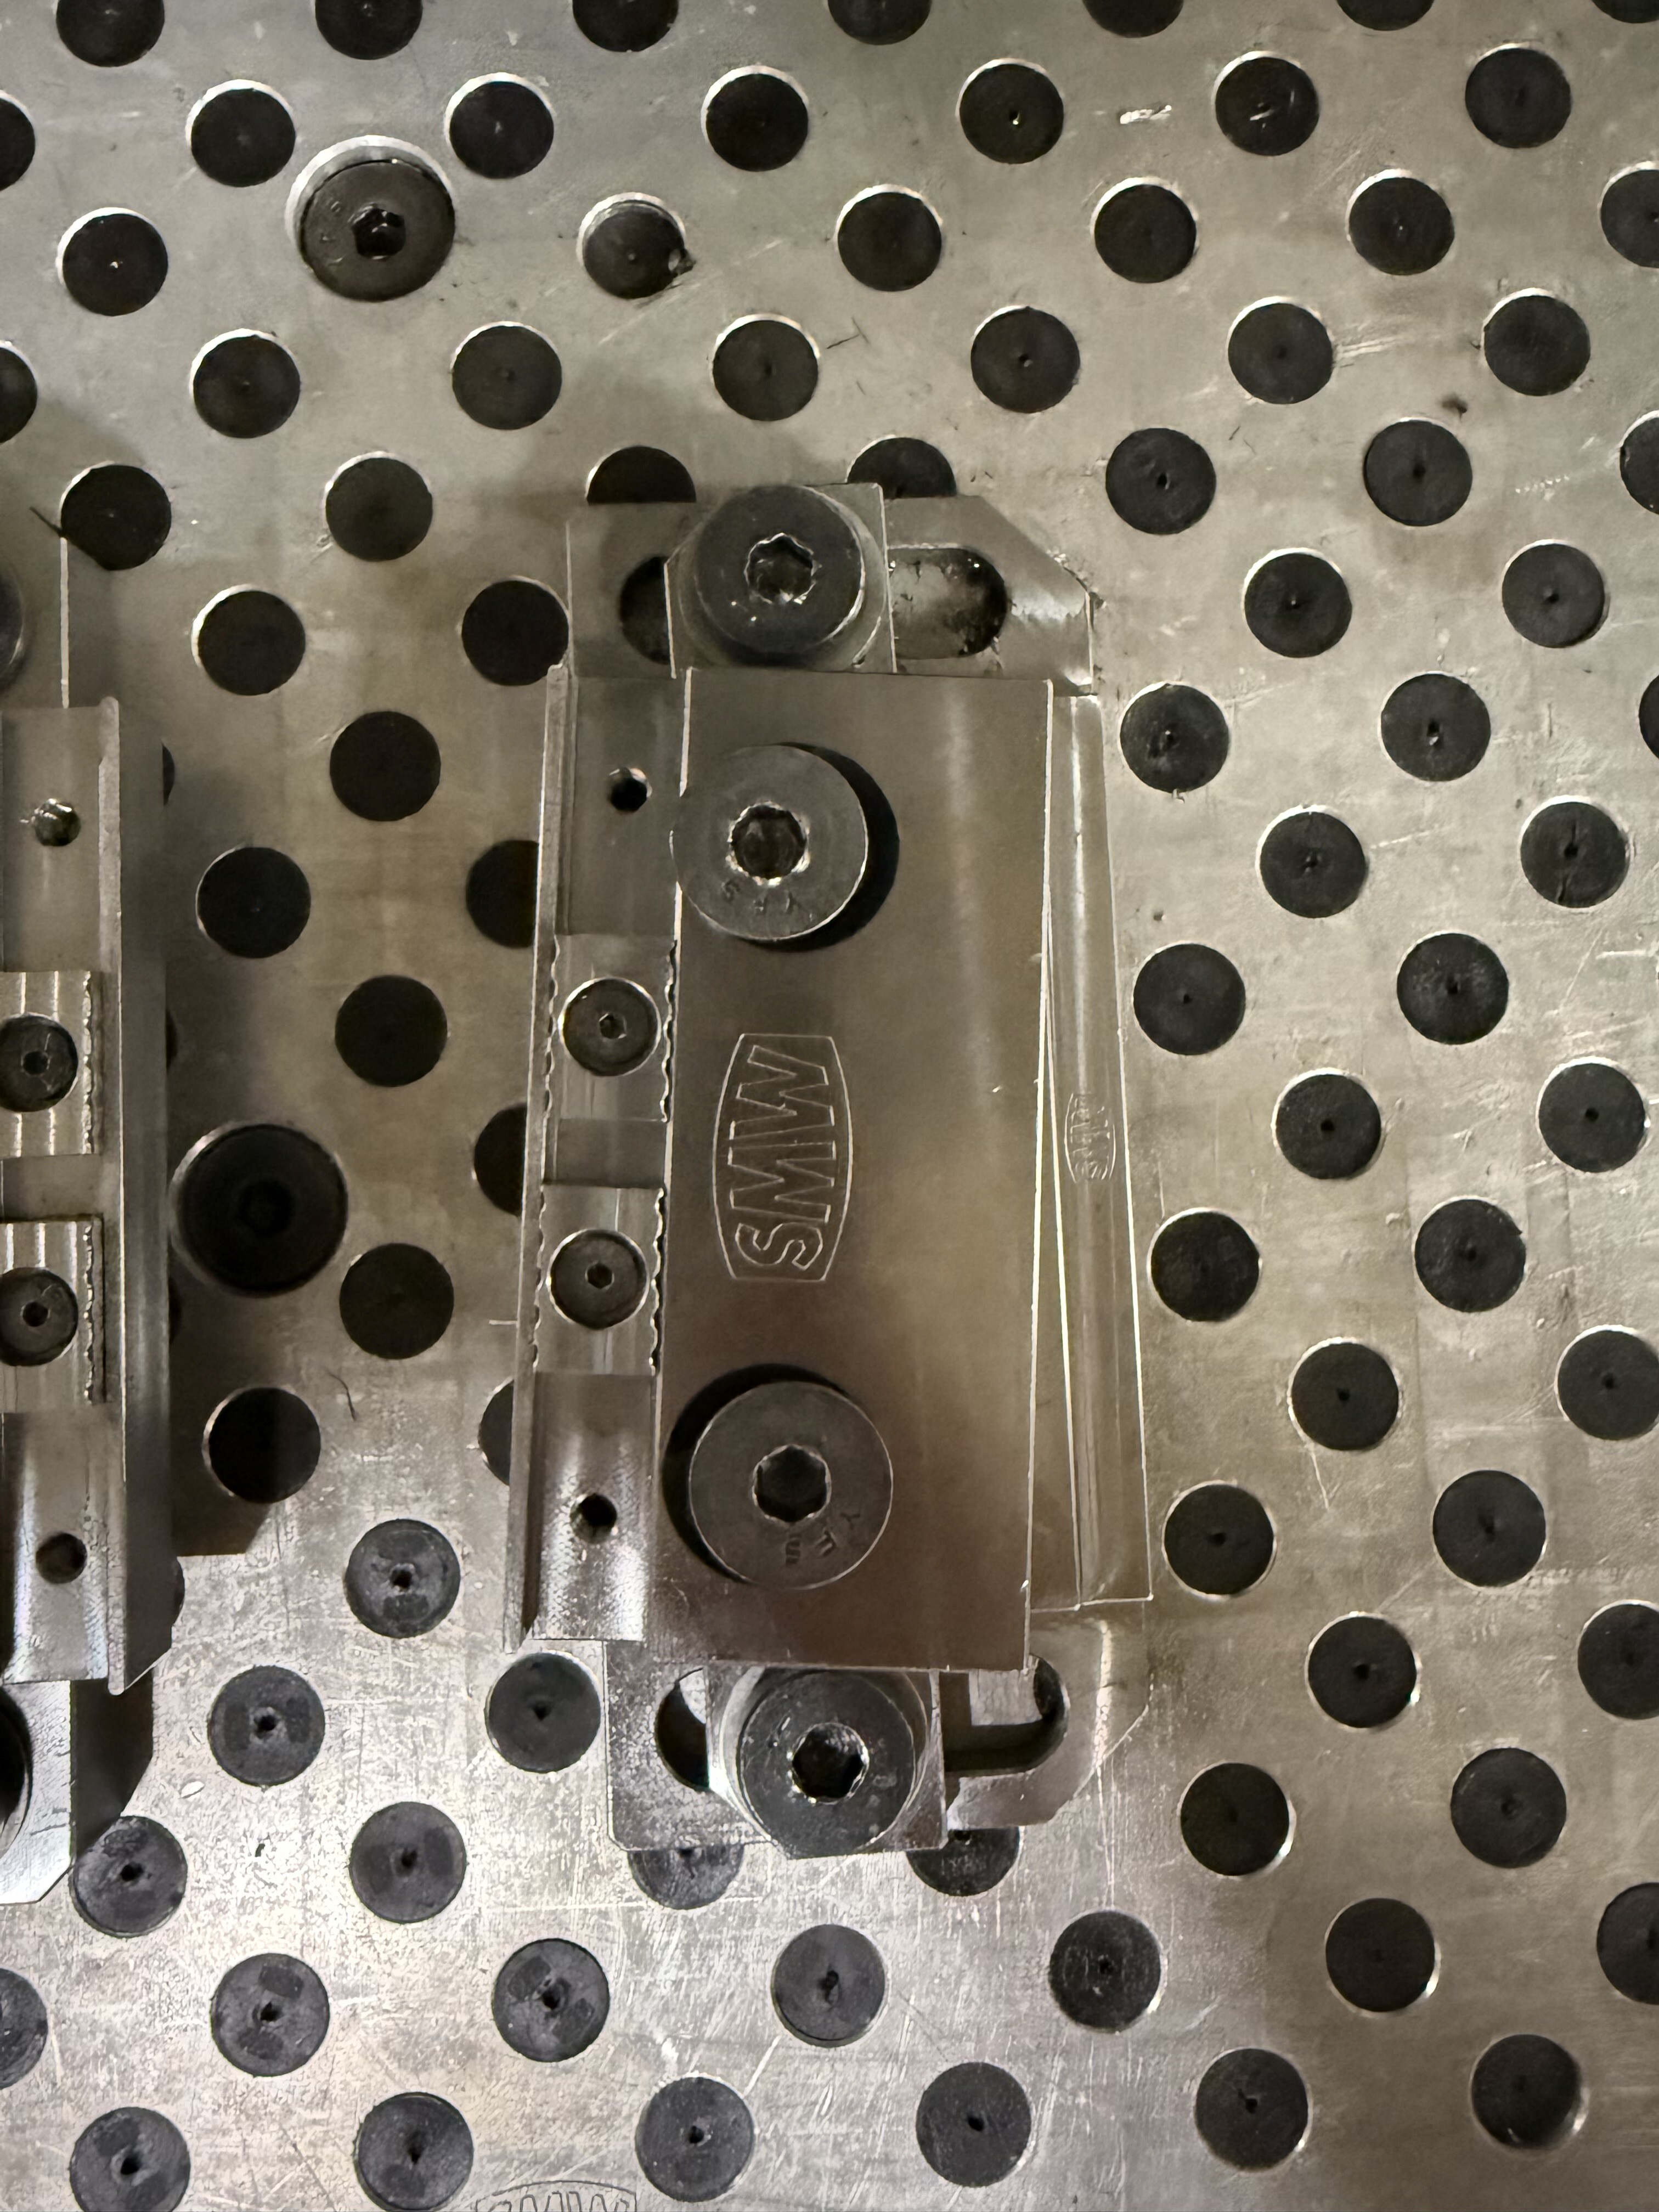
Please read the Wiki and watch a YouTube video about how to use the mod vises on the Tormach. As pictured, the bolts and hardware mounting the vise to the fixture plate are backwards. The big and small corner features on the mounting bolt “washers” are designed to match the equivalent features on the vice base.
It’s not immediately obvious but those pieces have a precision taper to them that locks the vise to the table. They are not machined flat. If you don’t use this correctly you’ll be realizing tens of pounds of clamp force instead of hundreds and it won’t actually produce a positive lock on your stock and you’re likely to send a block of metal flying through the side window of the mill (ask me how I know…).
Also, it’s clear that someone has milled into the fixture plate, which is itself a precision instrument (or was…). There is really no good excuse for this, and if that happened to you, your CAM and work holding workflow is way off. The fixture plate is not a spoil board and your end mill should never be less .25” from it in almost all cases. If you need help or feel uncertain I’m willing to be a second set of eyes/hands to get your skills up.