Making Large Dining Room Table Top- Materials question

Hi Makers,

Question for you furniture makers out there. I am going to be making a large replacement tabletop for my sister-in-law in the new year. They got a large farmhouse style kitchen table last year but it was a laminated MDF top and is unfortunately falling apart. I am wanting to make them a new top to attach to the existing base. I’d like to use pecan wood for its hardness (they have young kids) but haven’t worked with it before and from what I’ve read online it could warp in a larger panel. I’m planning to glue 3-4 inch wide boards together (using dominos) to get to the 96 by 40 inch table top. Am I being fool hardy to try and do this with pecan or will it be ok as long as I get quality, kiln dried lumber?

That beast is going to require stable lumber no matter the species. Good thinking in keeping the boards around 4" as pecan is on the heavy side. So start by reducing the boards to 4.25. It makes them manageable and less of a workout. Pecan/hickory is rather dense and will dull blades rather quick. It does sand rather easy but you will not get a super flat surface, it can be fibrous or grainy. You need at least 1" of thickness but if i was you, i would shoot for the 2" or as close as possible. You’re going to need help once you start gluing and you may very well need to get the clamps. I dont think highly of dominoes but if you decide to use them is going to give you a challenge during the glue-up. You have 8’ length and only around 10-15 minutes of open time of the glue (if you use Titebond 3). So it may require to do it in steps, two boards at a time, if you dont have help. 3/4" pipe clamps or bar clamps would be the best way to go, 12" apart. You mentioned that is going in a ranch house, so i assume is big but check make sure you can get in the door. Good luck!

You may also consider getting your own tablesaw blade. An alternative to dominoes would be a tongue and groove joint or a glue joint (below is a link to a sample, there are different shapes and models)
https://www.amazon.com/Bestgle-Degree-Matched-Banding-Woodworking/dp/B07F1MC6ZH/ref=asc_df_B07F1MC6ZH?tag=bngsmtphsnus-20&linkCode=df0&hvadid=80882941681721&hvnetw=s&hvqmt=e&hvbmt=be&hvdev=m&hvlocint=&hvlocphy=&hvtargid=pla-4584482468640583&psc=1

https://www.amazon.com/Freud-99-031-2-Inch-Reversible-Joint/dp/B0000225XN/ref=asc_df_B0000225XN?tag=bngsmtphsnus-20&linkCode=df0&hvadid=79920869053545&hvnetw=s&hvqmt=e&hvbmt=be&hvdev=m&hvlocint=&hvlocphy=&hvtargid=pla-4583520395476252&psc=1

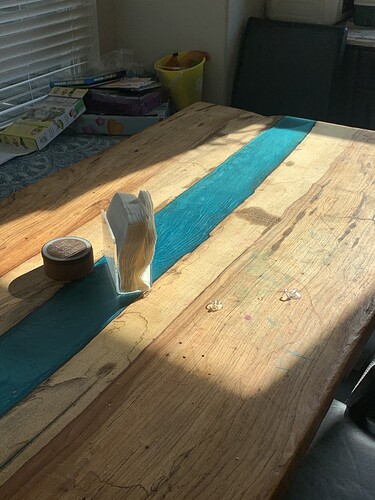
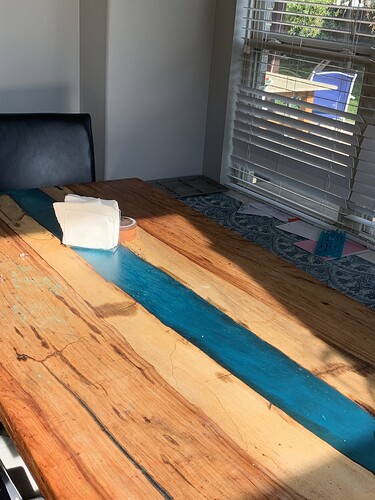
My kitchen table is a large pecan river table that my kids have beaten up for the last five years. I plan on resurfacing it sometime soon. Depending on the particular piece, pecan can be a bit soft in places. This slab was pretty punky and drank up a lot of epoxy when I was making it but now it is rock solid.


2 Likes

thanks for your advice, Jose. I think you’re right, probably going tongue and groove would be better than the dominos. I’ll check out those bits. The router table requires a separate safety training right?

I would also consider adding metal c channel for support.

Something like:
C Channel Steel Support Metal Support Bracing Hidden C Bracket for Table Top Live Edge Slab Woodworking, Black Coat Finish, 7 Holes (36inch) Amazon.com

2 Likes

The router table does not require more than the regular Woodshop Safety Class, but it receives only the minimal necessary coverage now and didn’t even get that consistently in the past. If you aren’t comfortable with it, I would suggest you seek out some videos on table router usage or get someone more experienced to give you a quick refresher.

I’m working on revising my introductory table router class; I hope to have a new session in January but I’m not ready to schedule it firmly yet. So that may not meet your timetable.

1 Like

If you decide to go the tongue and groove method, keep the scrap pieces (cutoffs) that are the same thickness as your boards. There are several ways. Router bits, table saw, and even the CNC (if you’re comfortable using it). Router bits require you to center the cutting blades on the center (up & down) the closer you are in centering those, the less waste youre going to have when surfacing flat. On the table saw, i would make the tongues first by cutting around 1/2 rabets on top and bottom of one side. Then to make the grooves on the other side center the blade as much as possible on the width of your board with the blade 1/2" (or the same as the width of the tongues) then run your board on the edgewith the top of the board against the fence then flip the board which would put the bottom of the board against the fence. The groove should be centered. So now all you have to do is move the fence in or out around 1/16" and repeating the same thing, run board then flip board and make sure youre checking to see if the groove fits the tongue. Sounds dufficult but if you want i can demonstrate this way to you, it is rather easy just time consuming. CNC is pretty much what is done on the table saw making the end mill do what the blade did on the table saw. The basic rule is the tongue shoulg be 1/3 the thickness of the board but you can get creative and make your own rule ir pattern. Remember, you are going to loose some material so make your boards wider to account for that. In other words if you have a 5" board and you make a 1/2" tongue on the surface you end up having 4 1/2." It may or may not equal out with your outside pieces. Also your outside pieces only need to have a tongue or a groove the outsude edge is smooth. Now that i said all that if you’re going with the 2" thickness, if it was me, i would just ensure you have a nice smooth squared edge and glue it. 2" has more than enough holding surface to stay stable.

1 Like

It is straightforward to make tongue and groove joinery with straight router bits with the right setup, but you can also get specialty router bits that make them much easier to setup and cut. It’s a classic money-time trade off.

1 Like

Thank you for all this info, folks! Super helpful.

Any specific thoughts on using pecan and its tendency to warp? Or will doing the tongue and groove and c channel address those issues?

1 Like

I have never done/worked pecan/hickory in that length, so im out. I do know that white oak does not do that at the 8/4 thickness, red oak for the most part will not do that neither will white ash. Sapele/Mahogany will move if it has stress at any thickness. Bubinga will not, nor purple heart but padauk can at times. I don’t like working pecan so i have either talked people into other species or passed on the project solely on that.

1 Like

I’ve made a table top with hickory in the past and it turned out great. I haven’t had a chance to do pecan but don’t be turned off by the rumors. With some good planning you can make it turn out fantastic!

There’s so much to this topic, more than I can cover in my response but you’re in a great place with a lot of experienced folks with different methods of building this.

Glue up and Alignment

Tongue and groove or dominoes won’t help with warping or cupping. They will certainly help with alignment during glue up but… also aren’t necessary. You could make yourself some clamping Cauls to help with alignment if you’re not comfortable with the other methods. It boils down to what you’re comfortable with. We have the tools at Asmbly for all of these options, so get some rest pieces and have fun experimenting!

There’s a lot of mention here about stable wood and proper clamps. Those are key. Let the wood sit for a bit before you work with it. There’s a lot you can get into here, but patience is key. Do two or more milling stages spread over a few days or more so you don’t take off too much wood at once.
Otherwise this will certainly expose the wood and bring some undesired movements.

Plan your clamps! Do some dry runs, maybe clamp 2-3 boards at a time to help keep everything aligned. A second person will be helpful as the table top is near full. Plan for a little bit of sanding or surfacing after the glue up, so be sure to leave yourself an extra 1/8" or more of thickness depending on your confidence level.

Long Term Support

The end goal is to make sure your table top is constructed in a way to prevent warping and cupping through the seasons.
One option is C-Channels. They screw into the bottom of the table in a way that allows the wood to move without negative distortion.
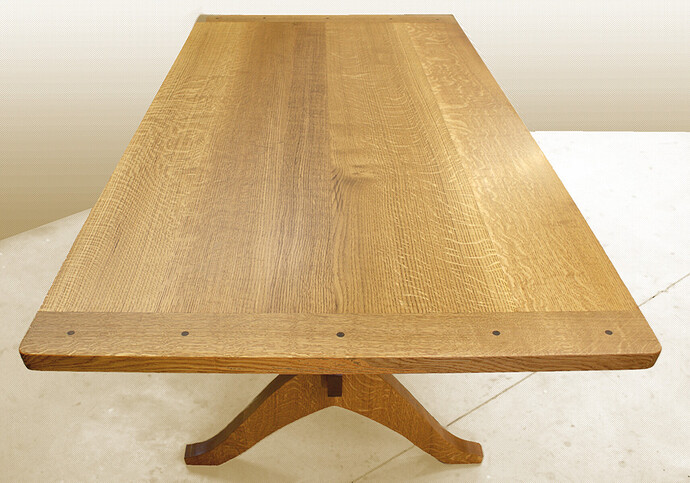
Another option, for edification, is breadboard ends. This certainly fits a farmhouse look but have a lot more effort involved. There’s some hidden joinery and specifically placed glue spots that keep your top lasting generations without extra hardware.

The last thing is how you’ll attach the table top to the base. Make sure to leave some room for the top to expand and contract. Some examples are z-clips, figure-8 clips, or homemade “buttons” which are similar to the former and can be significantly stronger.

Thickness

I built a few tables with pretty beefy legs, the top came out to about 1.75" thick. I started close to 2". A thick top is nice, but consider the whole table and what you think makes sense. C Channels will need some specific minimum thickness, so check on those if you buy them.

Happy new year and enjoy the build
3 Likes

Pecan and hickory are sold in most lumber yards interchangeably except in sawmills where they put more value at pecan (in this part if the country)or what they call “spalted pecan” wich in most occasions is pretty much pecan thats close to a roten start. Pecan and hickory have pretty much the same qualities with the exception that hickory for the most part does not have the big color variation.

Something that could affect it warping would be if it was going to a place that has a much different humidity/air moisture than the place where you make it. You want the moisture content to be 8% - 10% before you begin milling the wood.

I would recommend get the wood home from the lumber yard and put it in your house for 1 - 3 weeks. (Since it’s going to live indoors after making it, this helps it adjust to the humidity/moisture level of an indoor environment.)

Then rough cut it - [cut it an inch longer and about 1/2" or 1/4" thicker and wider than you need it.]

After rough cutting, let it rest another week indoors to allow it to warp and do its thing. Make sure to ‘sticker’ it during this week. [Stickering is when you stack wood and put wood sticks between each layer to let air circulate. This helps the wood dry evenly on all faces/edges and will keep warping down.]

After that, do a complete milling, then do your glue up right after that. I would agree with the other person who said to glue up a few boards at a time (say, batches of 4 boards) - that helps you stay ahead of the glue drying. Let it dry a good 1 1/2 - 2 hours, then glue again, until you have the whole top glued.

I don’t have an opinion on what to do between the boards, as I’ve not glued up anything that massive before.

It may still warp when it gets to its final destination if it’s going someplace vastly more wet or more humid than here. There are steps that can be taken once it’s in place to help bring it back to flat, so you may need to be prepared for that.

Making sure it’s had ability to adjust to indoor climate and taking all that time/care prepping it before you start cutting on it will help it warp as little as possible.

I am not sure about this part, but it may help keep it from warping so much - consider putting some sort of cross beams on the underside using something that doesn’t warp easily. I could be off base here - so hopefully others have some experience with this. Again, I’ve not glued up something this massive size before.

Good luck - it’s going to be gorgeous!!

I’ll add in two thoughts on this:

First, here’s a free wood movement calculator that will help you: Wood Movement Calculator

Second, another method to reduce warping or cupping is to add a breadboard with drawbore pins to both ends. This has a very distinctive appearance and may not fit your design criteria.

I love the the coloring of pecan, but I’ve not yet personally worked with it. That being said, my next project is a side table that I’m going to make with pecan.

Good luck with table, it’s going to be gorgeous.
Michael

1 Like

There are a lot of great technical tips and advice on the thread, but based on the information given is a bit overkill. He’s calling it a table top but the reality is just a big axx board that should be free to move tangentially and longitudinally. The big axx board is pretty much the size of a work bench in the shop, looks small but once you put it in a “normal room” is going to take a lot of real state. Based on the length, bread boards would not look proportional so keep it stupid simple (kiss design method) and let the wood, the size, or both make the statement. Maybe some ornate architectual design on the base. One thing that is easy and would really hit it out of the park would be to carve the brand of the rach on the center of the table with the CNC. Then you could fill with a wood inlay, epoxy, or just leave it as as is. My two cents and im out!

2 Likes