I’m a home whittler as a hobby and I’m about to work my way through the process of carving some wax figures and learning bronze/silver casting via the lost wax method. Just curious - anyone on here have any experience with this?
(and if anyone else is interested I’m happy to share my learnings)
My mother used to be a jeweler and when I was younger I remember watching her do some lost wax casting for rings and such – I don’t remember much of the details so I likely wont be of much help, but if you have any specific questions maybe I could ask her. I’m interested in the technique as well, so feel free to share anything you learn. Not sure if it would be possible to do the actual casting at the hackerspace unfortunately, as we’re not allowed to have open flames, but form making process could happen there.
I know at home in Dallas we have a bunch of molds made out of silicone or something similar that you could use to make repeat wax castings to then make the destructible plaster molds. Perhaps I could grab a few of those to practice with next time I’m in Dallas.
Thanks @gordoa40 - I definitely might reach out with questions as I go! I will also be happy to share what I learn. Good to know about the open flames! I do have home garage space for the casting centrifuge - if anyone else wants to give it go I’d be happy to share that home setup for the final step (after I get there, myself)
I’ve been making a more than a few silicone molds this past year. I recently discovered a YouTube channel that offers a lot of advice on mold making that I’ve found helpful.
A lot depends on the scale of the model and the material your going to cast. There are numerous strategies for production molds vs onetime “waste” molds. Money always enters the conversation. Plaster is cheep. Silicone is expensive. Silicone can be easy but there are a LOT of gottchas like viscosity, bubbles and de gassing in a vacuum pot. The mold can trap bubbles of the casting material.
I could probably offer you some guidance and point you in some directions for methods and resources. but we’d need to have a conversation regarding what it is you’re casting.
Thanks David - that is a fantastic video. I will check out the rest of the channel for sure. The figure he casts is actually similar in size and complexity to what I do (my insta is @hewnutterance for some examples)… This is the first time I’ll carve in wax as opposed to wood.
The only real difference here is that I want to cast metals at the end… I know of a few paths so far… I wonder if silicon is an option with metals as well? I had been thinking plaster all along just due to the videos I’d been seeing.
Going from wax to metal presents it’s own challenges. I took a class 14 years back sculpting a figure in wax as an art class. My project ended in disaster. But teachable moments.
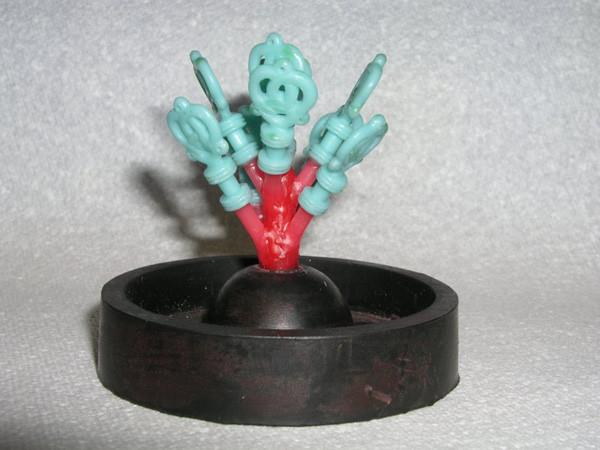
My original was an aluminum pitcher handle for a bunch of doors for a house in Travis Heights. I made a cast in which to pour wax so that I could make multiple copies.and cast a bunch of these. I needed about 14 I think.
When I poured the wax into my plaster mold, the wax shrank in size considerably - maybe 7%. As it cooled it also distorted its geometry - far more than I realized at the time. The surface was also flawed and attempting to correct the geometry on 14 waxes proved daunting…no impossible. I created flat facets instead of smooth geometry attempting to fix the problems. The completed waxes bore only a rough resemblance to the original.
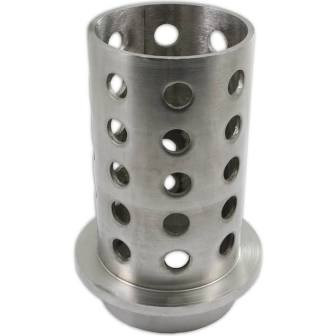
Casting was also a disaster. I separated the waxes and put them on a central sprew that I would later place in a large can and fill THAT with plaster. The instructor was to take my two cans and heat them up to remove the wax leaving a cavity for the metal to be poured in the follow process.
The next step involved heating the plaster in the cans to vaporize the remaining wax prior to pouring the molten bronze into the mold. The structure of the class meant that I was not present for this process, but because of the number of students there were two weekends devoted to that step. I needed to take my first cast and cut off the parts for post processing and return the bronze from the sprew to the instructor for the pour the next weekend.
Life happened and I didn’t get the sprew bronze back to him the day of the pour. He’d already poured my second mold however but with insufficient bronze to fill the mold and all THOSE casting were basically scrap. Unusable except to another artist.
There were lots of takeaways I could offer you to address what I think you are attempting to do. But you could communicate with me directly at my email david78737@gmail.com for additional guidance. I’m happy to share what I know but cannot say you will be successful with information I can impart. But we can have that conversation.
Here is a resource you might want to explore. White metal casting is a technology used apparently for mass production. Not that I’m implying that anyone want to go into mass production but more there are people who cast stuff all the time and they have some interesting production technology that might be interesting to look at and apply to your own situation.
Look for other YouTube videos on white metal casting that demonstrate the whole process. Fascinating stuff to feed your inner nerd.
Thanks for the head’s up about this article. I had seen that formlabs had a resin for casting - and I noticed hackerspace has a formlabs printer. I’m more interesting in hand carving the model (just because hand carving is a main hobby of mine)… but I could imagine that being able to 3d print a part and then cast in bronze or something would be fun…
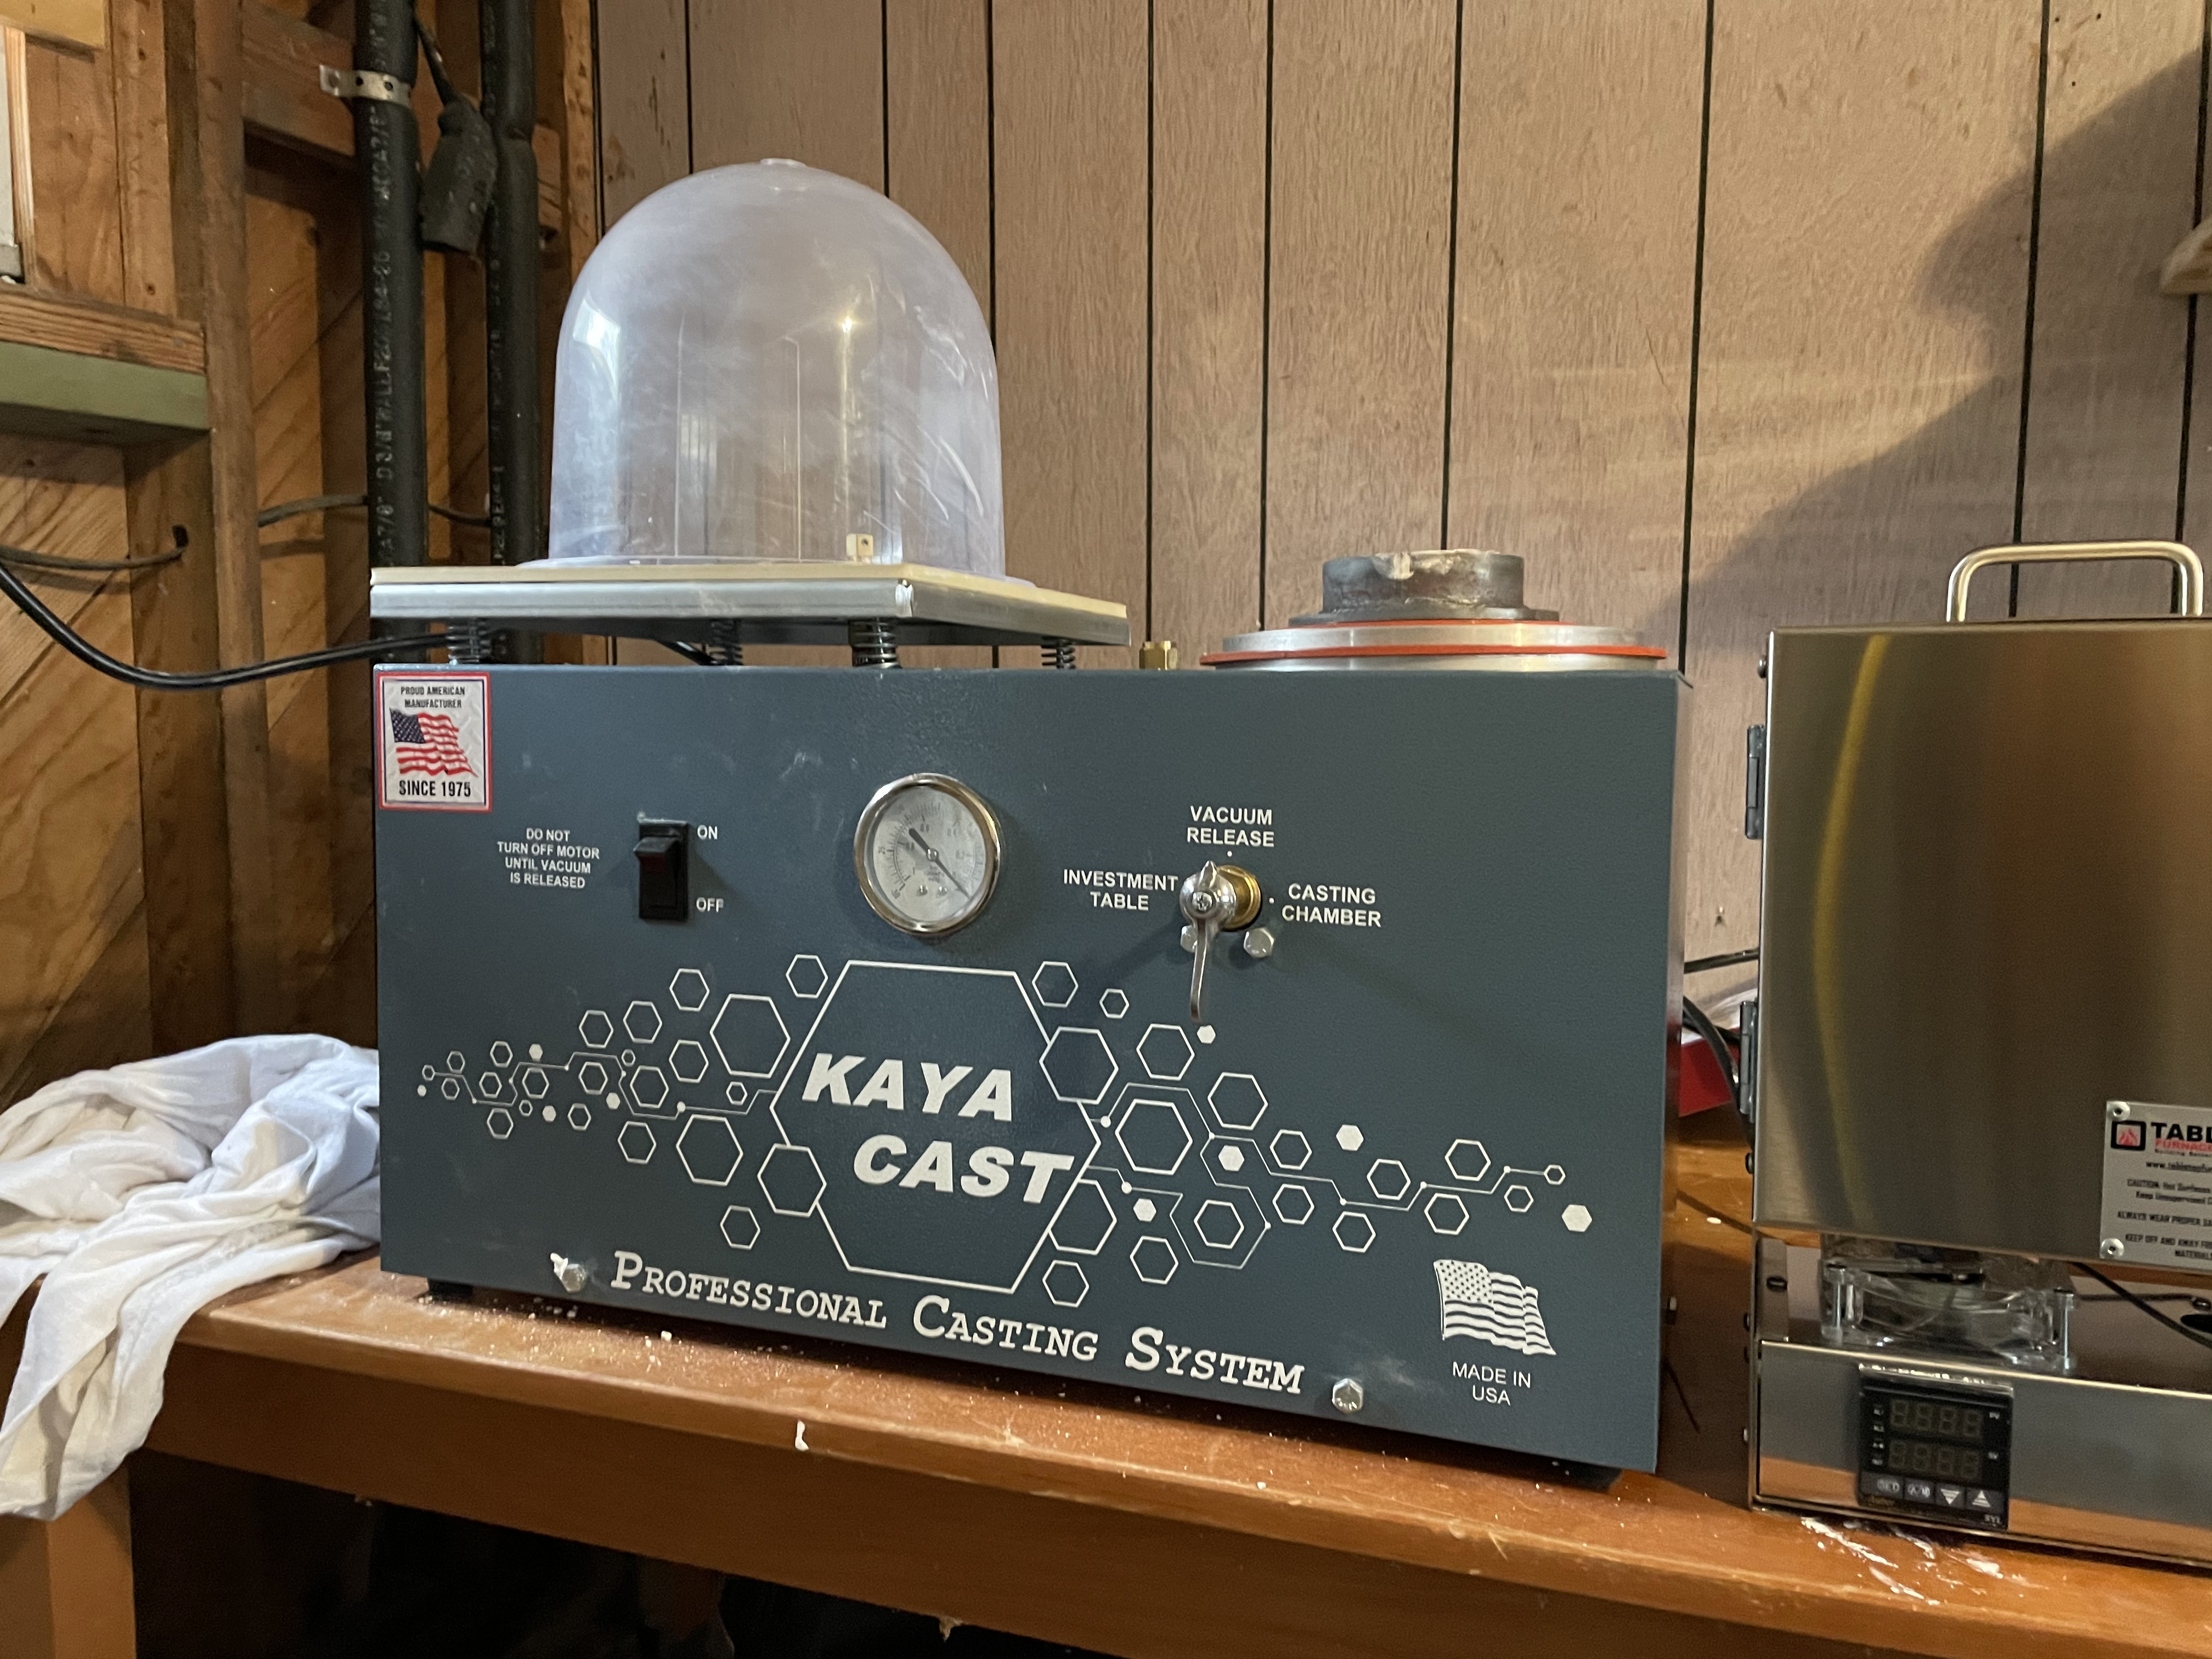
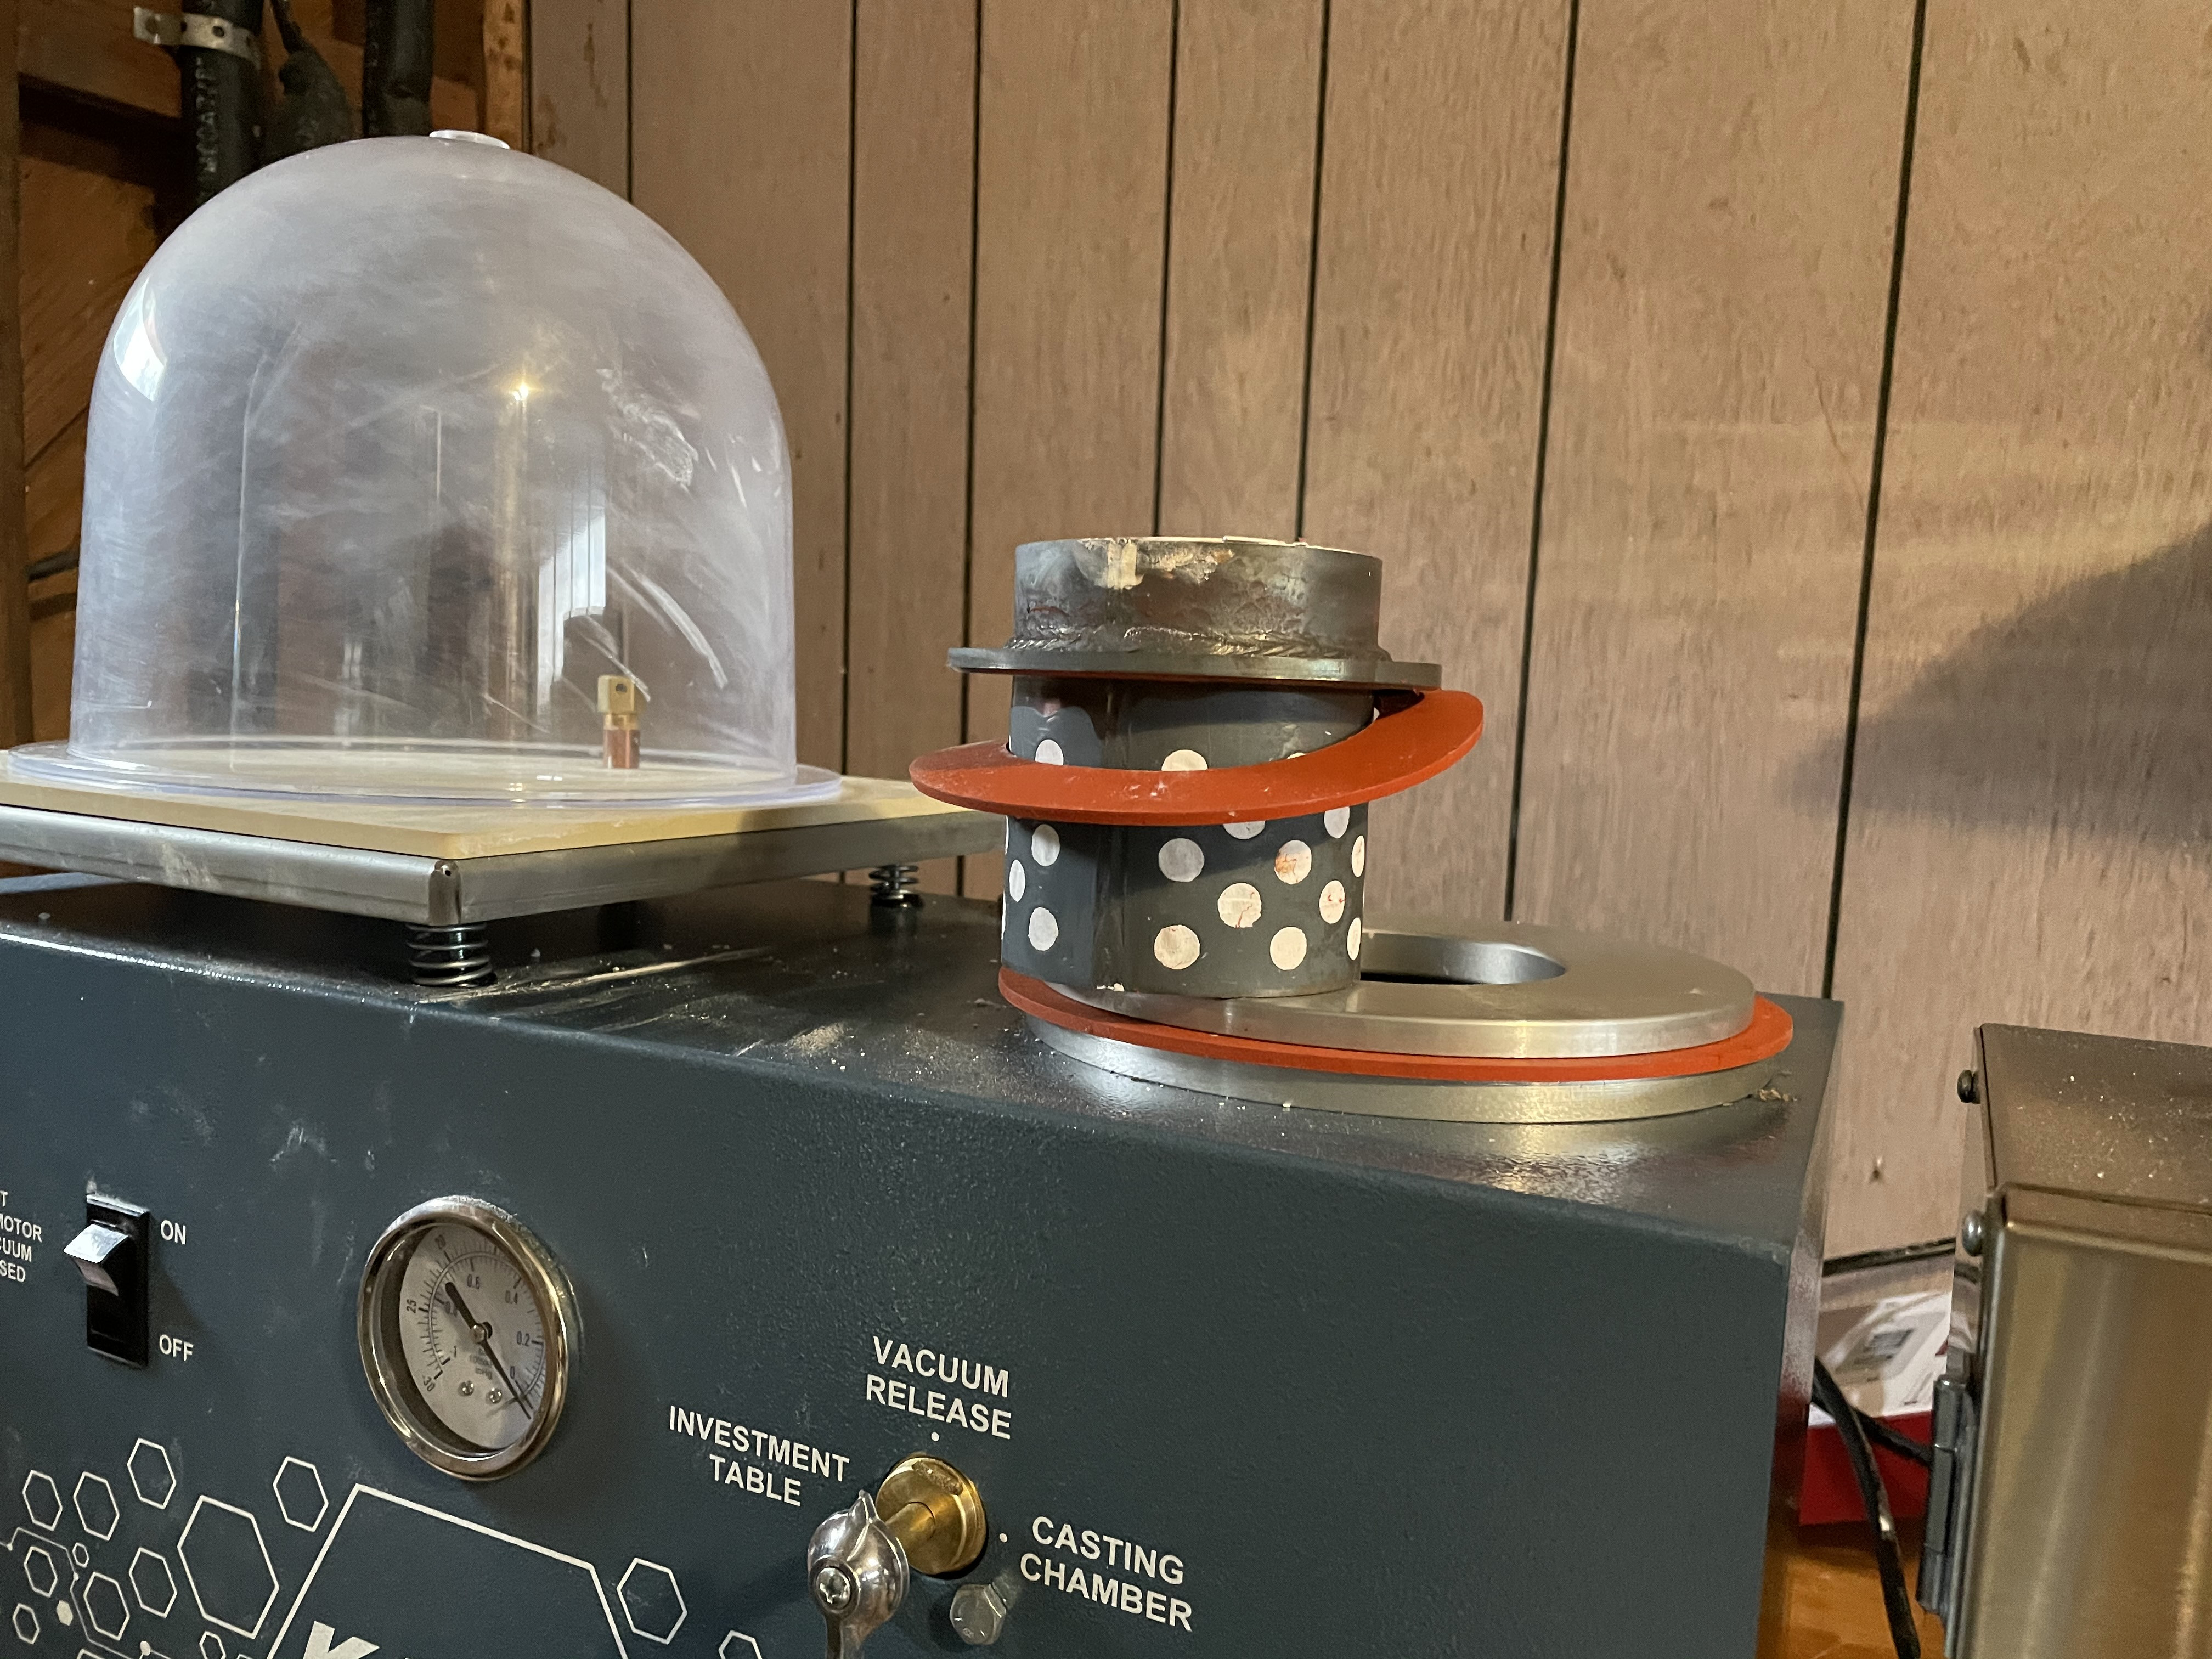
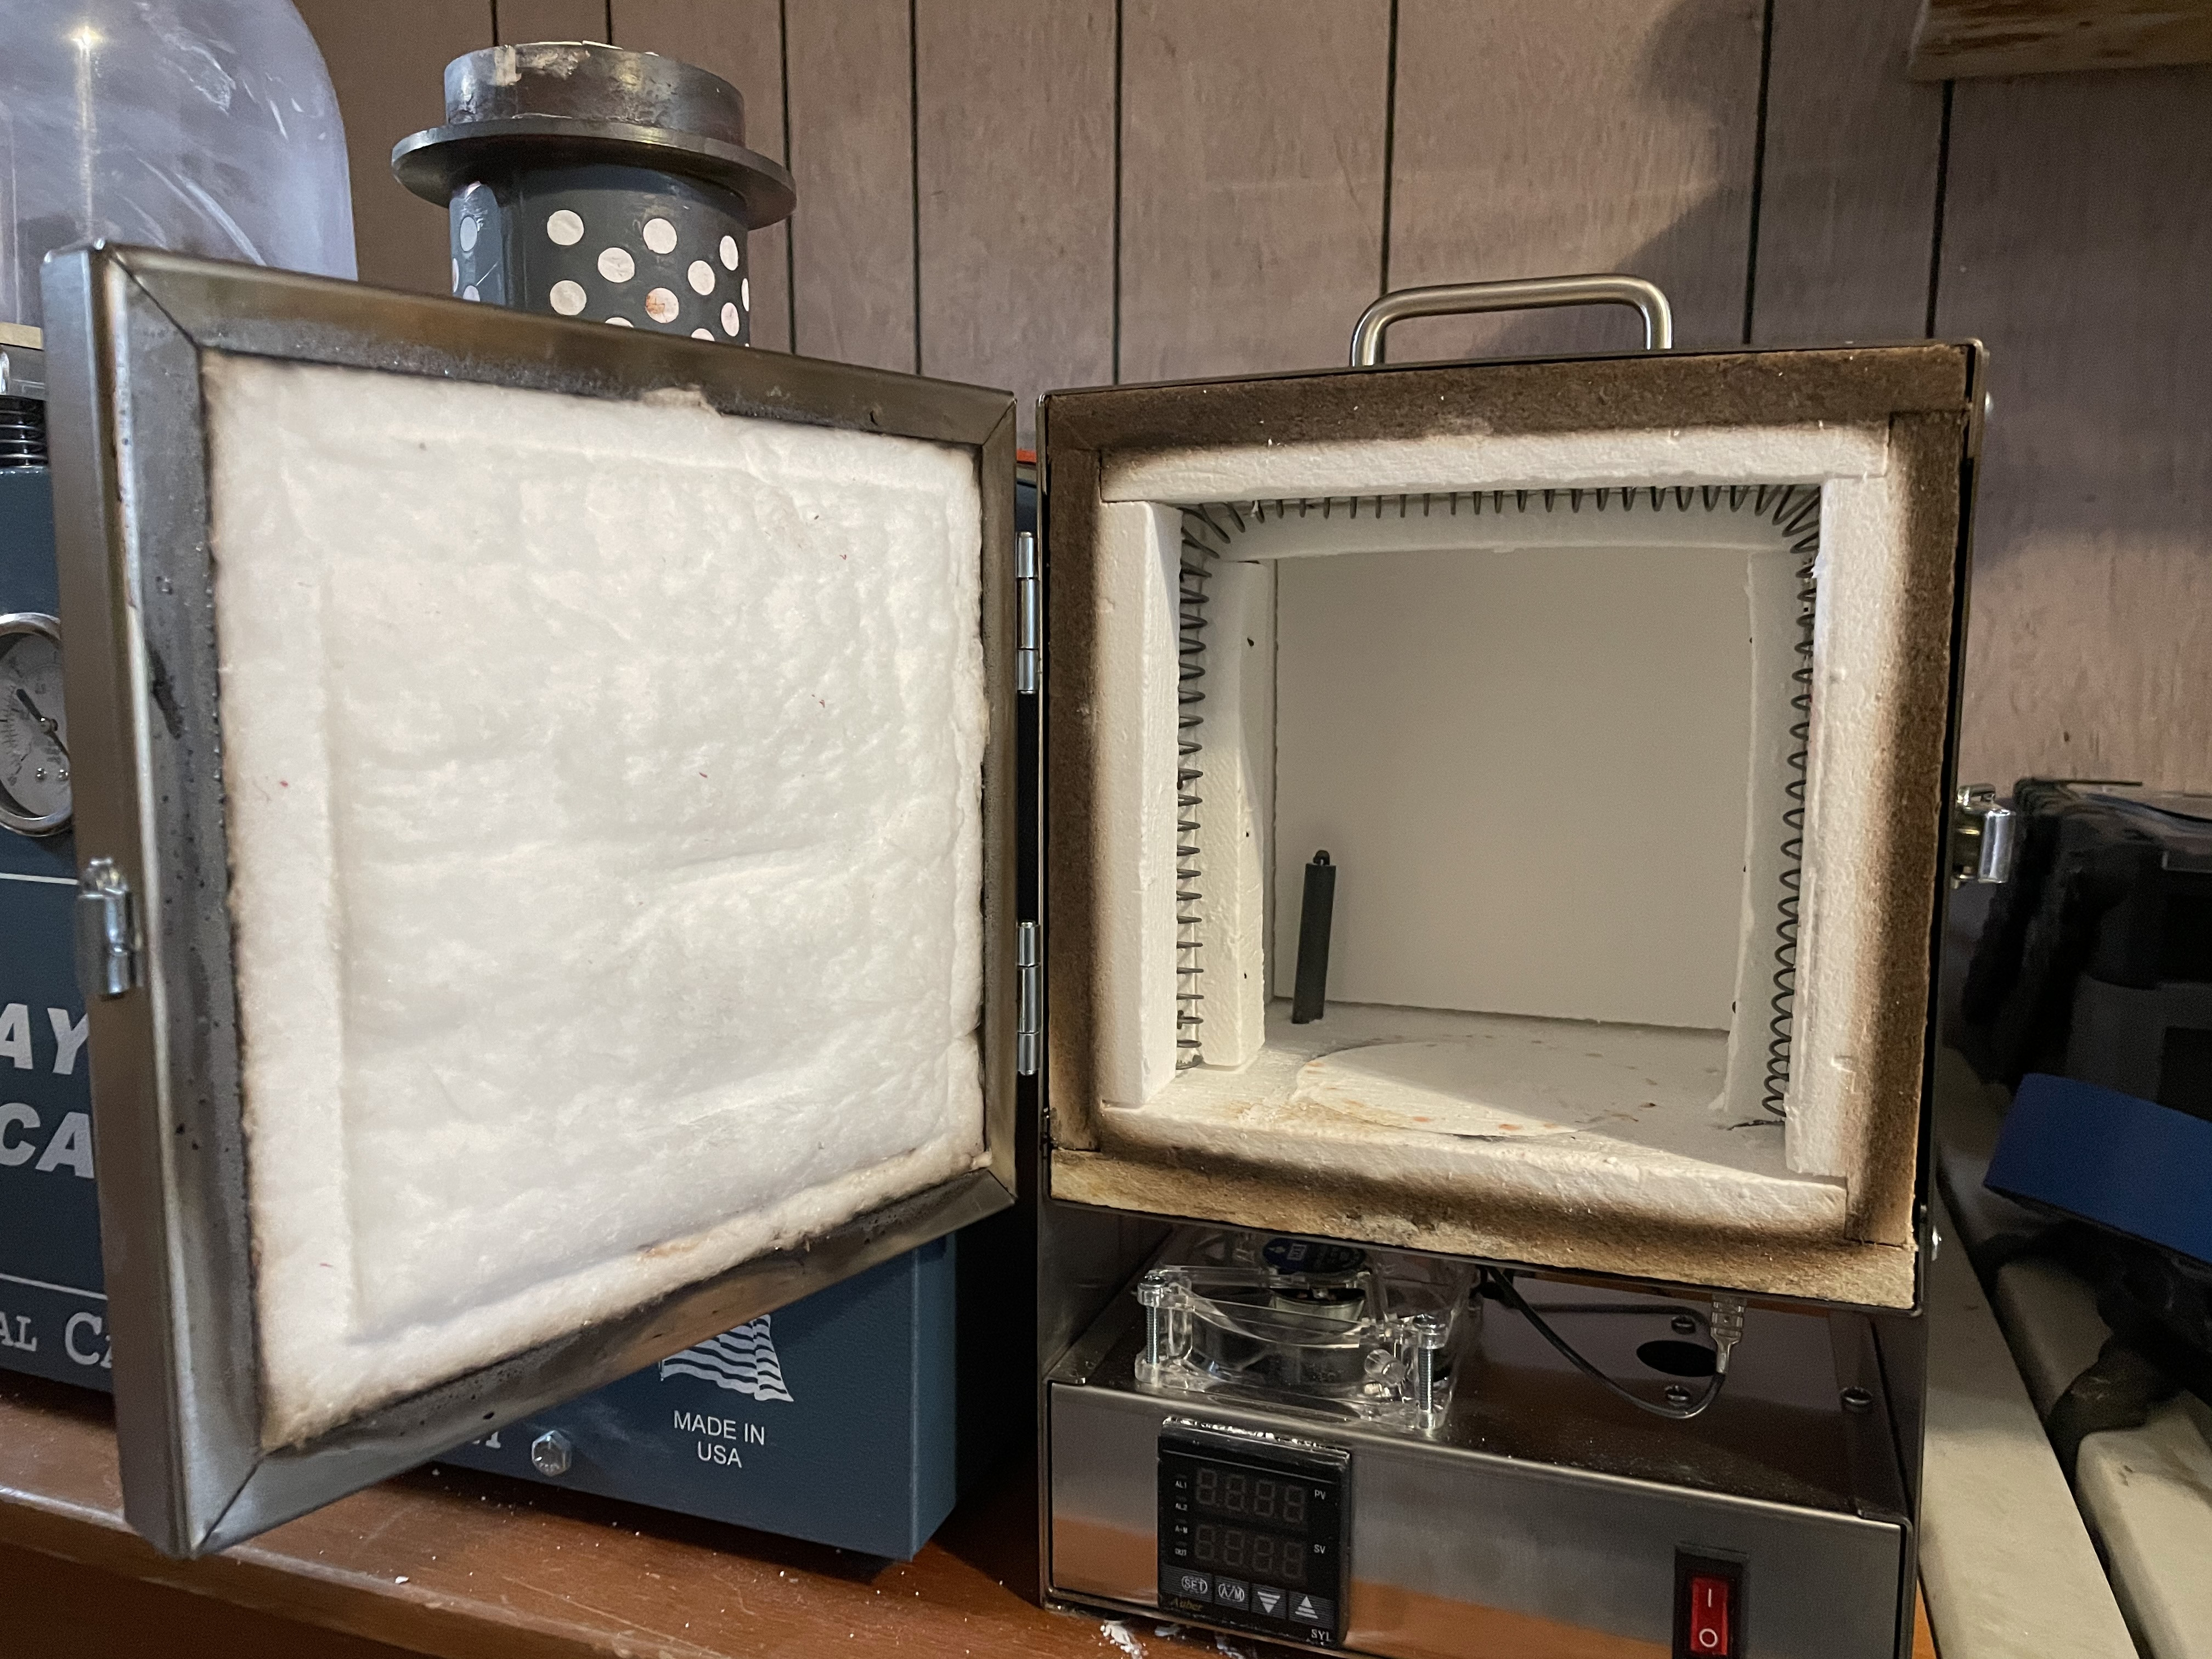
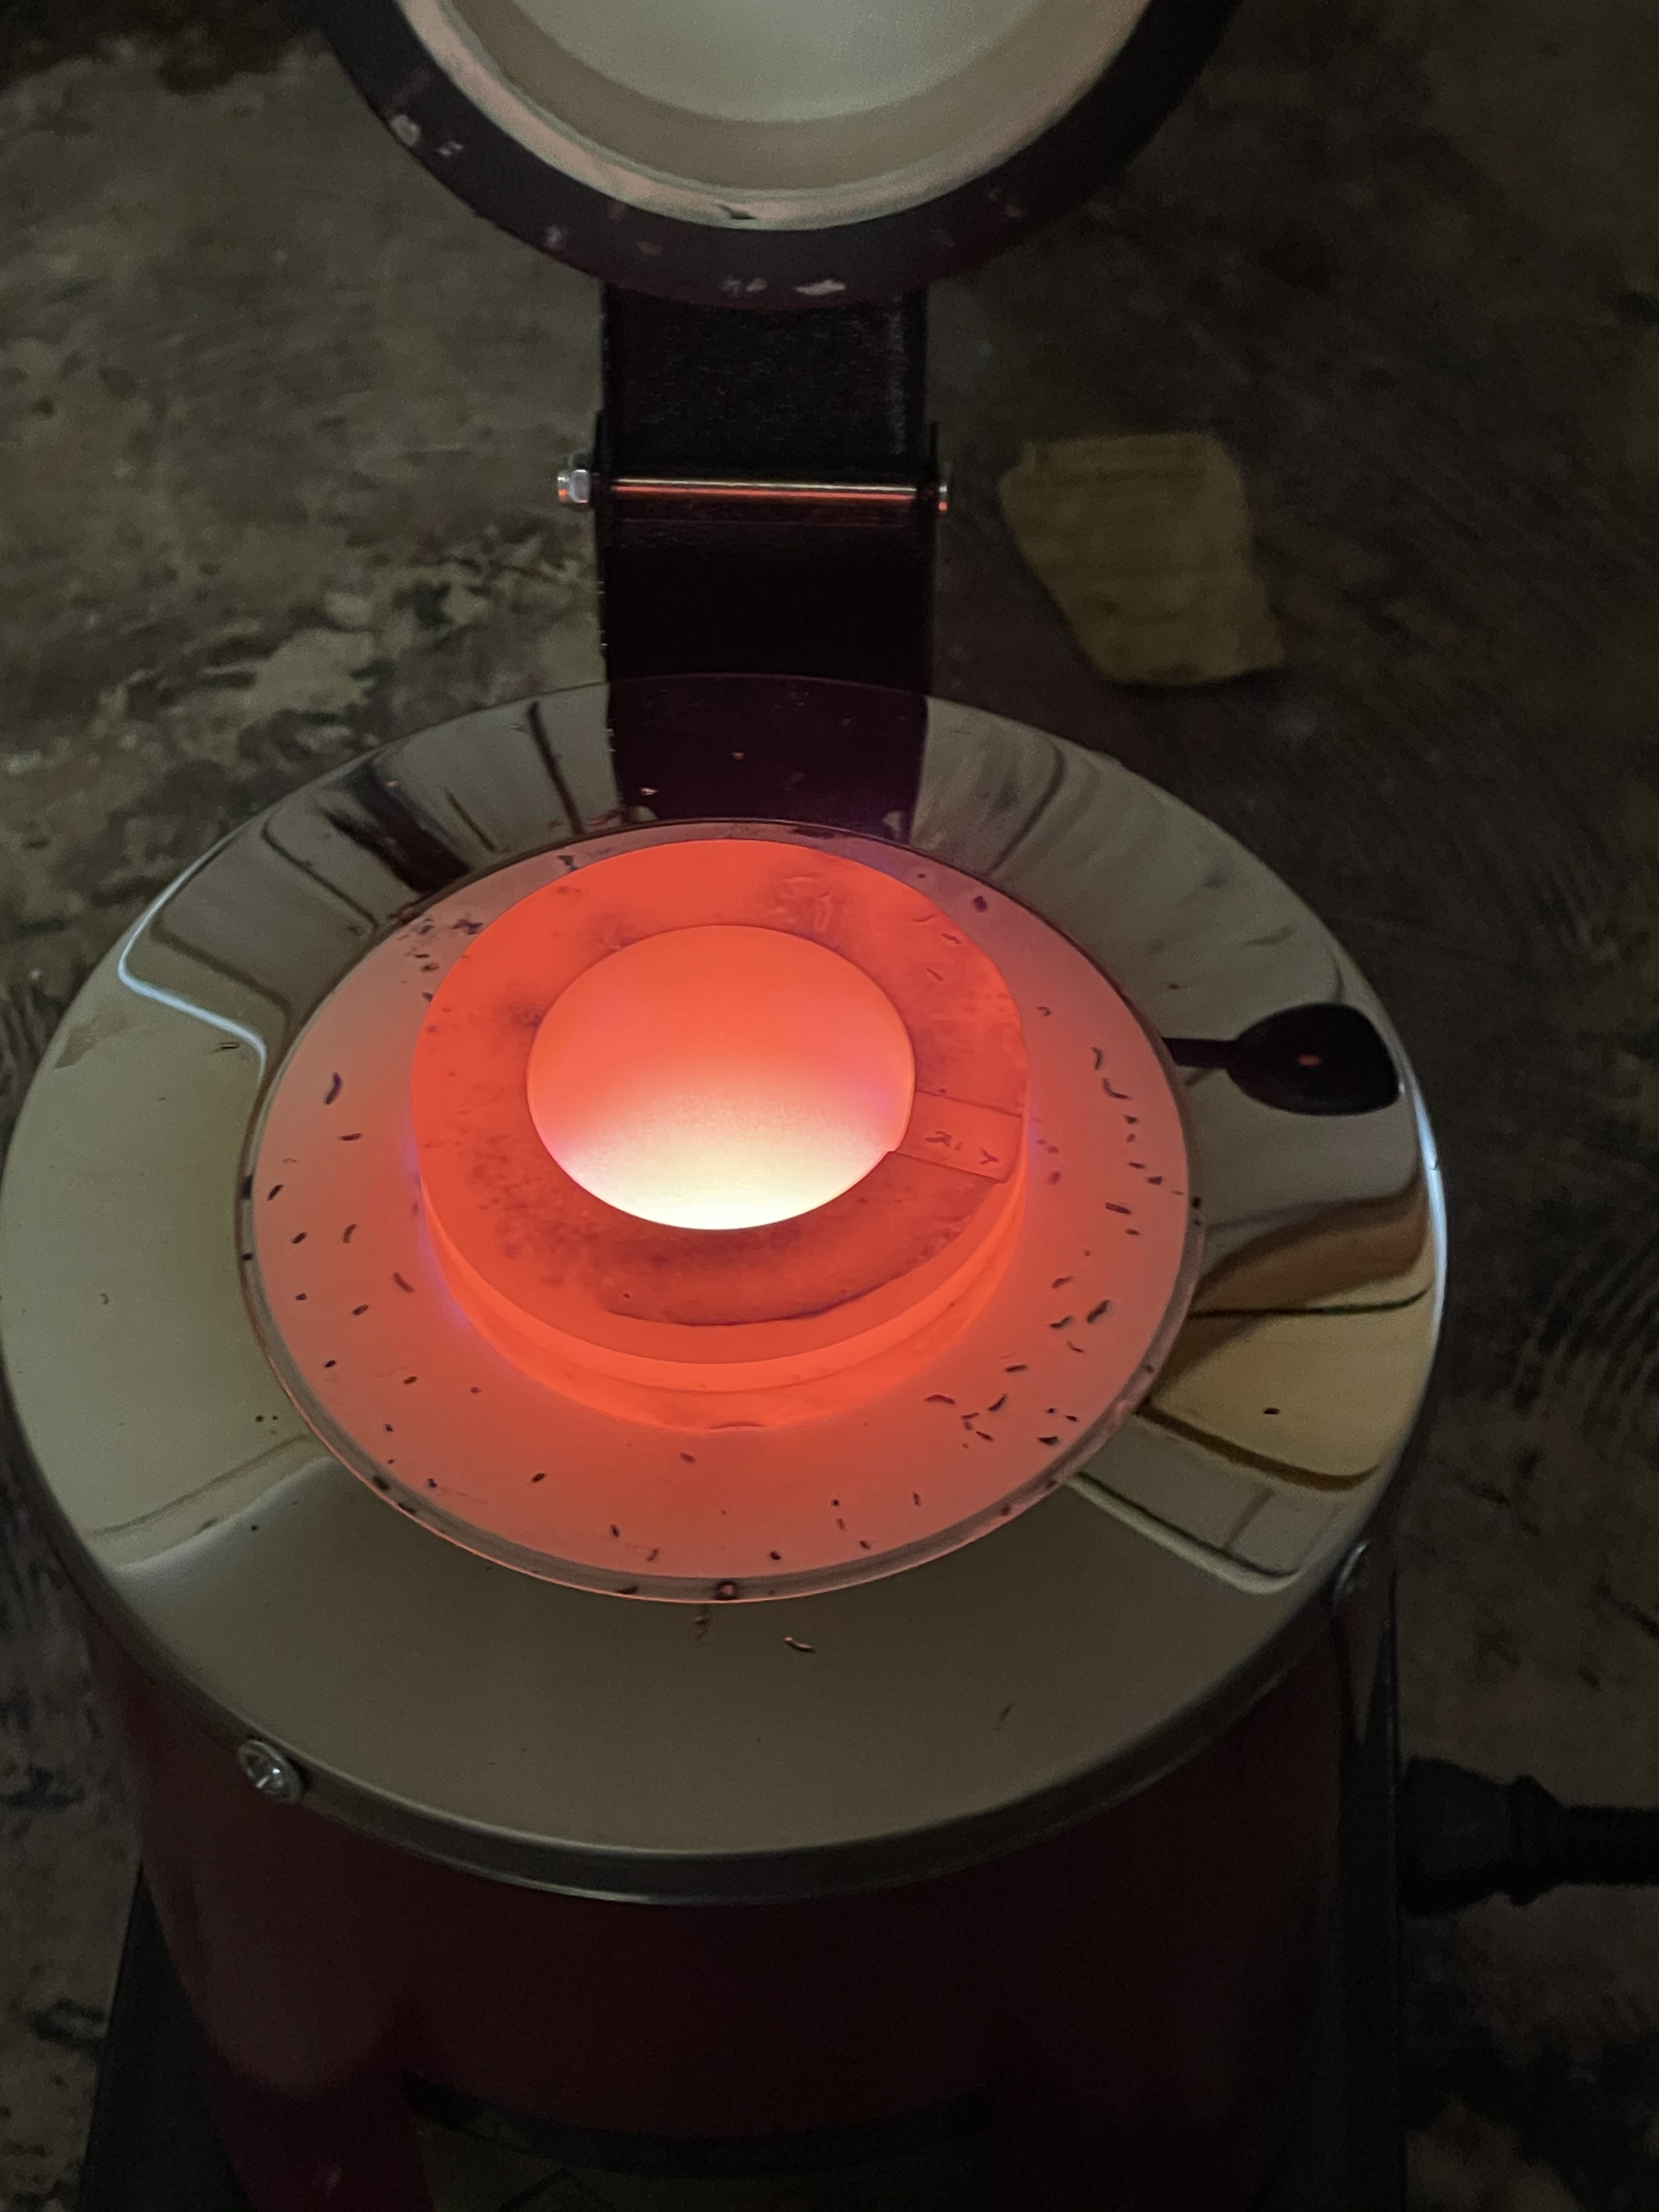
I have kind of spec’d out a vacuum based casting “system” that I Might pull the trigger on for my garage… I’d be happy to host it in the space / teach it after I get it dialed-in myself. Not sure what the rules are - I’m not sure where molten metals fit in with the open flame restriction.
Technically as long as the flame is inside the furnace it’s not an open flame lol.
The bigger concern is having a dedicate place to do the pour. Molten metal on concrete can cause small steam explosions. (Accidently melted a spot on a camera of a guy doing a news segment when I was doing a pour)
At a minimum a sheet of plywood under the poor would work. (Have a water hose handy)
An ideal would be to have a sand pit somewhere to do it.
Hello again. I’ve been meaning to post an update on this topic here for a bit for the people who expressed an interest in the process - but as normal - life got busy. I worked through the process, got the equipment - and just did my second casting today.
2 things - 1). formlabs does indeed have a wax resin that can be used with this process to cast a 3d wax model into bronze, copper, brass, aluminum, silver, gold… and then pour. have not even thought about steel yet (and don’t plan to right now).
2). This process is a lot easier than it looks. I’d be happy to give anyone an intro to what l know so far and to do a demonstration. I plan on using it to do small figures… and jewelry for family / friends…