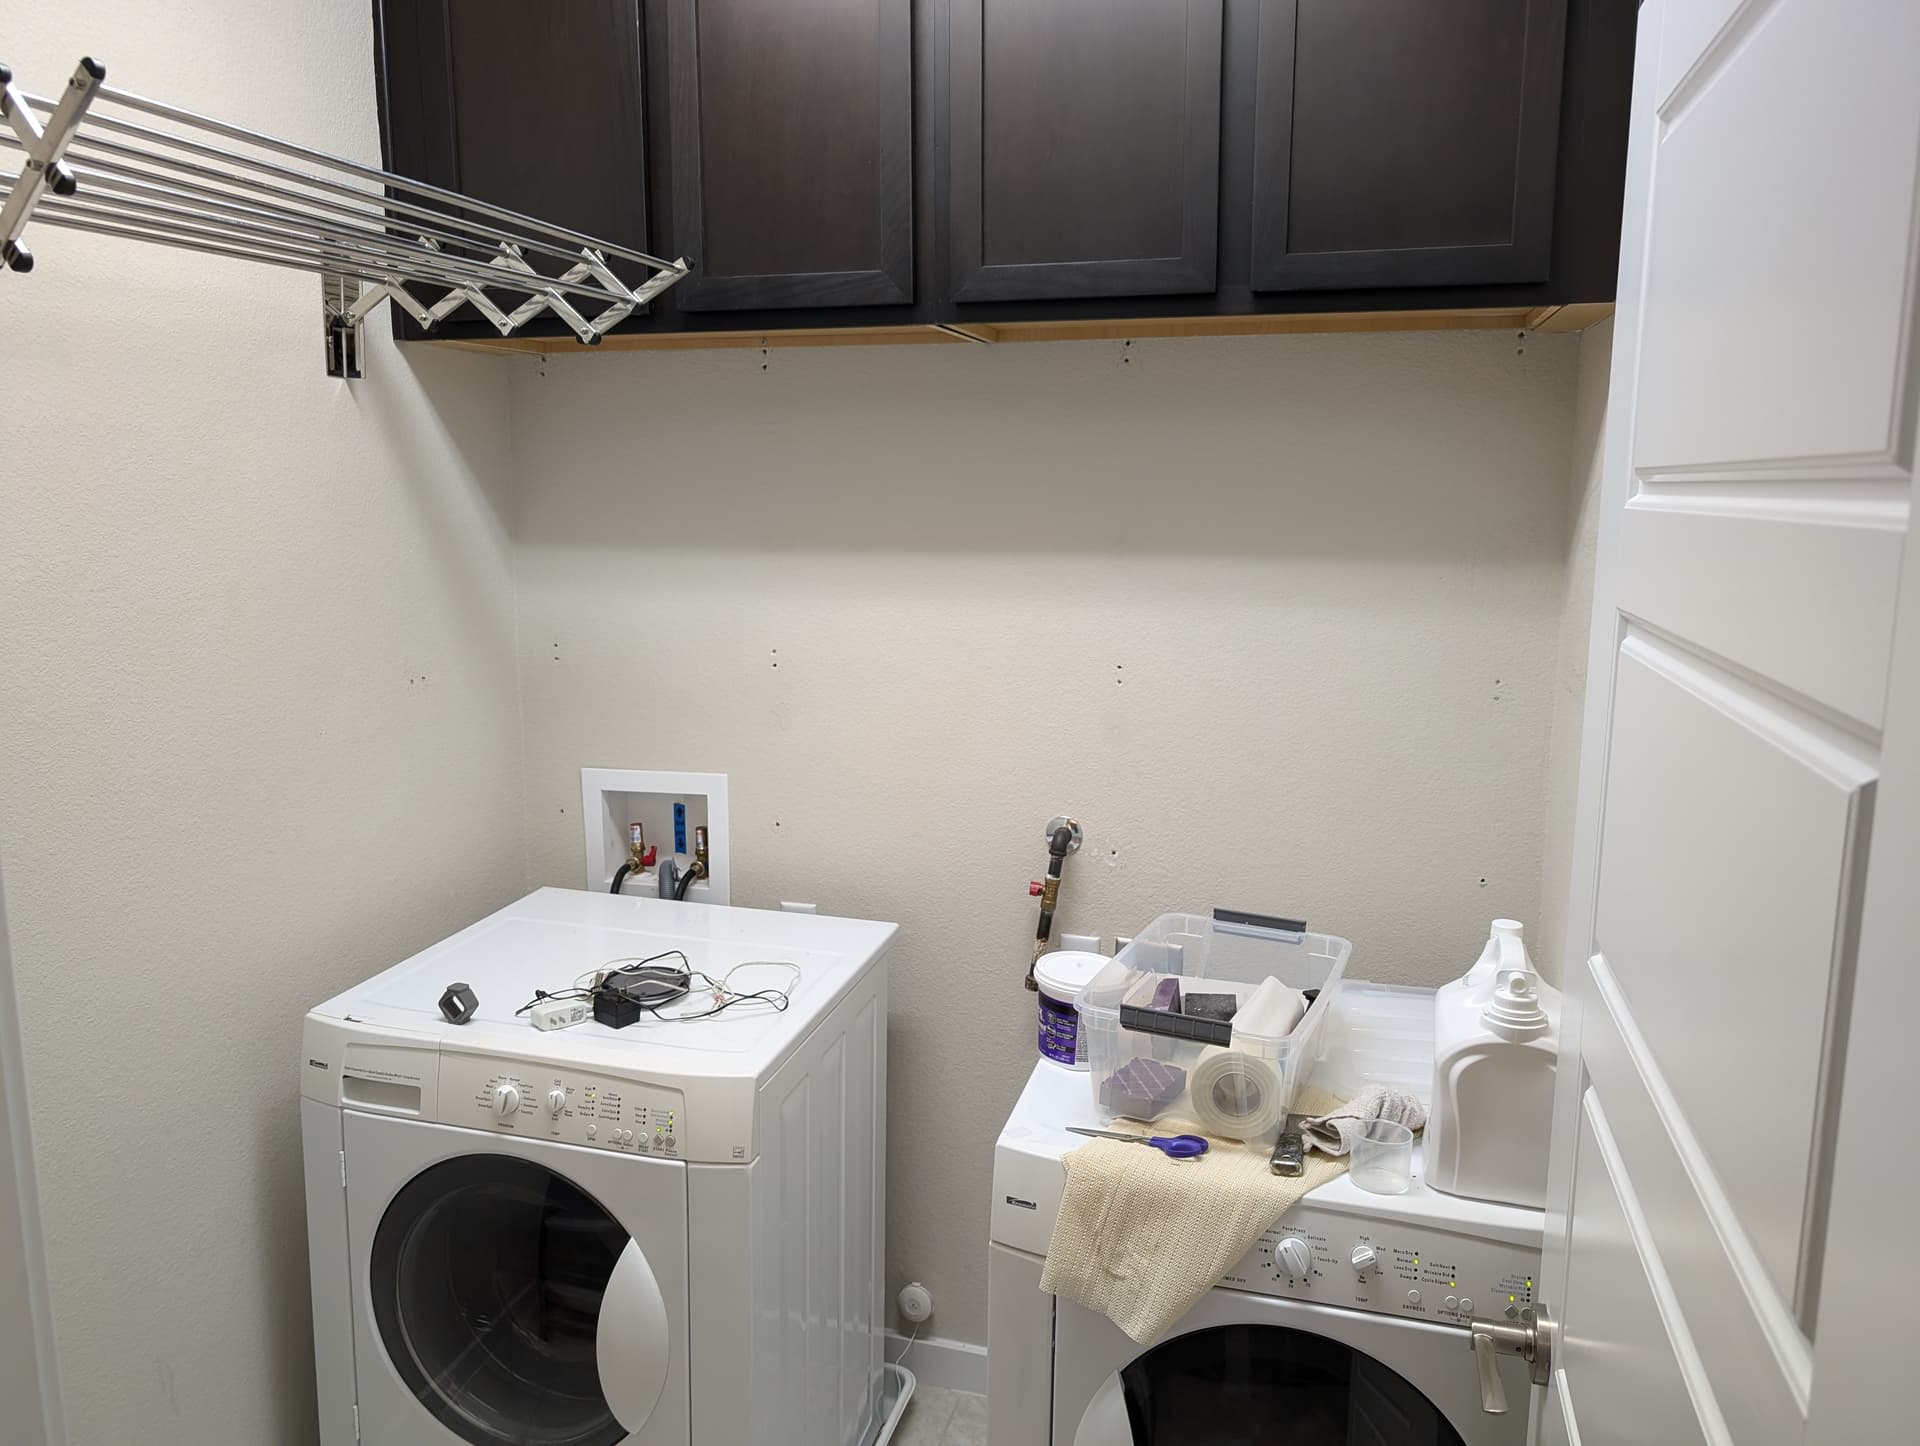
Step 1: Roofers shingle over your dryer vent, so your dryer stops working.
Step 2: Take apart the dryer multiple times, cleaning lint and vents, and replacing thermal limit switches.
Step 3: Not working, order a new washer/dryer.
Step 4: “while you’re in there” decide to rework the whole room…
Step… OK, we’re going to need more steps. ![]() (The roofers did fix the vent finally.)
(The roofers did fix the vent finally.)
This is how I went about making the single largest piece of wood I have ever worked with fit into a laundry room, and reworked the flow of the room while I was at it.
Design restrictions:
- Level, appropriately sized countertop adjacent to 3 walls, at a height determined by the appliances.
- Removable (with some pain) to allow for servicing the utilities.
- Waterproof-ish, humidity resistant, strong.
- Anchored safely in place, without drilling into my floor tiles.
- Provides some organization space.
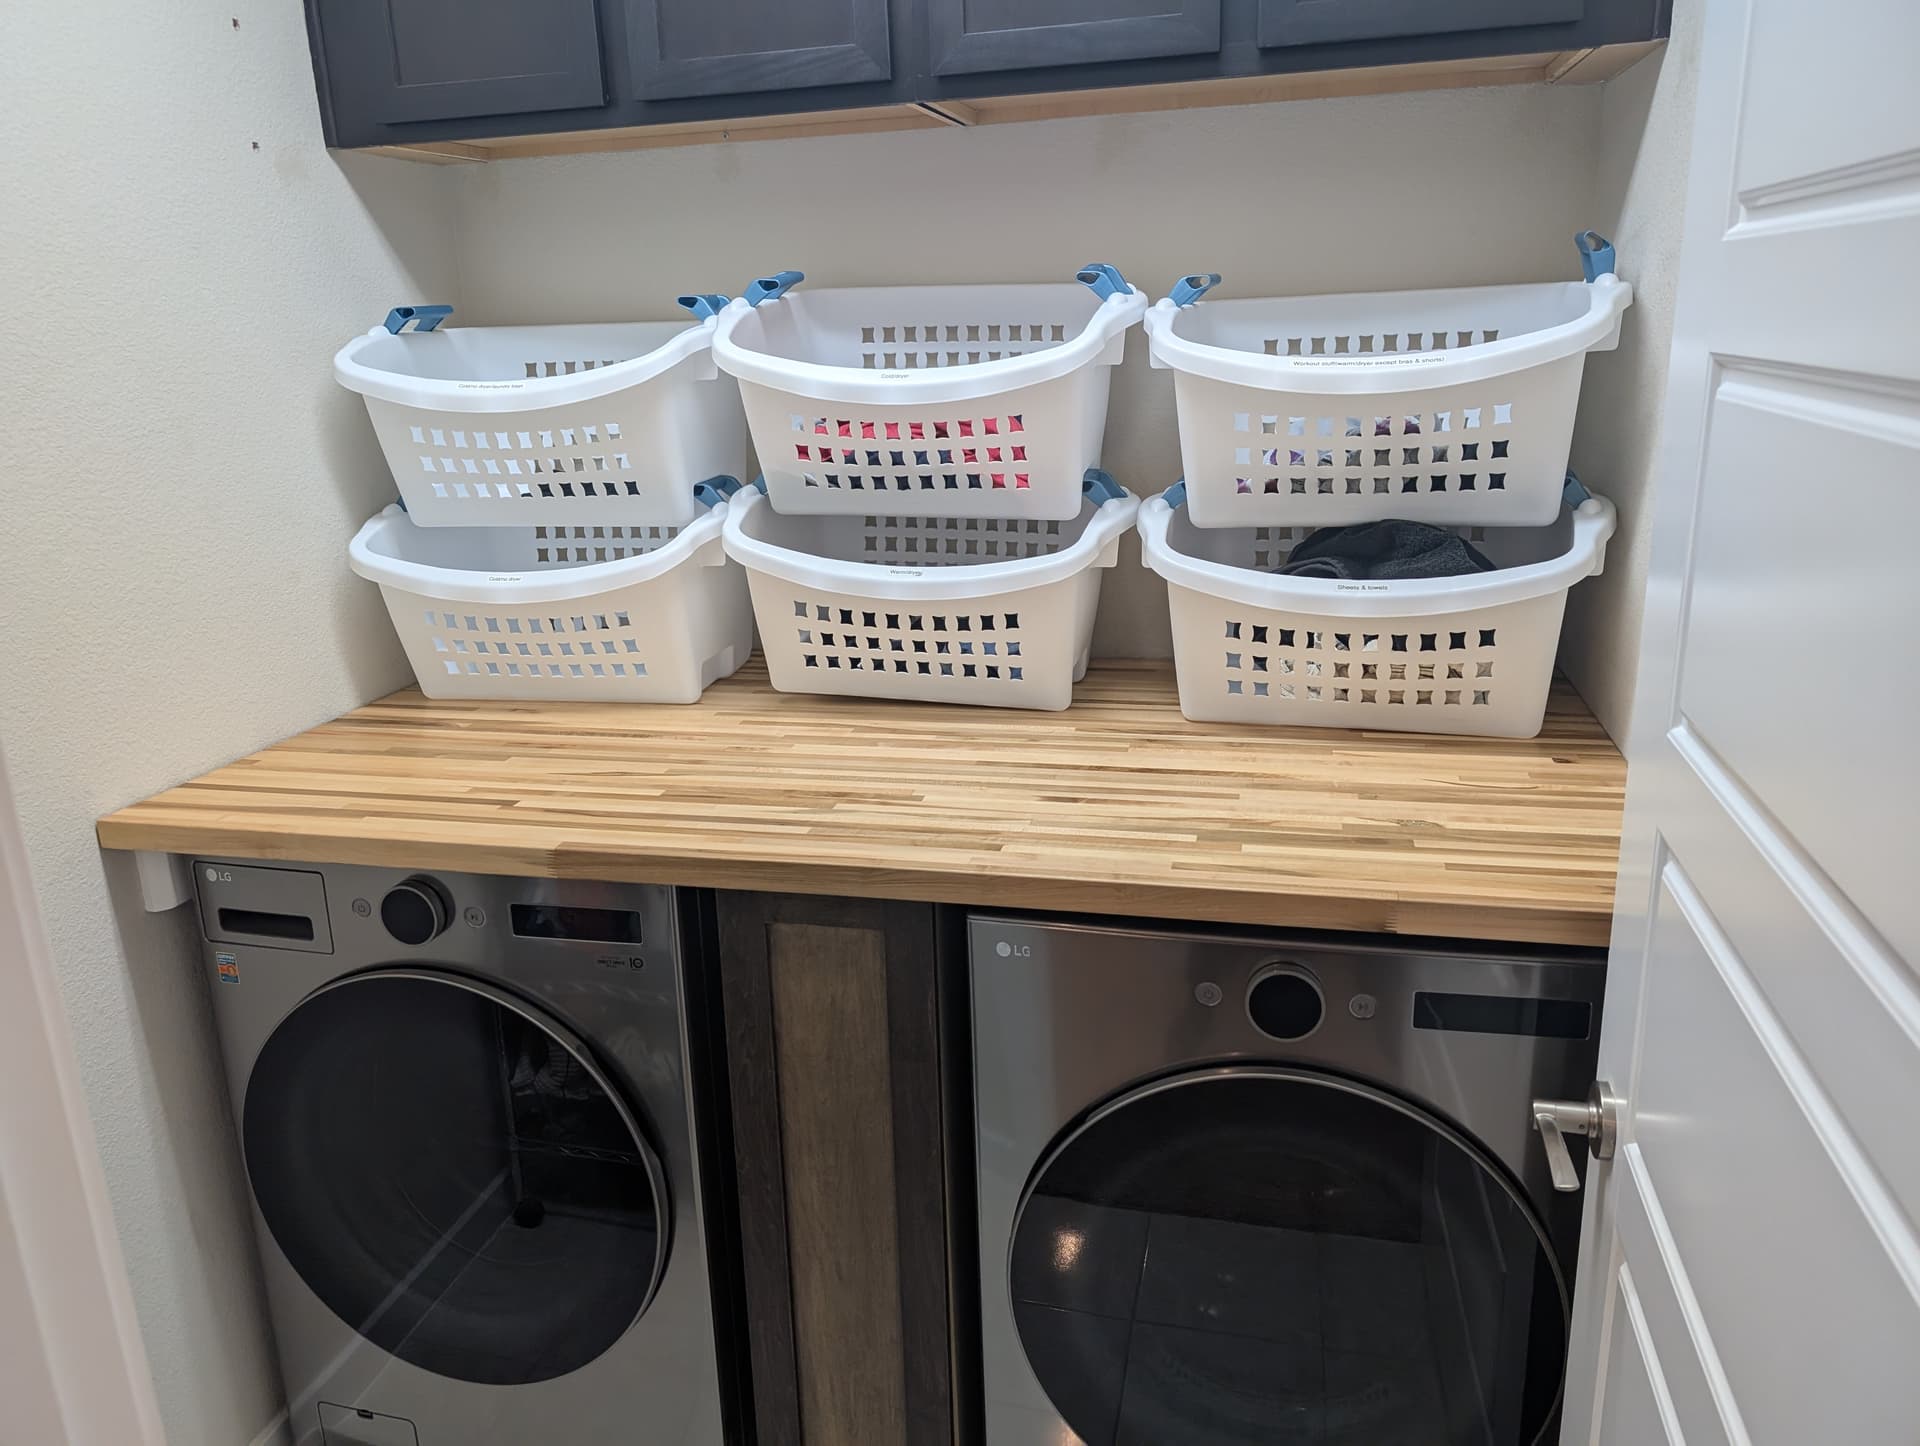
Before and After:
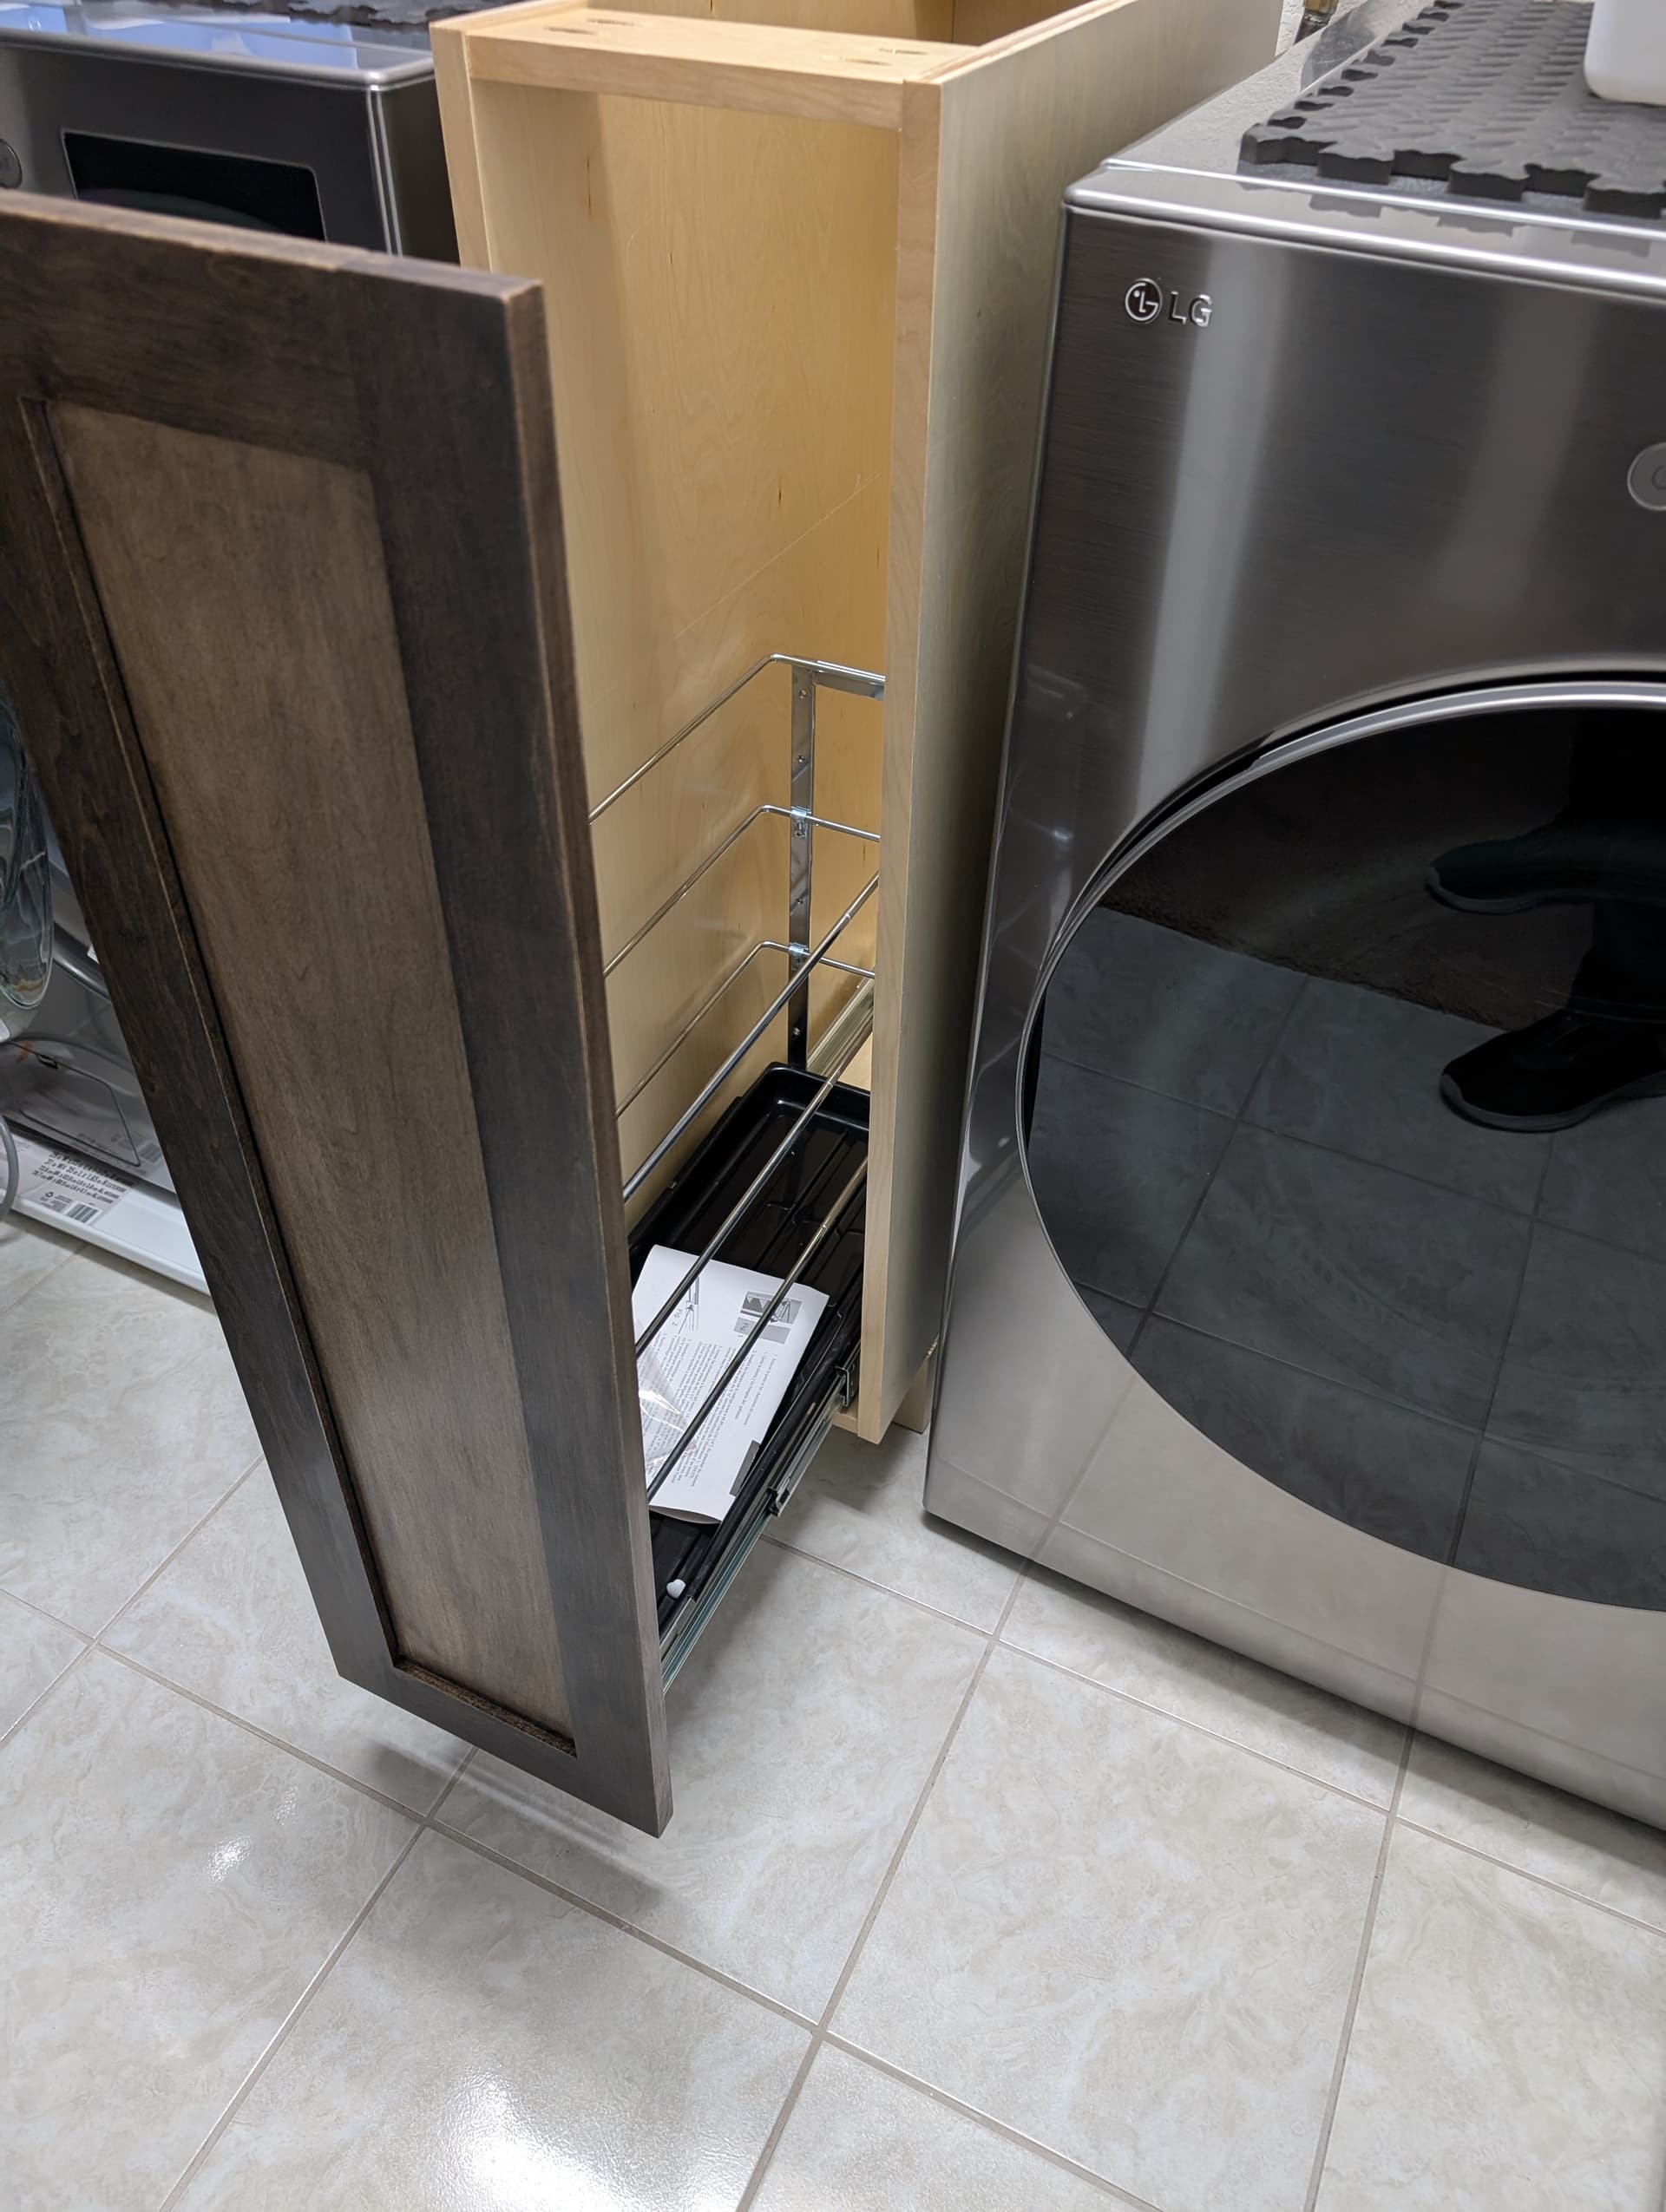
Chapter 2: The Cabinet
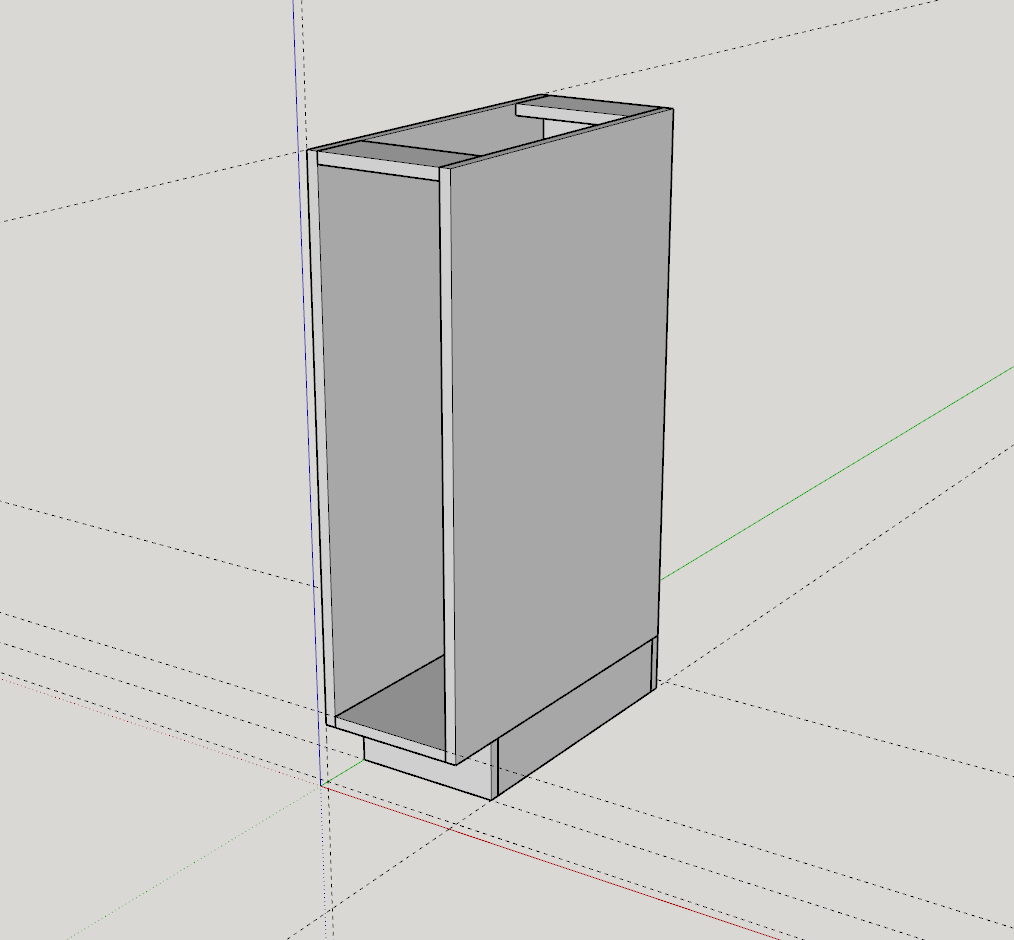
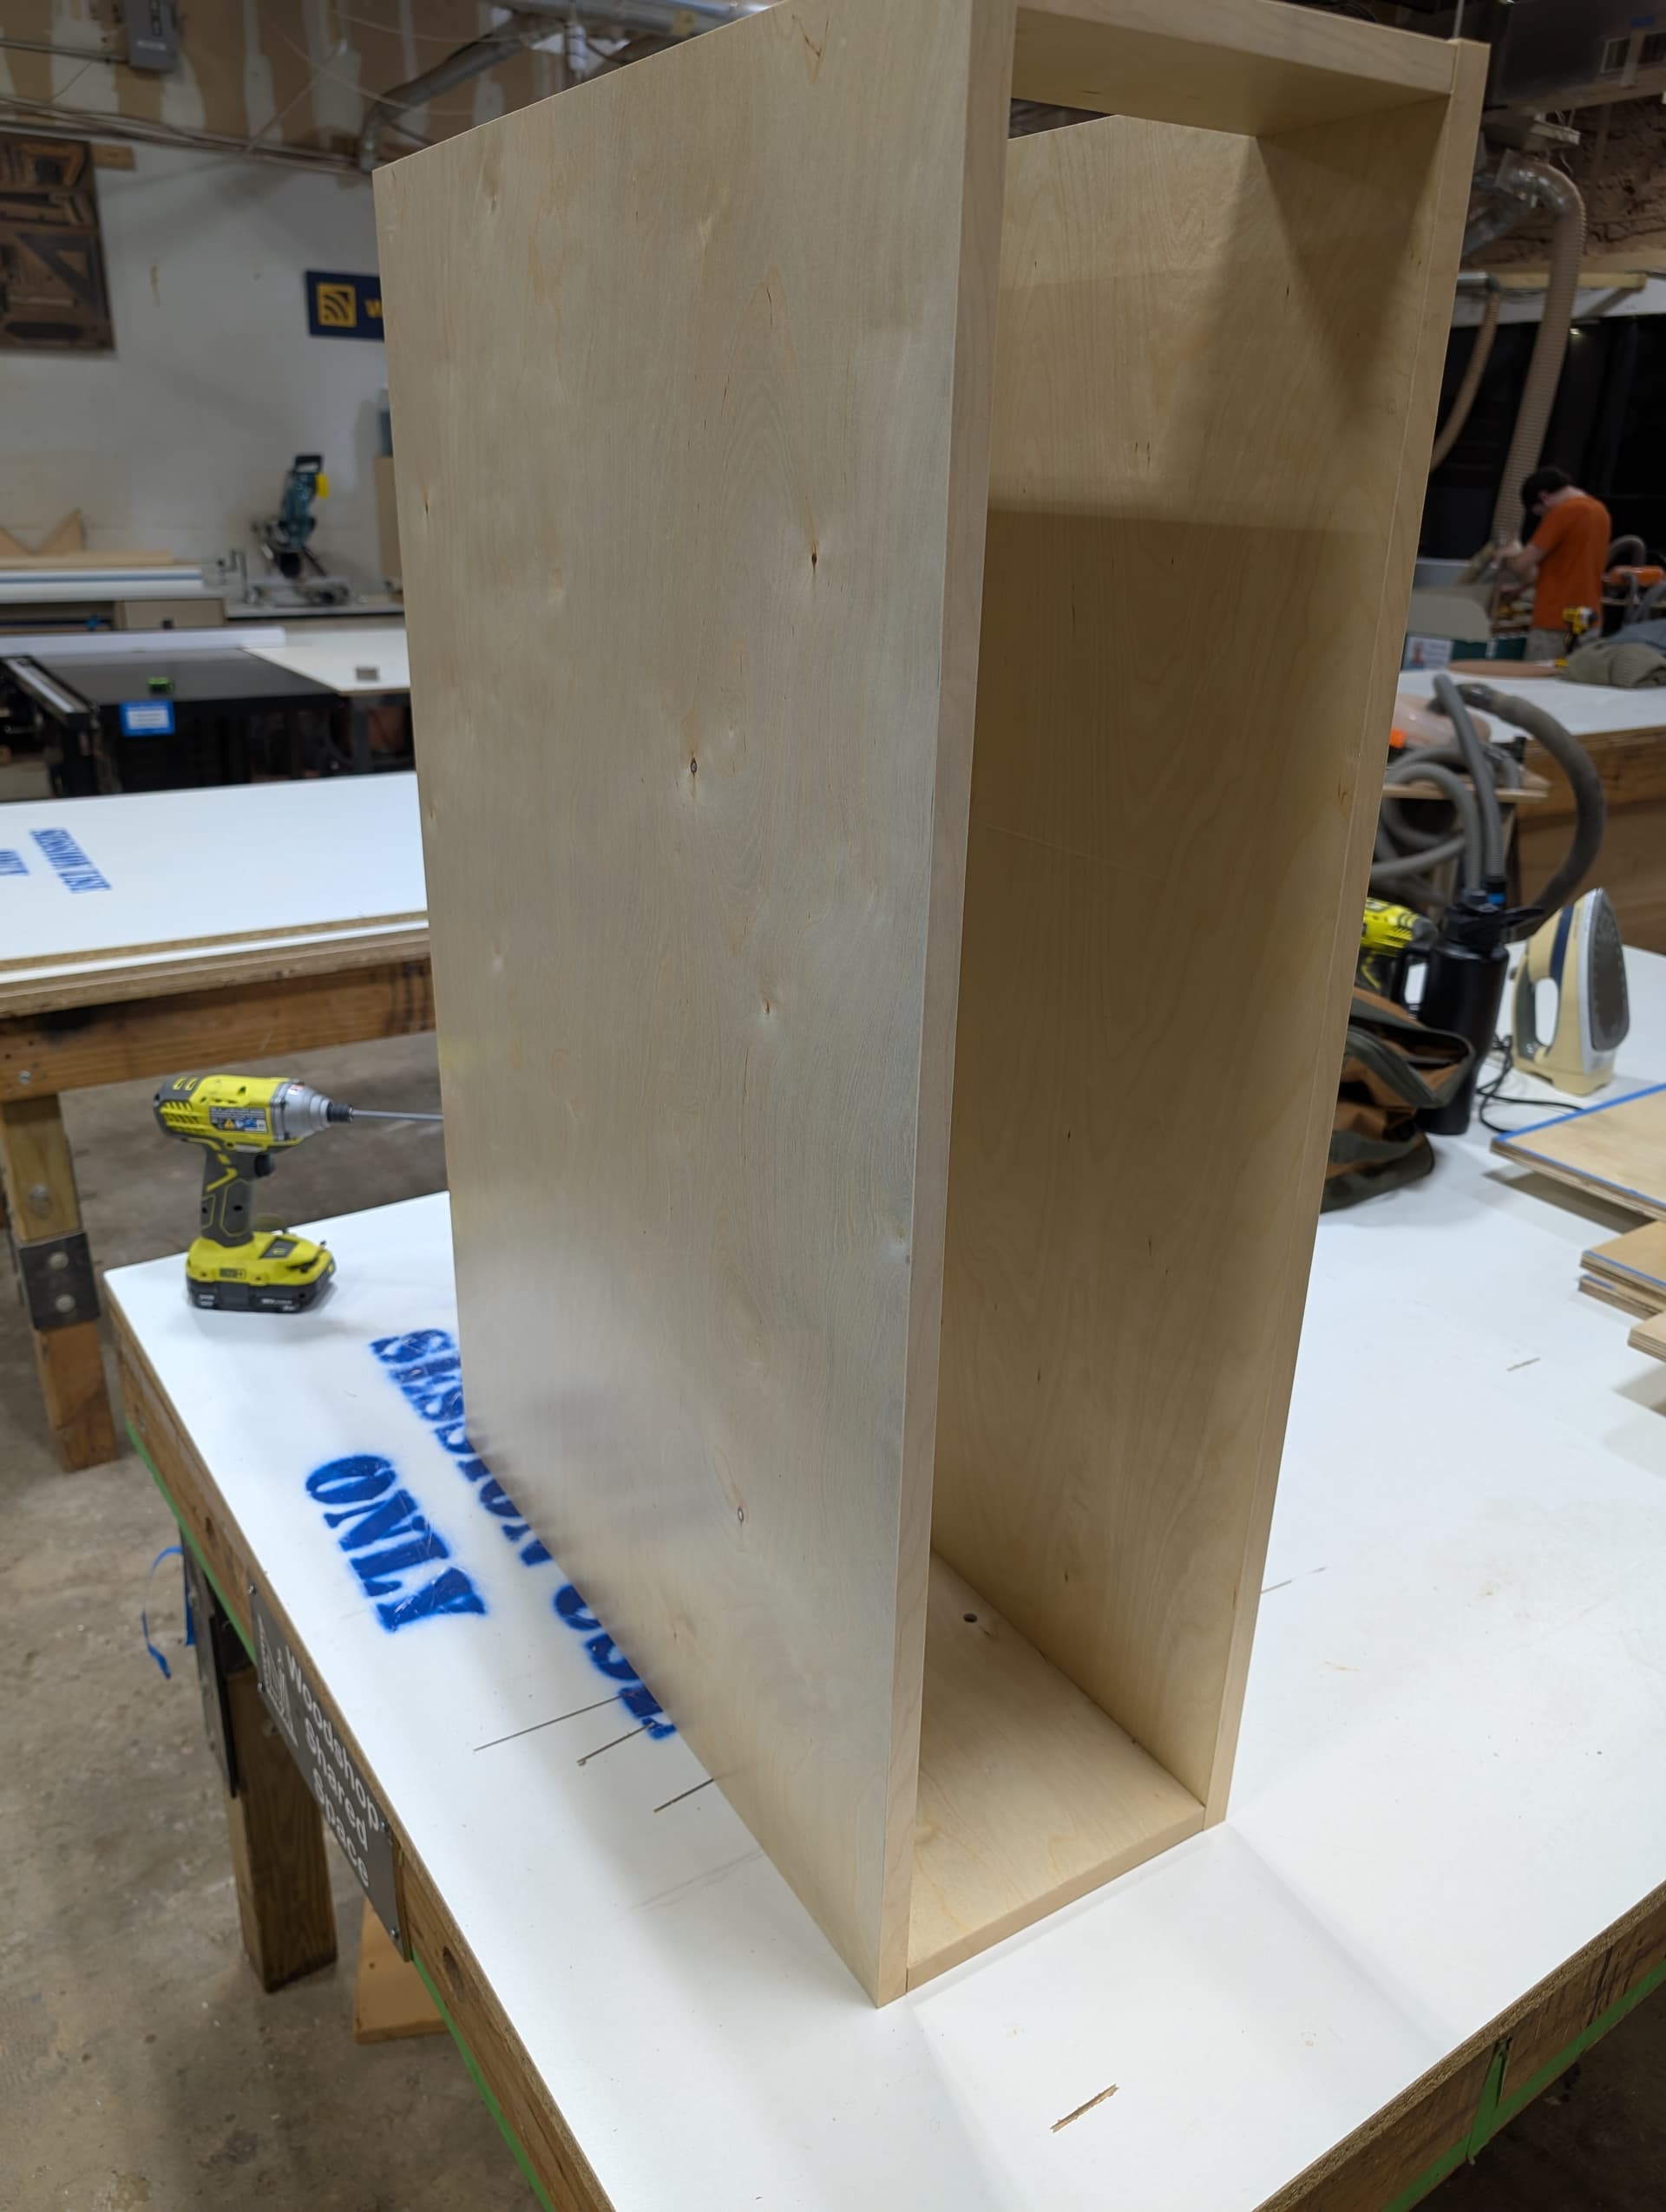
I’ve never built a cabinet carcass before, but I have seen many on YouTube! Thankfully, this one came together well. I did a ton of shopping for a pre-built cabinet, but both the height and width were non-standard. So off to SketchUp I went. Using some prefinished birch ply from Fine Lumber around the corner, this came together pretty much exactly as planned.
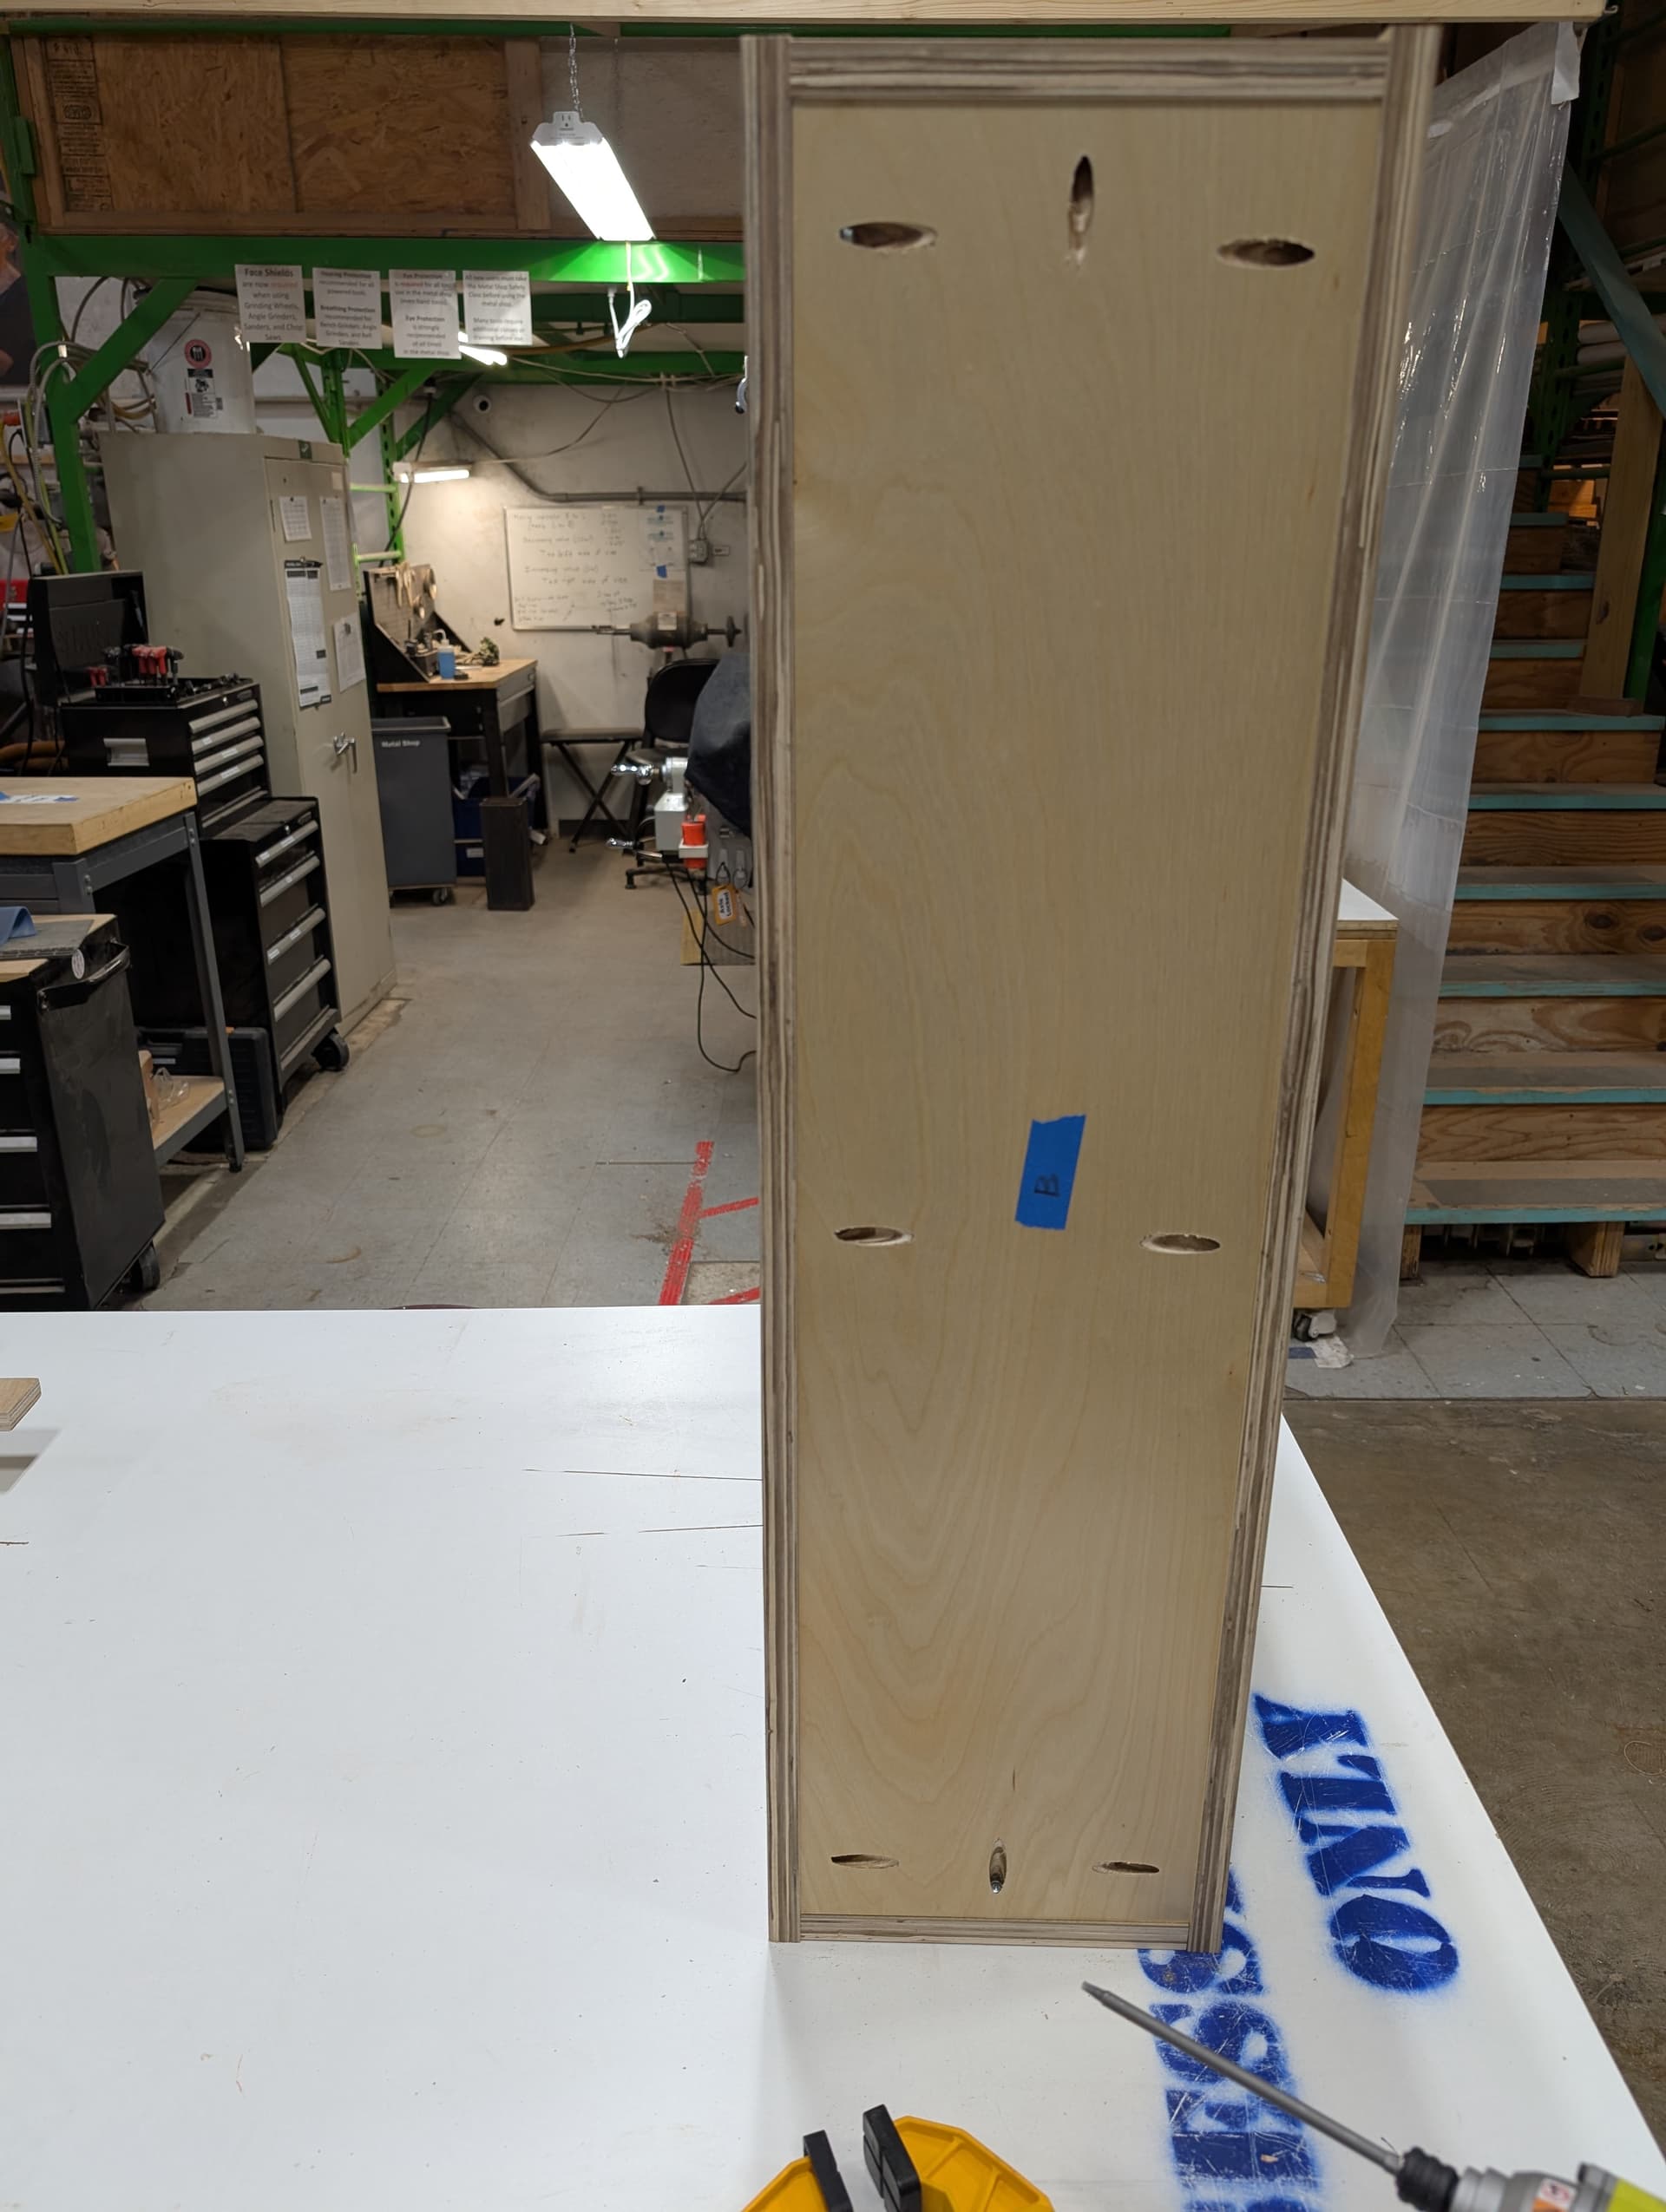
For the door, I wanted to match the existing cabinets if possible. I watched some Shaker-style cabinet door tutorials, looked at the router bits that could do this for me, and THEN… ordered it from Rockler in maple to my exact size needs.
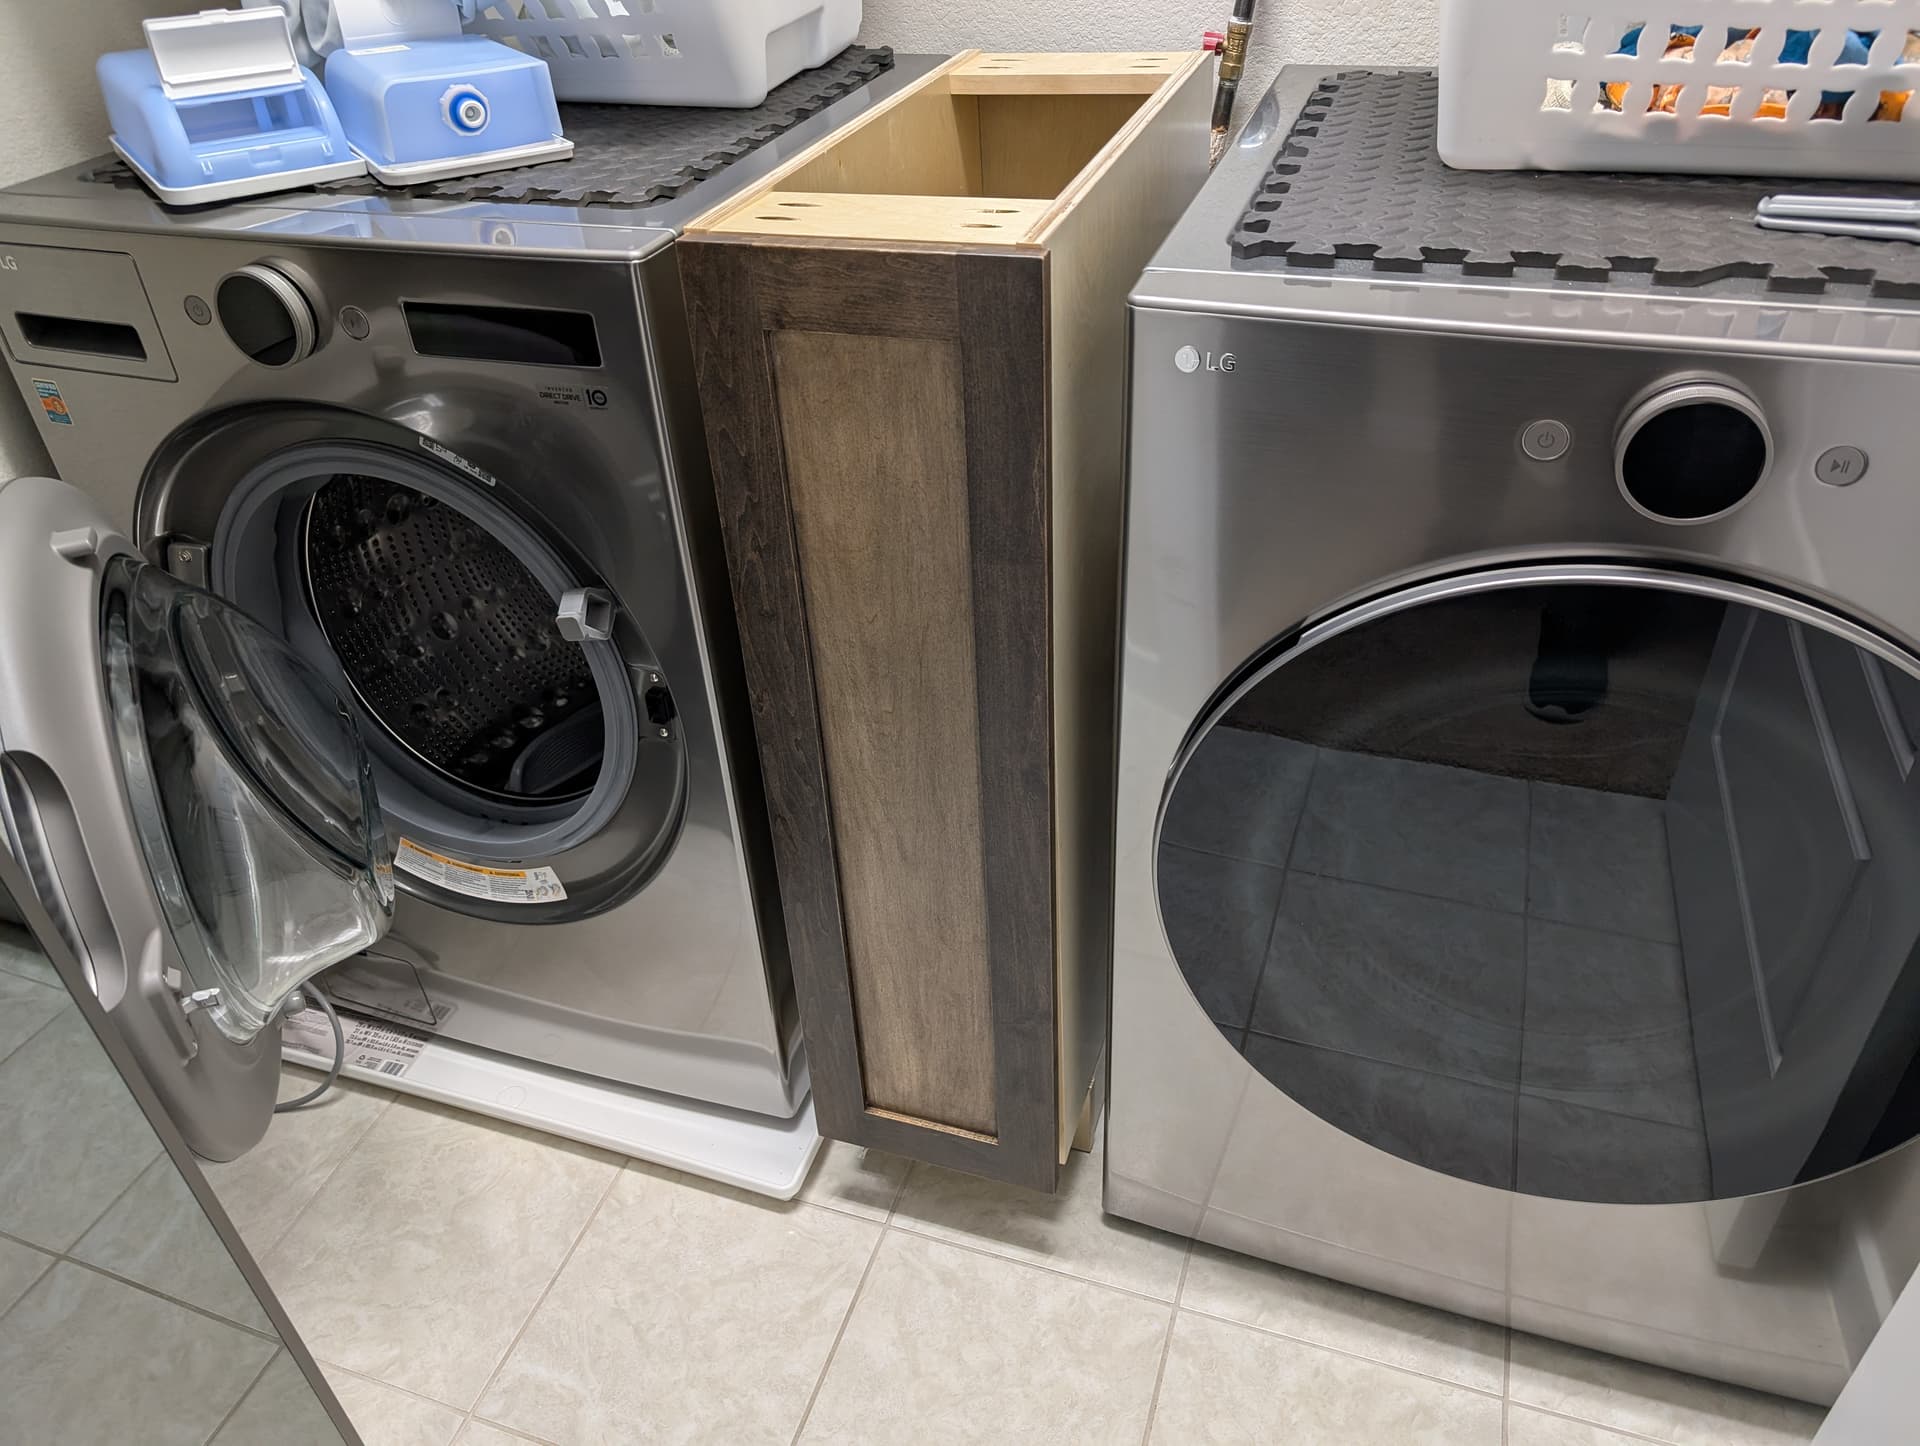
This is the second best idea in this whole project - that $60 door order saved me a bunch of time and headache, which I could afford to spend on …
Chapter 3: The Countertop
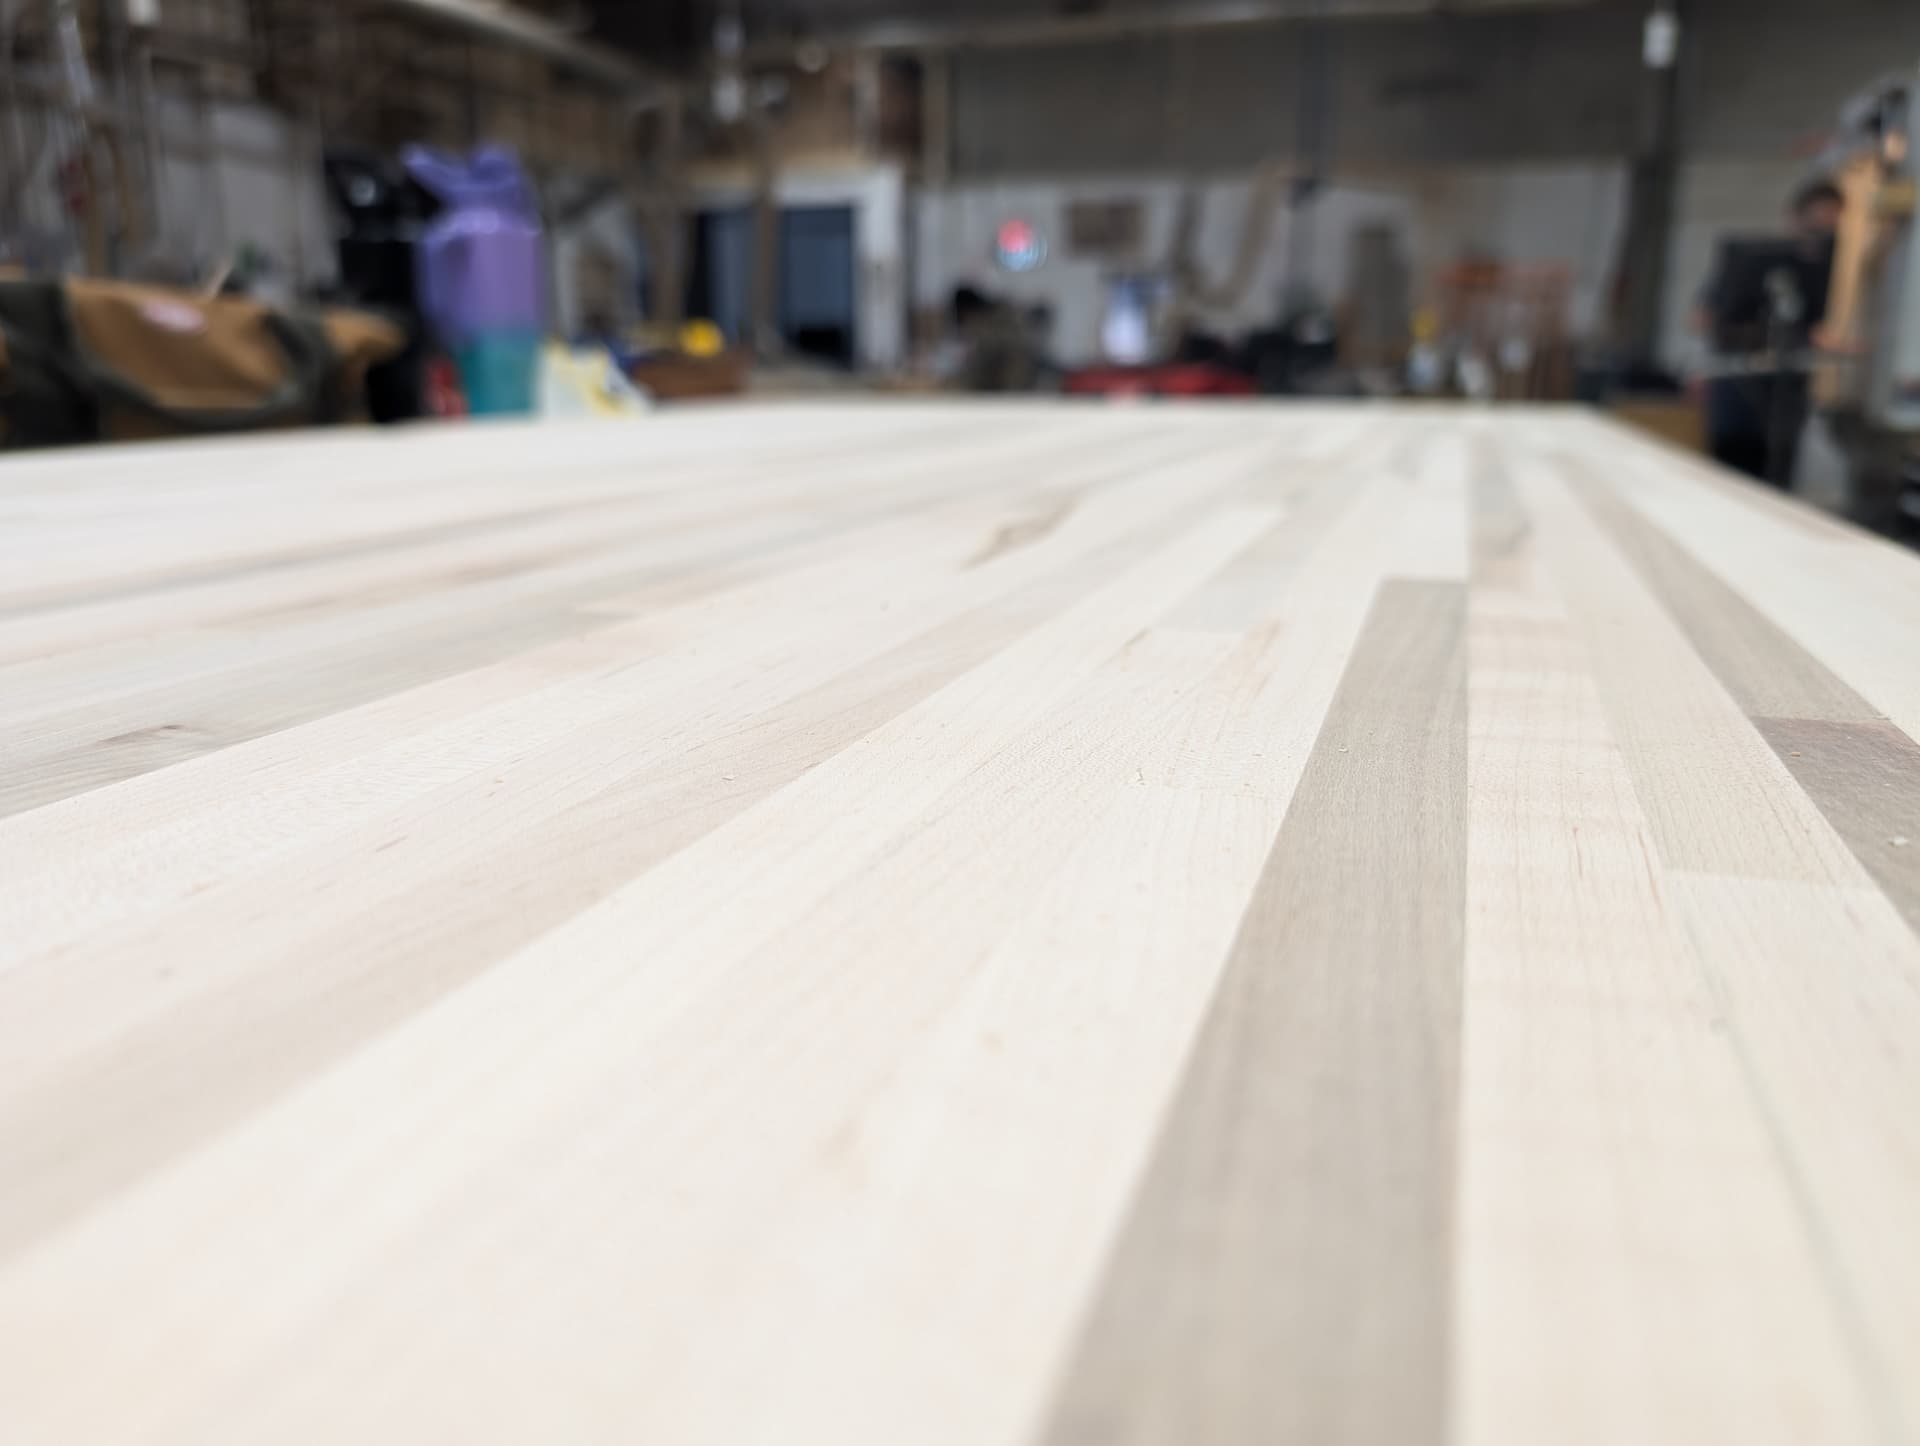
Speaking of headache: I needed a ~36" deep, ~72" wide solid maple butcher block that I could cut to final shape. I wanted a solid appearance, tight glue joints, and strong finger-jointed butt joints if the pieces were not long enough to span the full width. So I spent hours and hours hand-crafting… the web searches I needed to find what to order. Yep, at $329 Floor and Decor countertop stock was just fine, 1-2" oversized in every dimension, and could be in store in 4 days.
All I had to do was make it fit the room! Adjacent to 3 walls, with studs in the wrong places, utilities protruding from the back wall. Thankfully, exactly 2 of those walls were approximately parallel! Unthankfully, none of them were square, and only one of them was close to straight.
However, the countertops ship with the single most useful tool ever for a project like this, absolutely free - CAD!
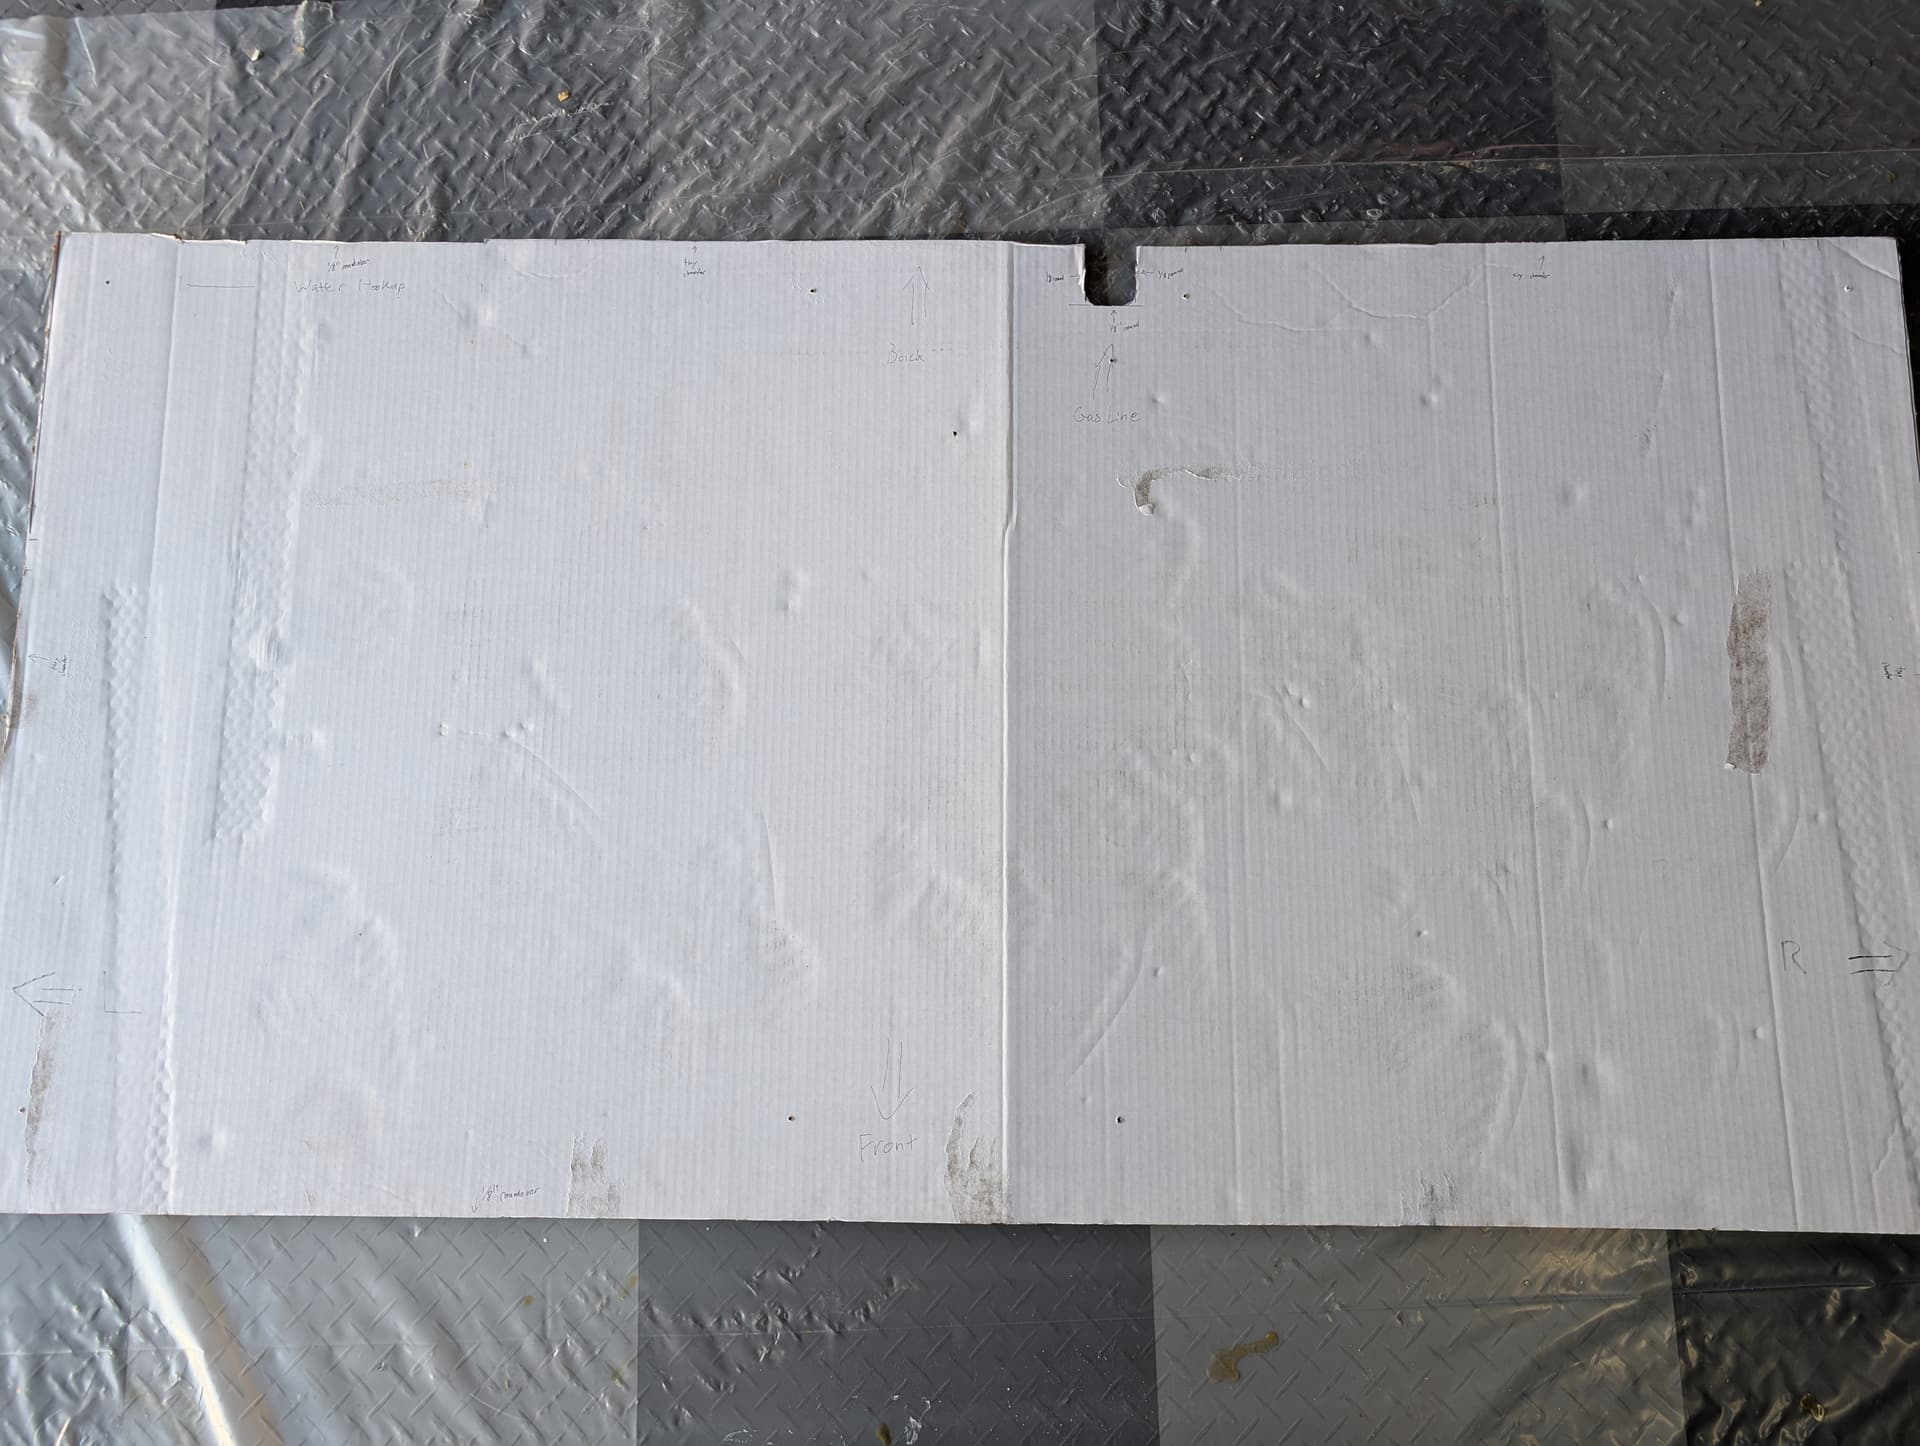
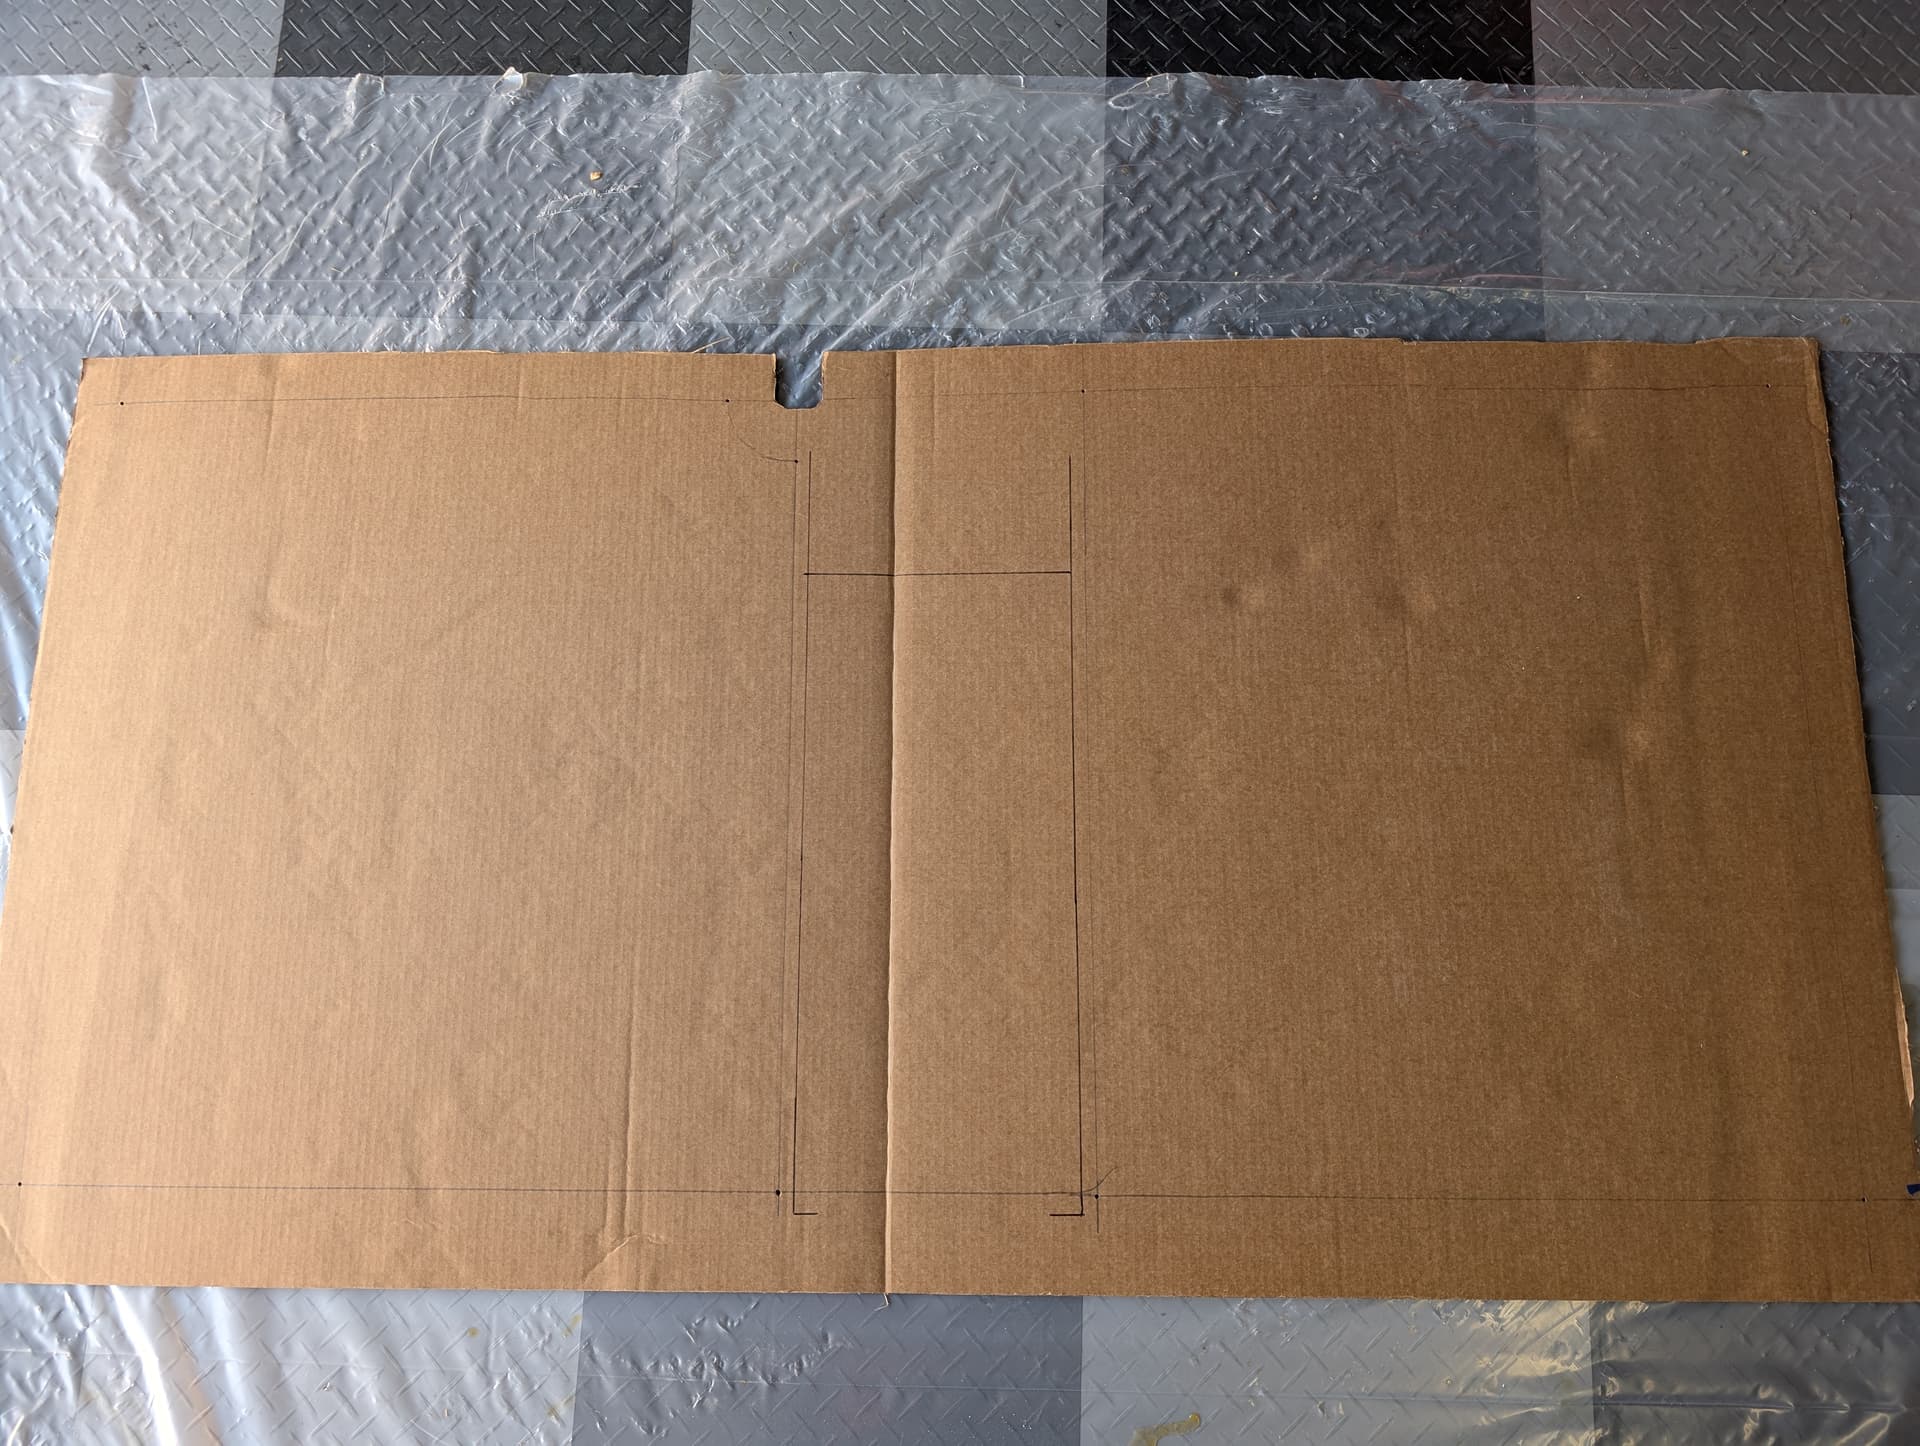
Aside: Cardboard Aided Design
This is the MVP of the whole project: a cardboard template from the countertop packaging itself. You can see how beat up it got as it went through this process with me. If you look closely, you can see all my notes about which edge profile I wanted where, plus my template for the aluminum-lined foam insulation I adhered to the bottom to prevent a lot of moisture from the appliances from seeping into the wood.
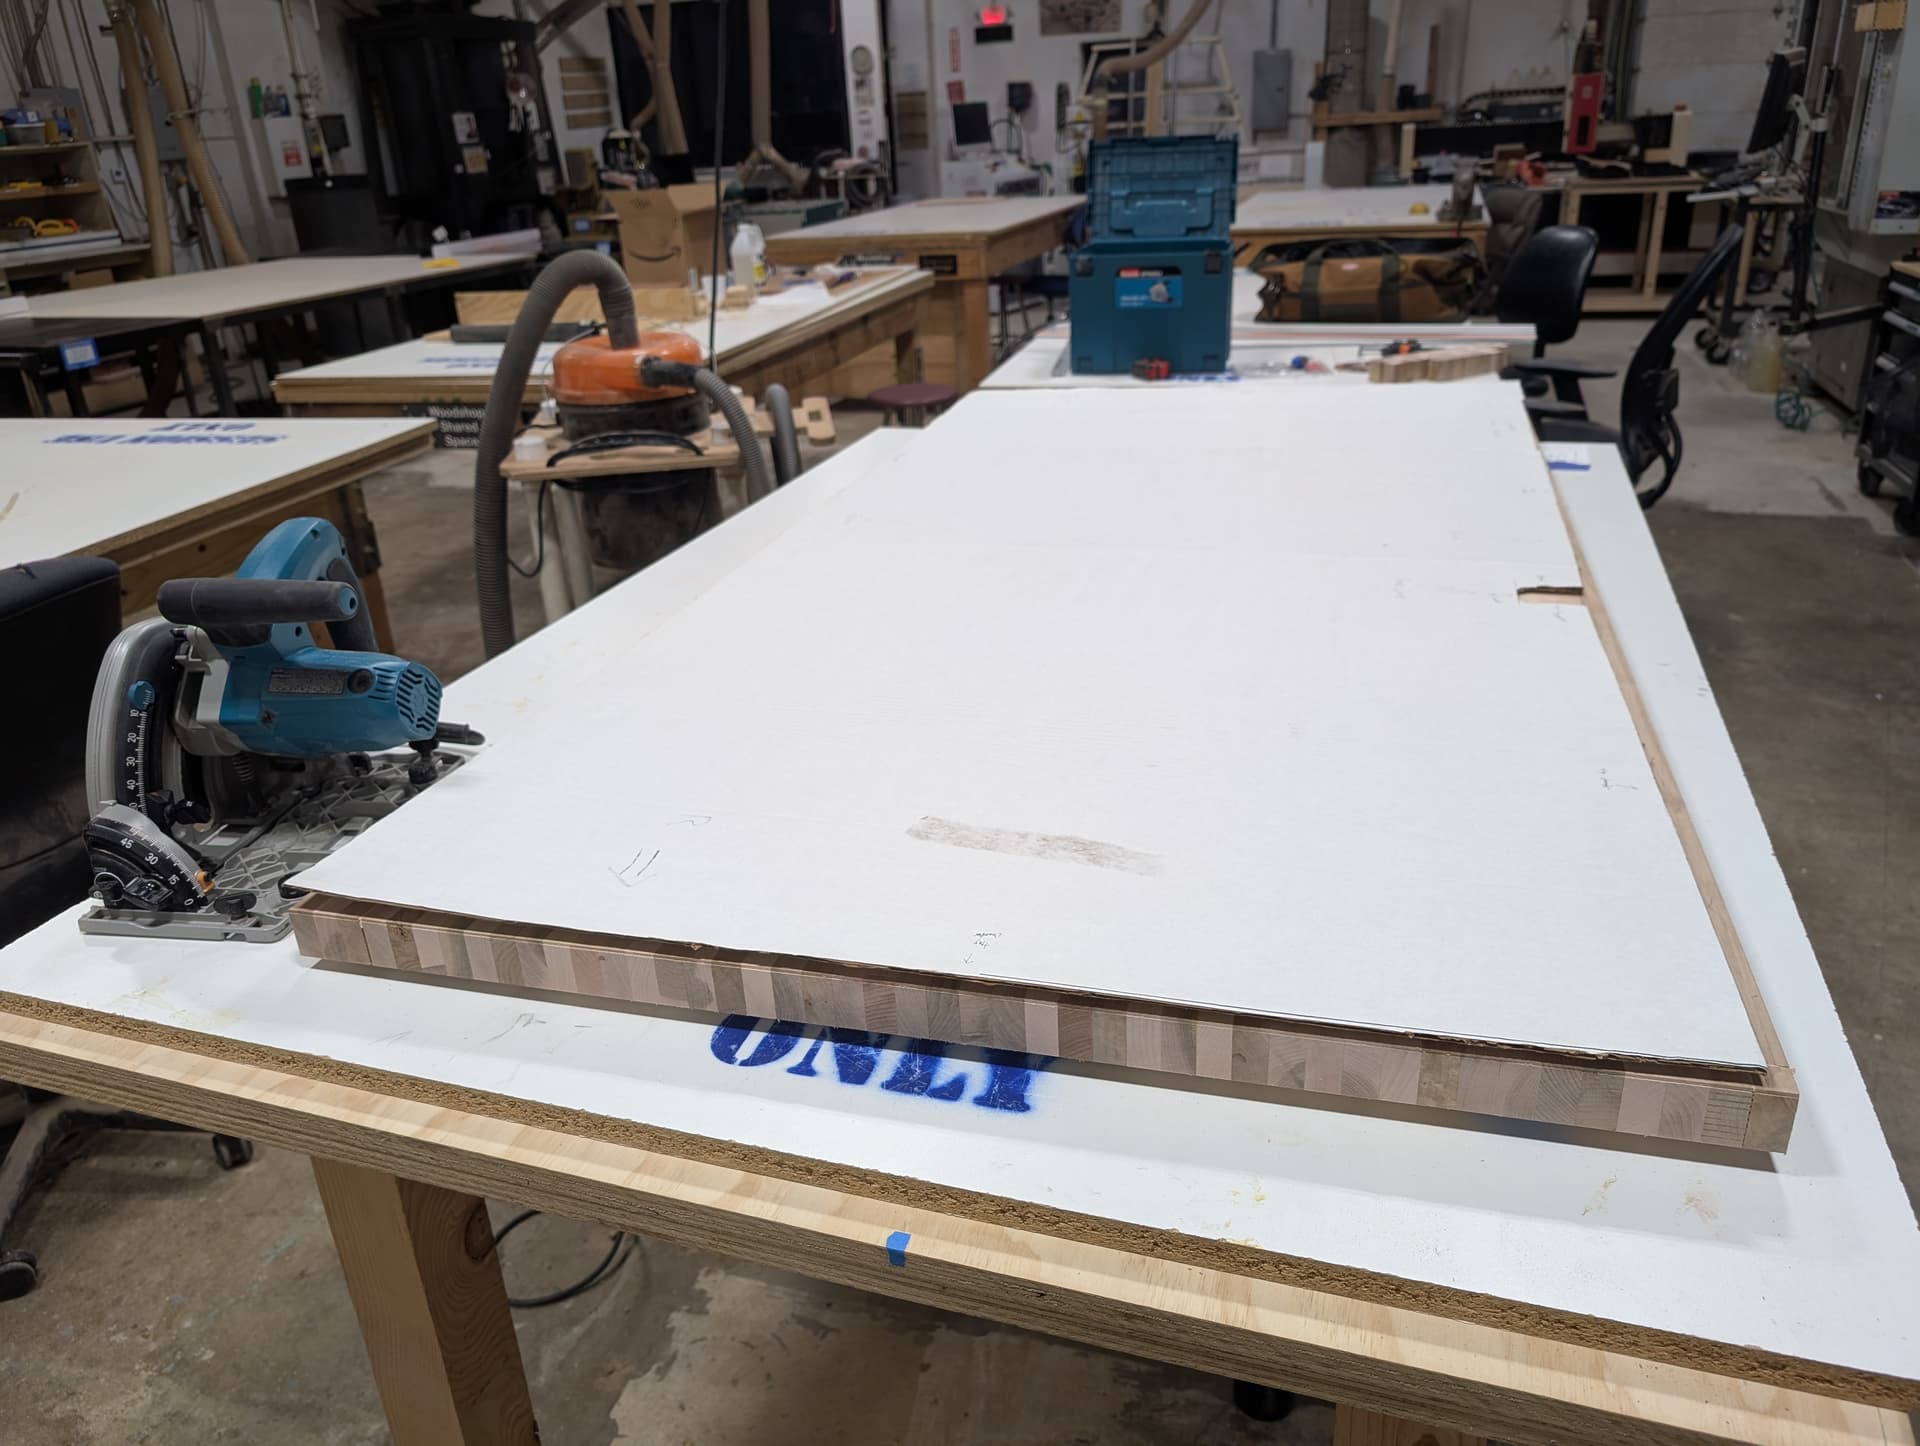
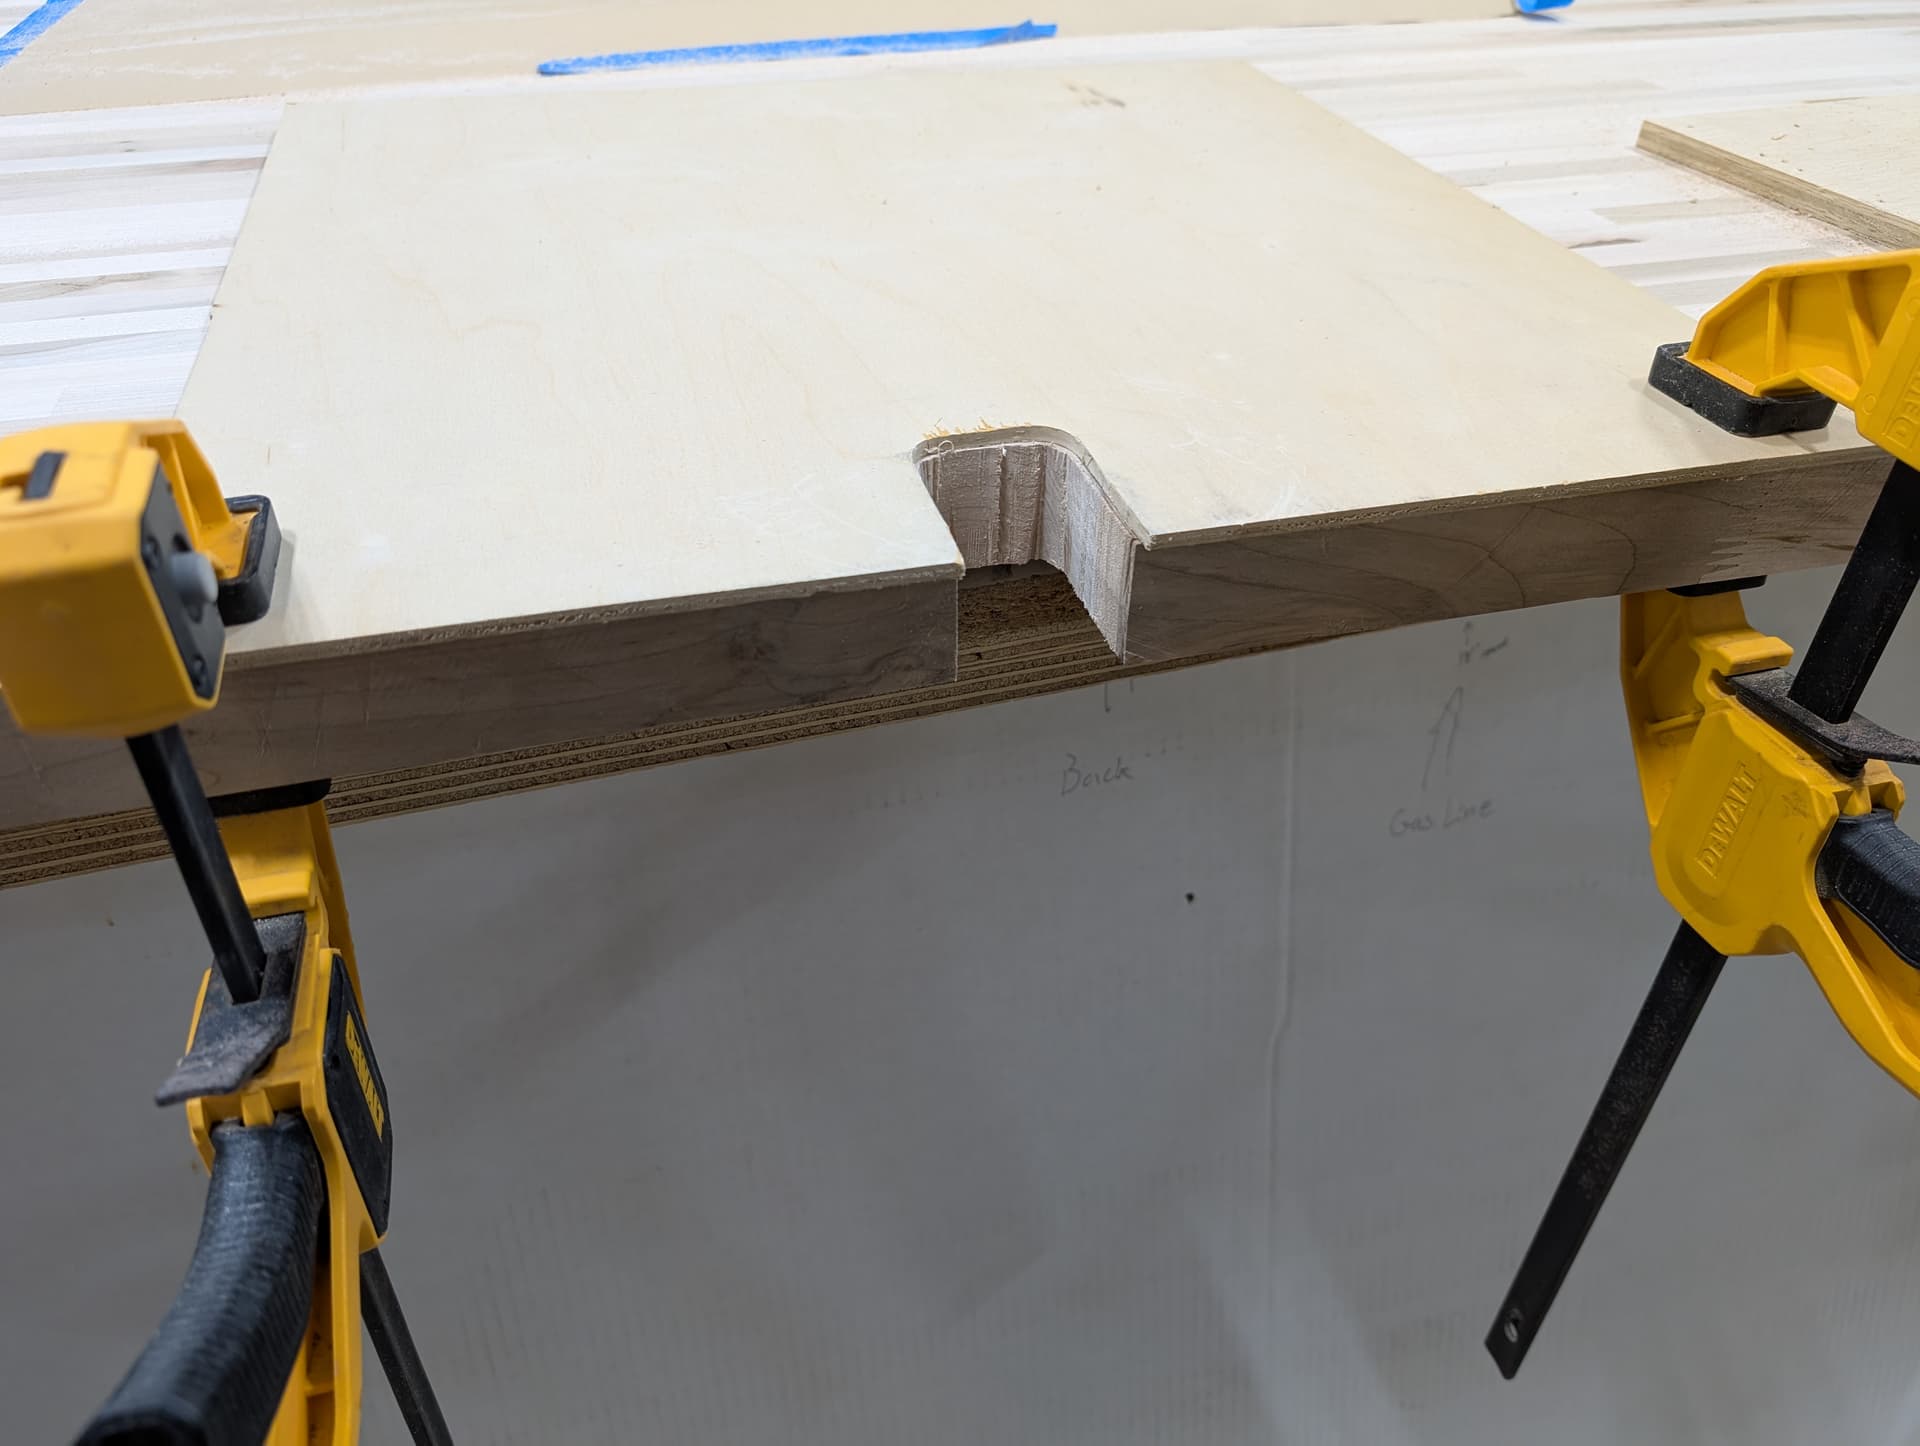
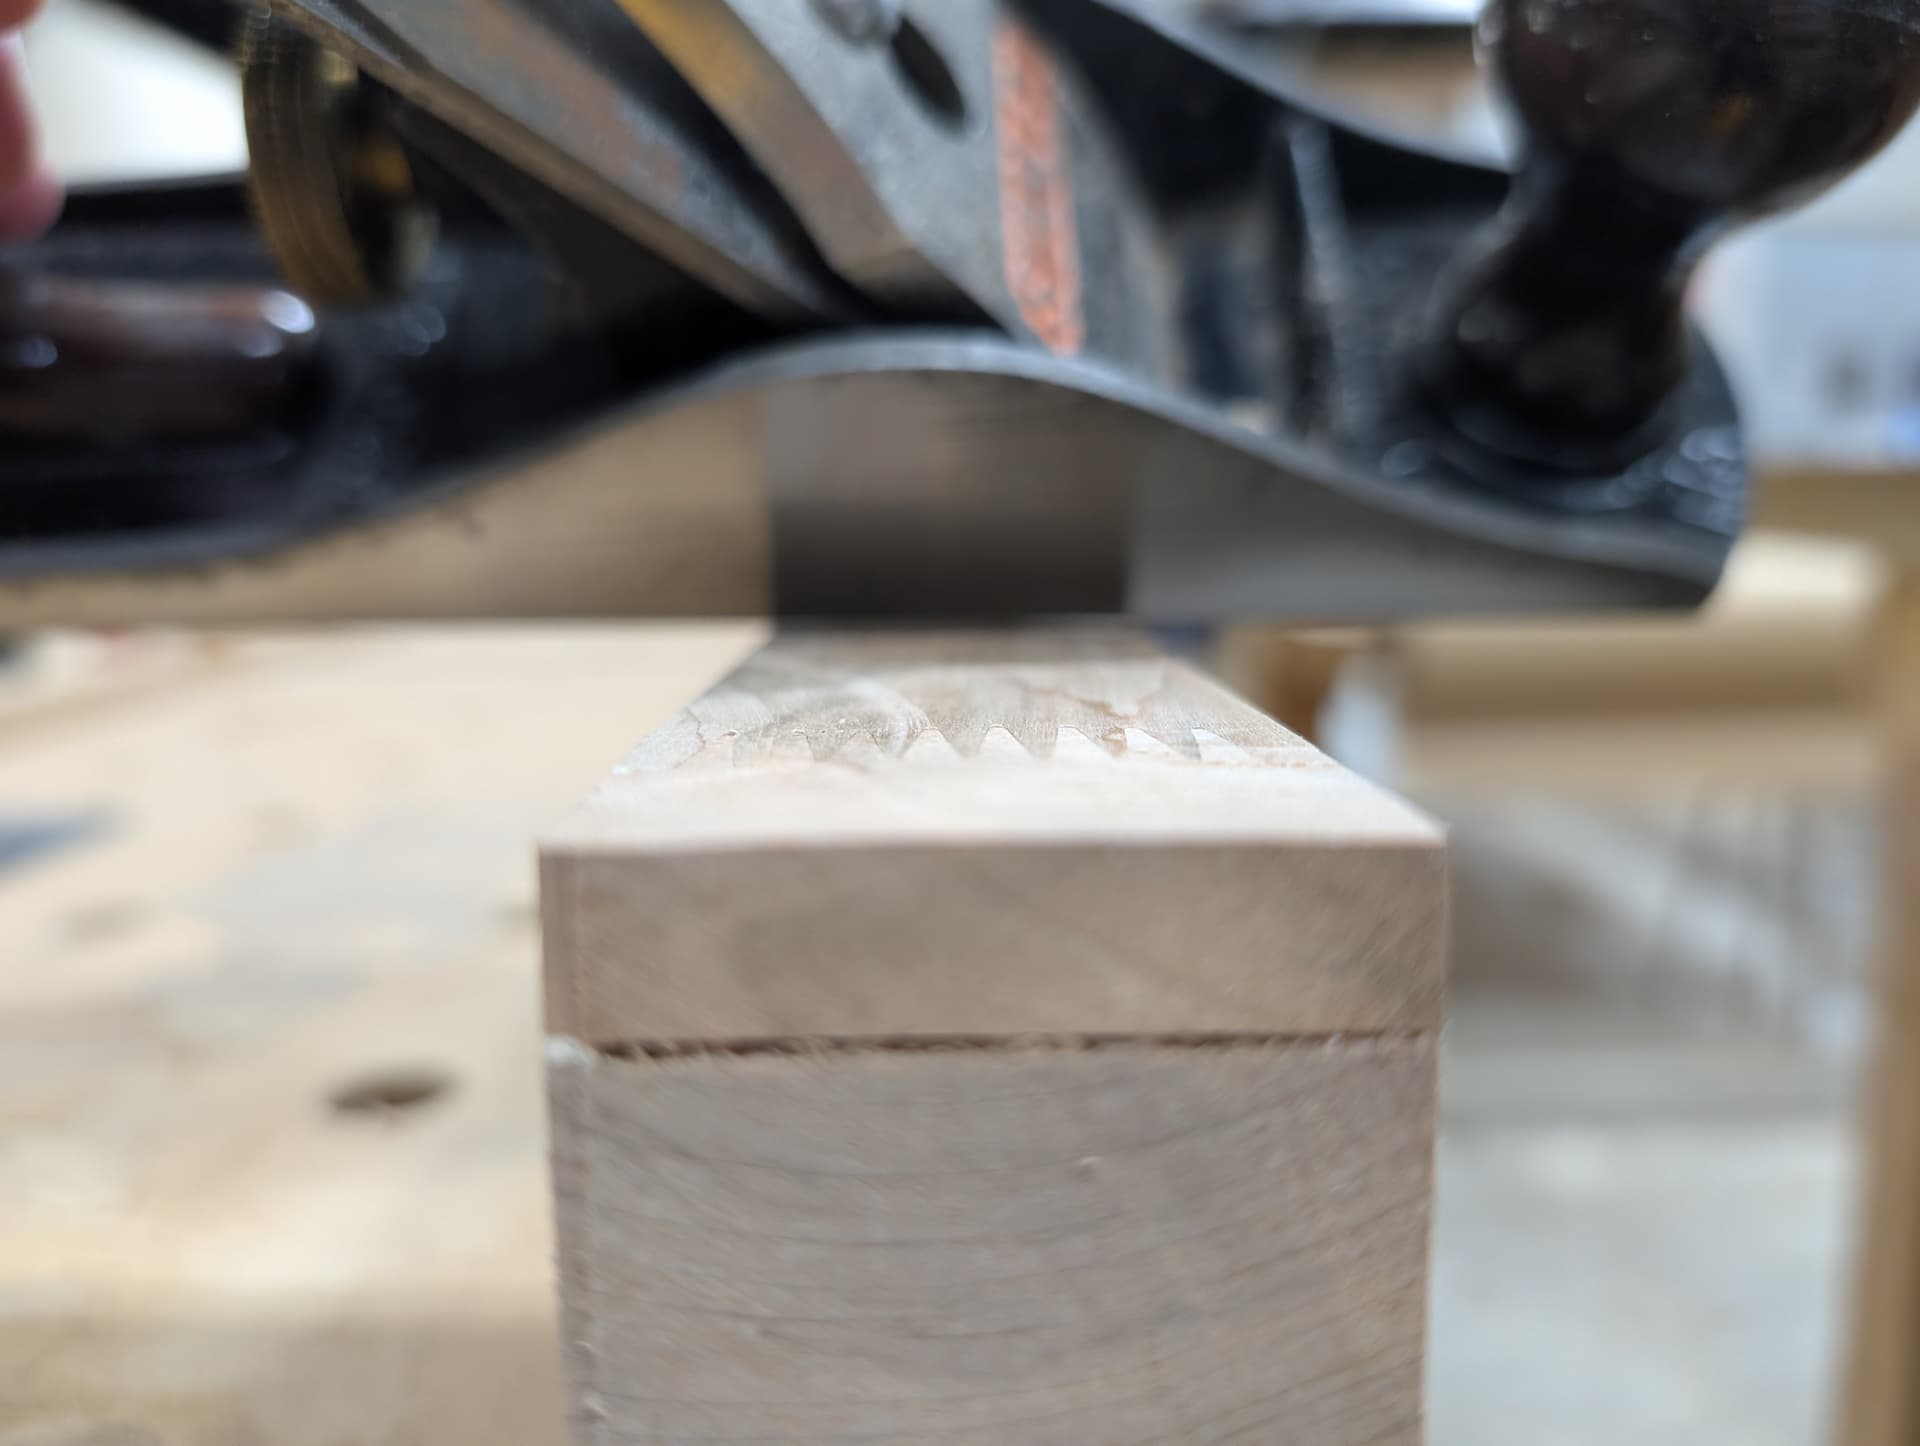
Back to the countertop! Using the template that was measured to a ~1/8" gap on every side, I laid out and cut the major parts with the Asmbly track saw, after making some test cuts… on the ends of the workpiece I was going to cut off anyway. I highly recommend a new, or at least SHARP track saw blade for this. I had minimal maple burning, but I did have some! Then, I made a plywood template (thanks, scrap cart!), used a jigsaw to remove the bulk of the material, and flush-trimmed my utility cutouts.
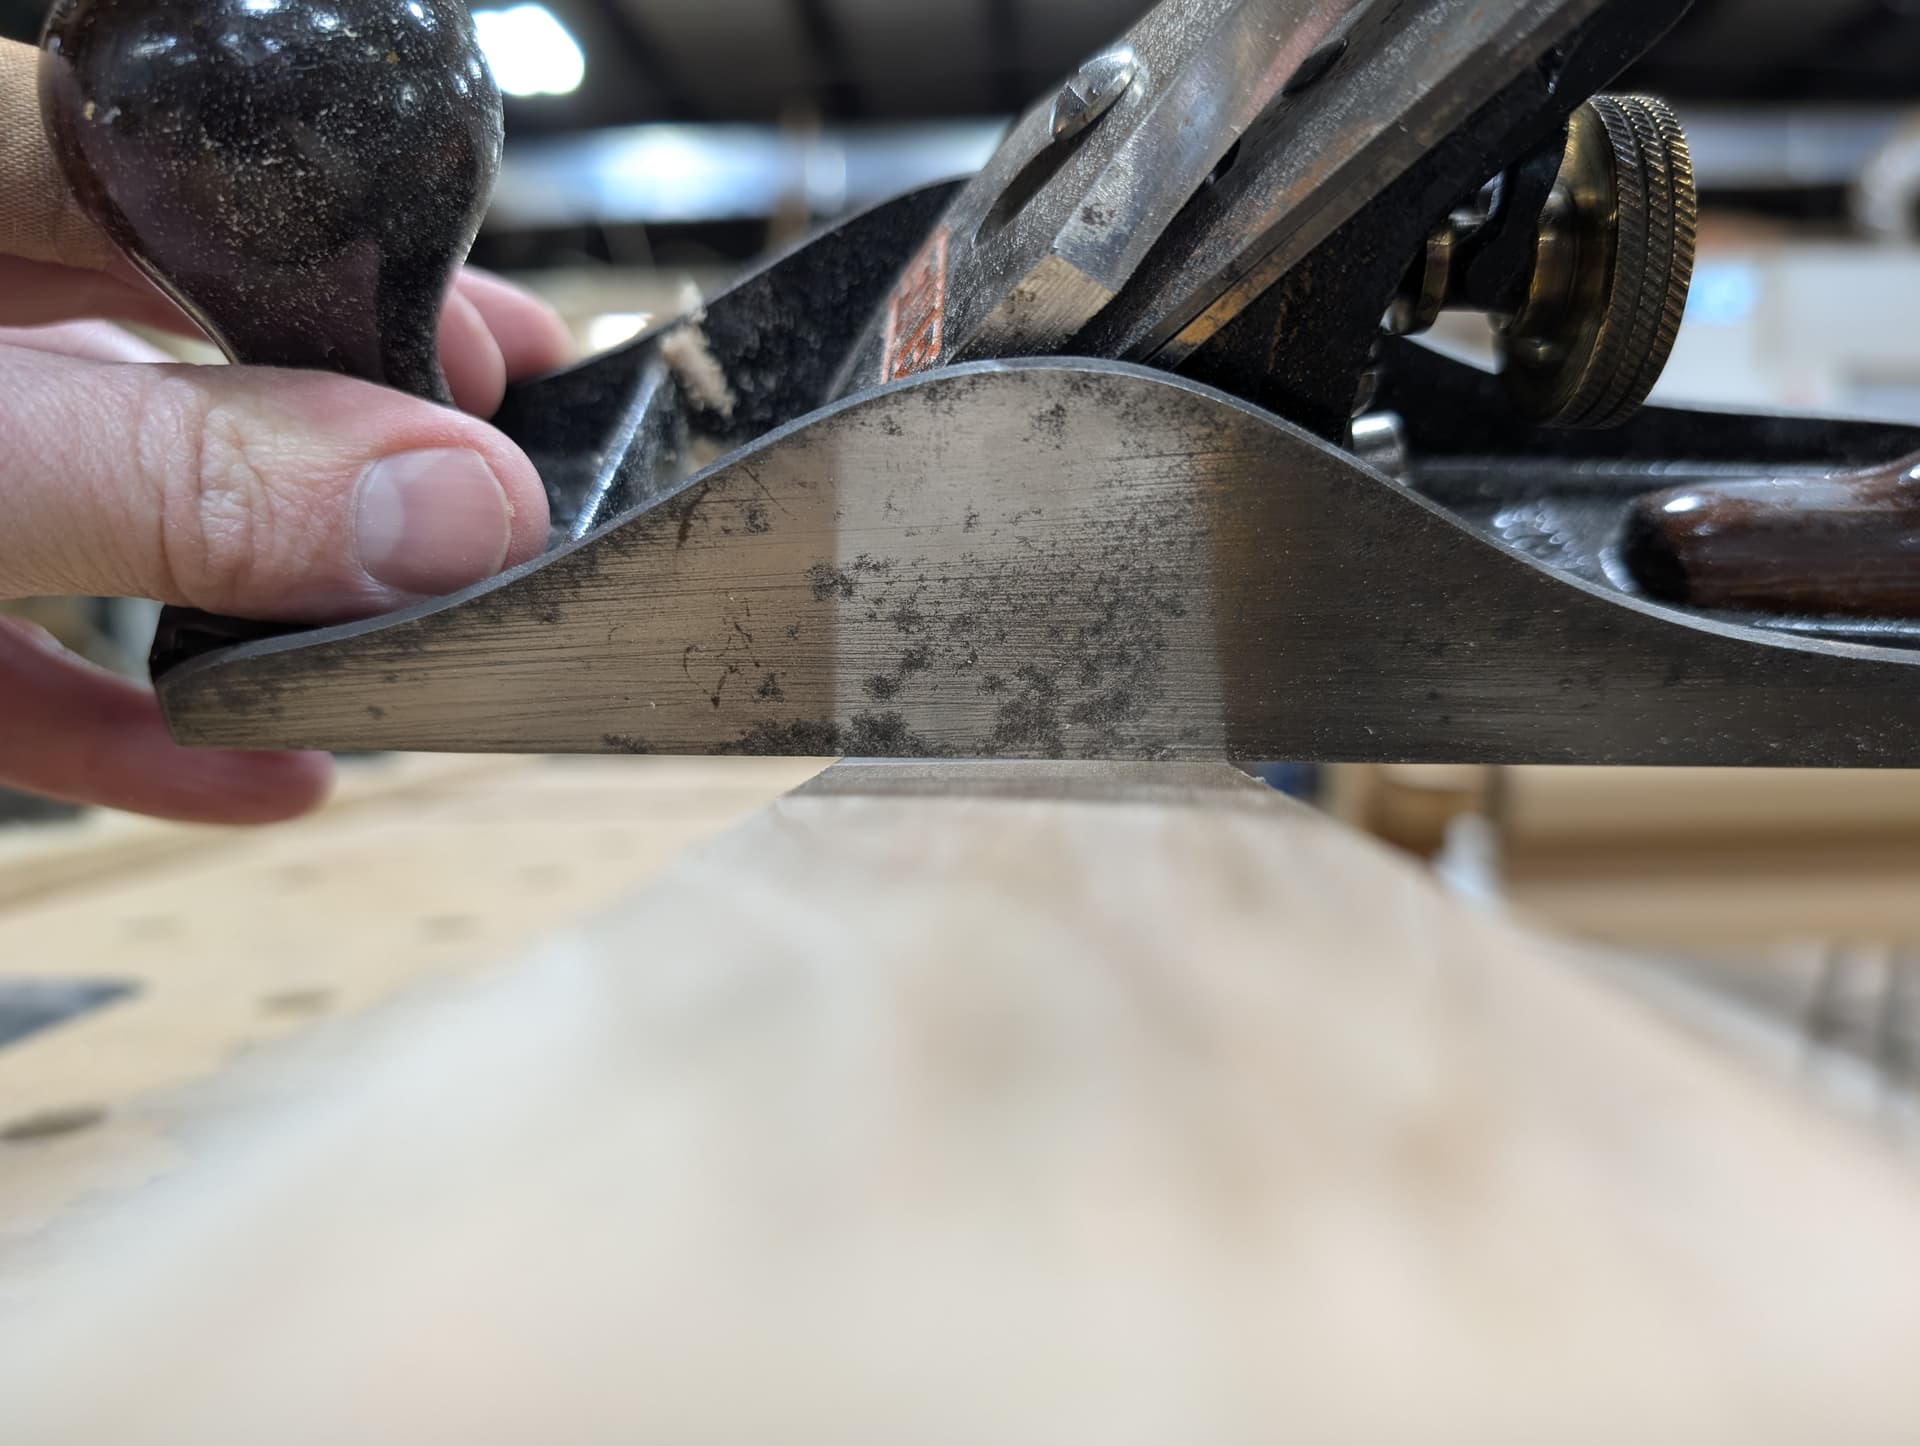
Next, it’s time to sand! Edges first, including a bit of hand leveling of the back edges. This wasn’t really necessary, especially for the back edges, but apparently I had a craving for shavings.
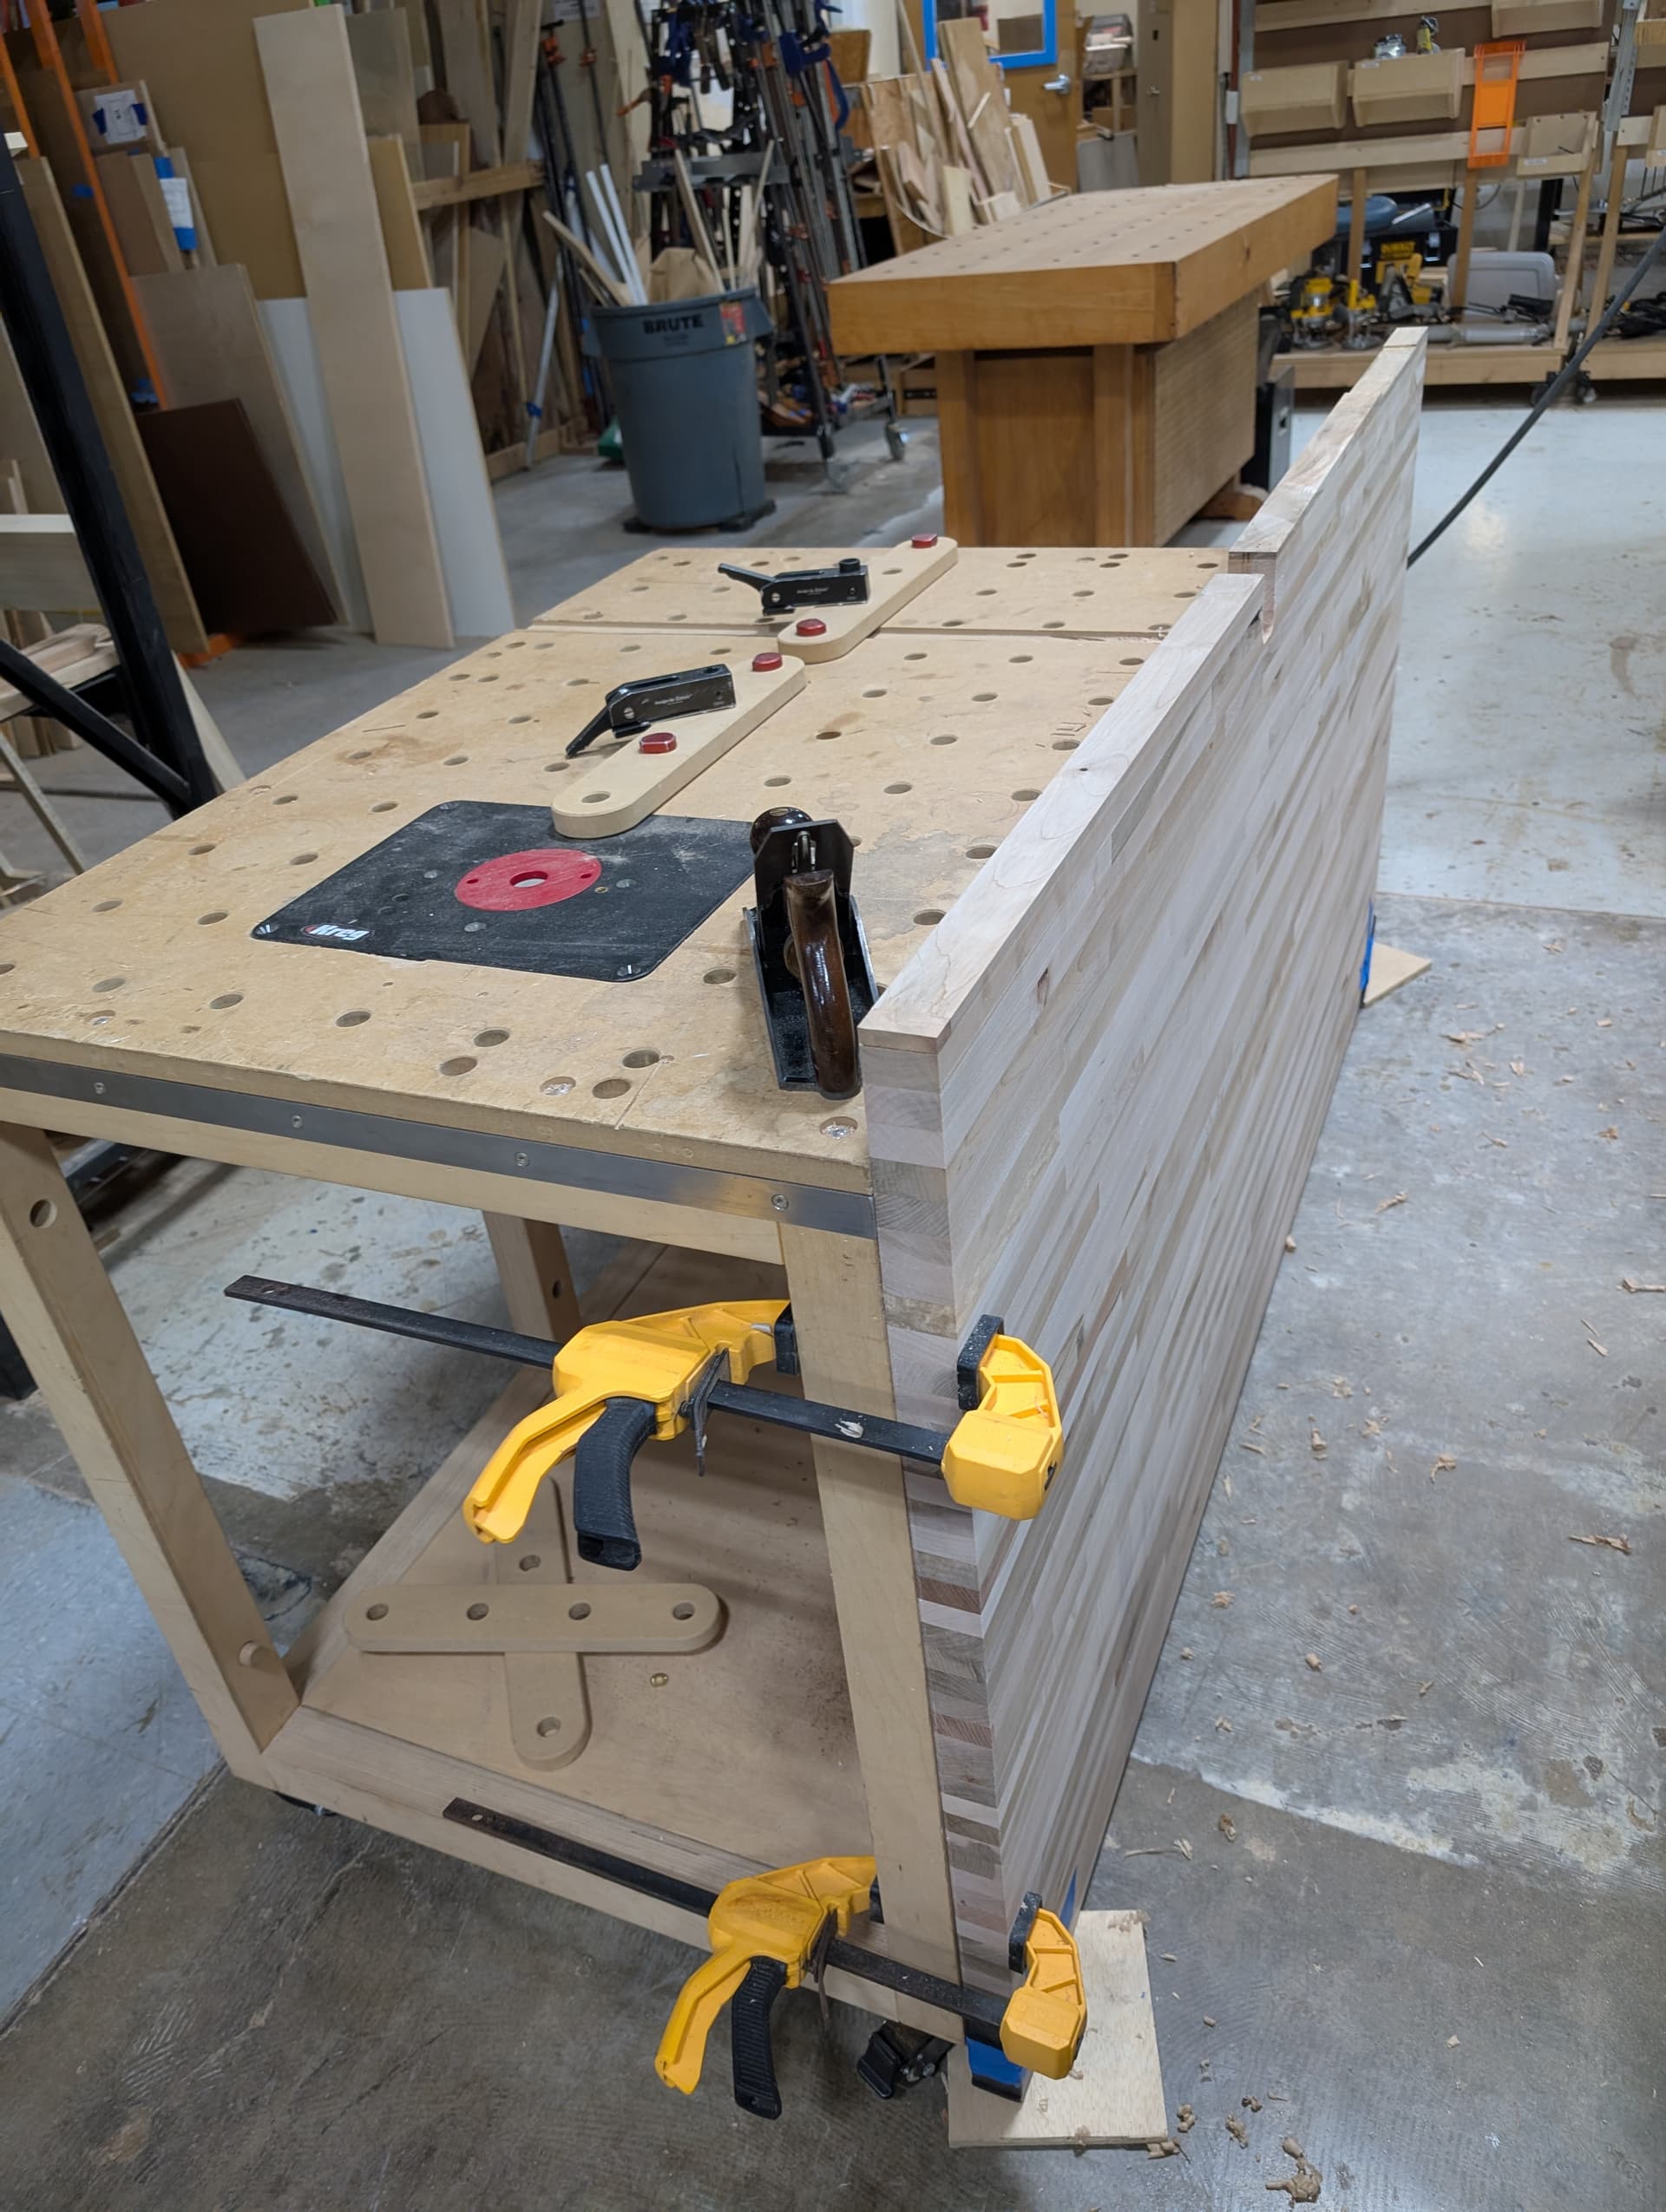
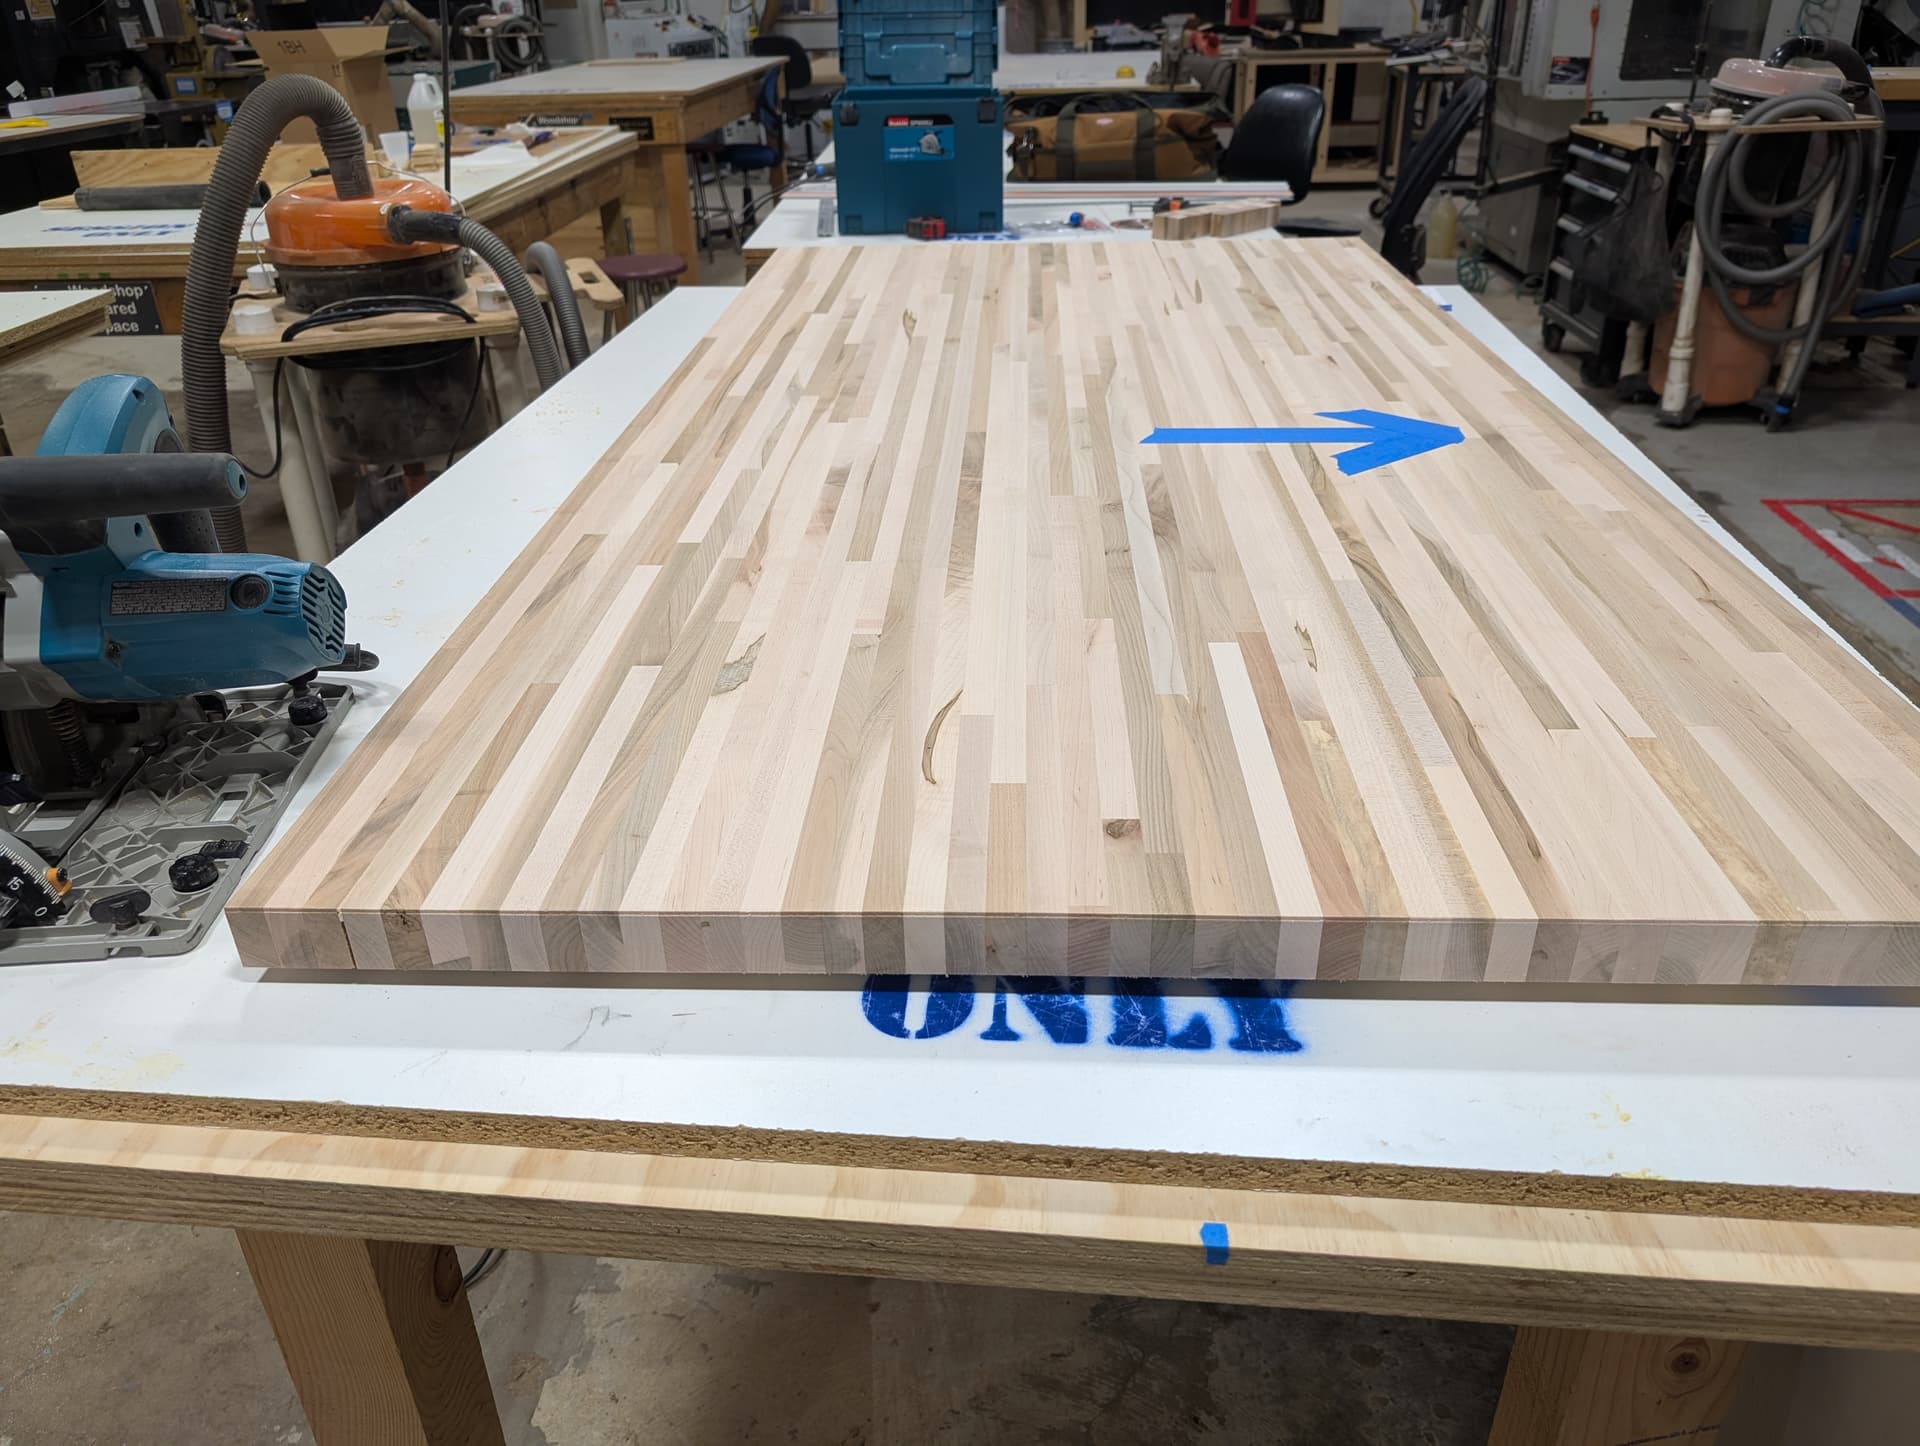
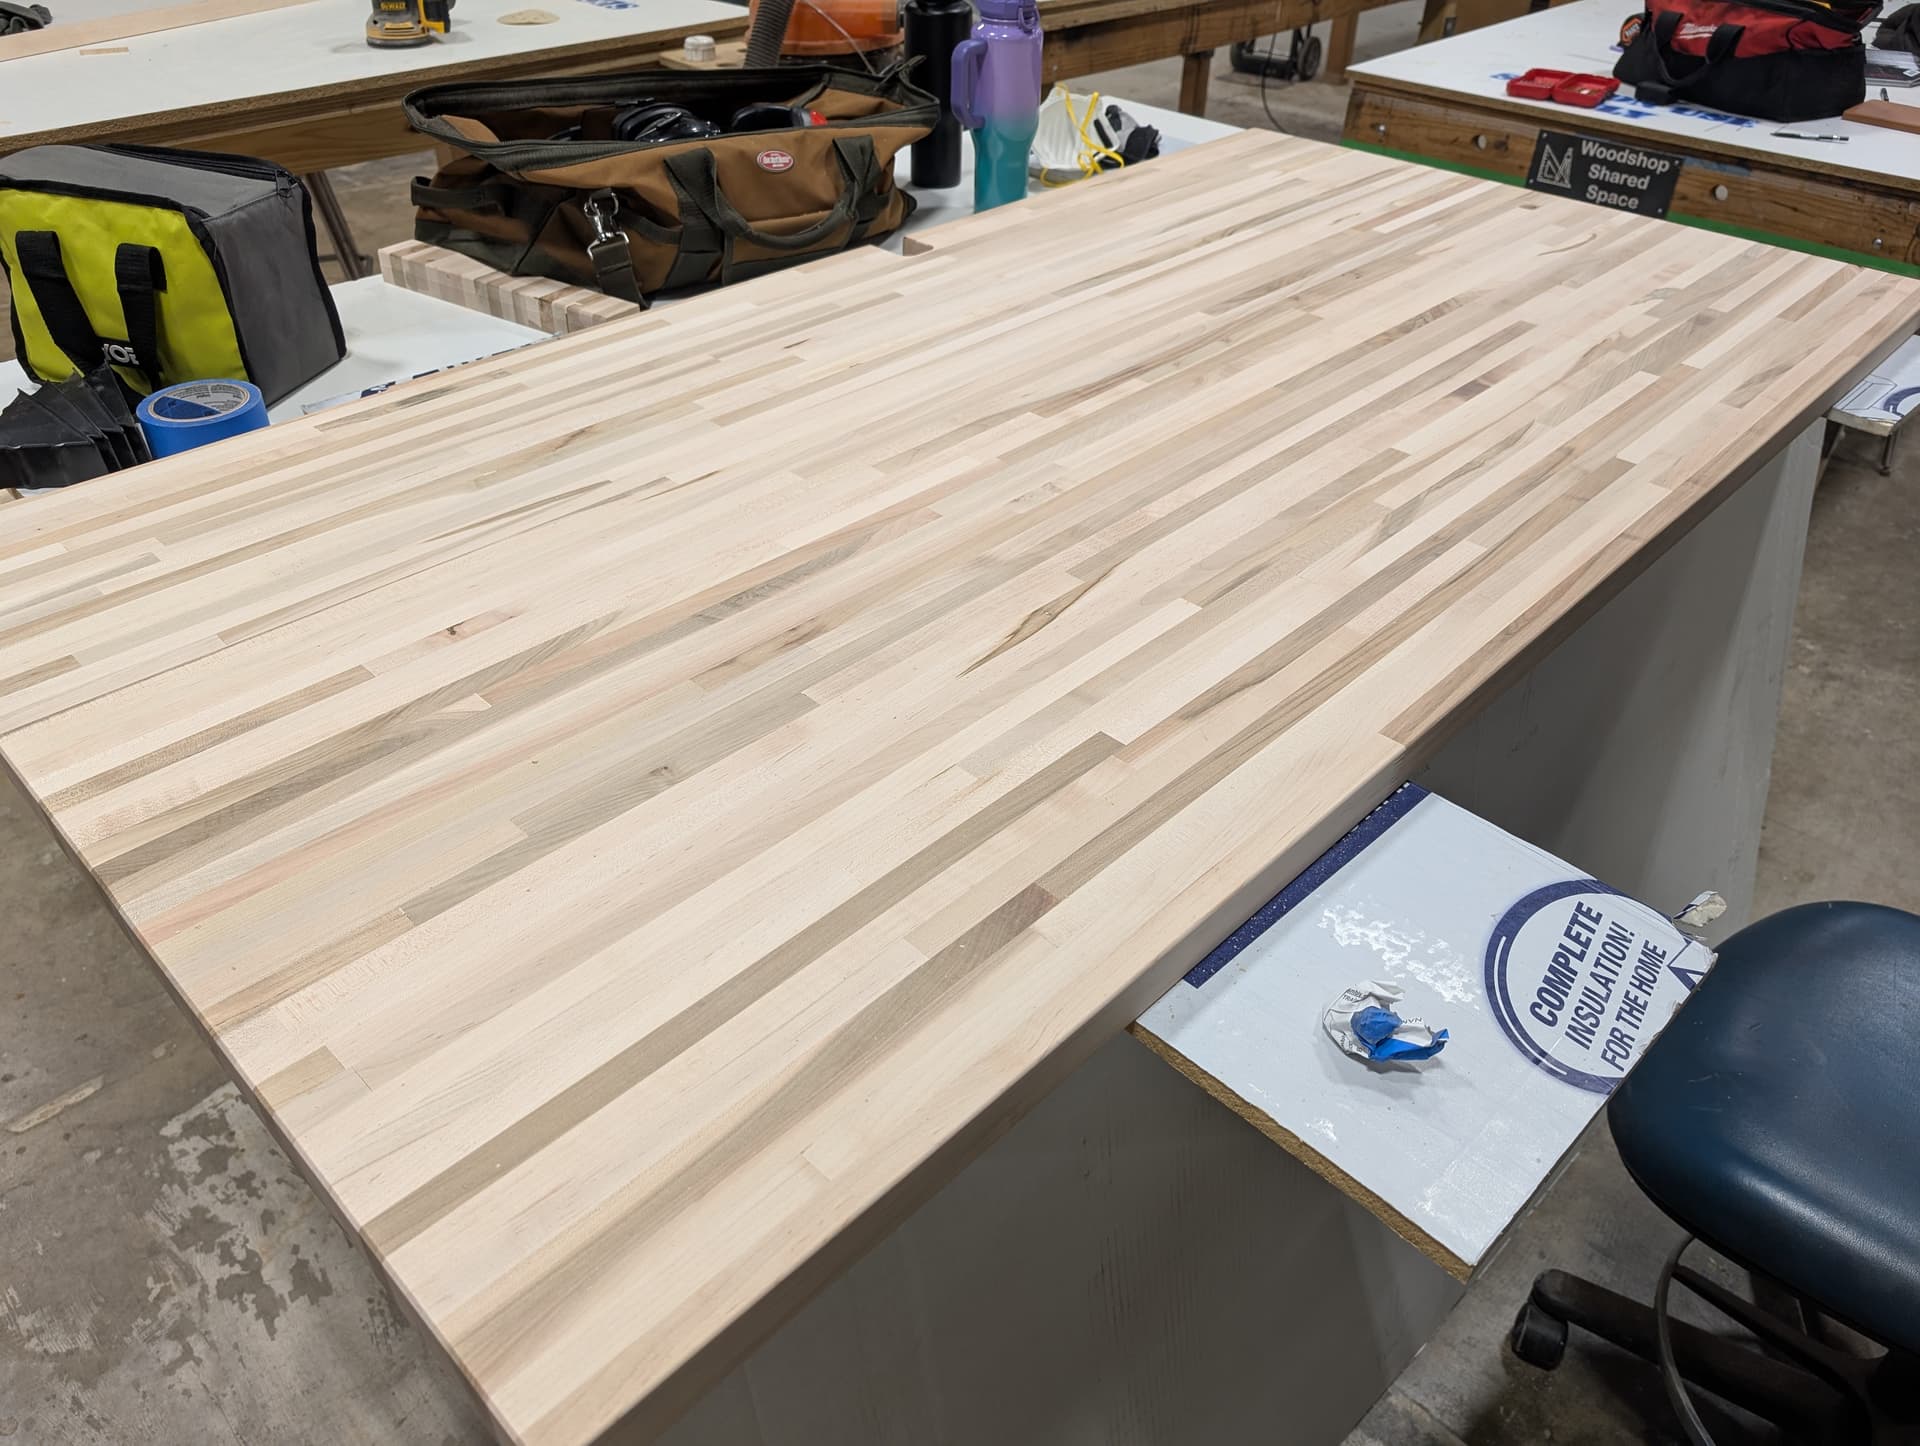
Now, the main event: sanding the top. This countertop is 36" deep in most places, up to 36.5". That is as far back as the dryer can sit and still hook up to the vent. Coincidentally… Asmbly has a 37" capacity wide belt sander! I only hit the top with the sander, taking ~8-10 very light passes at 80 grit, then ~3 at 120 grit. Probably would have been much fewer passes if I could dial in on the thickness a bit better. For this, I needed 2 people minimum, and I think 4 feed rollers both in and out! Thanks to that day’s bandsaw users for being gracious with me as I took up a ton of space. The sanding was great, and I did very minimal touchup in one low spot with 220 grit on the orbital. This could have been days of sanding work otherwise!
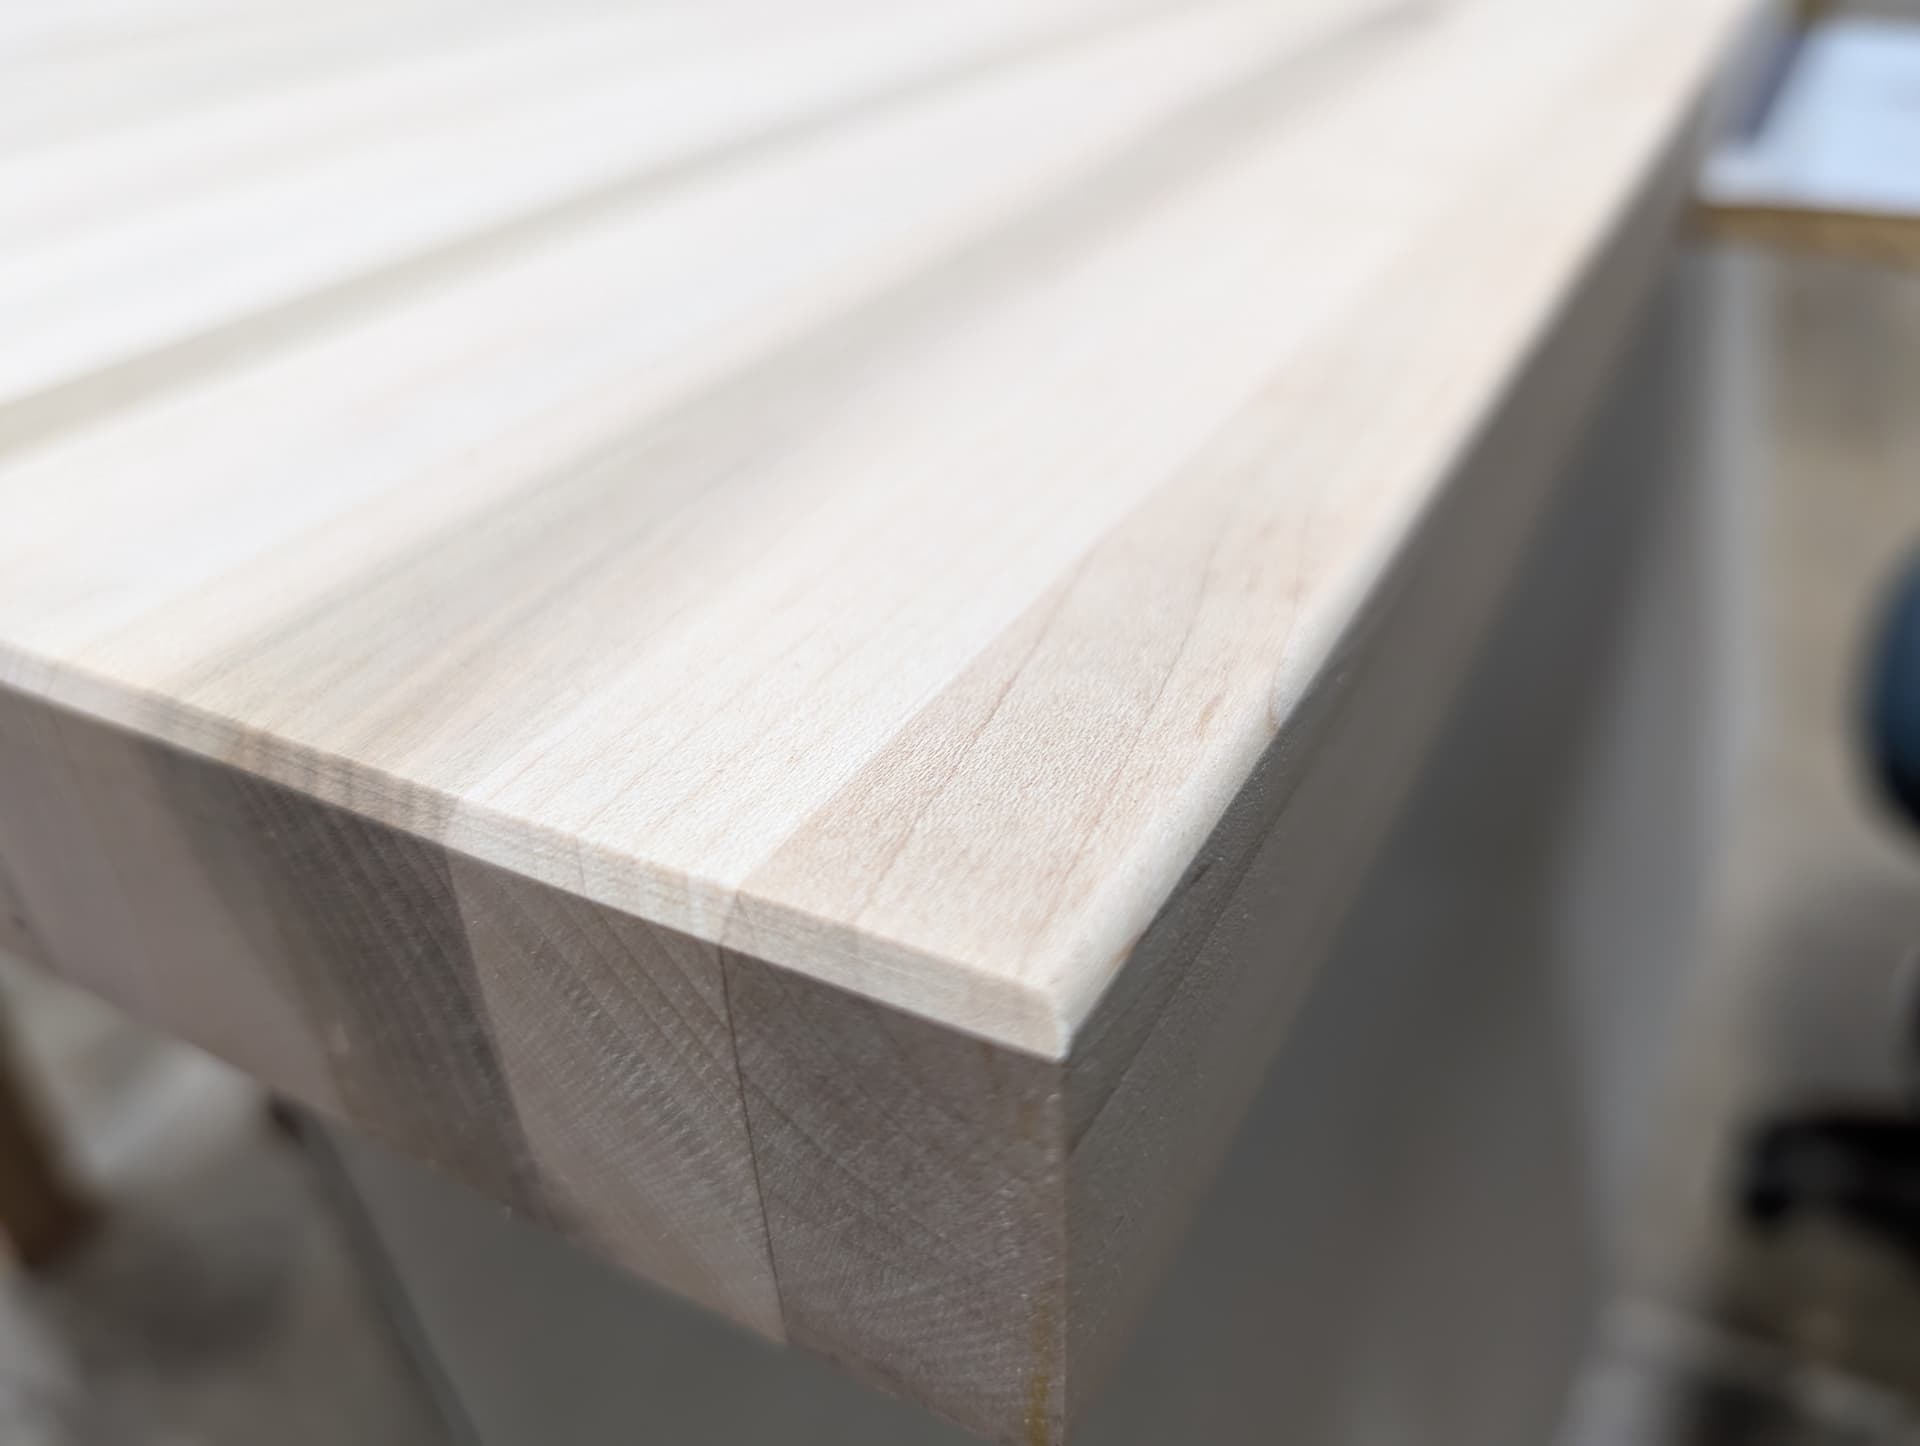
Next, back to the work table for some edge profiling, as noted on the template:

After a (long) interlude for finishing with satin wipe-on poly (side note: it will look like complete garbage before it gets better. You have to trust the process more than you think, even after considering this advice.), it was install time. Note that at this point I have never test-fitted this very heavy countertop in the room, not even once. Measure none times, cut… more? We’ll see!
Chapter 4: Install
Assuming my piece will fit, I now need to install it so that it sits perfectly level on 3 walls simultaneously, at a height determined by a cabinet that is slightly off-center on the floor, on uneven tiles. So, armed with a 3-foot level, two 8-inch levels, and several measuring tapes… I asked for help. @Michael came through for me with the loan of a cross-line laser level, turning hours of frustration into minutes of just marking directly on the wall. Thank you again Michael!
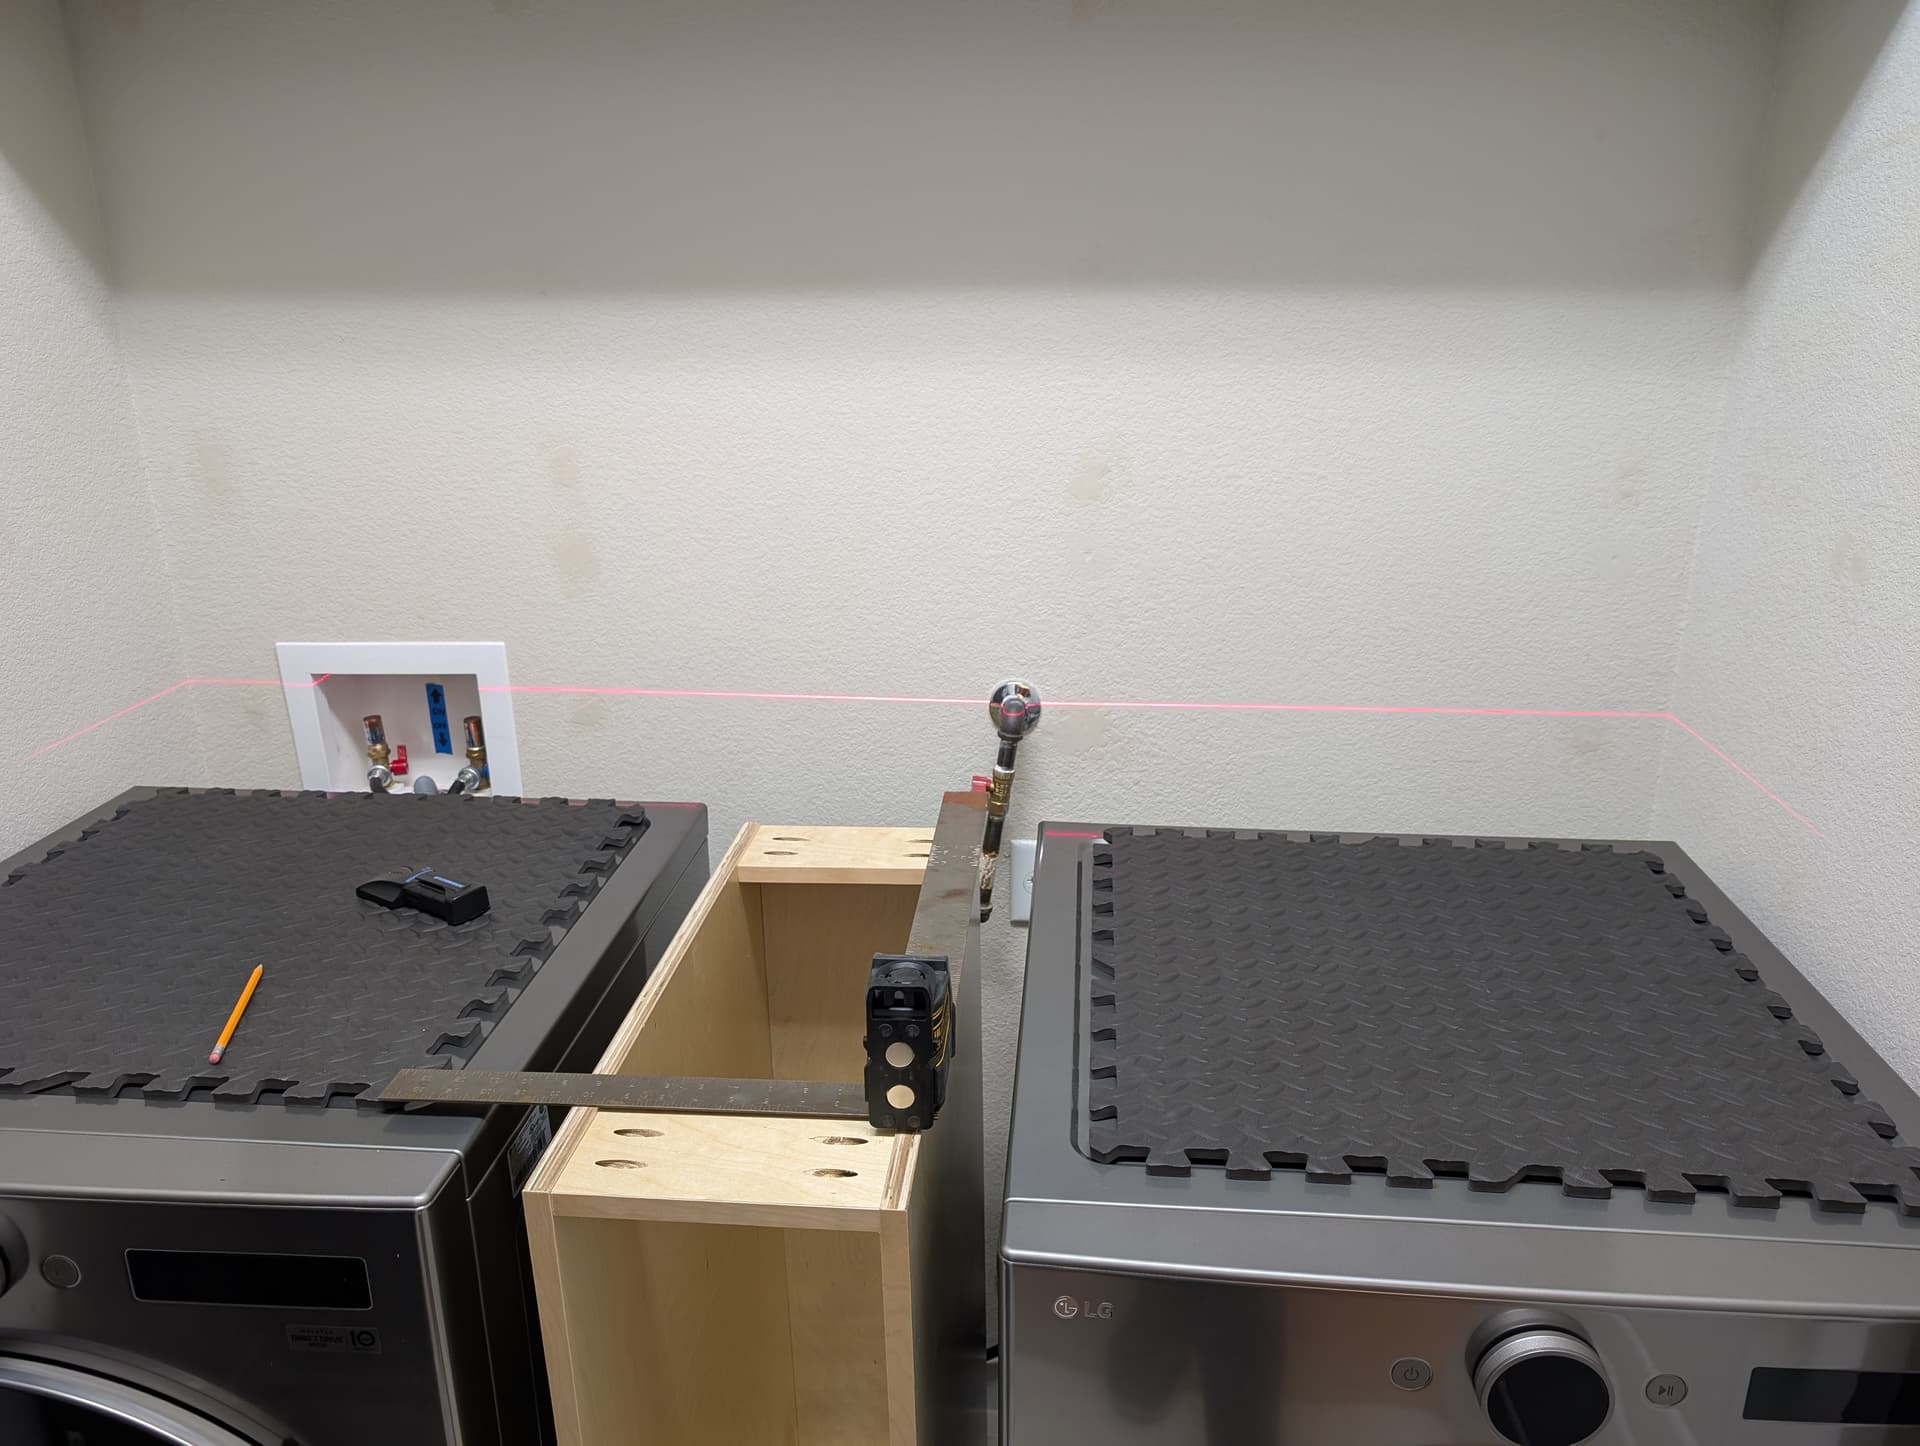
A few stud-finding expeditions later, some supports milled straight and flat from Home Depot’s premium crooked-forest pine that had been on my garage floor for a year, and dismantling the dryer for a weekend, we could get the install done!
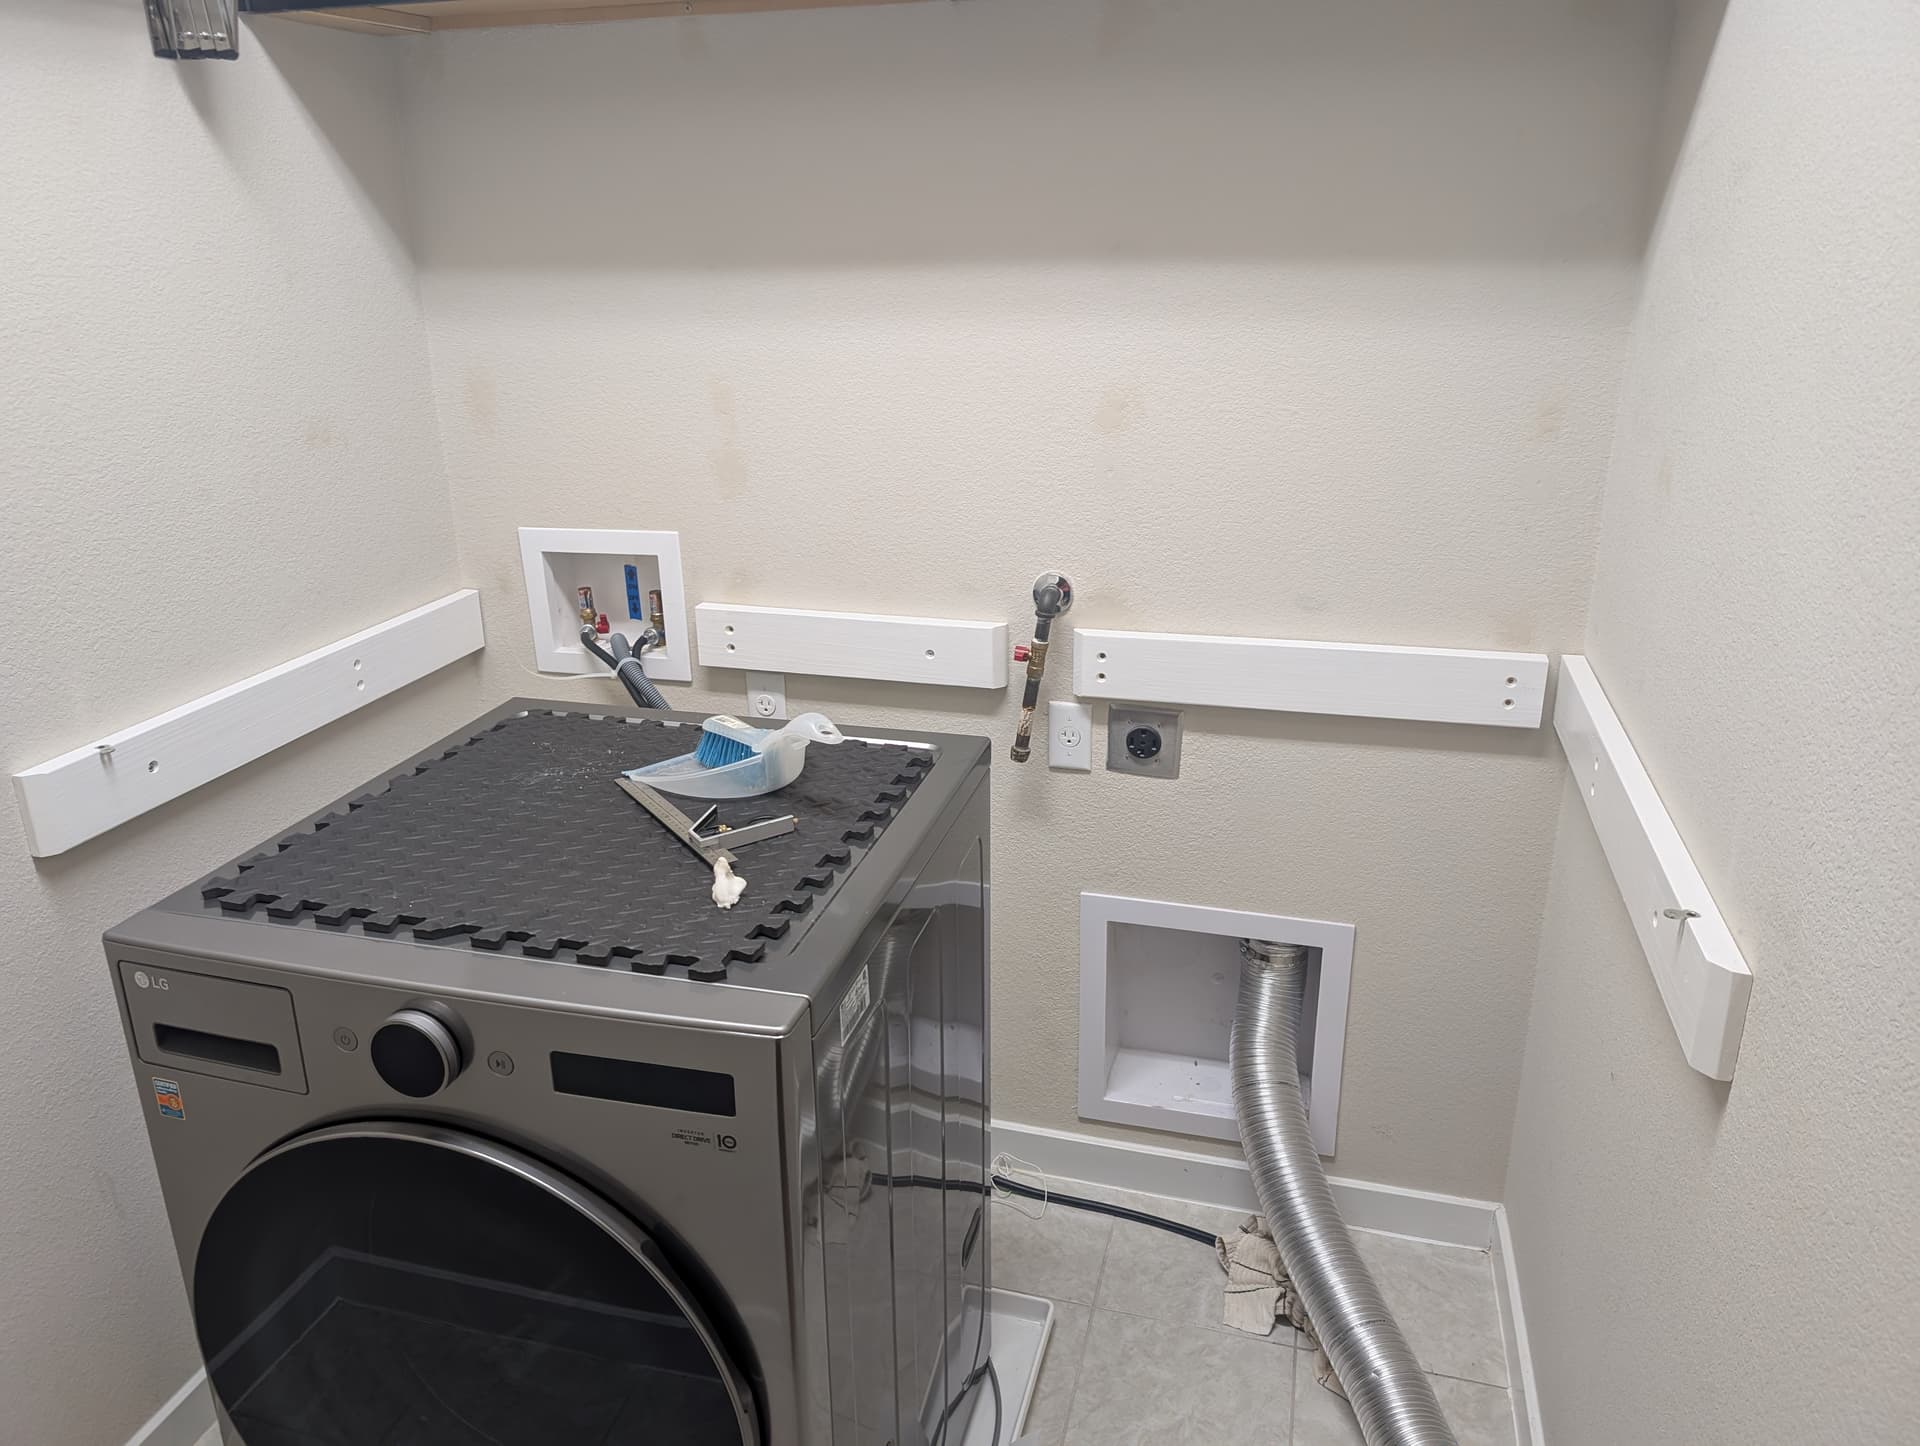
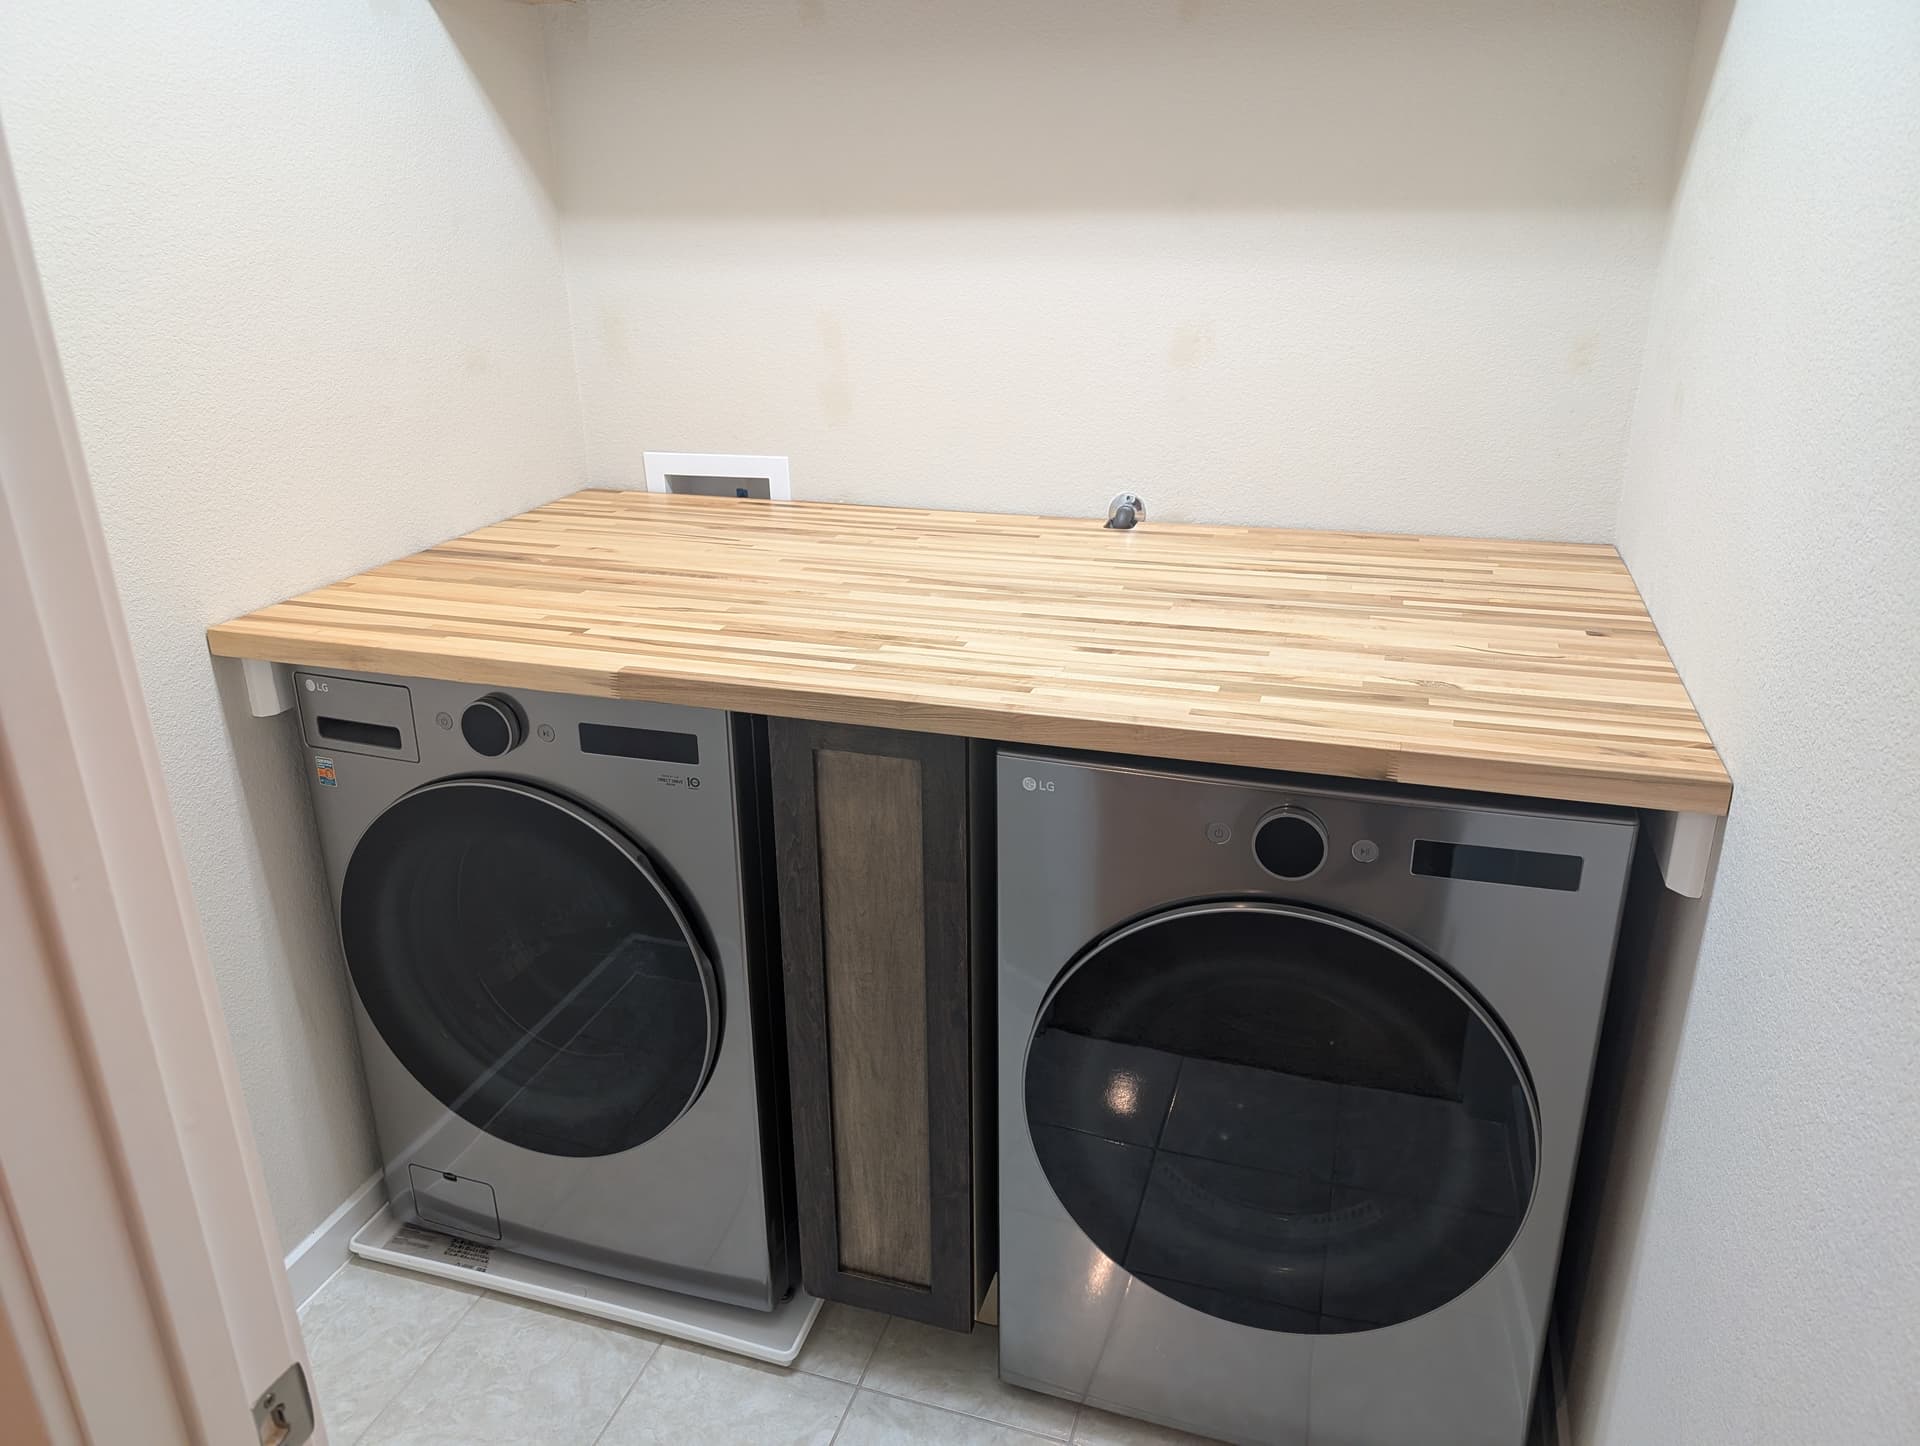
And yes, it fit just like the template did. ![]()
Some additional steps you may need to do throughout the project.
- Make appliances functional-ish, fix them, or replace, without waiting for the project. Total time elapsed since they shingled over my dryer vent: 4 months 16 days. I would have run out of clean clothes for sure.
- Bribe your closest truck friend with food to help you move 4x8 plywood, 6’ countertops, and much more.
- Write yet another storage tag, because while you got a lot done today, you didn’t get the countertop done yet. Again.
- Haul the template upstairs, tear apart the stuff on the appliances, and check your template. AGAIN.
- Find more information and resources on finishing, ideas for more features to add (what if we added a sink too!), and distractions.
- Despair, wail, and resign yourself to just following the plan you already had.

Happy making!