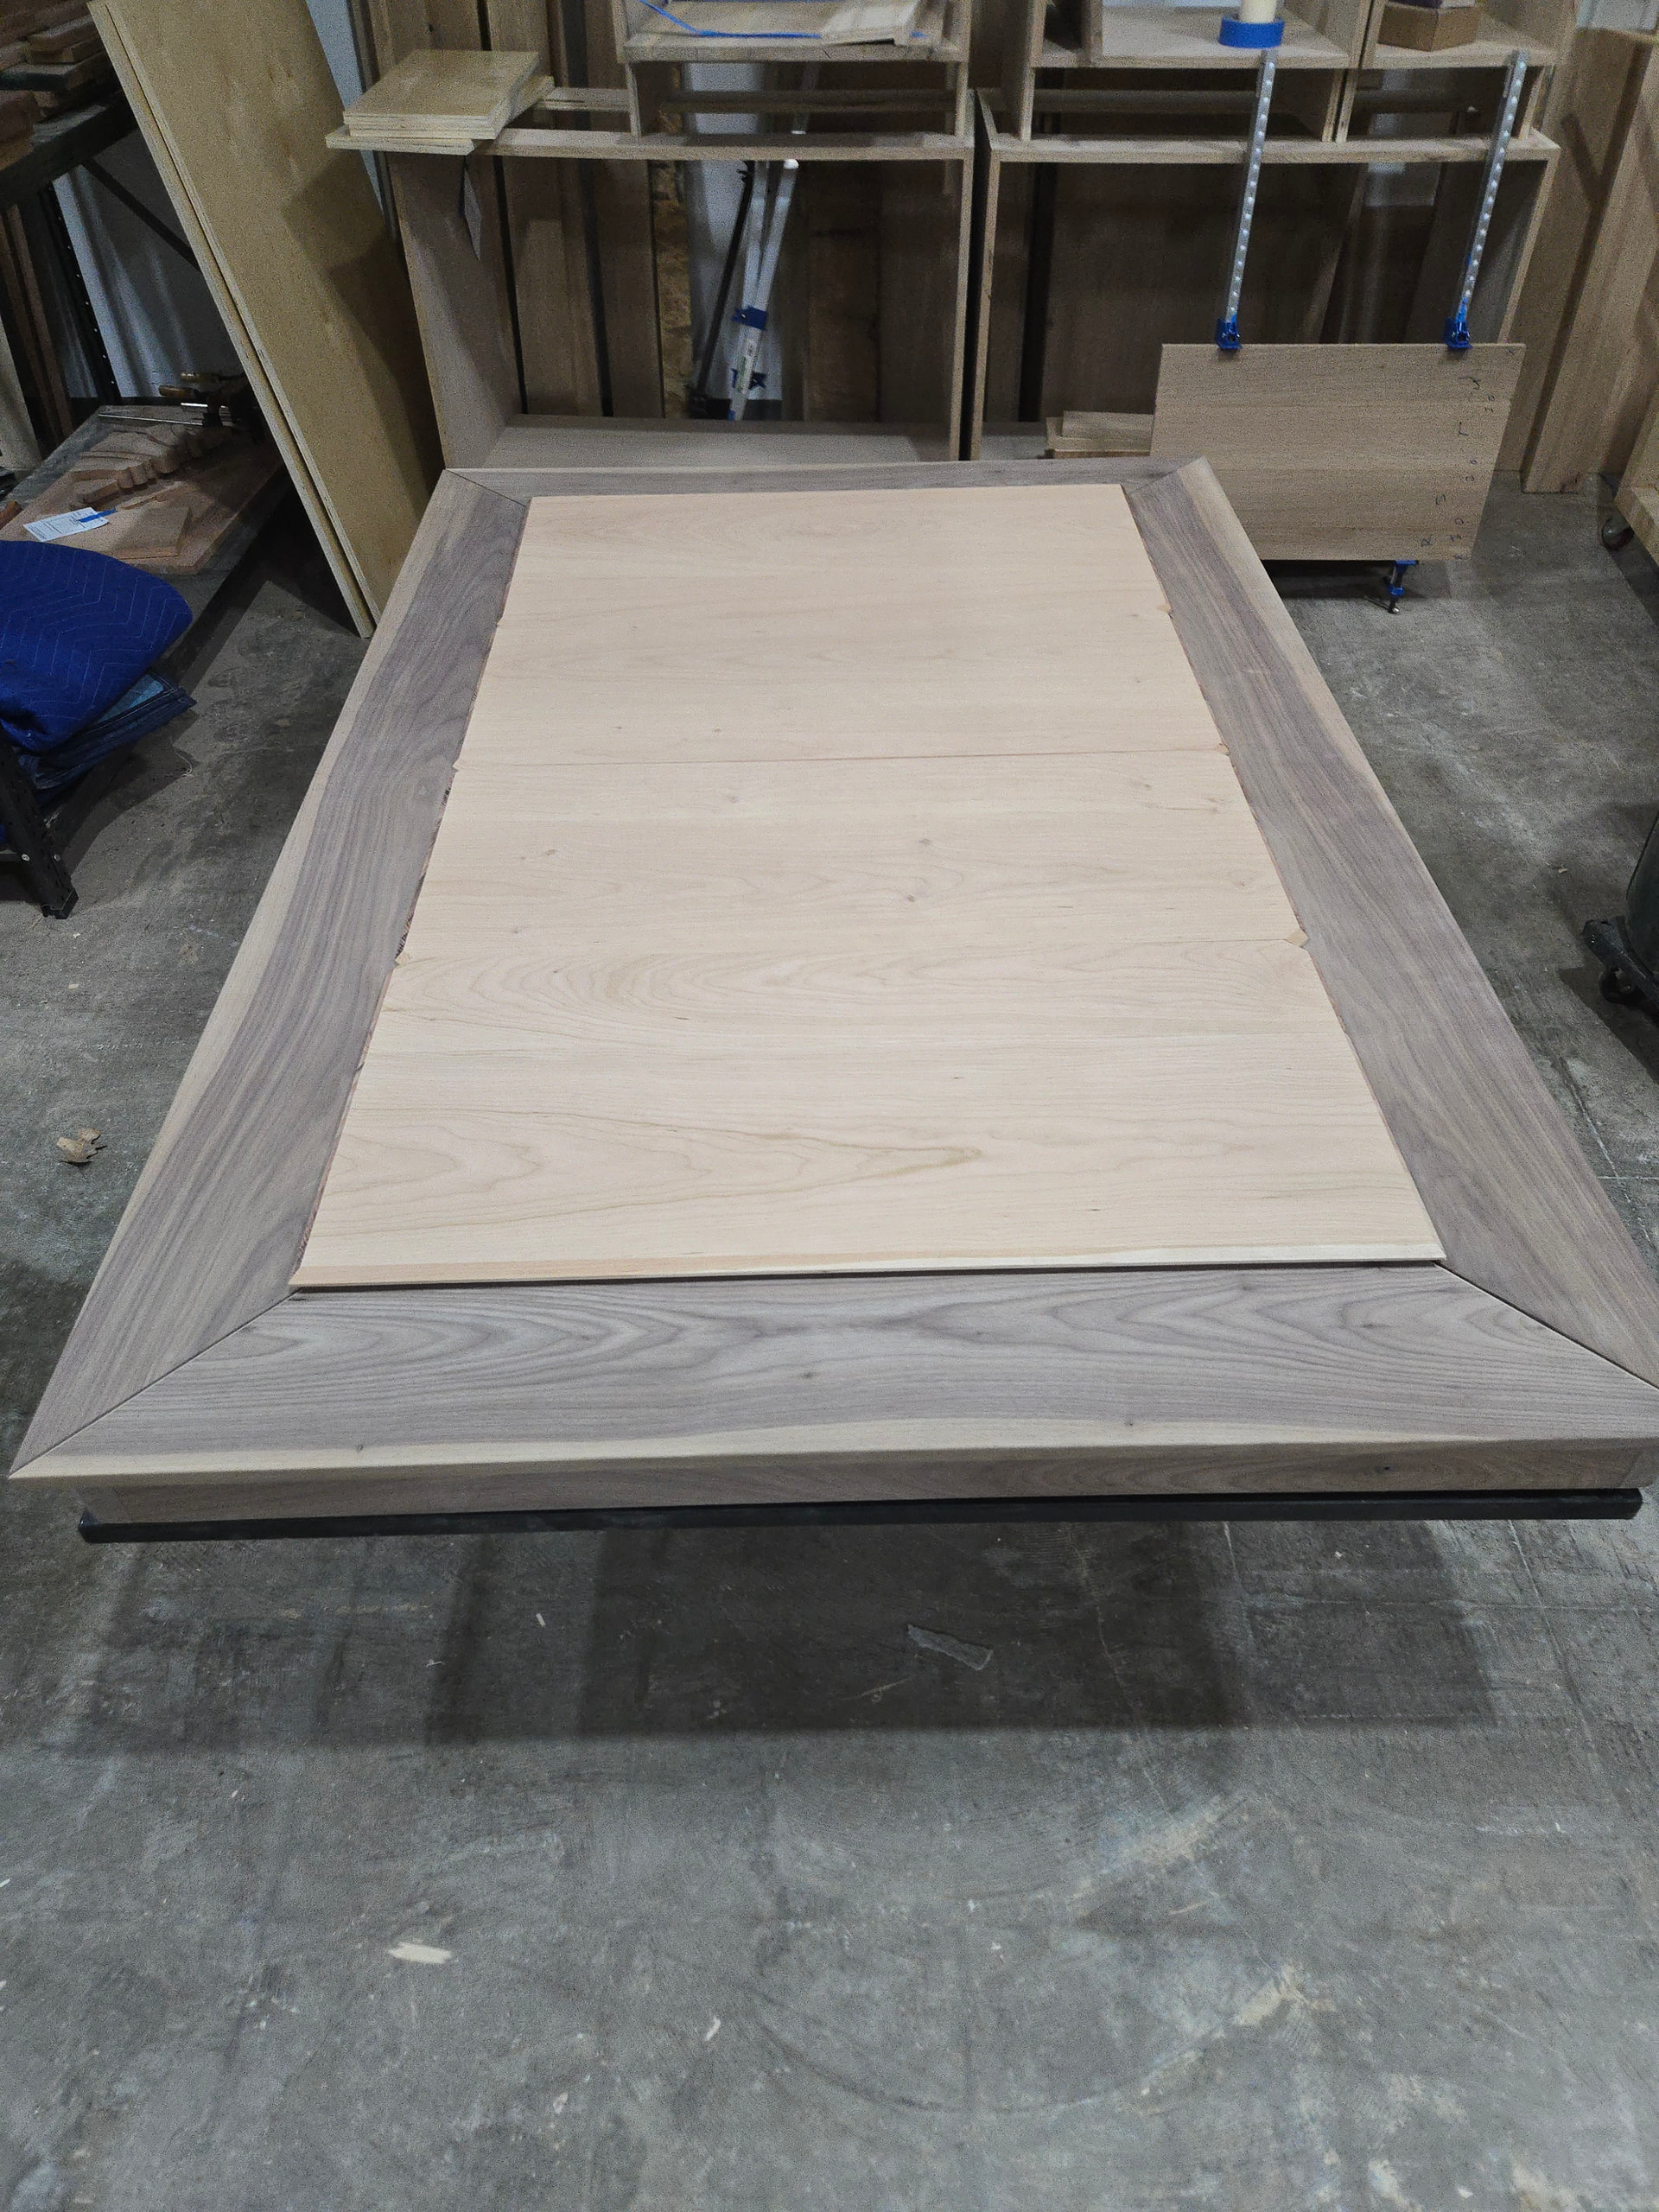
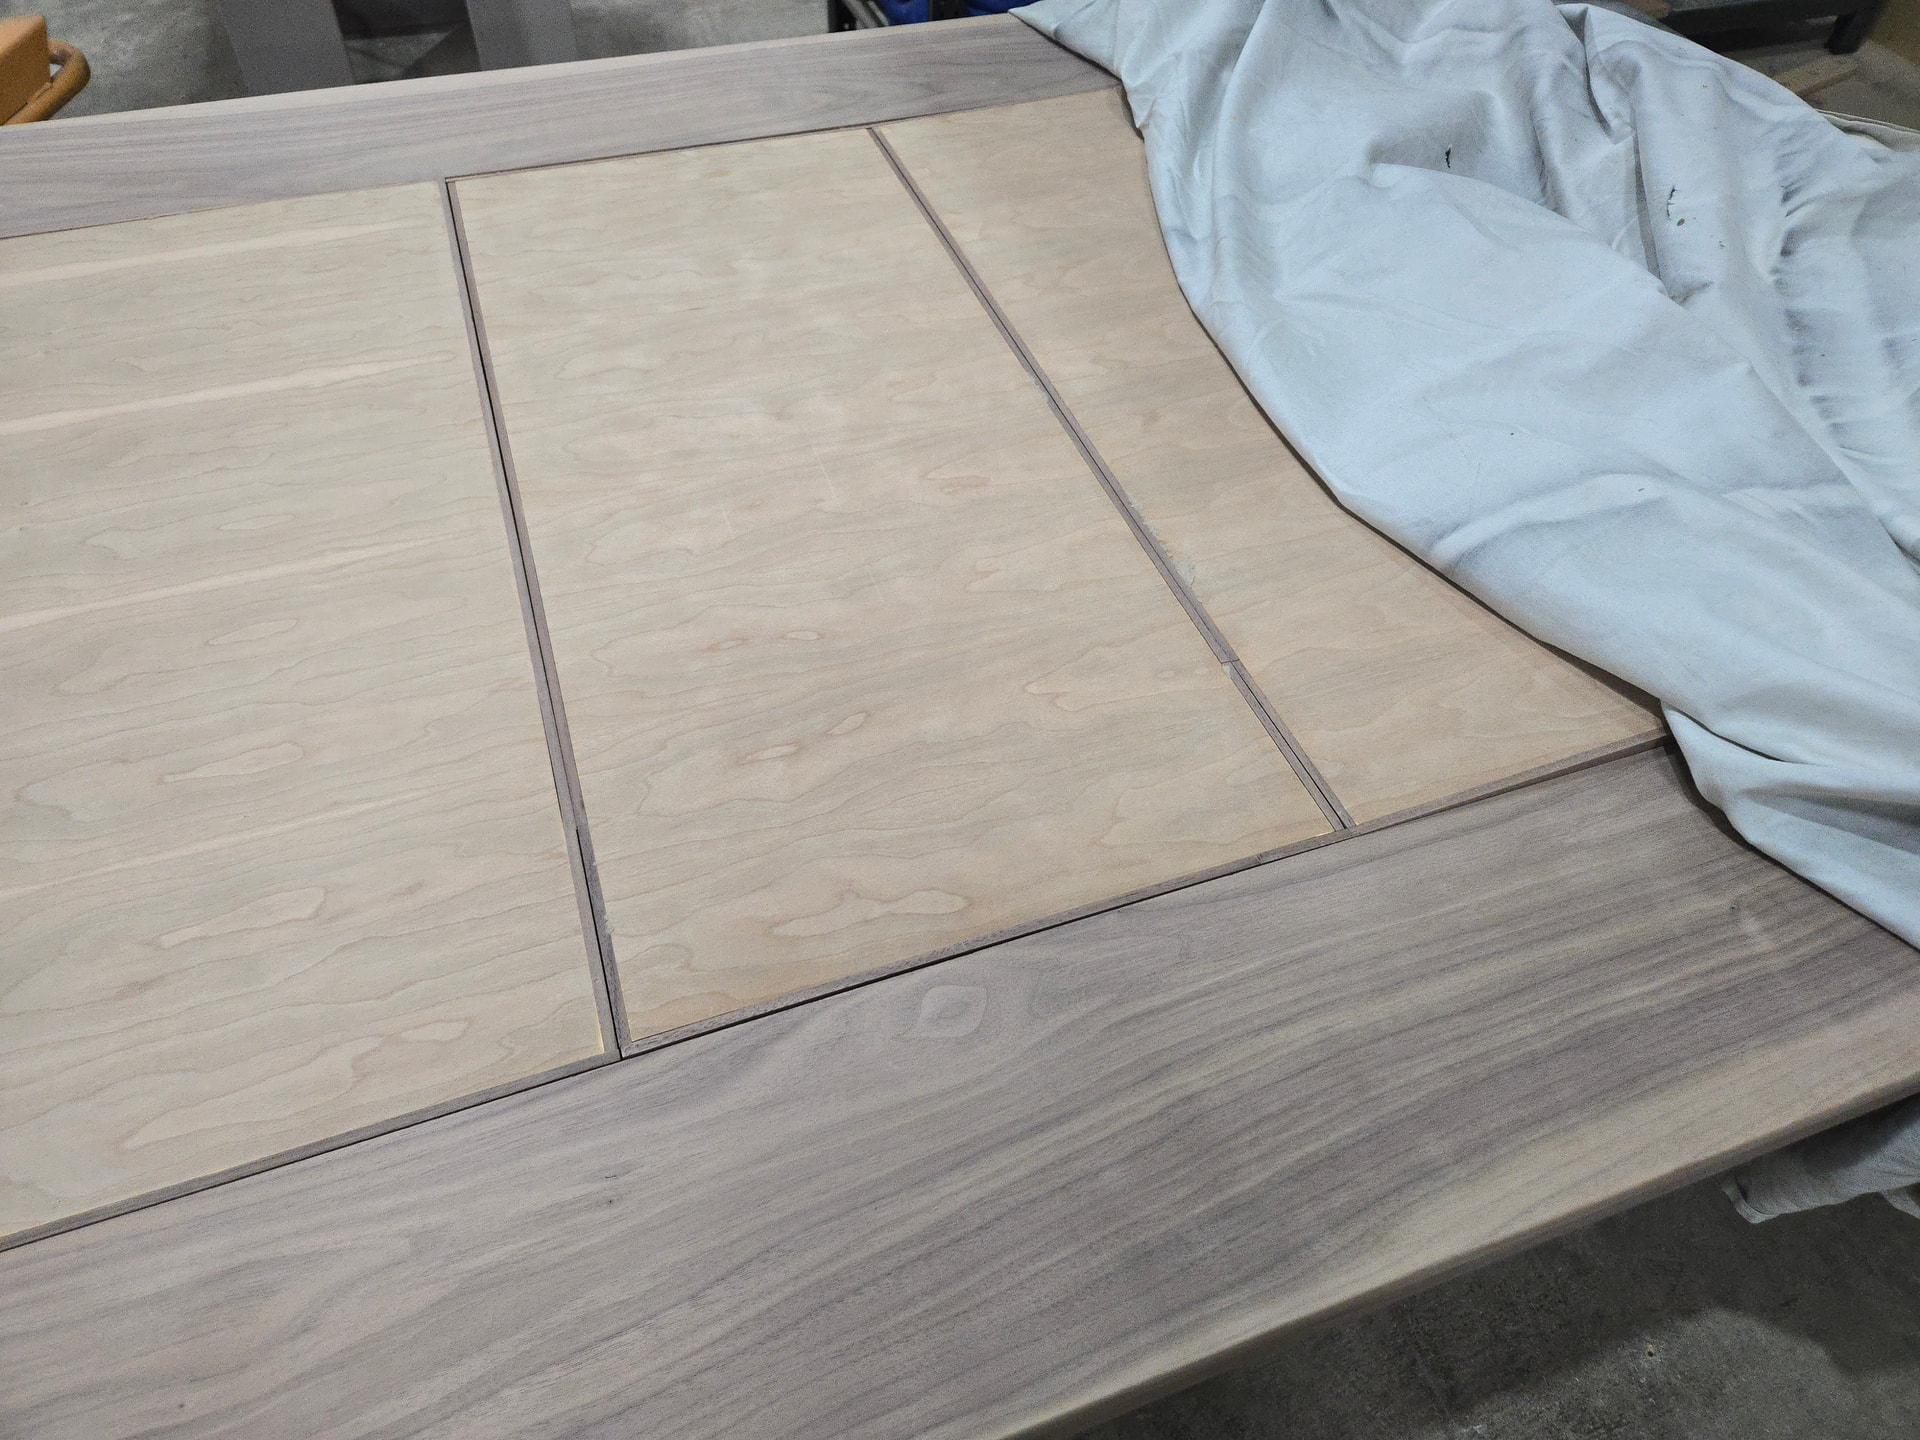
Got the covers made! Their 4 segments of cherry.
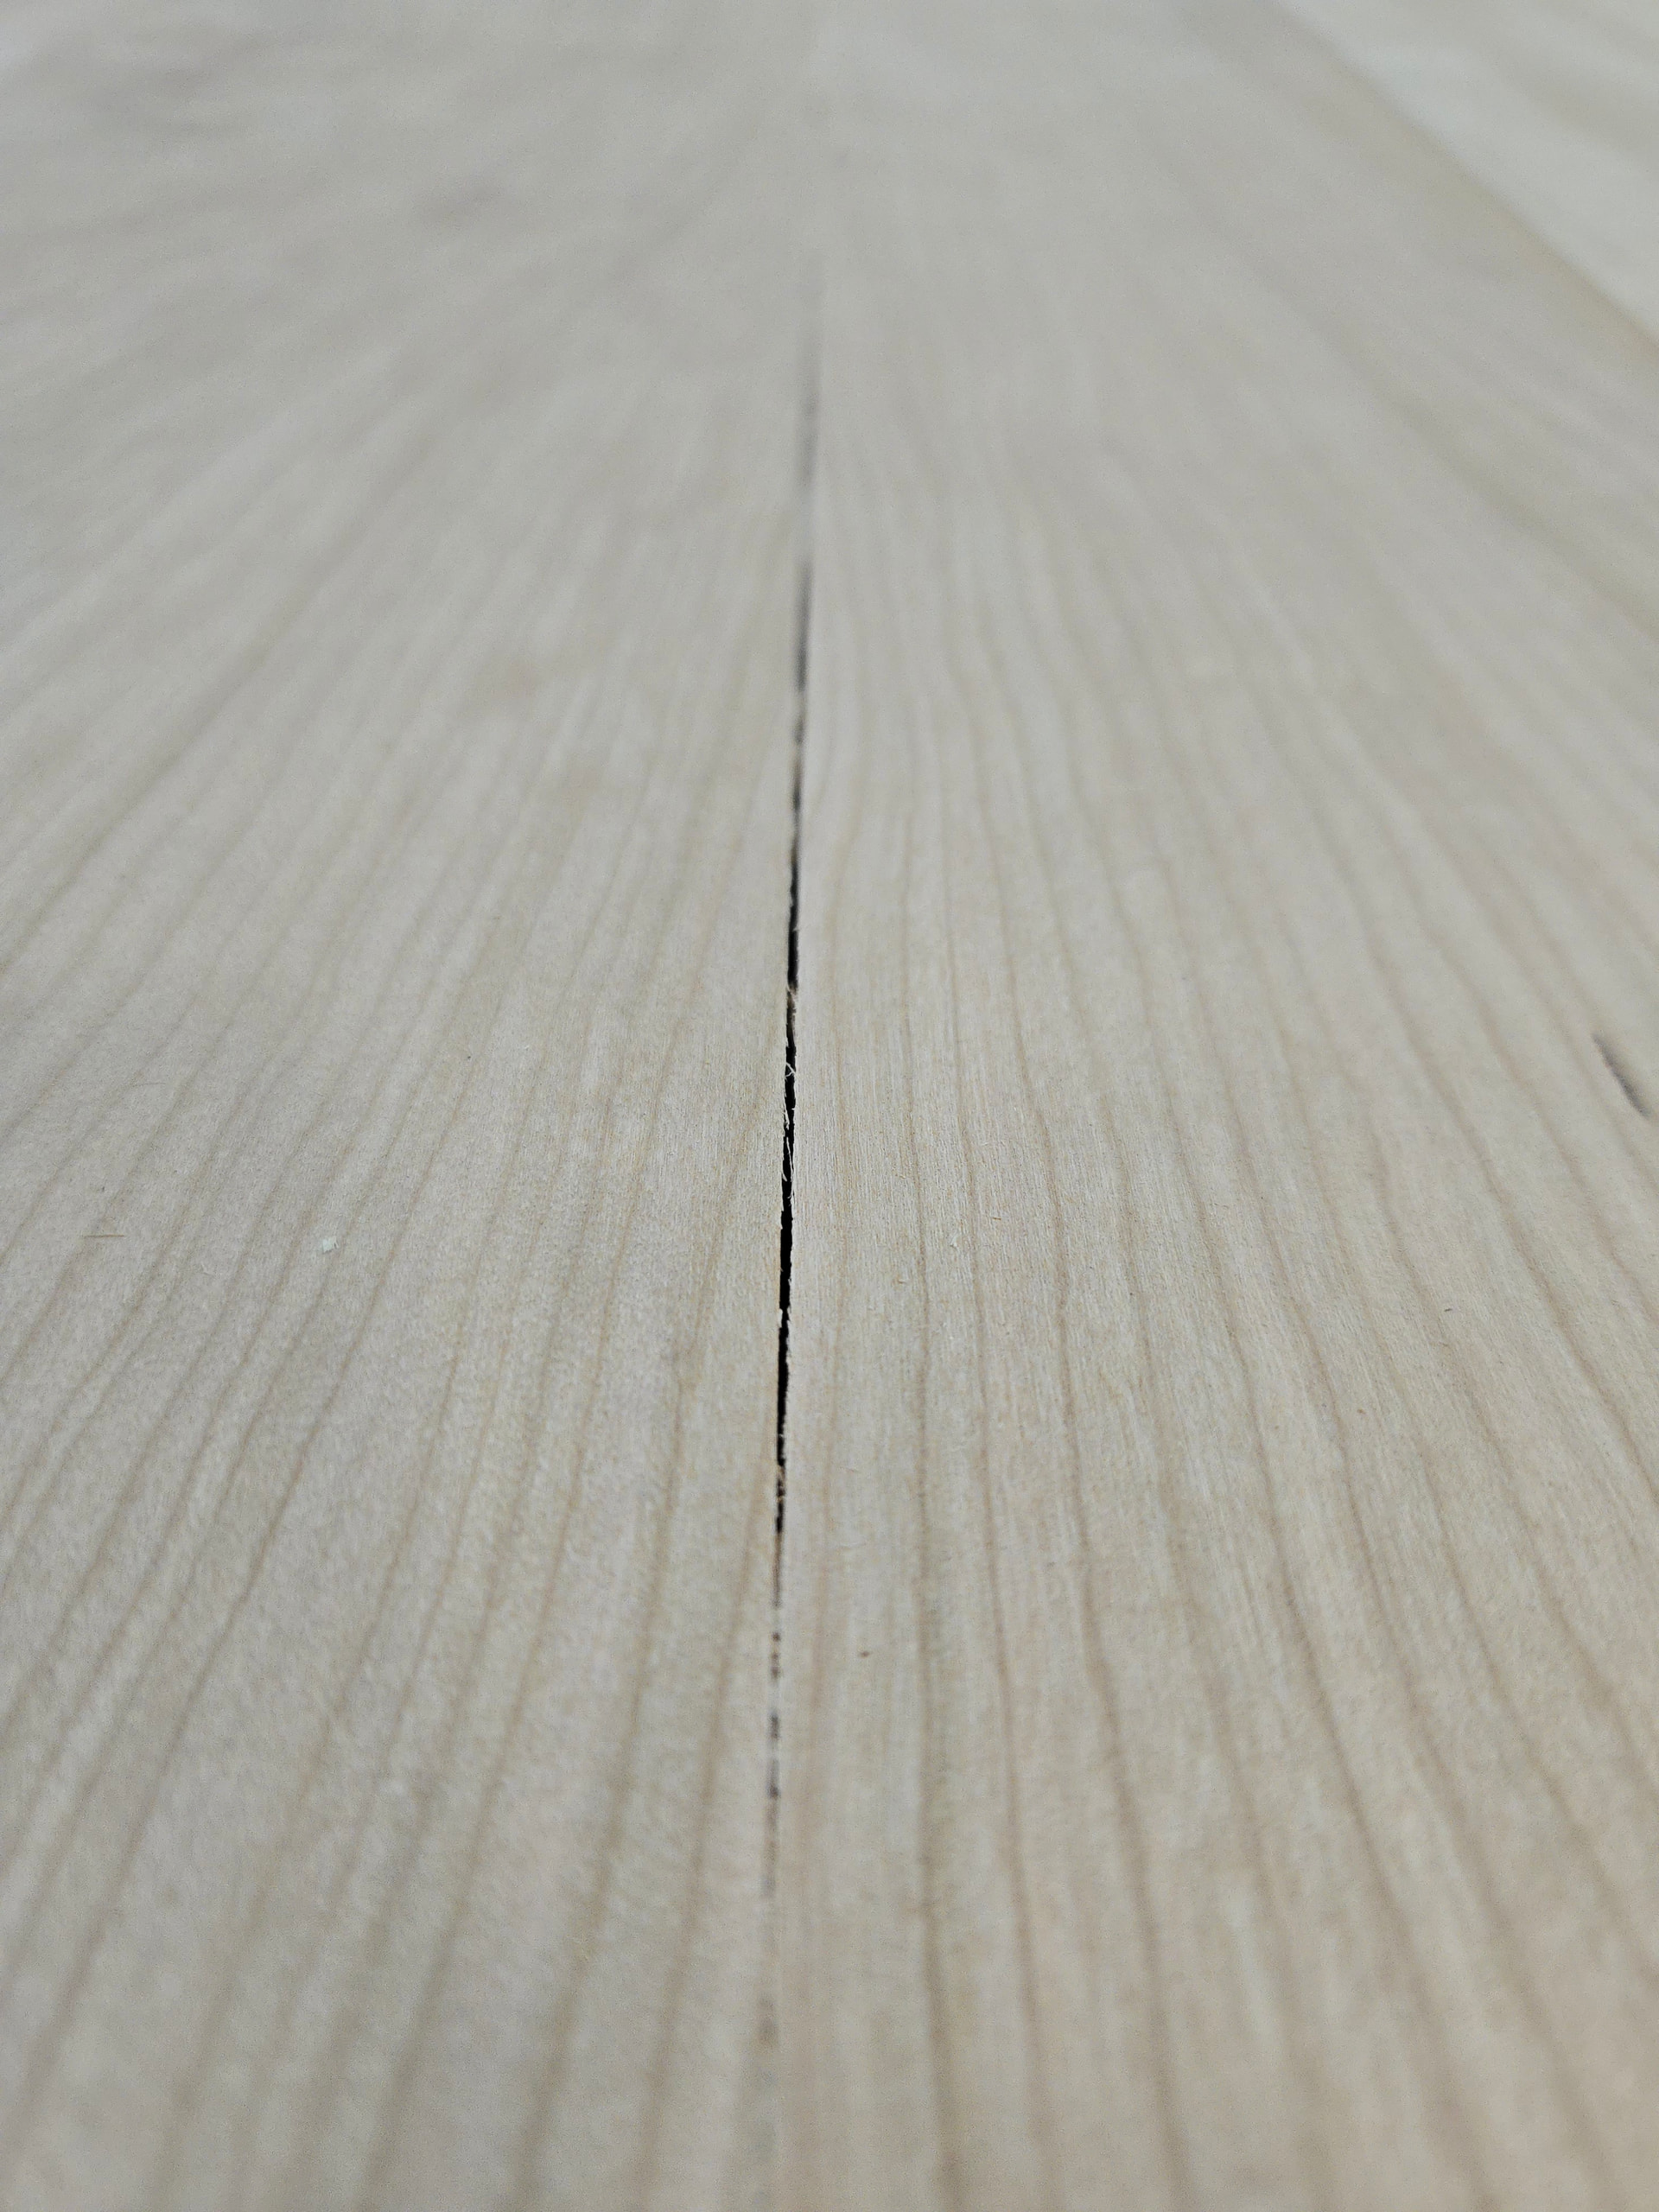
Before I show you more, I need advice for something. When i glued up the cherry boards, one of the glue joints didnt fully press together which left this gap. Anyone know how to easily fix or fill this? I’m hesitant about using wood filler, since it will finish as a different color and stand out.
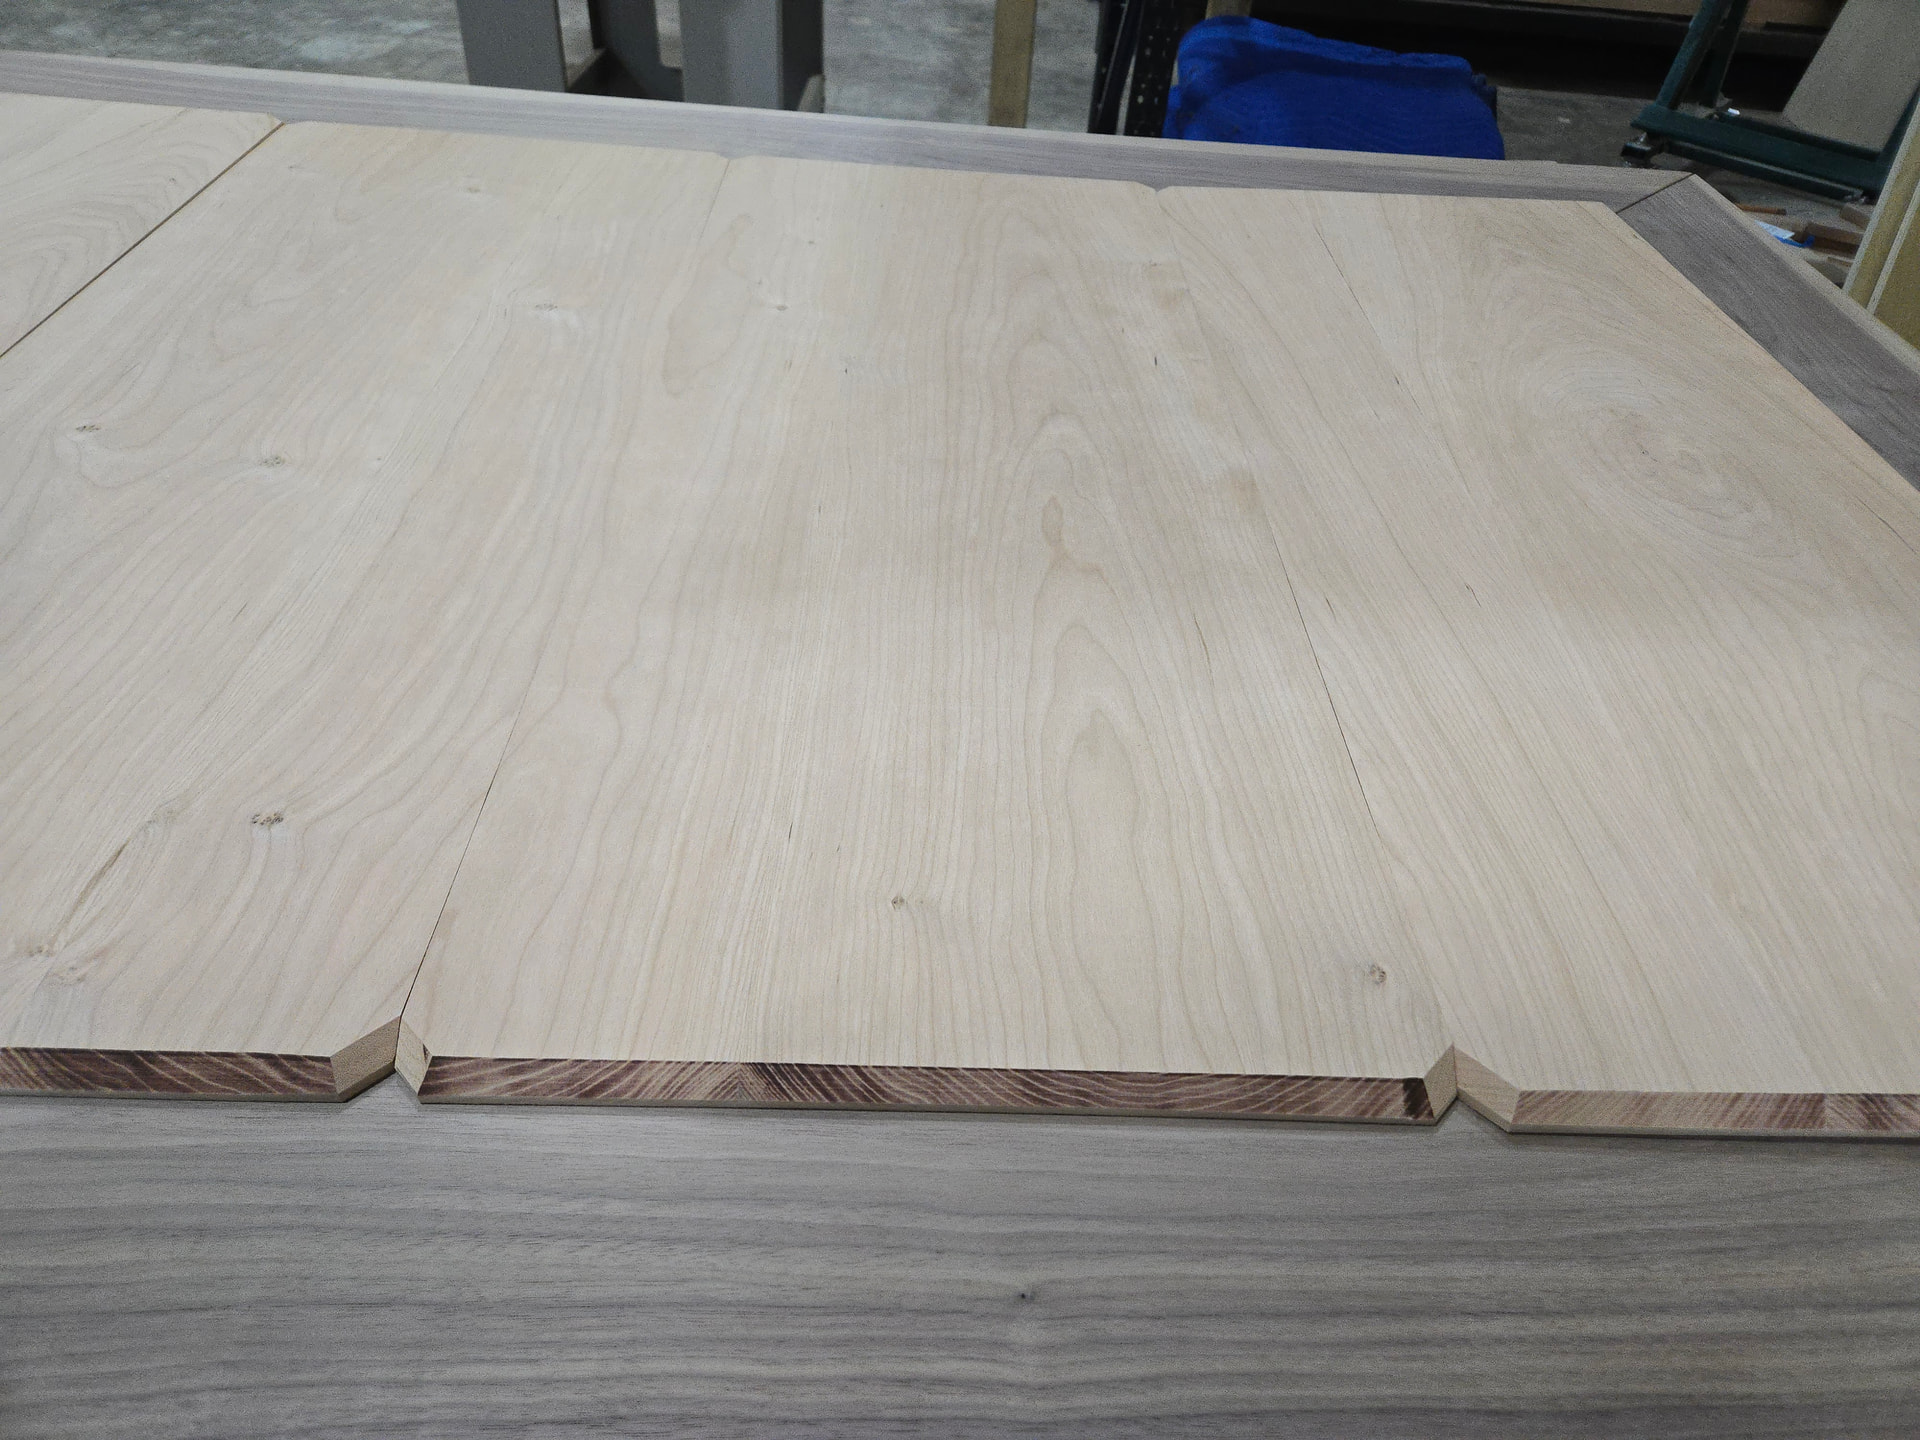
Added these corner cuts to each segment
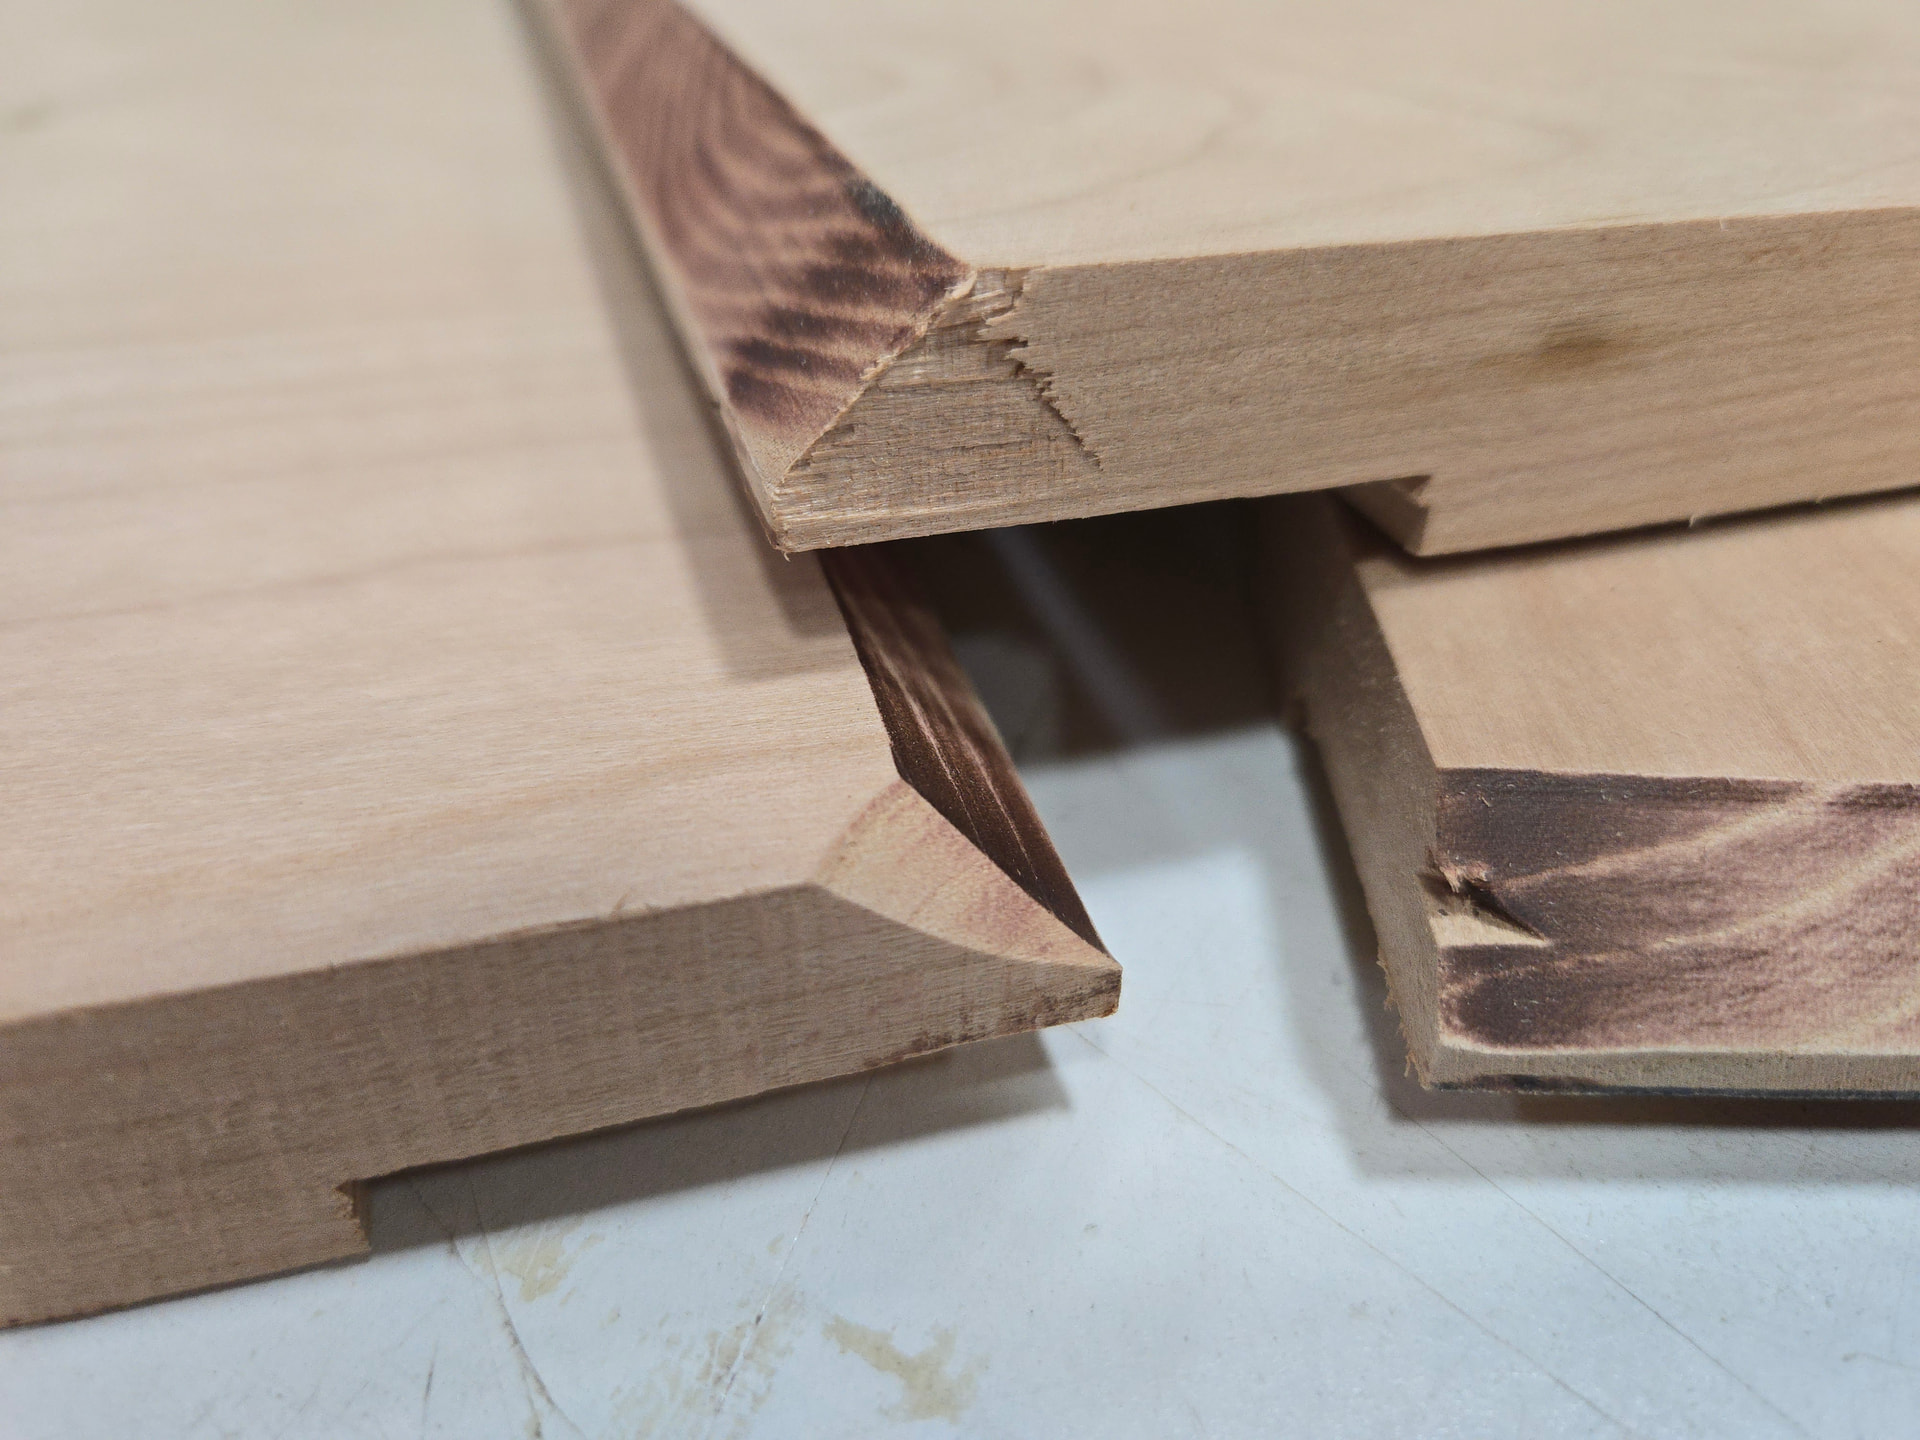
I used a rounder to cut the 45 degree edge, but realized after it would have been much easier and faster to use the table saw.
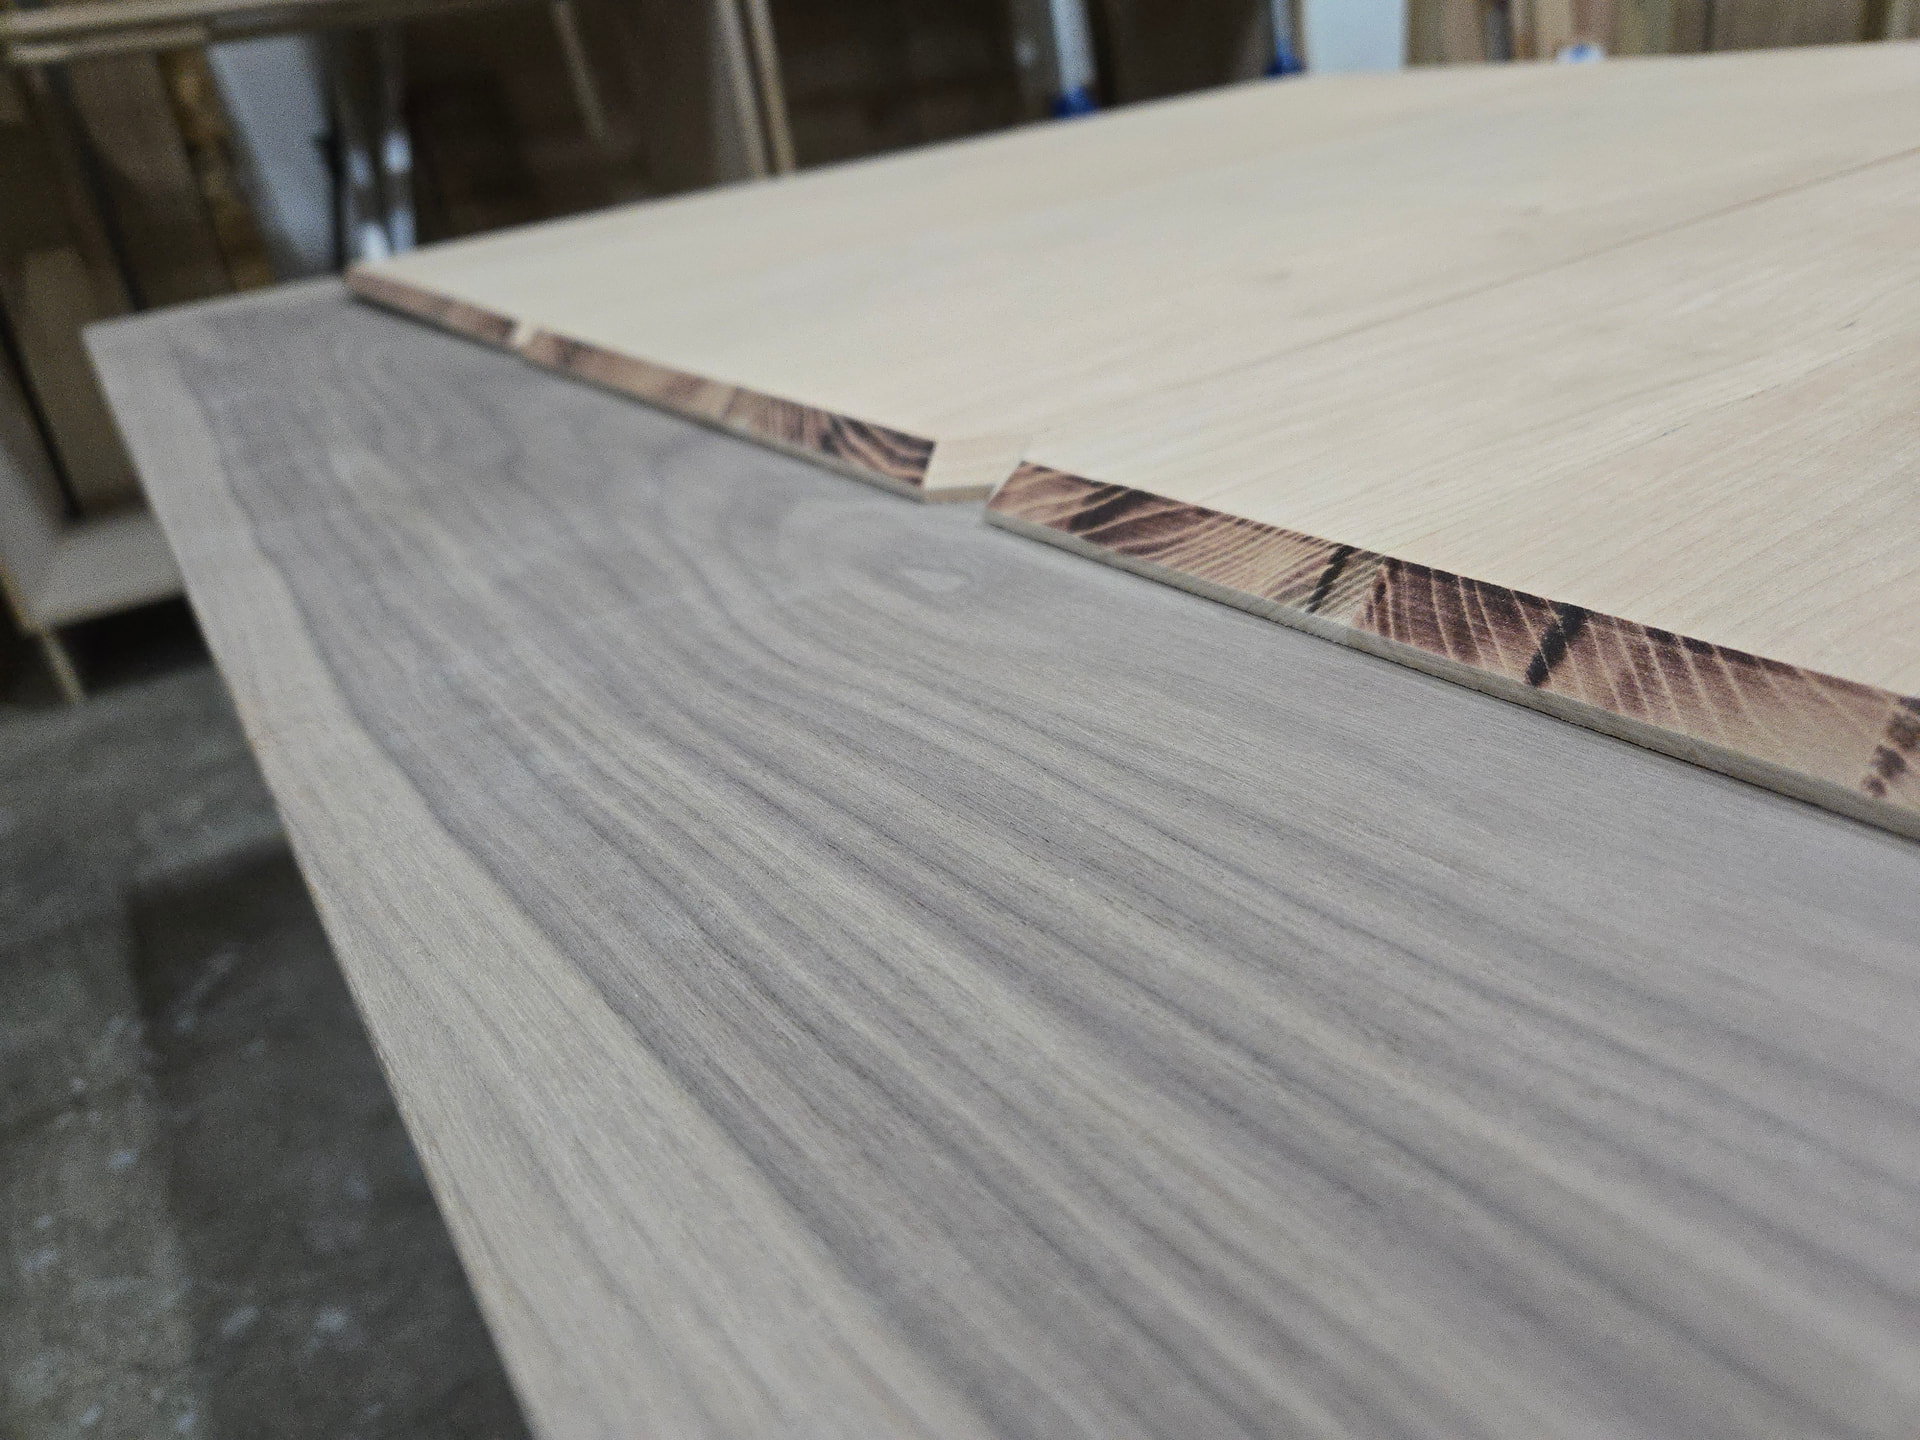
The router gave me all sorts of trouble, like with these edge chips, cuts, and gouges. These are just a few. But when the bottom left mistake happened, it actually gave me the idea to make the corner cuts. And it looks SO much better with the comer cuts! It also helps hide any alignment issues between the covers, even though there really isnt any other than micro millimeter stuff.
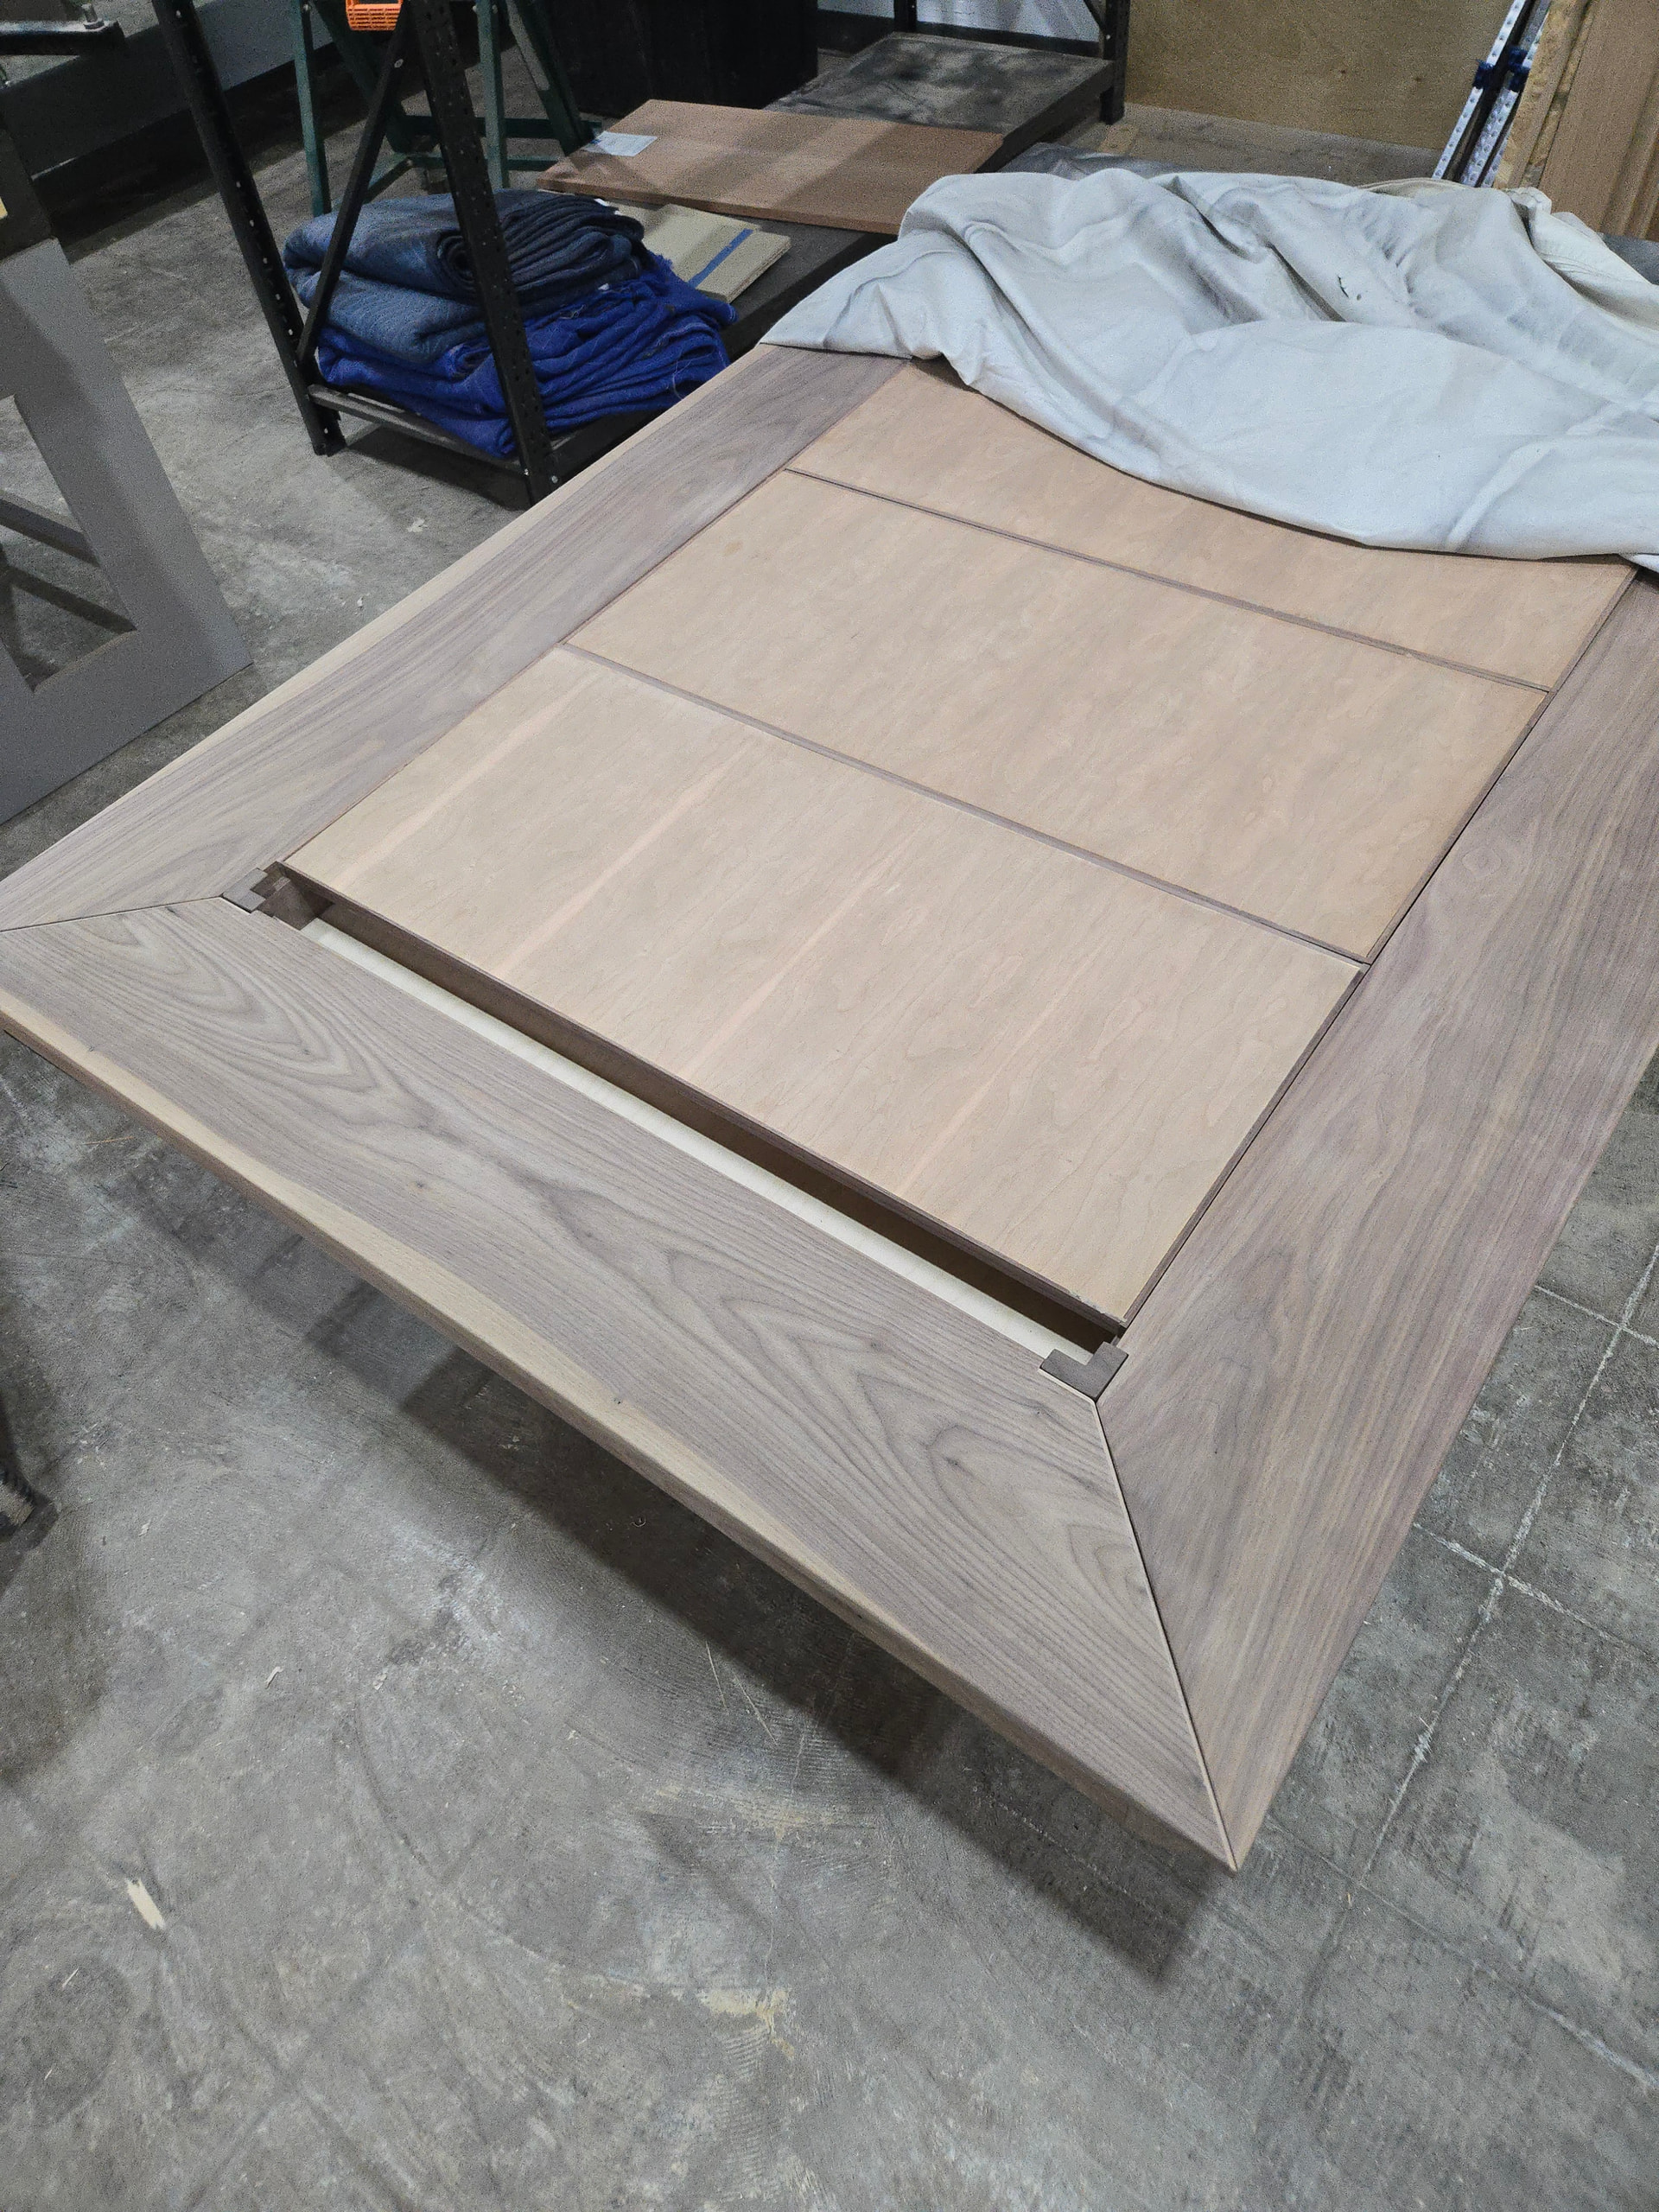
Also those cuts on the bottom edges that go in 1 1/2” are so the covers can slot into the tables center. This prevents the covers from sliding off.
Made a wand for lifting up the covers. Theres a hole in the bottom of the table that you poke the wand through to lift a cover from the underside

The covers took a super long time to make because of this. These are my original covers, and i actually like their look better than the new ones. Their flush with the outer table top. Made from cherry veneer with MDF glued on the underside edges. This let me shave the mdf so i could adjust the height until it became flush. My vaneer wasnt thick enough alone. Plus veneer would have been a pain to sand flush. Then a rim of walnut was glued on to hide the mdf and veneer edge.
This was all to avoid expansion, since the fit was to be tight and MDF and veneer dont expand nearly at all (i think).
However, two problems arose.
First i couldnt remove the glue on top of the veneer from when i attached the walnut without chipping the veneer and revealing the ugly underwood (it was also taking me a super long time to do). Its hard to see in the photo, but if you zoom in on the one above you can see the chipping in the bottom left coner.
Second i forgot i had these corner brackets, so the covers cant reach the edge. I would have need to cut the corners on 2 covers, re glue the walnut where i cut (i didnt have any more of that size so i would have needed to cut more), and sand the walnut down until it fit snug with the brackets.
With both of these problems, i decided to just throw out the covers i spent 20ish hours on and start over.
Lastly Im debating adding pegs between the covers so they can slot into each other. It would keep everything in line nicely, but when you use the wand to push a cover up to get your hand under and remove it it would put torquing force on the peg thats inserted into the neighboring cover. So i would also need to remove the wood under the peg hole to give it space to rotate down. Bit idk if the work is worth it