Kotatsu gaming table completed!

Its done! I made a website too. tayloredtables.com (I also have pics there of the cyberpunk desk I made)

Next step is to find a customer that wants to commission their own table. :crossed_fingers:

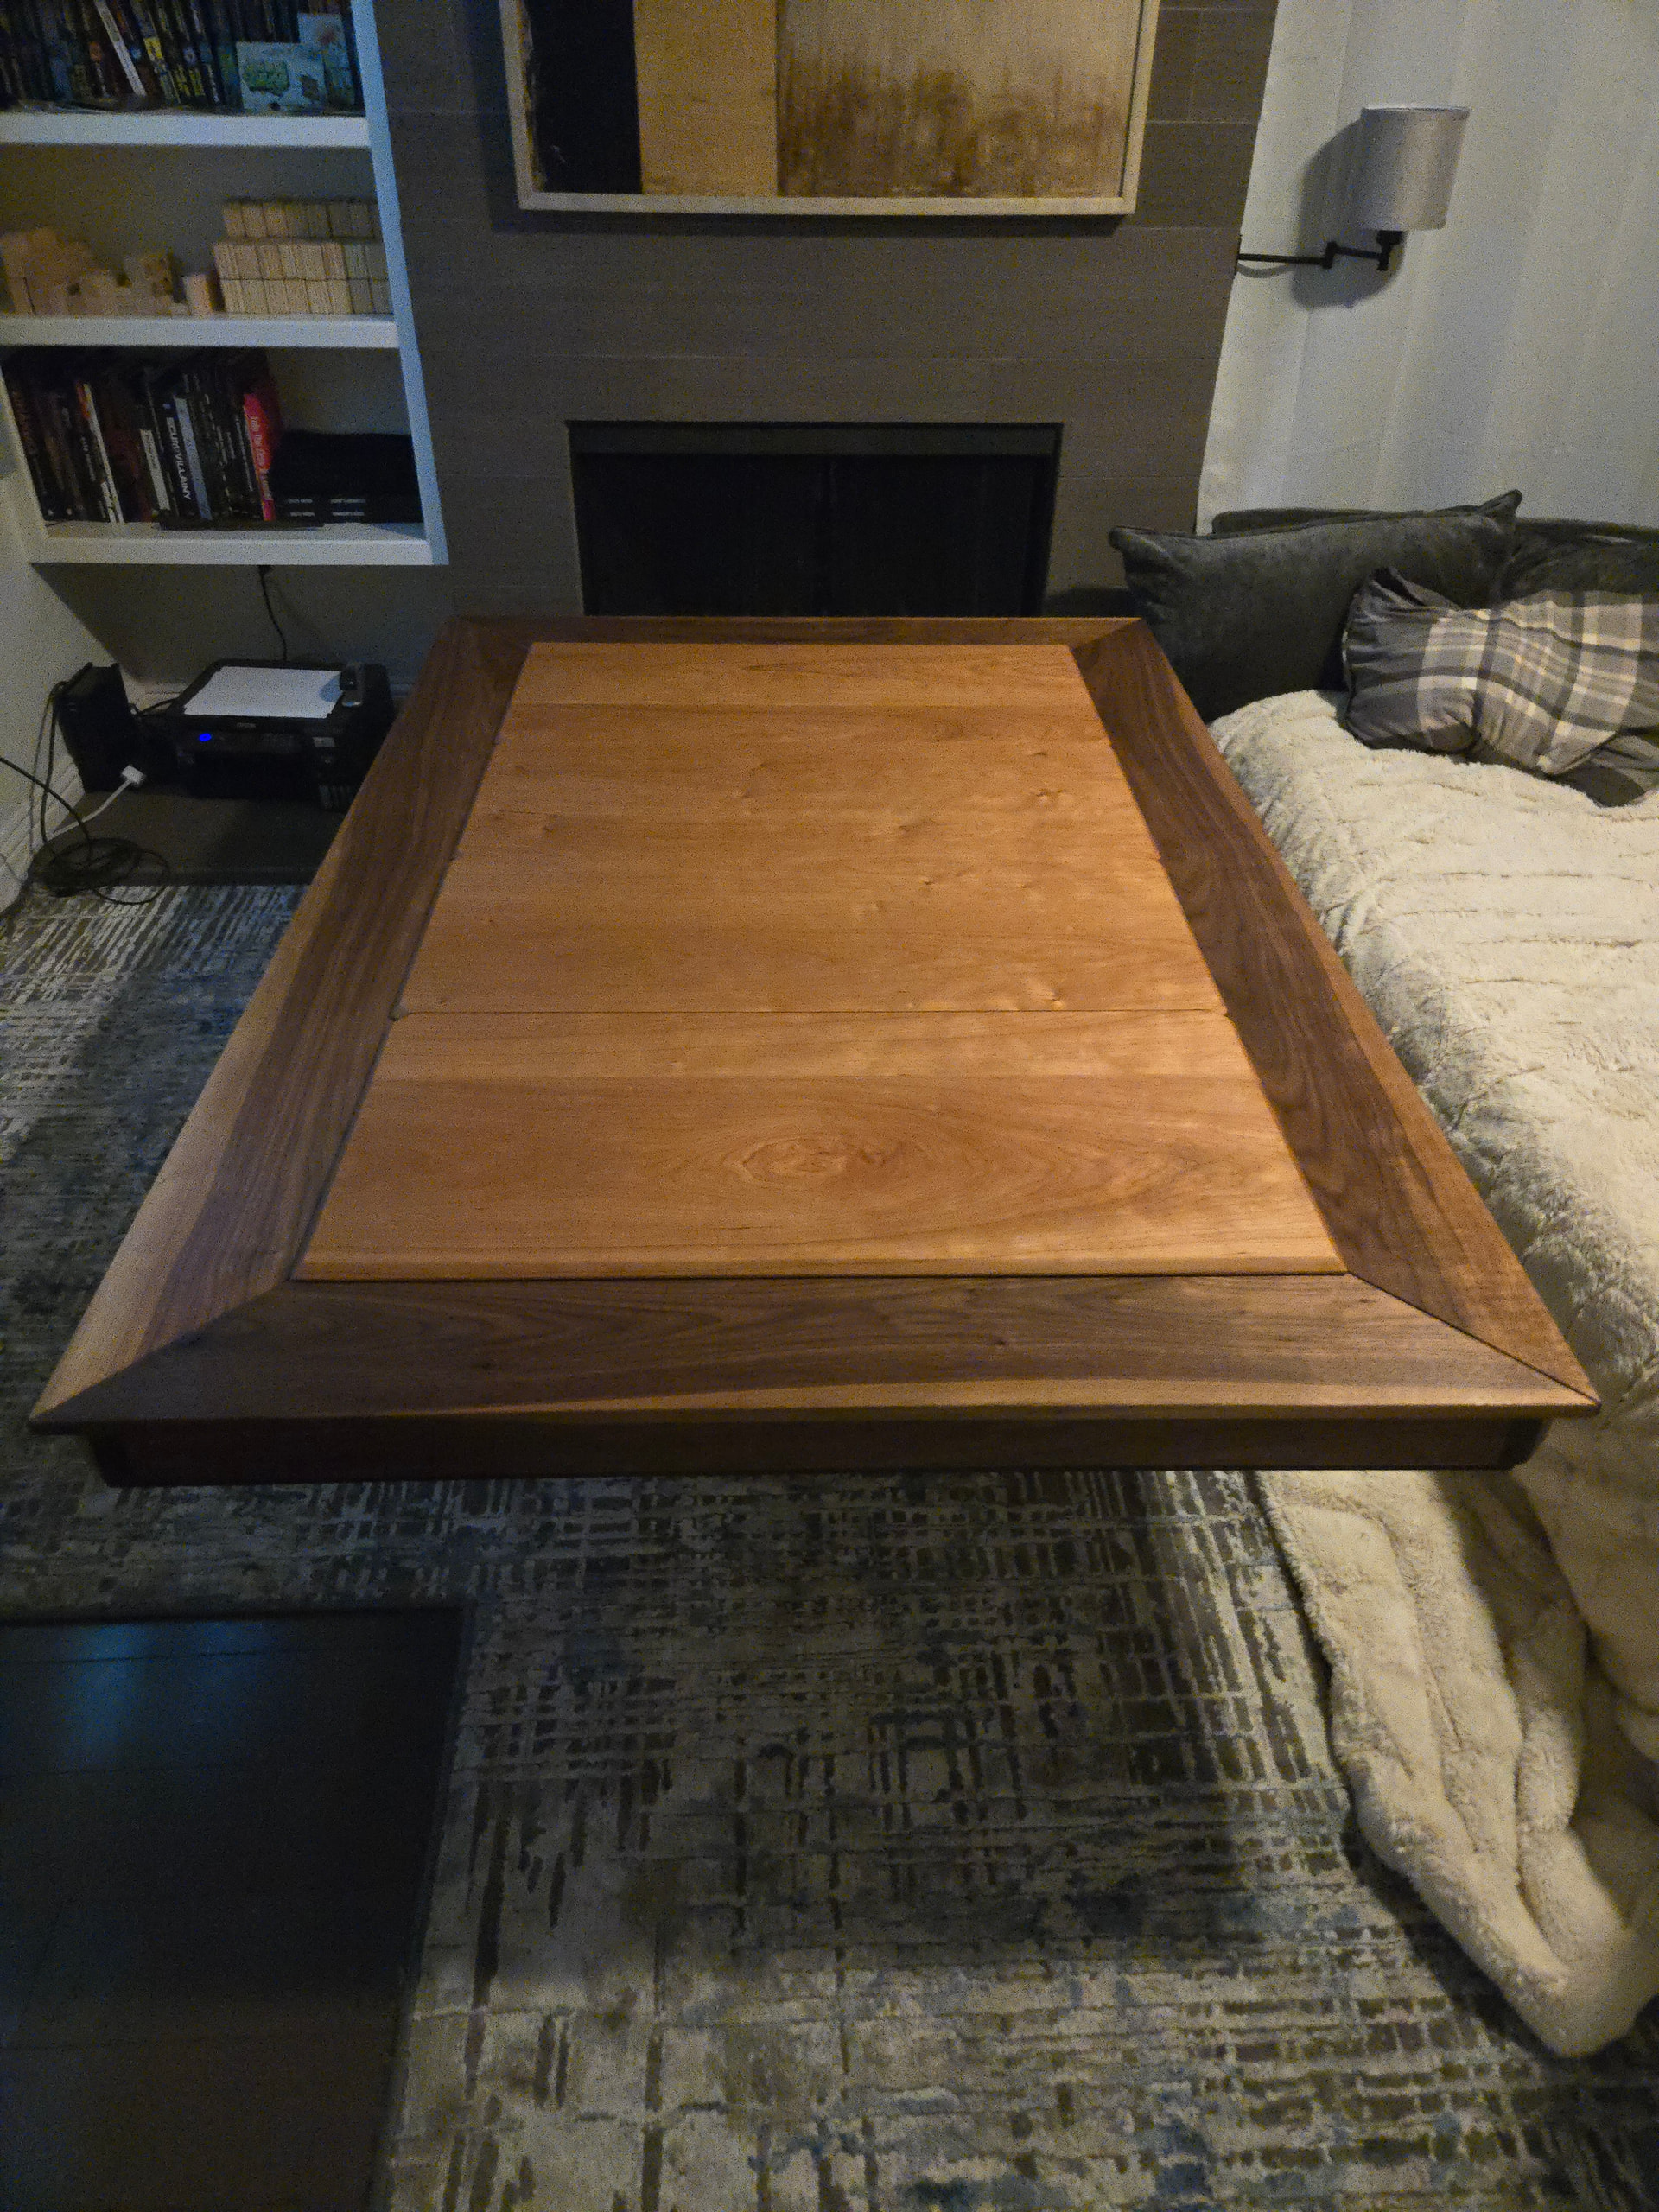
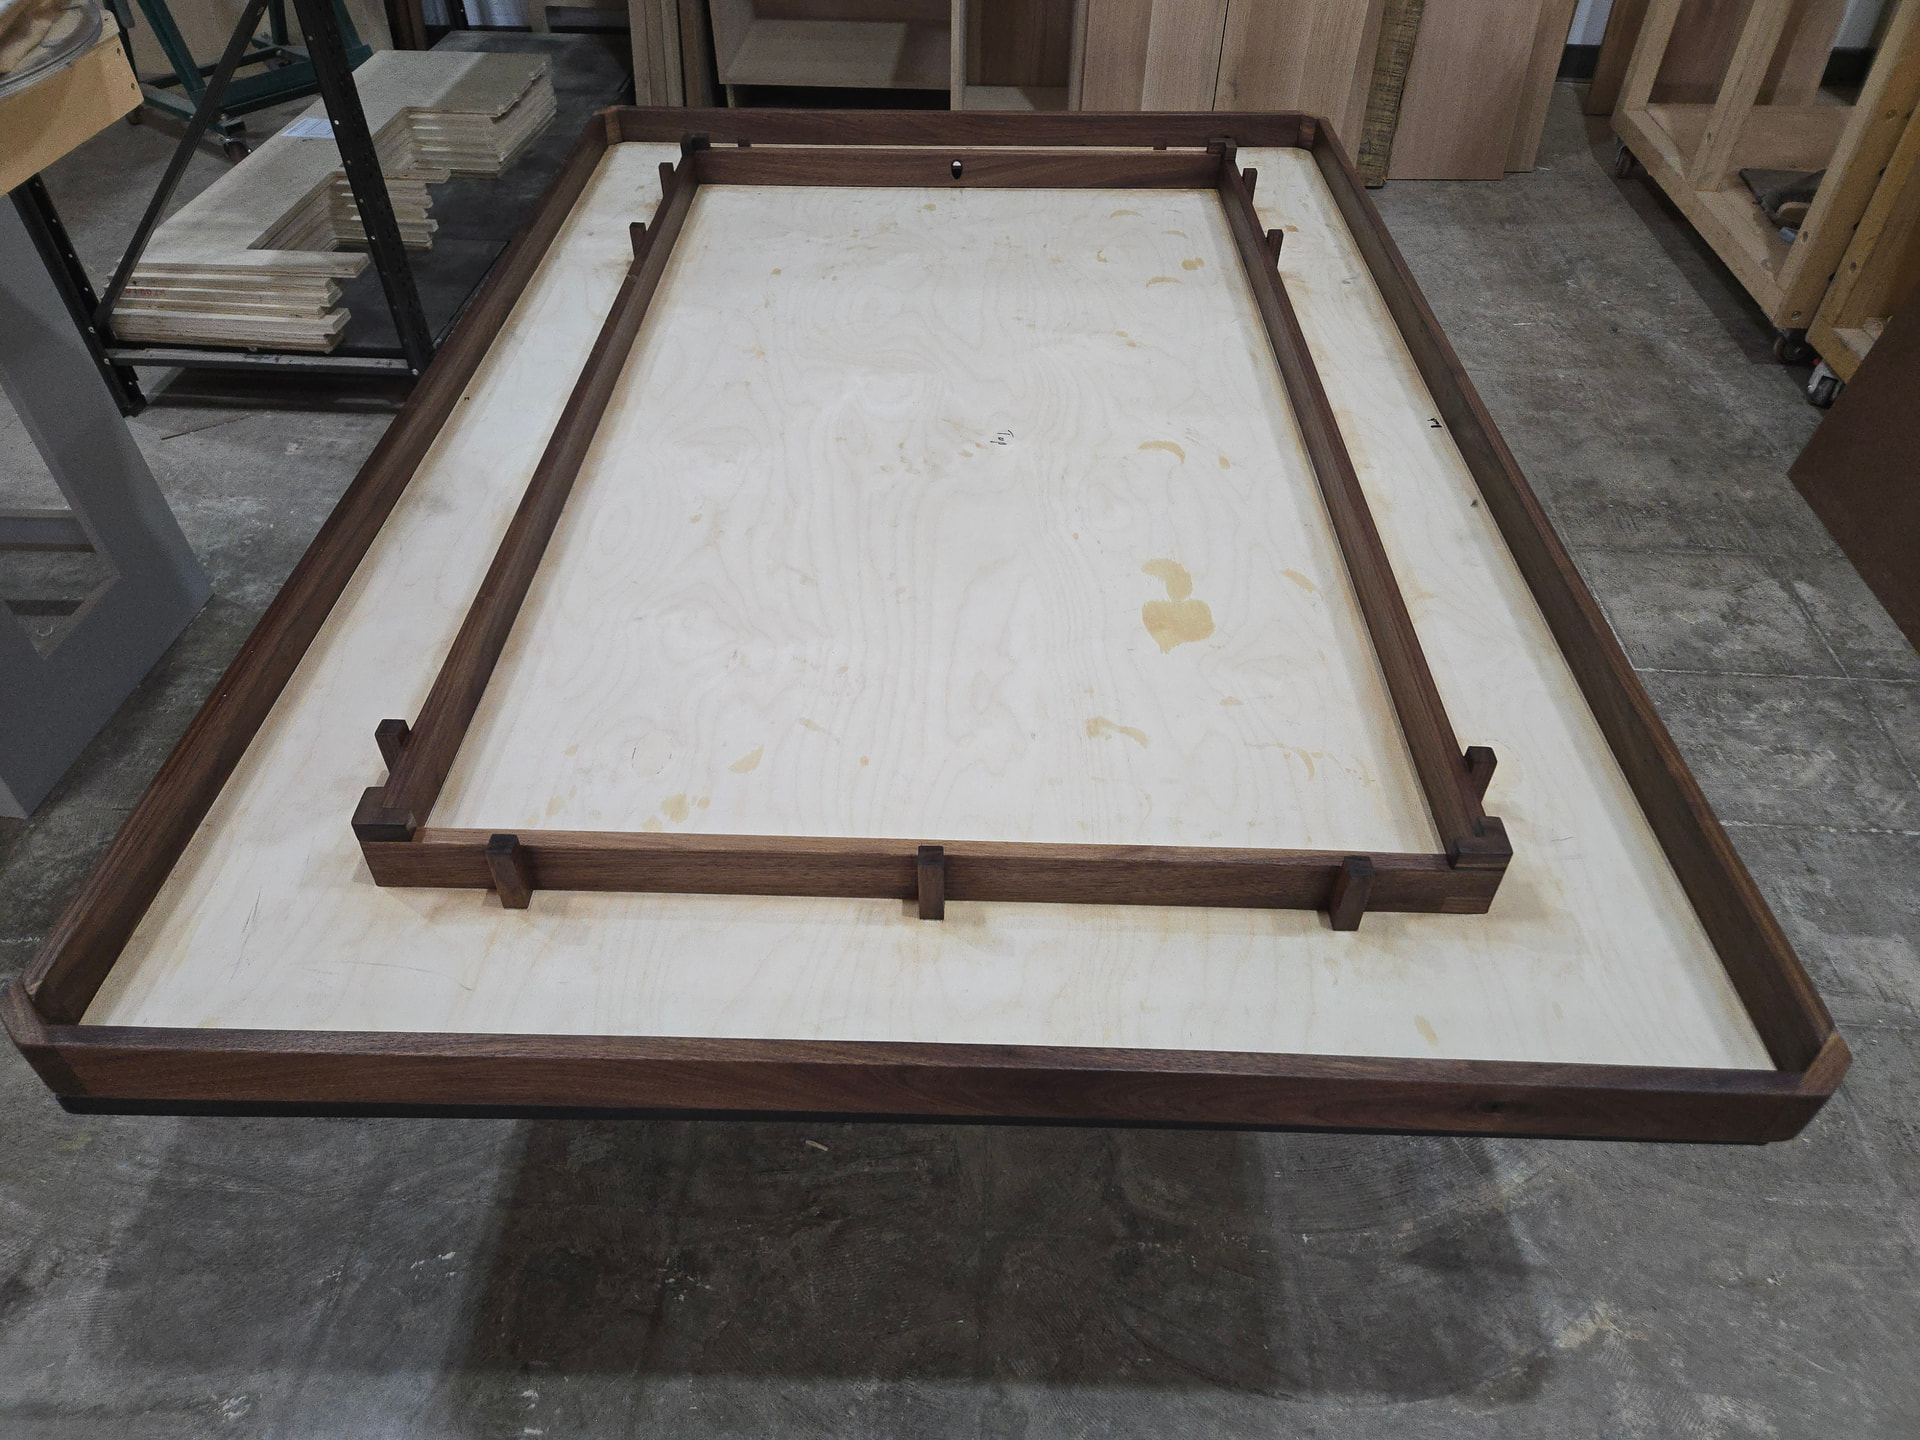
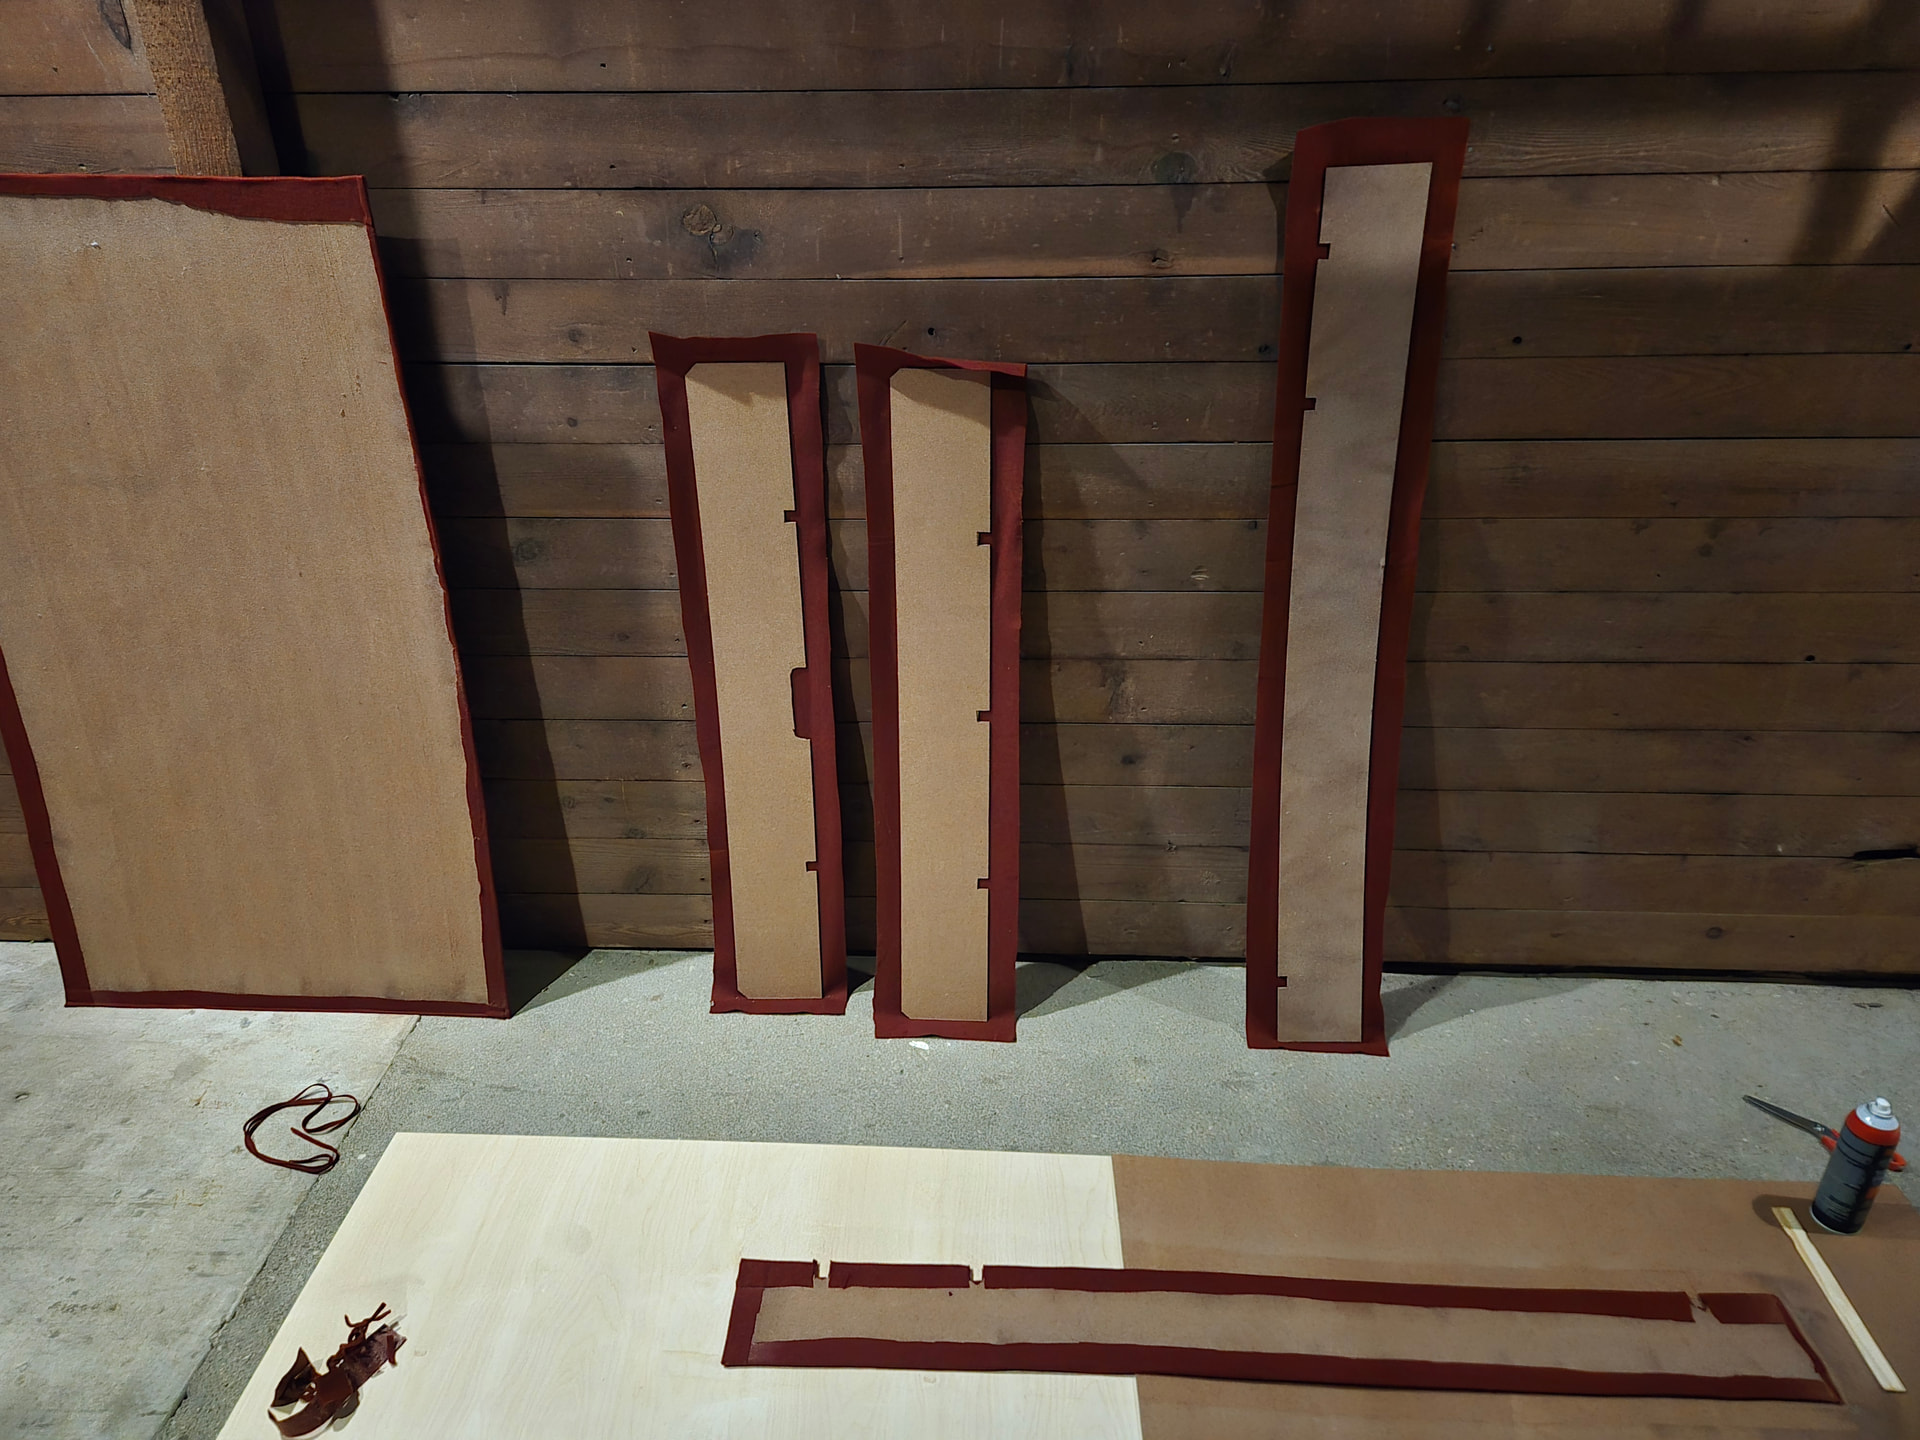
What it looked like after finishing, but before the inserts.

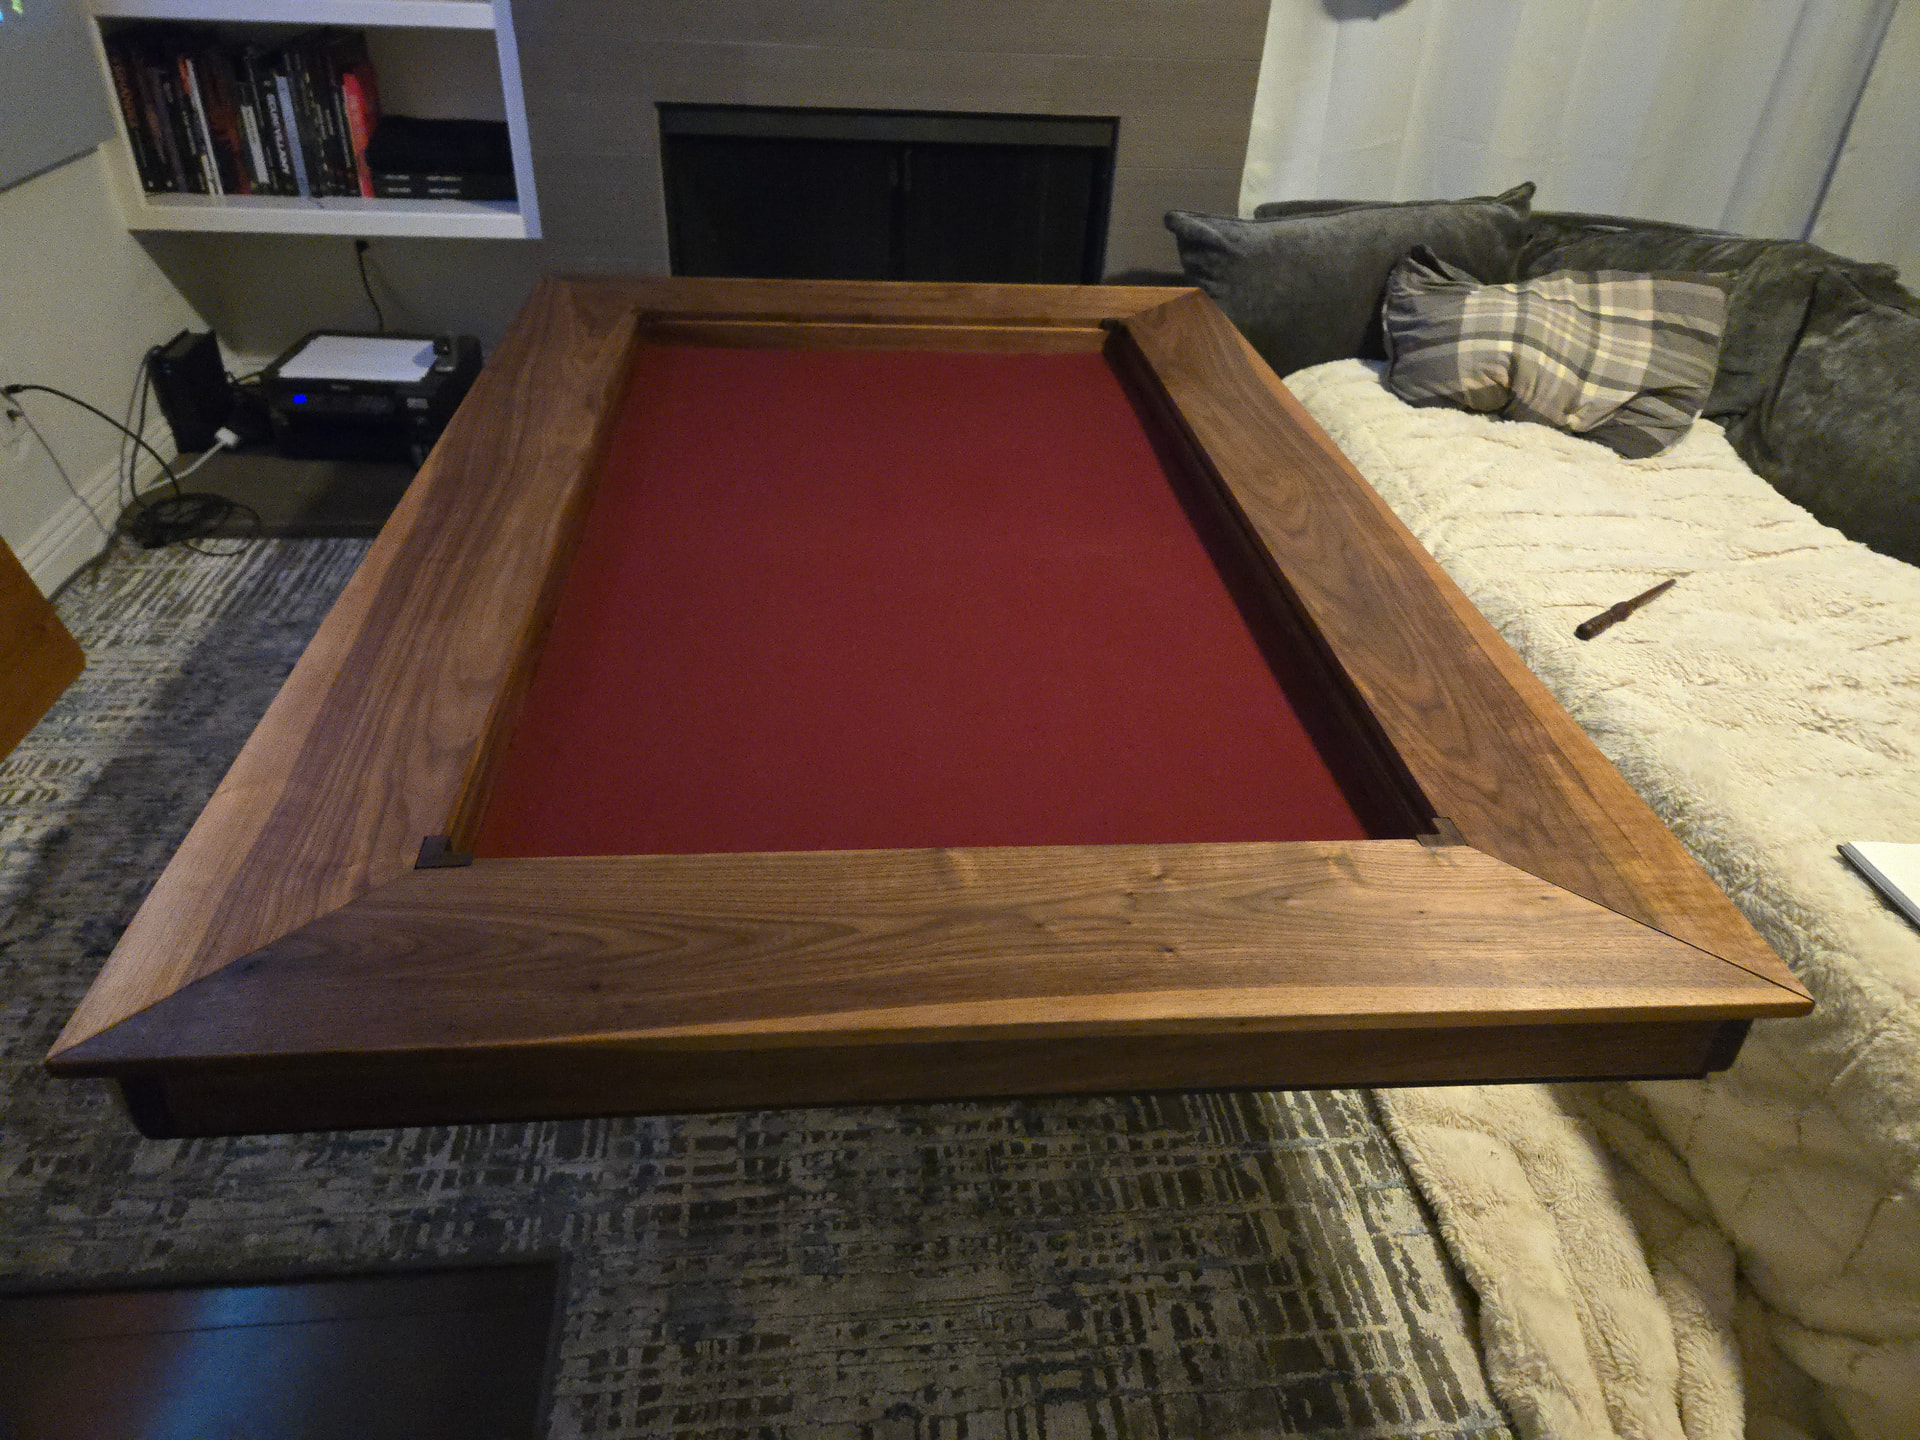
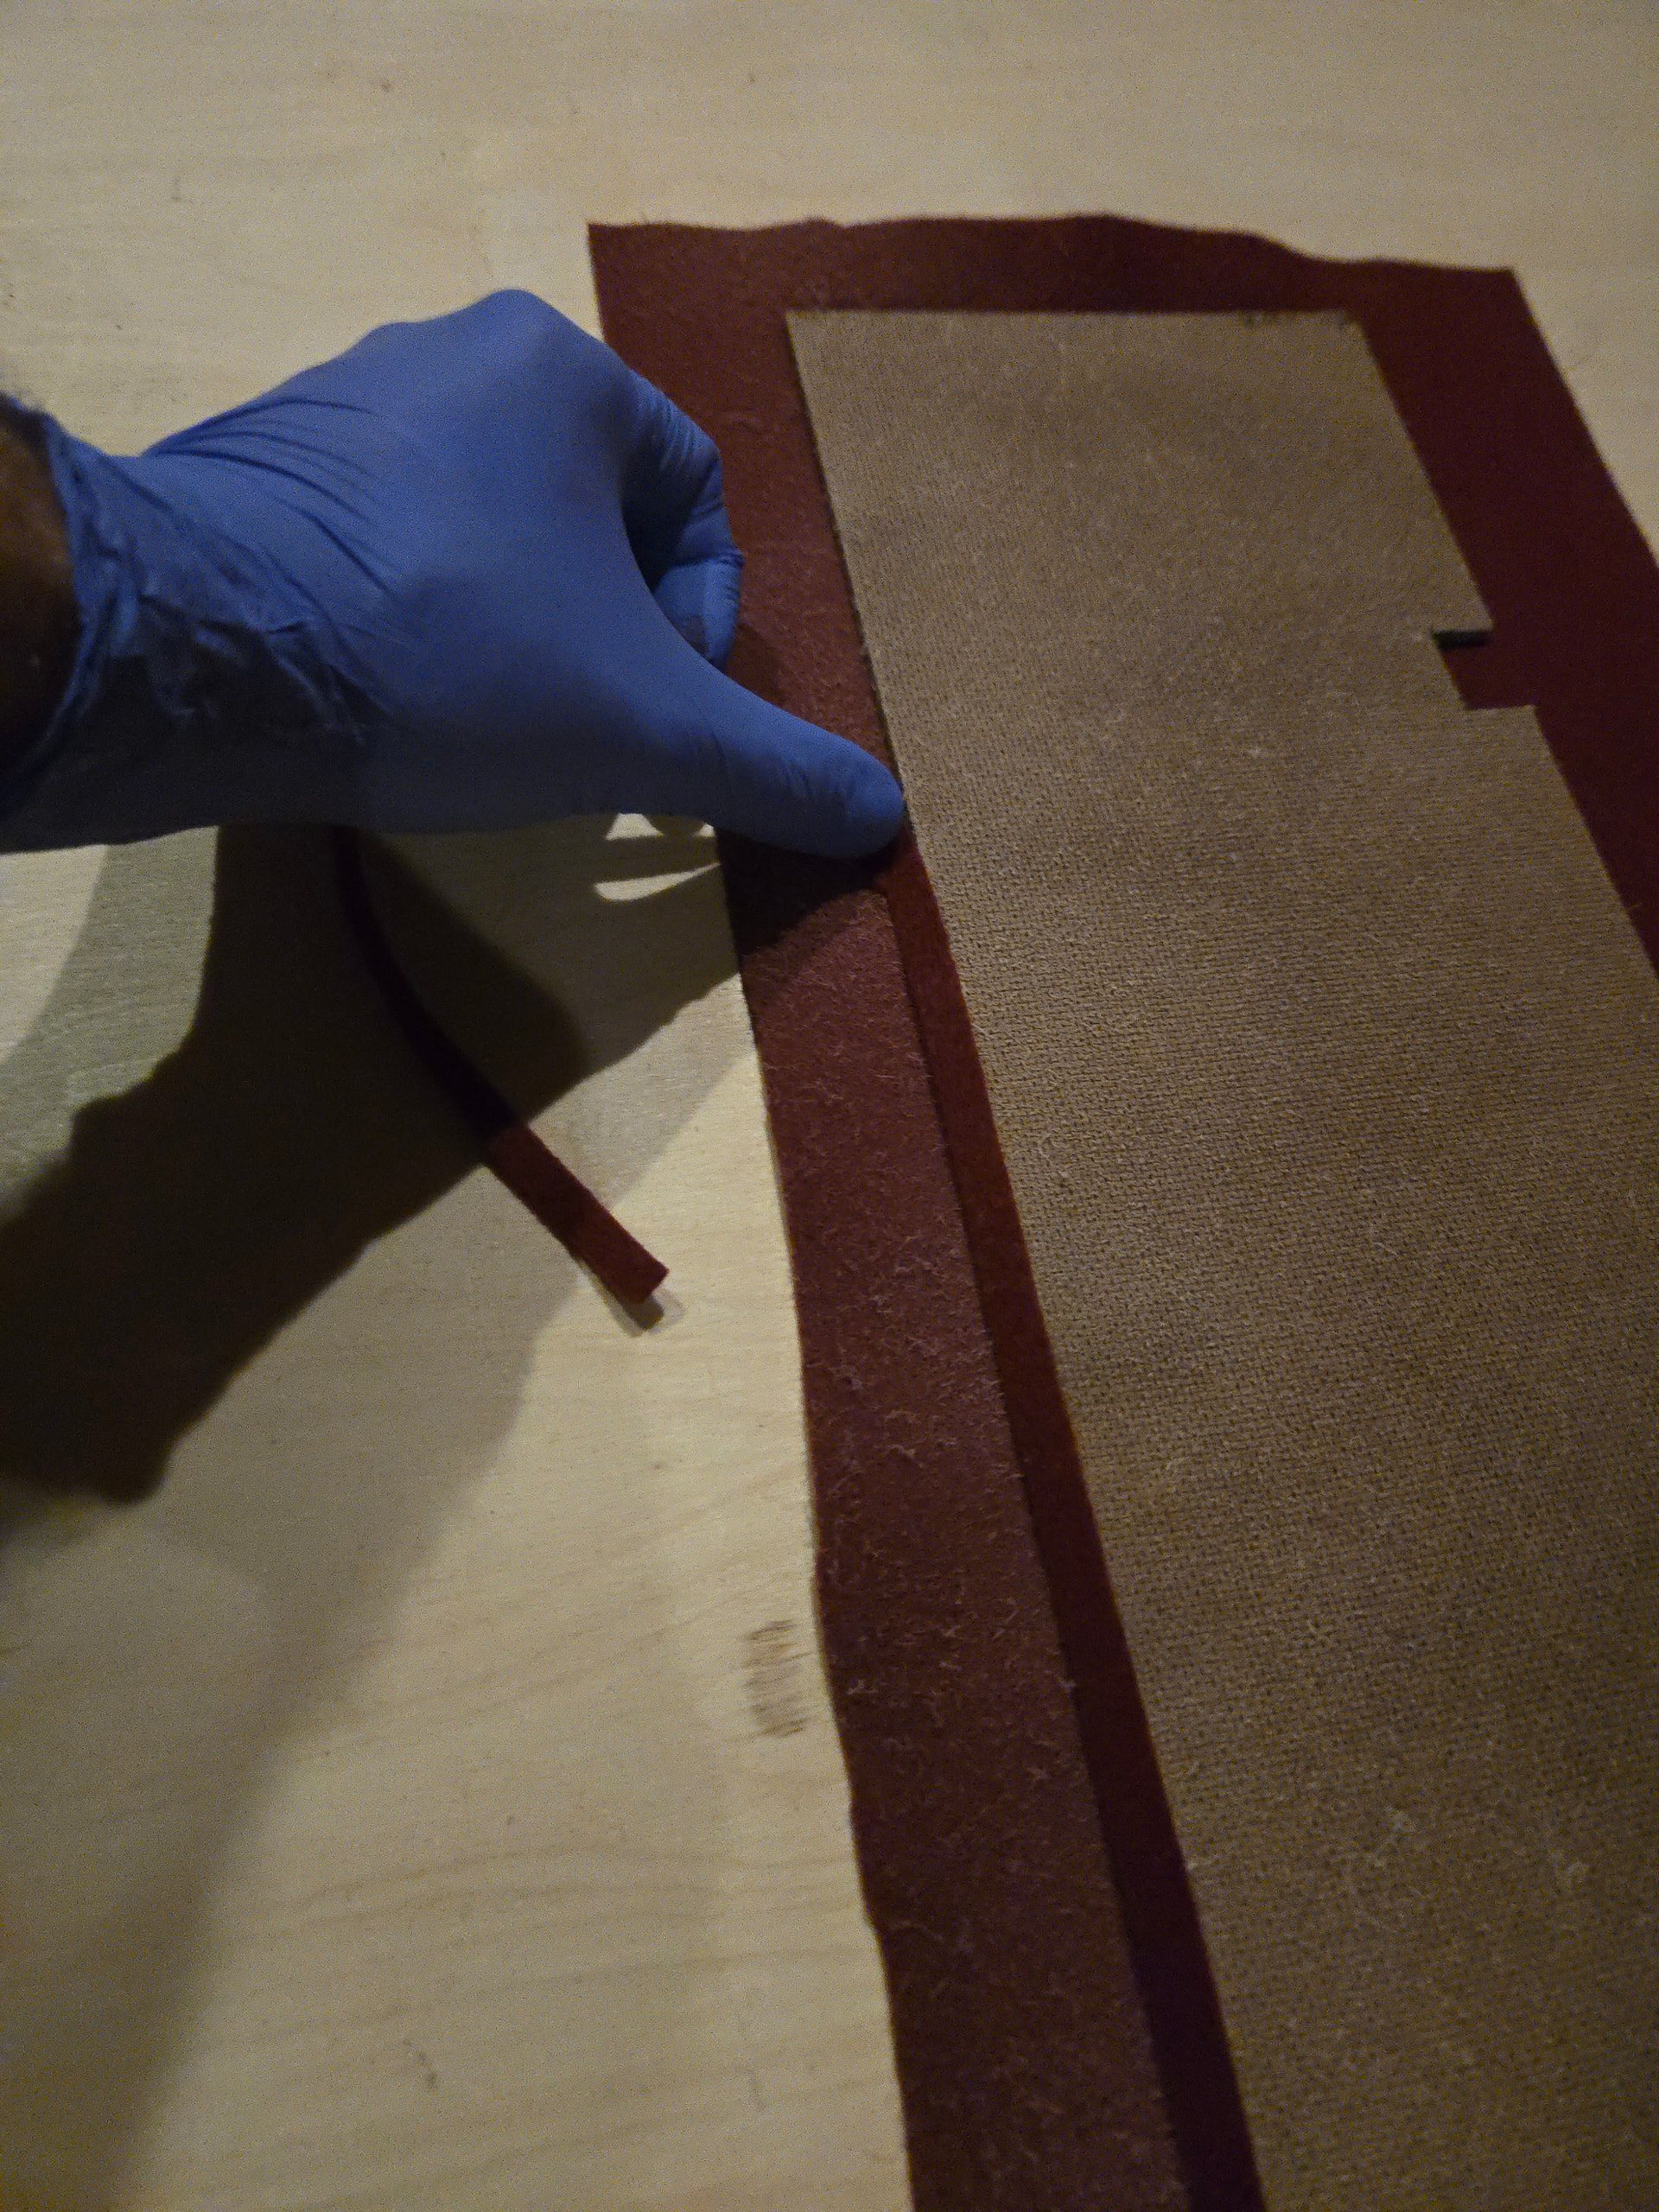
The felt inserts are made from felt spray glued to hardboard. I couldn’t cut the hardboard to perfectly fit without showing a little of the base underneath at some edges. So I added a felt strip on the edges that the top felt folds over. The idea was that this would add extra thickness to the edges while still being compressible which would fill those gaps. If I didnt include the strip when folding the felt over there would be a bad looking step down from the hardboard to the felt edge. Its hard to explain, but trust me i needed the felt strip to make it look good.

2 problems.

One, the felt couldnt be cut to thin or it wouldnt hold together, so the edges ended up being thicker than i wanted.

Two, the hardboard was already way to tight fitting, so adding the extra felt edges made everything to thick to fit. There was really only a few edges that needed the felt strips. The rest would have been fine just folding the top felt tight over the edge. Next time i need to give the inserts like 1/16” gap on all sides, then only felt strip one side.

Ended up having to cut off a lot of the edges, undoing my work.

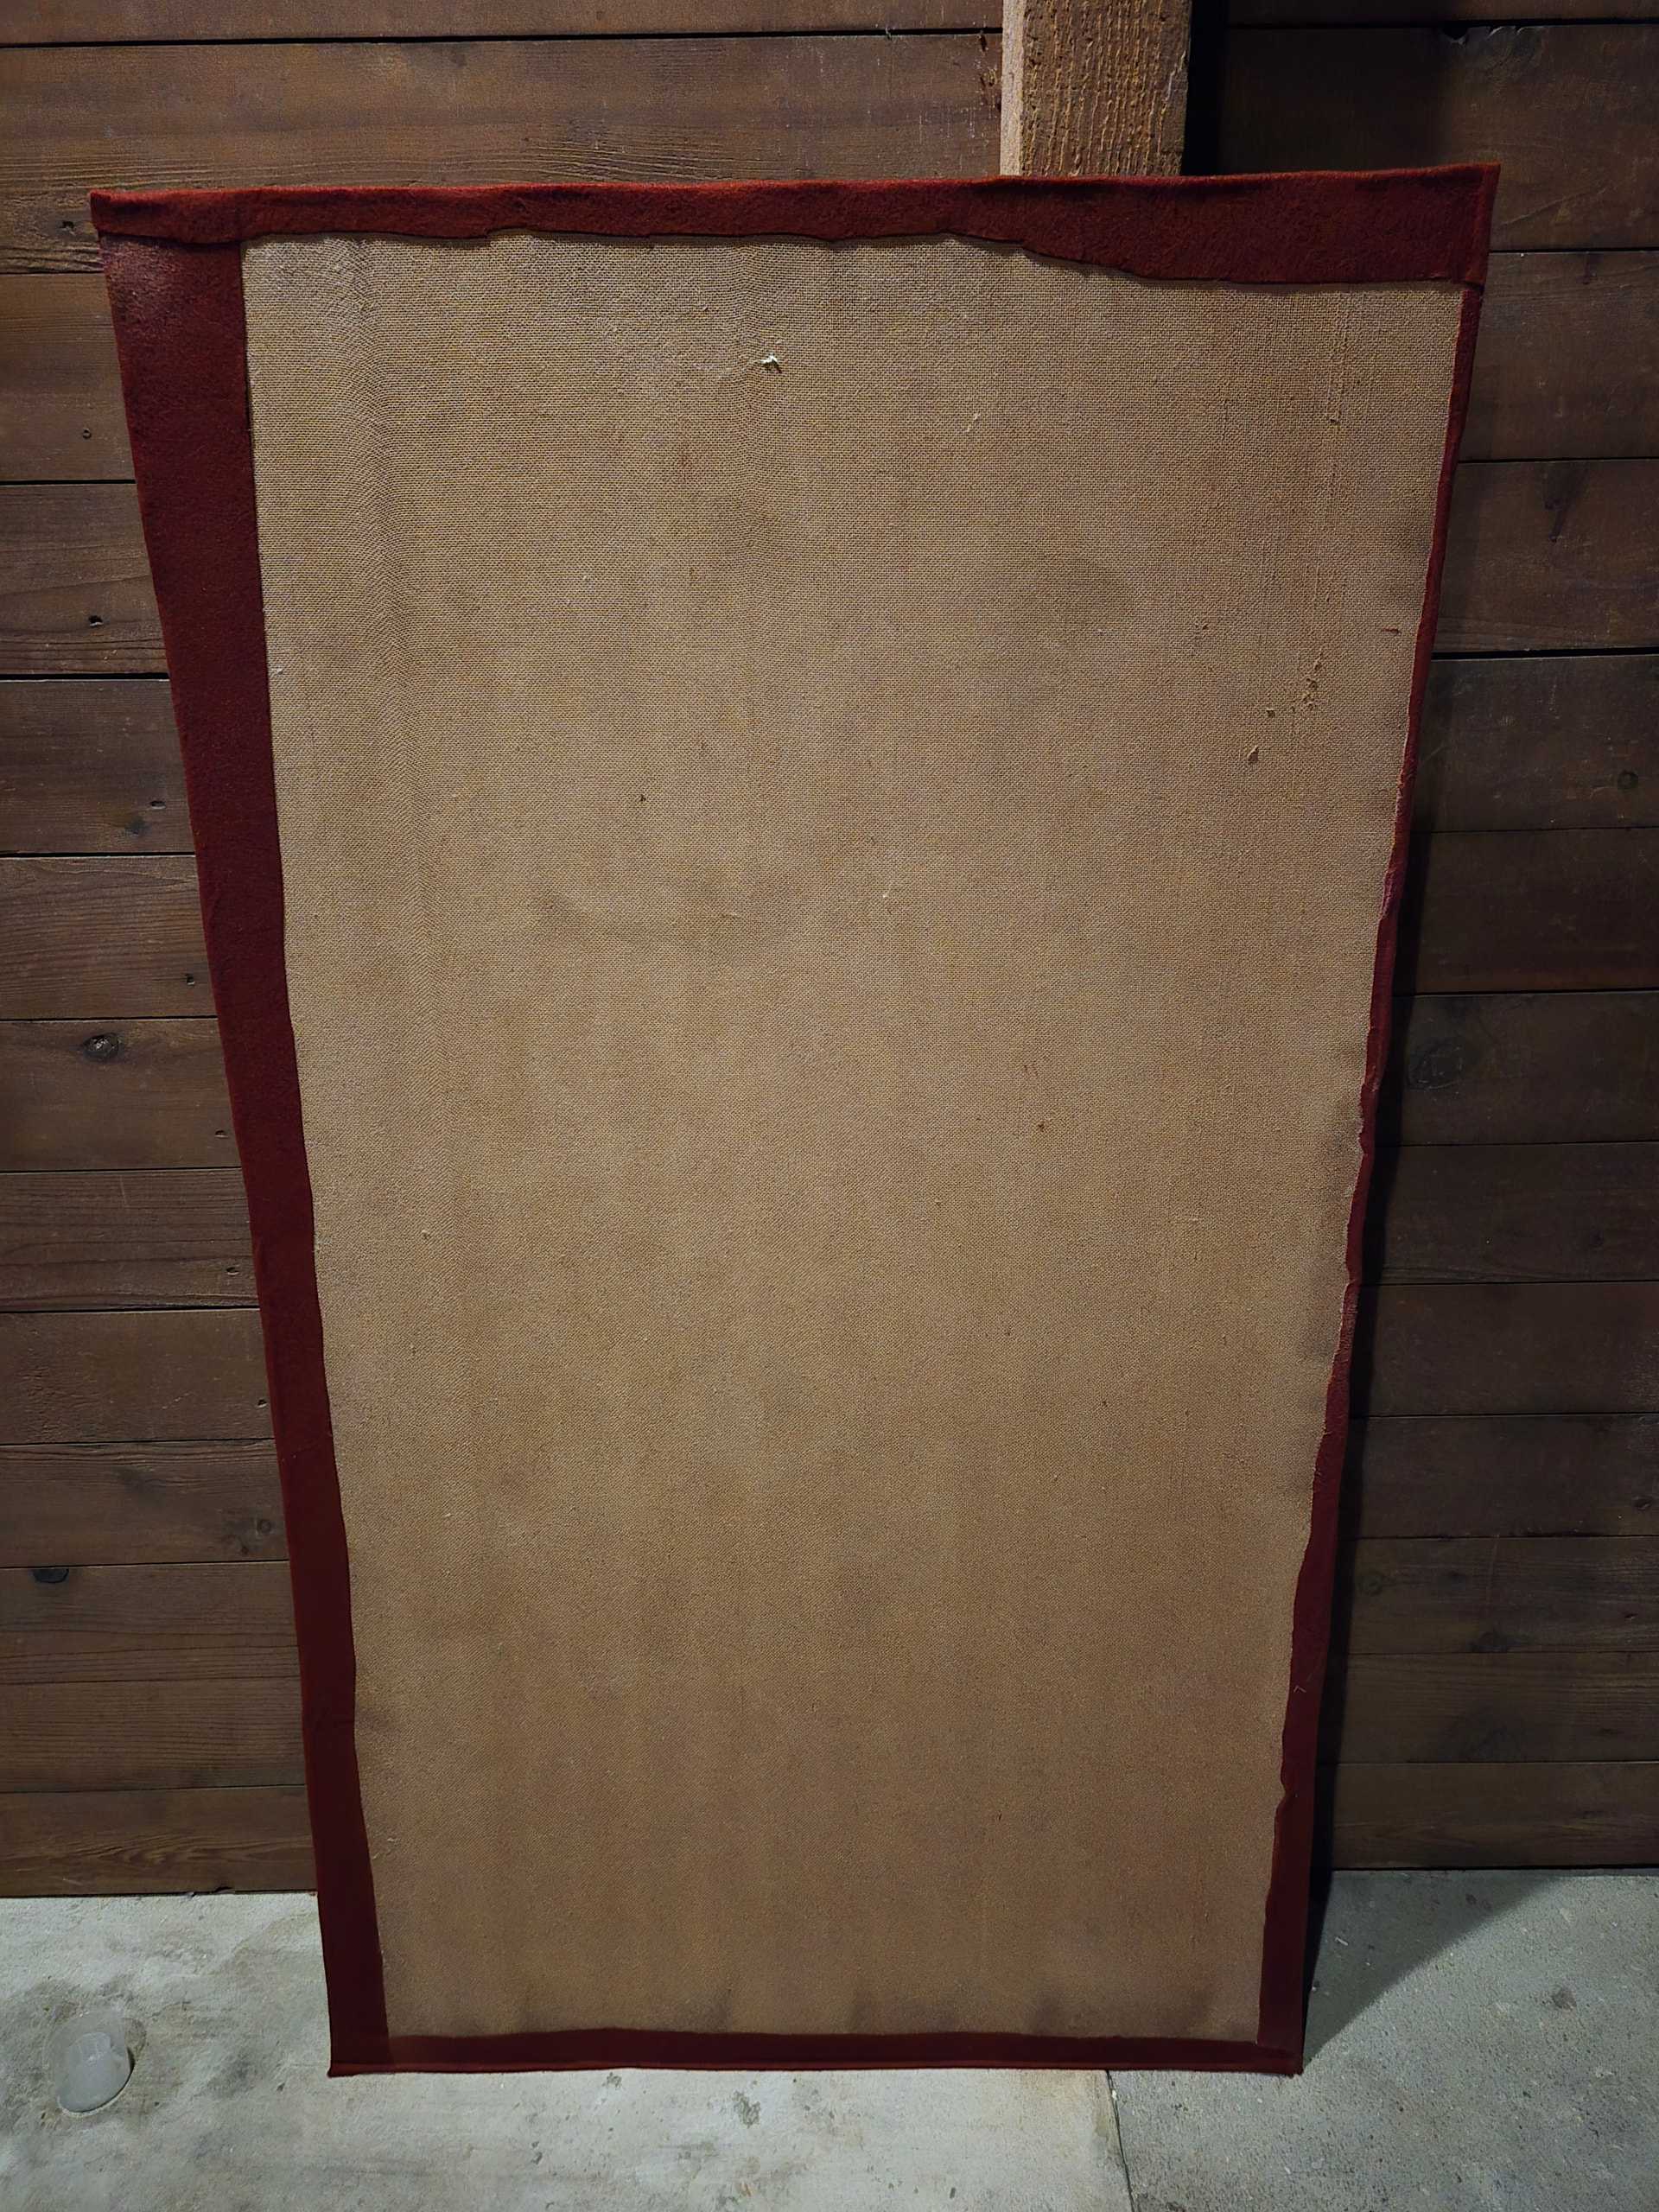
Messed up attaching the felt evenly here. Ended up with a very small margin on the top right.

Gluing up all the inserts.

Here’s my final stats for the project

Total time spent : 252h:25m (aka about 4 months)
Total time waisted (because of fixing errors or redoing work): 108:55
Time spent that could easily be reduced: 33:15

Total Cost: $2205
Total Cost minus membership fees, waisted material, and one time purchases: $1170

Final thoughts

7/10
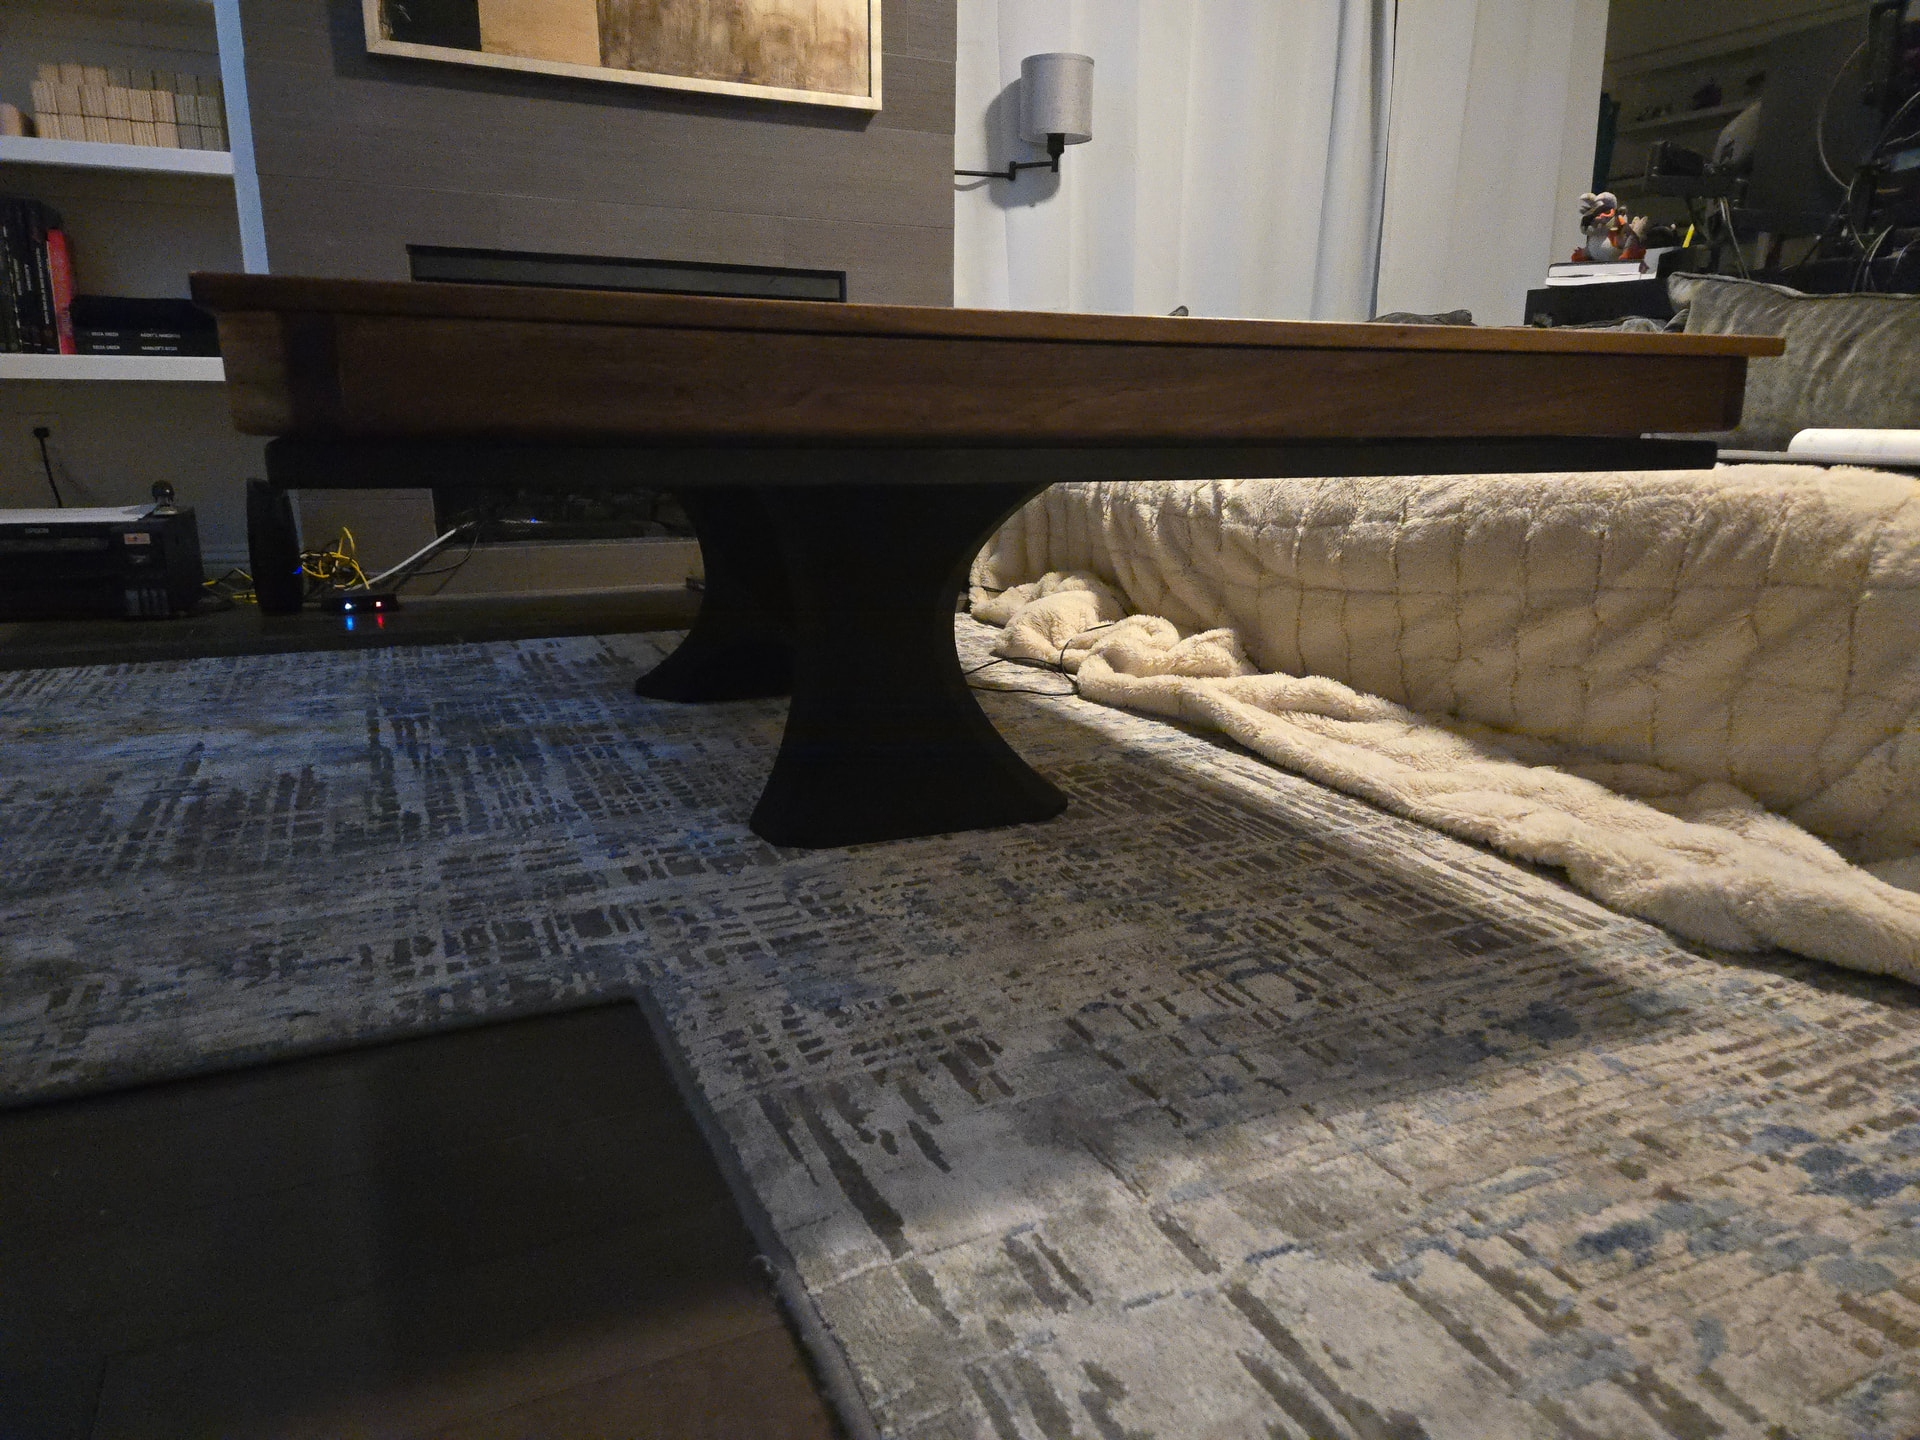
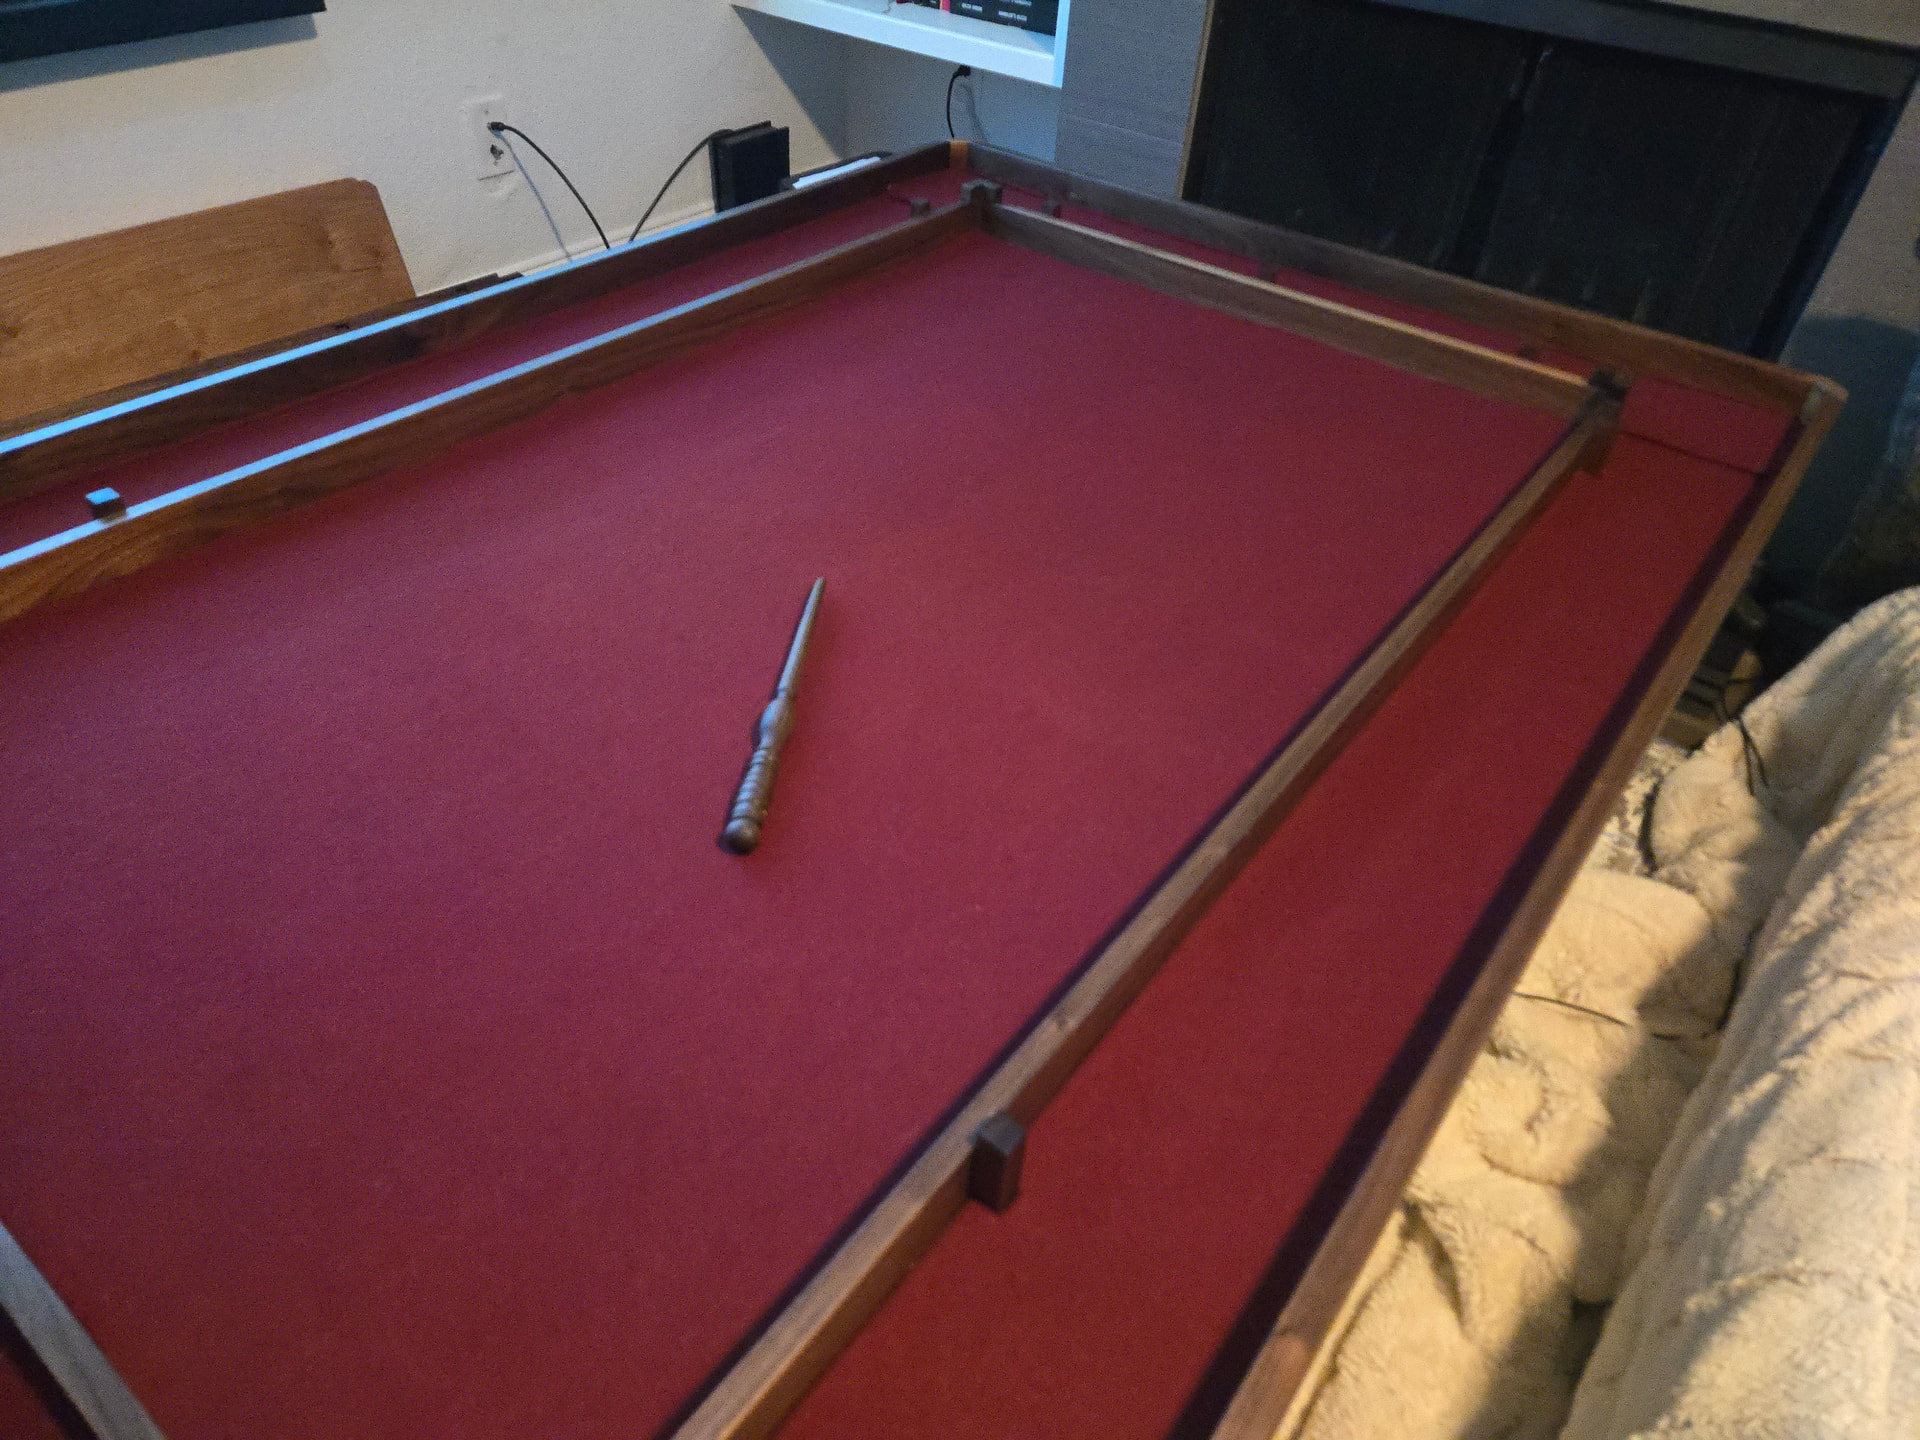
I wouldnt sell this to someone. There are too many problems. The interior felt insert doesnt perfectly fit, so its pushed up on a corner. I’d want the cherry covers to sit in line with the outside top pieces. The walls of the table should be thicker and connect more strongly with the wood bottom. The metal base is to close to the tables edge, making the table look to thick and clashing with the look of the corner cuts. The bottom doesnt sit flat on the exterior bars of the metal base since it bows up. But most importantly its unstable on the long edges because the leg base is to small. Pushing on the long edge easily tips the table.

But I now know how to fix all of these problems for the next one :wink:

11 Likes

Looks fantastic, Taylor! Congrats!!

2 Likes

You can cut the fabric corners at a 45° about 1/8” from the corner then fold the fabric in. If you do a good job, you will not have the build up of the fabric. You have to run some practice pieces to figure out how far from the corner you have to cut as all fabric is different thickness. You are right about the 1/8” clearance to account for fabric thickness at the joints but again is dependent with the fabric thickness. Look at some upholstery videos in how they handle corners with no wrinkles. There are different techniques that you could use. The one mentioned above has been the easiest for me. If you want to keep repeating what you done you could cut a rabbet slightly thicker the the fabric in your substrate. Where you cut your edges at 45° chamfer you could use the table saw. If you decide to use the router, you need a sharp router bit and use the fence instead of the guide bearing. I would go with creating a lip on that part that way it would hide any gaps it would give you more lee-way in covering the gaps. Study joint techniques. Specifically lap or bridle joints that would make your big frame stronger and easier to put together. If you did not use a band ratchet clamp to glue together your frame, you may want to get familiar in using them. They save you a lot of time and you would get a far better pressure in the joints. IKEA straps(link below) has probably the better ones you can get for very little $$. All the other ones stretch without putting pressure on the joint, harbor freight is the worst. You should not try to make the table affordable to everyone you will not make money using the materials and techniques you did in the “first” one. Instead market the table as what it is, a custom job that I would charge $2000 at the minimum.

It looks great, Taylor! It’s been fun watching it come together.

1 Like

the space use to have a wratchet strap that was perfect. it was red and had a handle and spool. The only wratchet left on the clamp rack wasnt long enough for my table, so im just glad i was lucky enough to be able to do the wratchet part of the project before the good one went missing

The band strap you’re talking about do not last long and are on the expensive side. The ones I mentioned, I have put two or three in tandem, you can connect the strap of one to the ratchet of another one. At one point I had to do frames for a lot of bulletin boards the size of a sheet of plywood. I have around twenty of those straps at home. I use them a lot to make boxes. For me that’s what has worked over and over for a very low cost.

1 Like