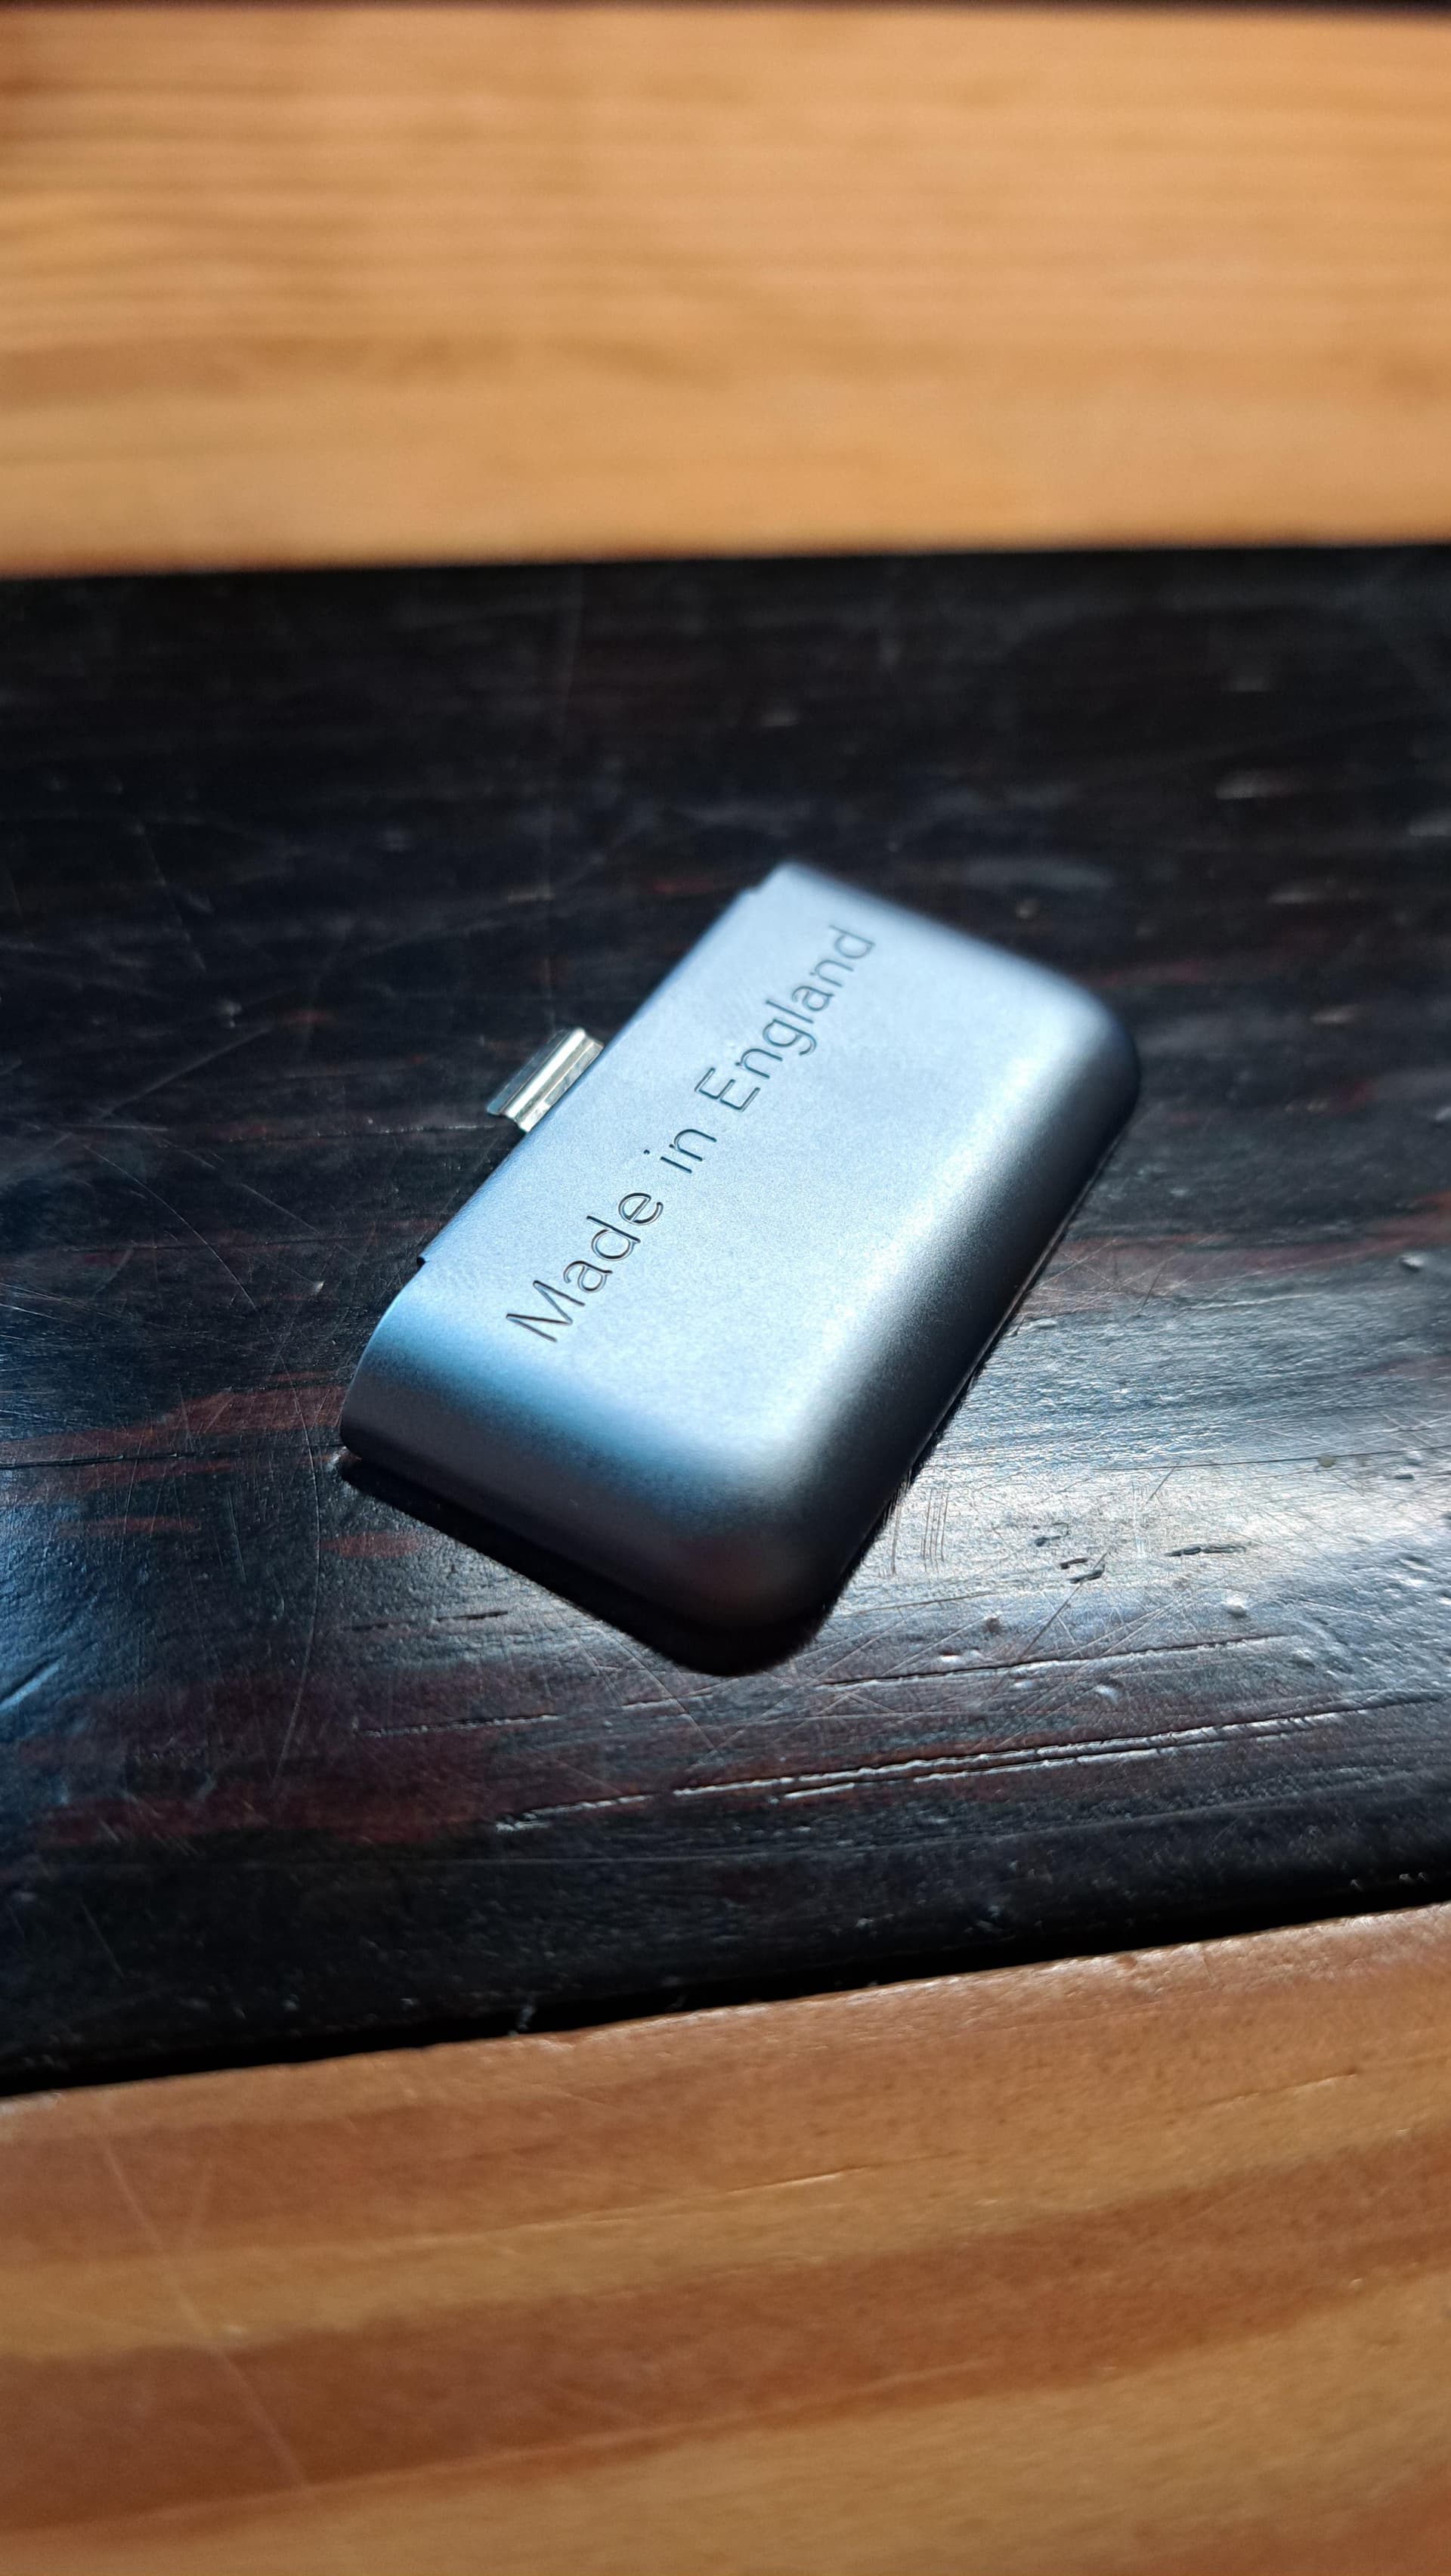
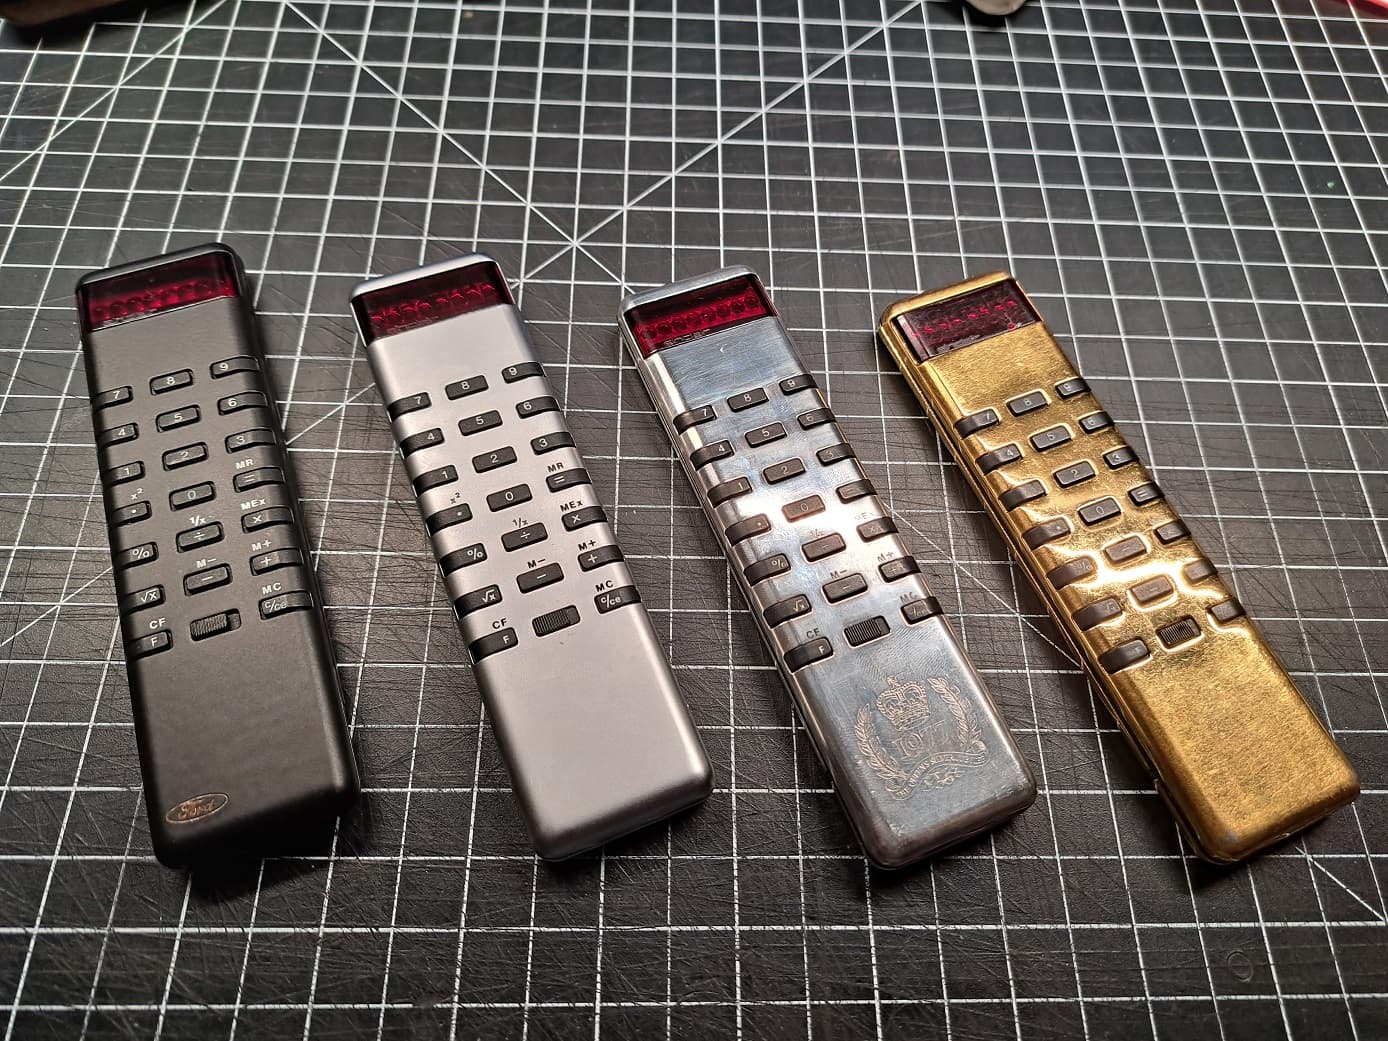
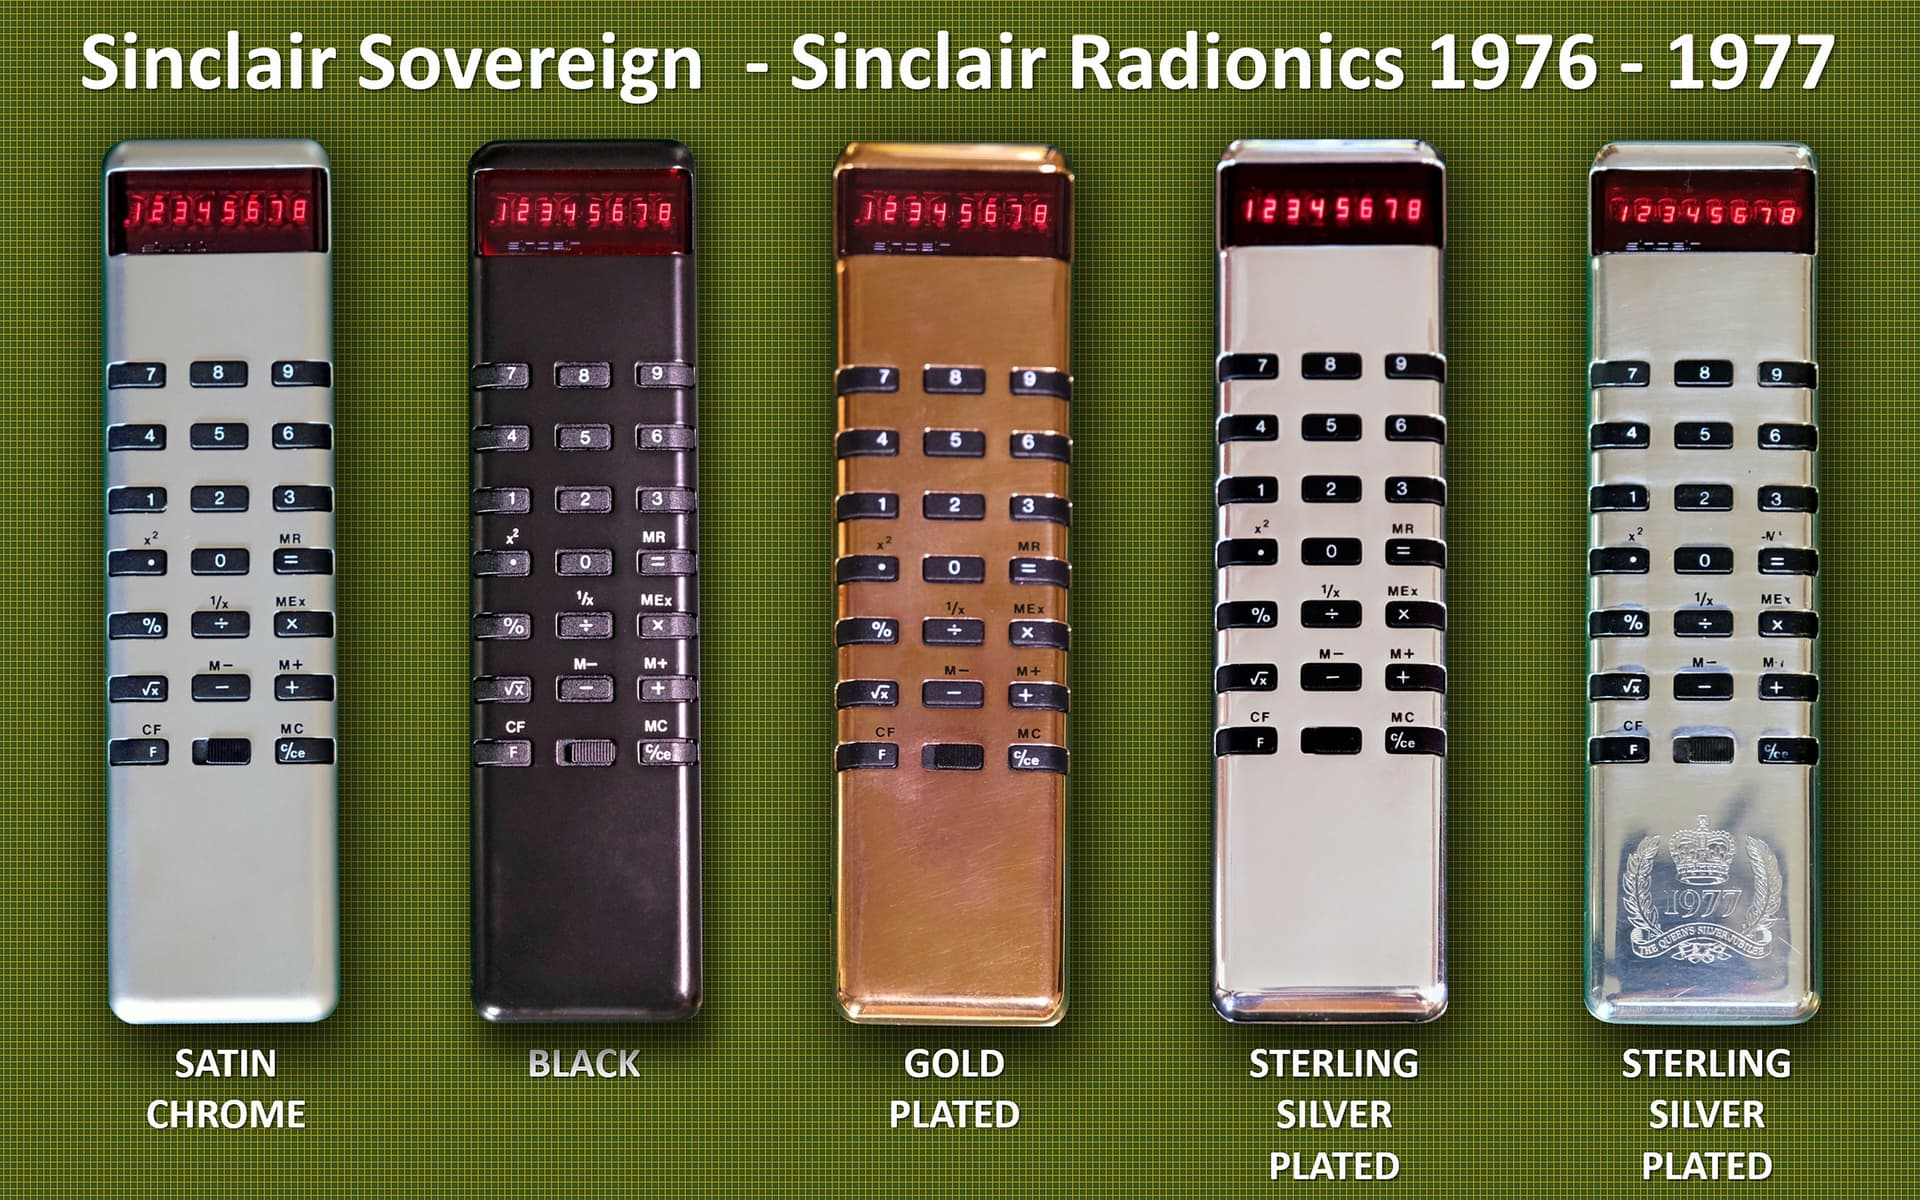
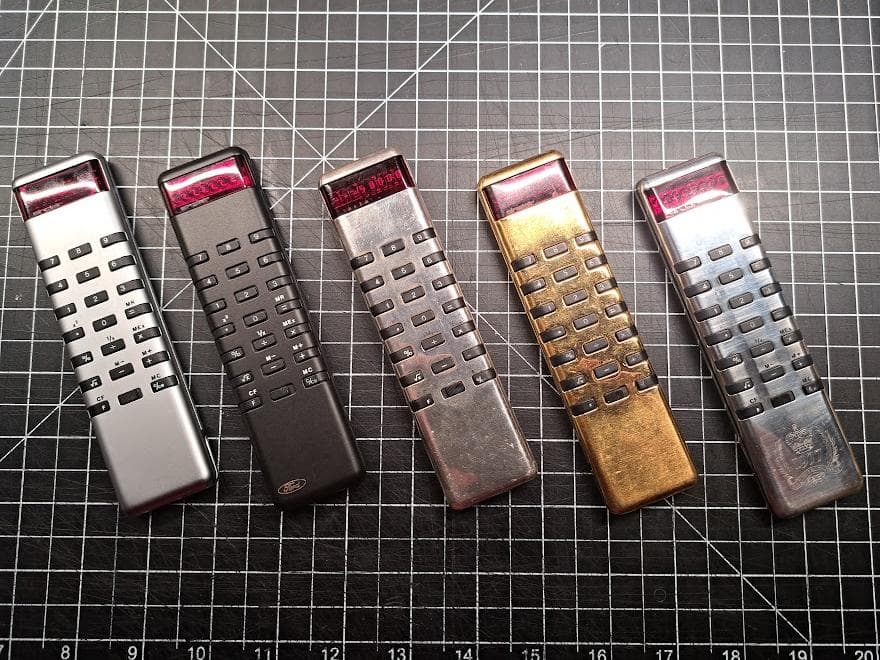
One one of my vintage calculators is missing the battery cover. Luckily, I have a mini-collection of the various models of the calculator in question (Sinclair Sovereign) so I have several other copies of the missing cover:
My first instinct was to use this one to make a silicon mould, then cast a duplicate out of PU resin. I still might go down that path, but that’s a ridiculous cost of materials (with short shelf life) for such a small part.
Another option is 3D printing, most likely resin, but I’m stuck getting started. The original battery cover is made of stamped steel and has various curves, bends, lips that make it… let’s be generous and say tricky to model, at least in my limited experience with Tinkercad.
So I’m very much up for any advice from those more experienced. Are there tutorials or tools you can recommend? Should I look into photogrammetry instead of trying to build a model? I appreciate any guidance
I would also look at more powerful cad such as Fusion or Onshape. You can get it scanned. You can import the stl into cad and start modeling from there.
I would also look at the cover as 2 parts. The outer and inner. I would make a part file of both parts singularly and bring them together as an assembly.
Thank you, @JoeN – I also think that a scan as a starting point might be the ticket. Maybe I’m deluded, but it seems like it would be easier to clean up vs. start from scratch.
Learning about the KIRI app for now, but I’m all ears if there’s some other (cost-effective) solution out there.
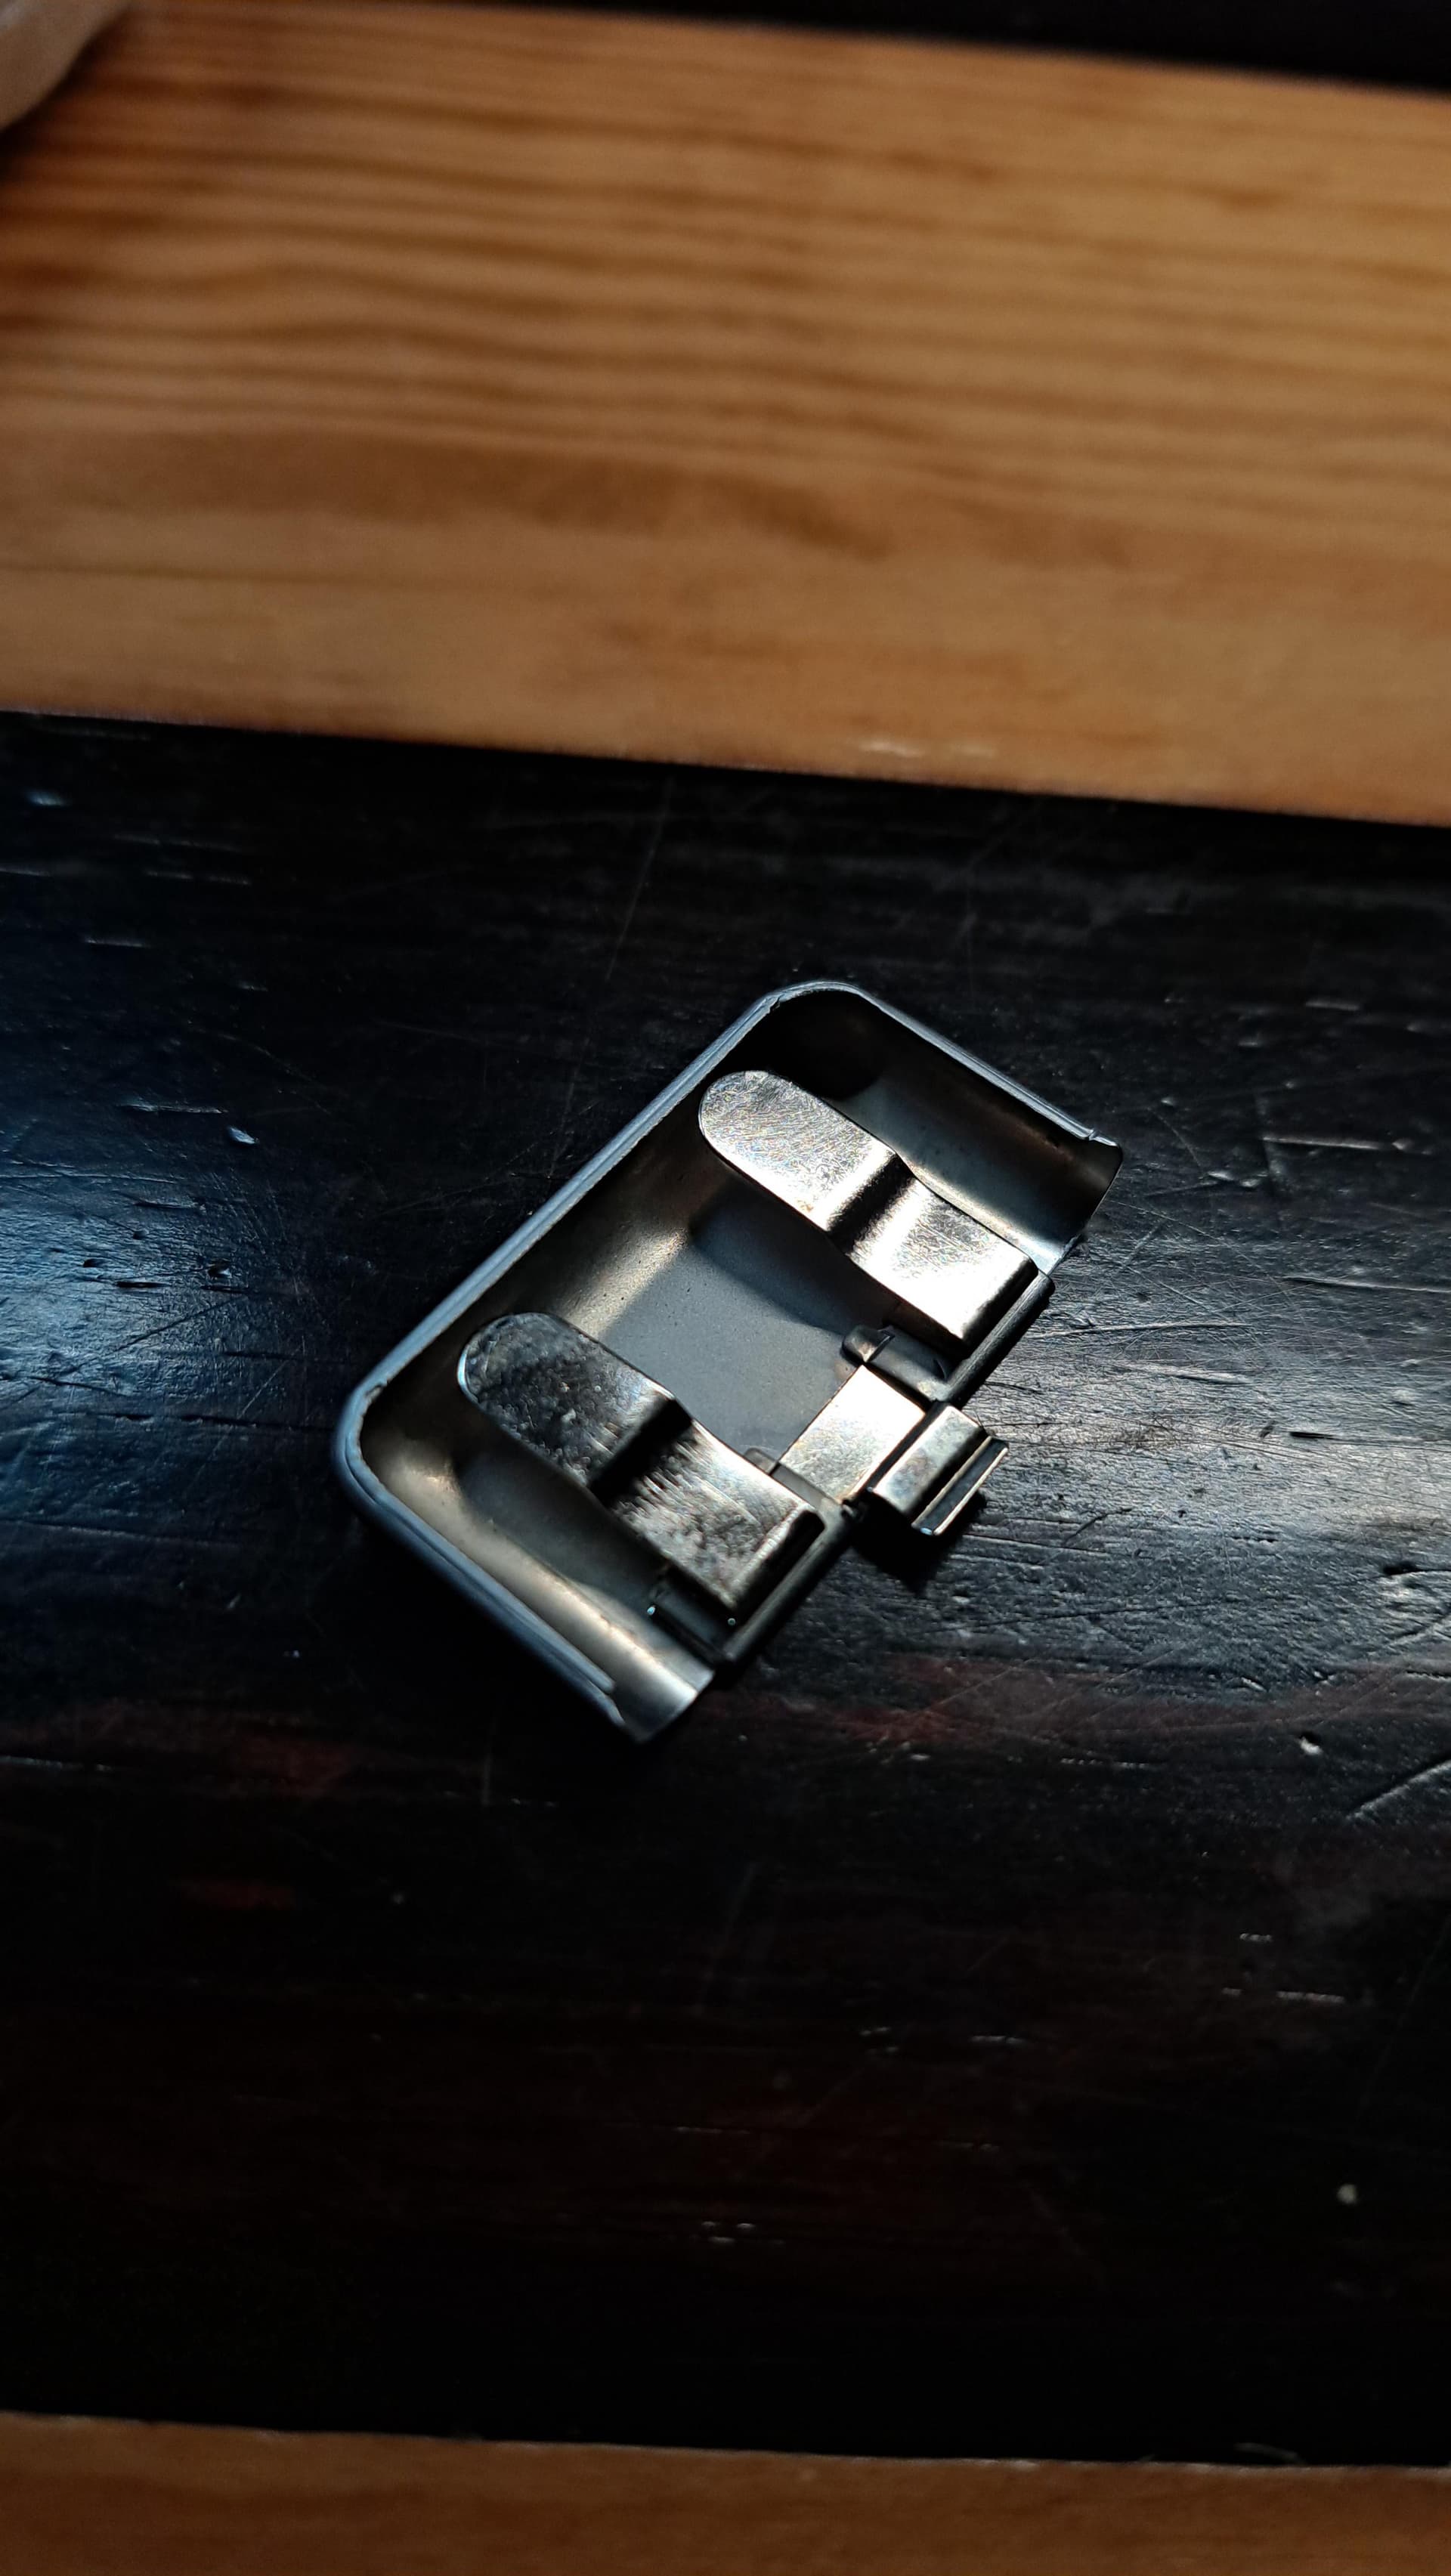
I can’t tell if the steel brackets are part of the case, they shouldn’t be, if that’s the case, I’d try use a heat gun to release it from the case, you just have the rounded case at that point to model which is much more manageable.
As for creating the outer case in 3D, I concur with @JoeN on using more powerful CAD software, but I wouldn’t use 3D scanning, you’ll never clean enough model for a perfect fit unless you’re using and high-end scanner, and the clean up can take a long time. For a simple shape like this case, I’d just take a caliper to it and model out the shape and thickness within Fusion 360 or similar software. Start with an overall shape, fillet the edge then just shell the box to get an even thickness.
As for printing, the regular resin will become brittle over time and may shatter easily at that thickness, your best bet would be the engineering-grade resin from Formlabs which will do better, but not sure if it’s worth getting a whole bottle for a one-time use. FDM, well, it’s FDM, you have to deal with layer lines and being plastic.
re: printing technique: I’m OK with a relatively brittle resin cover (since this will get minimal use) or having to do plenty of sanding on an FDM print. It will need to be painted anyway, so some measure of post-processing is guaranteed. Going down the path of casting aluminum is something I hadn’t considered but I did just complete a silly project with casting pewter, so… maybe?
Thank you both, I appreciate the advice. Just browsing through Fusion tutorials gives me extremely unpleasant flashbacks to VLSI classwork in college, but hopefully I’ll get over it.
I can help with a zoom Onshape tutorial. Fusion has a better cam software. It is maybe more helpful to go with Fusion since you can do projects on the cnc routers and Tormach.
What are the dimensions in metric units (height, width, depth)? I have a mini 3D scanner that creates a mesh using photogrammetry. It can scan things about 80mm in size. So if you can remove the metal clips we could give it a try. Then you could print a resin part from the mesh. What do you think?
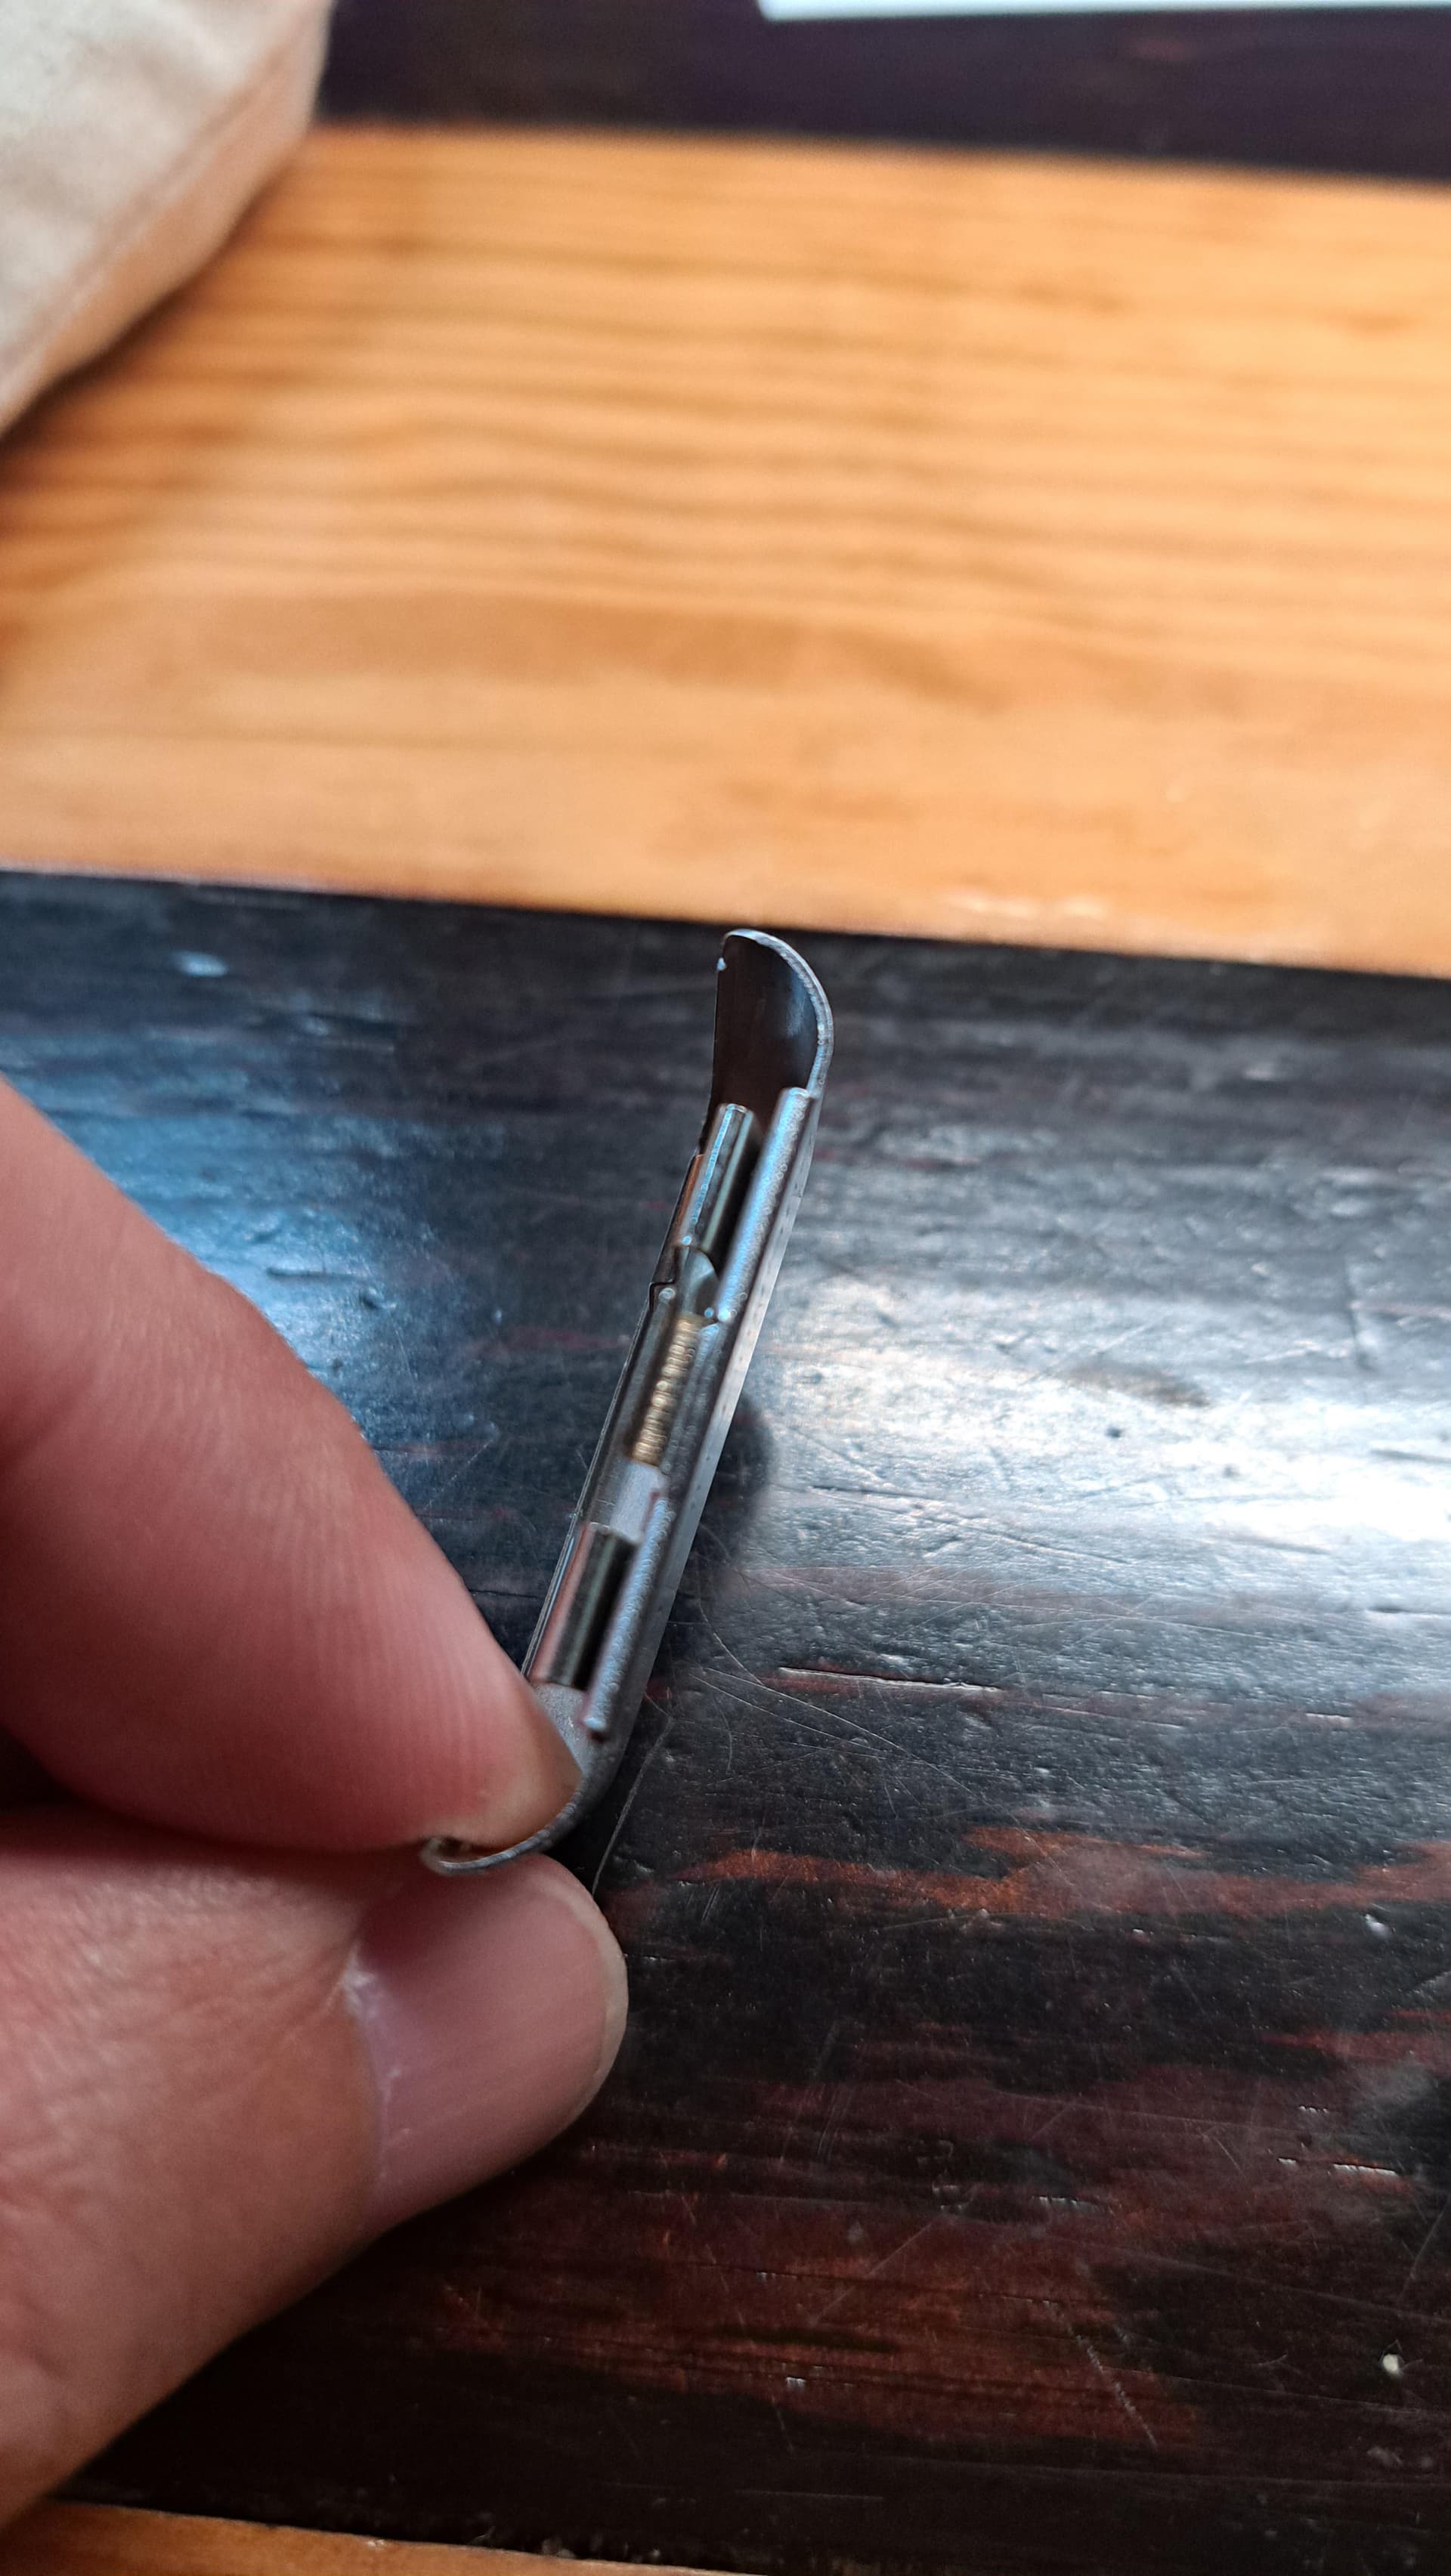
That would be absolutely fantastic, although I’m not sure about the ability to remove the clips The part itself is only 37mm on its longest side, but the clips seem to be folded steel that’s either part of the cover or extremely tightly pressed together. Is that a dealbreaker for photogrammetry? I imagine the cleanup would be a pain, like Joe and Alex noted above.
I suspect that the manufacturer (Sinclair) is actually using the metal clips to bridge the batteries in series, instead of doing it further up the circuit like pretty much everyone else…
It would be best not to include the metal parts since they won’t be printed in resin. If you must include the metal then the mesh would need to be edited before you print the part in resin.
When is the next time you’ll be at ASMBLY and maybe I could stop by and we could meet and show you the little scanner.
DM me at “bwatt at 1fifoto.com” if you want to meet.
Thank you very much Brian! I’ll be using Tarkin on Thursday evening (6:30 - 8:30) but plan on being at Asmbly starting around 4pm. That said, I have a reasonably flexible schedule so feel free to let me know when you think you’ll be around. I’ll drop you an email, it will probably be easier to coordinate that way.
Hah, well… If you mean an actual replacement part, it’s not something I’ve ever seen for sale on its own. I do have every model (really, finish) of these calculators because I’m stricken by the incurable disease known as Completism:
But only one of them is missing the battery cover and I figured 3D printing is the perfect tool to help me with that.
These calculators themselves are not fantastically rare, but they’re rare enough that people ask simply ludicrous amounts of money for them. Crafting a replacement part instead felt like a wise decision.
The collection is complete – unless there’s some super-special edition out there, in which I don’t want to know about it – and thankfully I managed it before prices went fully berserk.
I do want to build a display case for them eventually. That’s one of the many, many projects in the backlog…