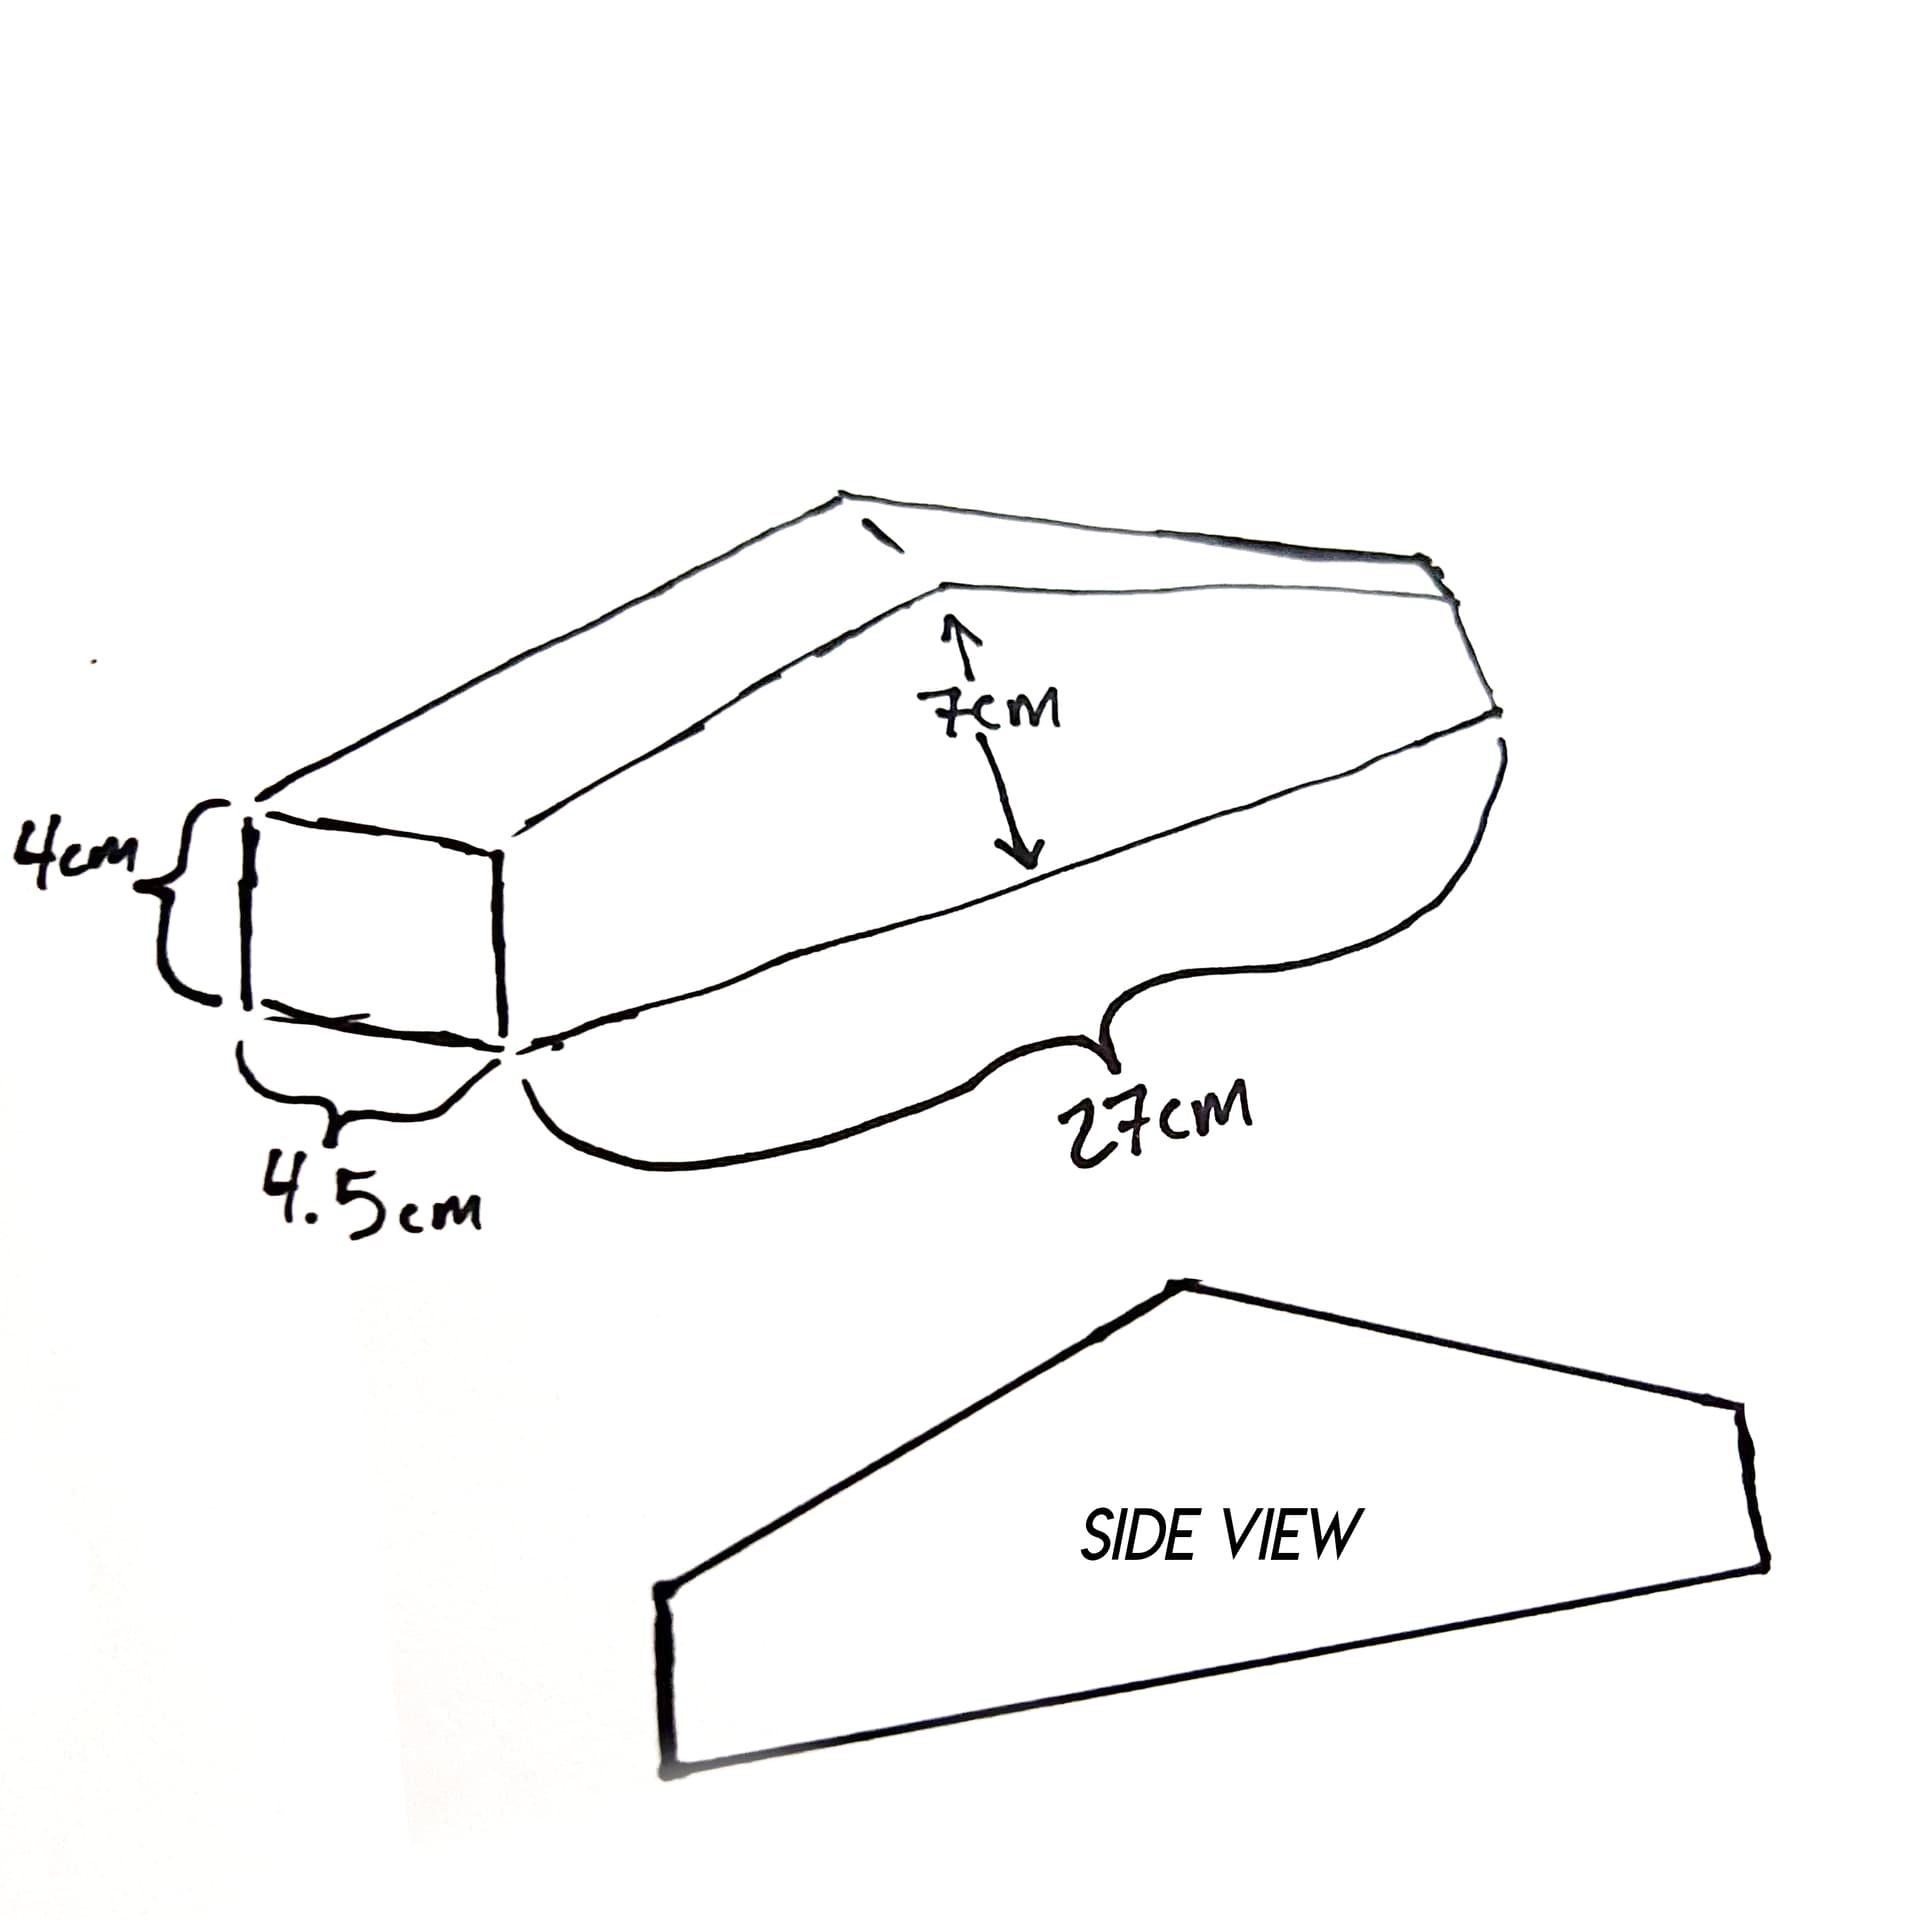
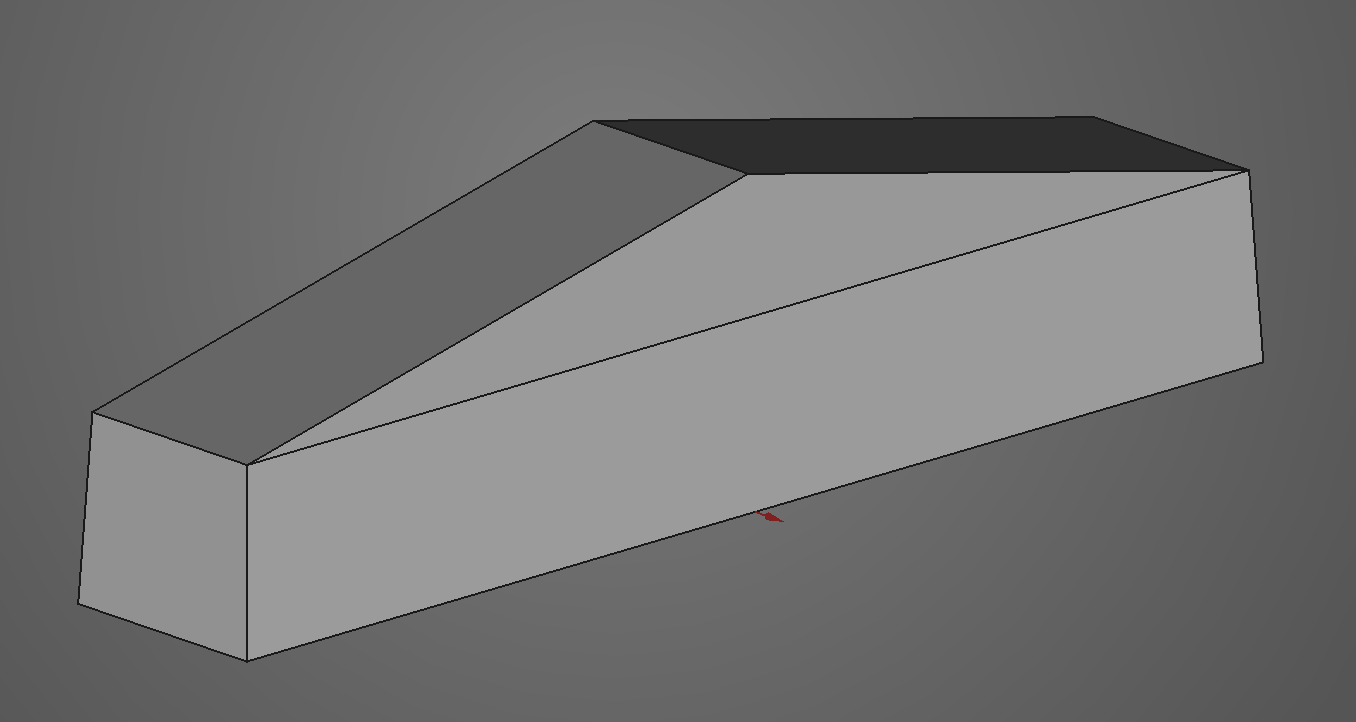
I have a pretty simple shape I need a 3d print made of. It will be a blank for me to make a rubber mold of, So I think resin might be best to minimize the surface texture? But It may be too large for the resin printer as it needs to be about a foot long.
Anyways, I am open to any suggestions and willing to pay for someone to draft and print the project based on my sketch and dimensions.
Can you please share your sketch + dimensions? I’m curious how complicated the build is. I’ve printed molds using PLA before.
If you are shooting for minimal layer lines, could always smooth PLA. I do recommend at least starting with PLA while you are prototyping. Much easier and faster to iterate with, compared to resin.
Resin would likely be overkill for something like that – it’s usually more useful for high-detail/high resolution things, not solid shapes with straight lines. Not that it can’t do that too, just not quite necesary for your purposes. Instead, you could just sand away the layer lines or use some filler to fill them in and get a smooth surface. That’s assuming your drawing isn’t missing any hidden details.
You may be able to print the thing full size in one piece on some printers, the Prusa XL at the space has a volume of 360mm360mm360mm. In others, you may be able to print it if you spin it around or something, but for that shape, you could probably slice it down the middle and glue the halves together.
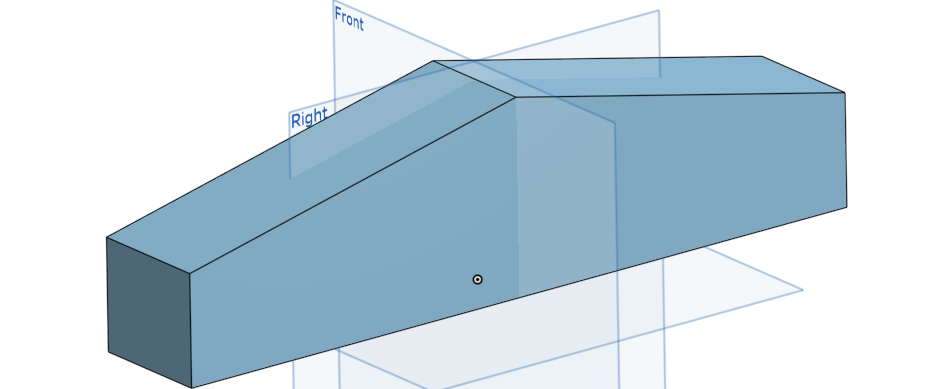
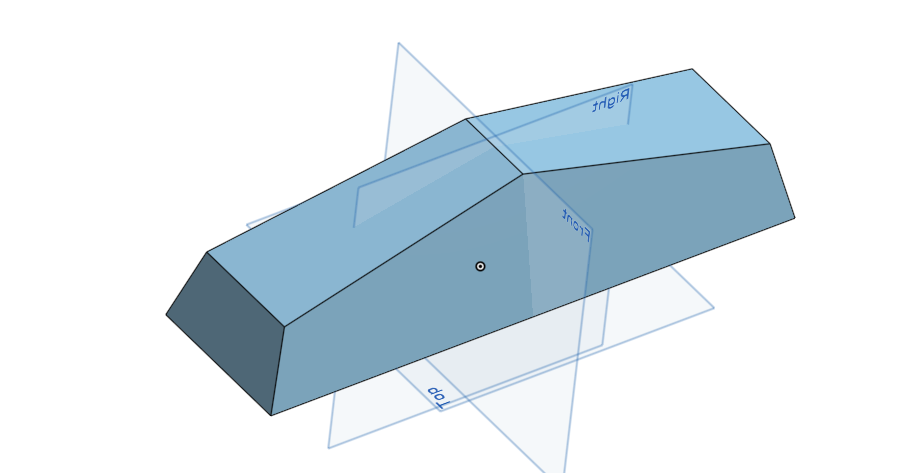
I’ve gone ahead and drawn it in OnShape for you based on your sketch. No need for payment, took 30 seconds haha. I can help you print it too, but I don’t really print at the space, and my home printer has a build volume of 256x256x256mm, so youd likely need to contort it or print it in parts. Let me know if the design needs edits, too
I have heard of people printing something like this and then use Bondo to get a smooth surface. Since it’s model to make a mold, the aesthetics would not matter.
I have found that integrating a small rod about 2mm in diameter and 10mm long will elevate the model from the bed. That will help to eliminate a rough patch where the digital model sits on the bed and doesn’t have support for printing. Instead, the entire model is supported with “normal” support, or tree support. I’ve also found that orientating the flat surfaces so they are NOT parallel to the heat bed will create a smoother surface on the finished model.
Hey @gordoa40 Adam, thanks so much for drafting this up. I would love to be able to print in one piece as I have 0 experience with joining multiple parts together and I want to minimize the finish work on this project to try to get as clean of a sample as I can manage.
However as no one else has currently offered to take on the printing aspect, I may reach out EOD to inquire about printing it through you.
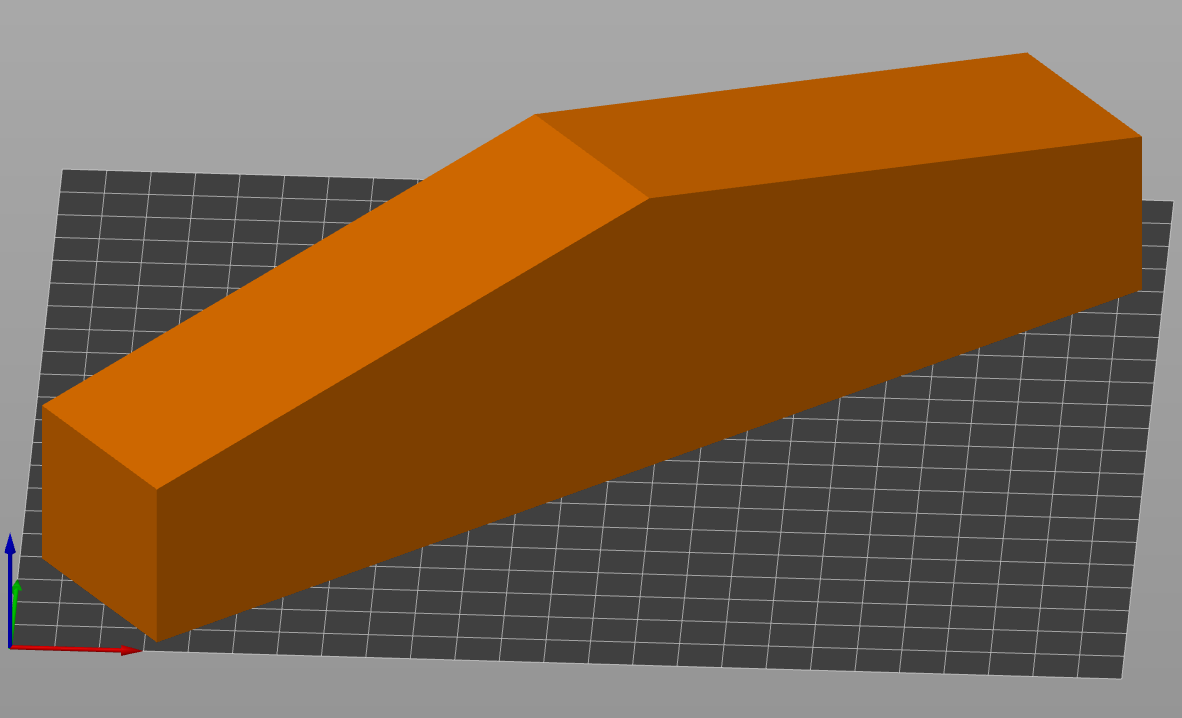
No problem. It looks like you’ve got some help to print in one piece, but before you do, you might want to consider adding a draft angle to your part to help with demolding. I’m not sure what you’re making your mold out of or what you’re trying to cast in it, but in general a 1-2 degree angle on the sides will make it much easier to demold than flat sides, as long as it doesn’t impact your final part too much.
If you decide you wanted to use it, I went ahead and created some more versions of your part, with a 1 and a 2 degree draft angle. Up to you, with a silicone mold it may not be necessary but might help prolong the use of your mold if you need to cast several times. Along with mold release
I’ve made more than a few cut molds in silicone. If you want me to do this, let me know and I’ll draw it up with sprues and vents so you can just pour in the silicone, de-mold, remove your model and be ready for your pour.
It would be helpful to know how this will be used - material you’re casting and the silicone for the mold, and the number of copies you hope to produce.
Feel free to call (512) 423-5292. But TEXT ME FIRST so I can put you in my contacts.
email is david78737@gmail.com
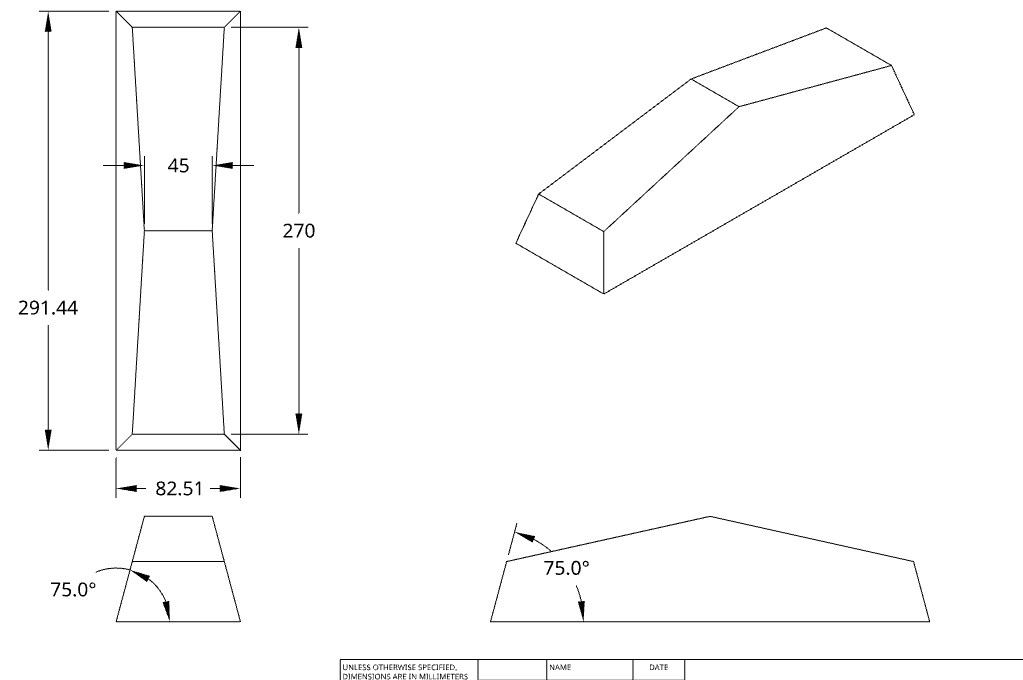
is it pretty easy to add angle to the sides of a cad model? I was considering making the sides all have a slight angle already but don’t have the know how to begin drafting that. I would be stoked If the outside edges could be at a 75º angle instead of a 90.
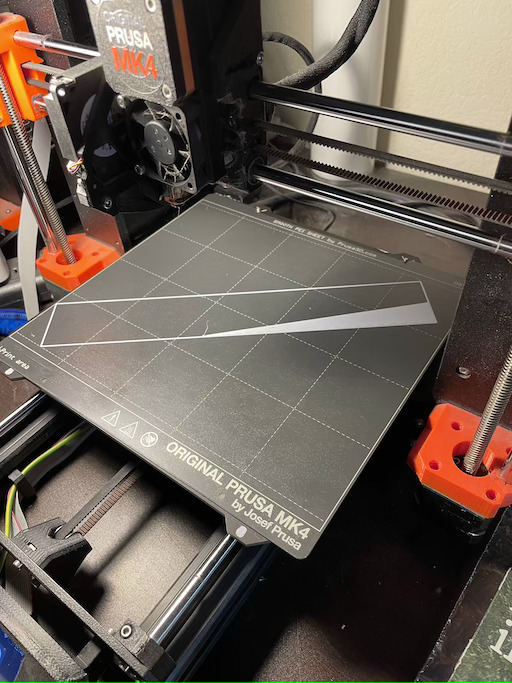
Finally I starting printing to make sure it would fit and it did. I cancelled the print because it would take 4.5 hours to print with a layer height of 0.30 mm (coarse) and use up my filament.
Back to FreeCAD and I made a lofted solid with the bottom 4 mm bigger that your specification to add a draft angle to each side. I left the peak with no draft angle which probably isn’t a good idea.
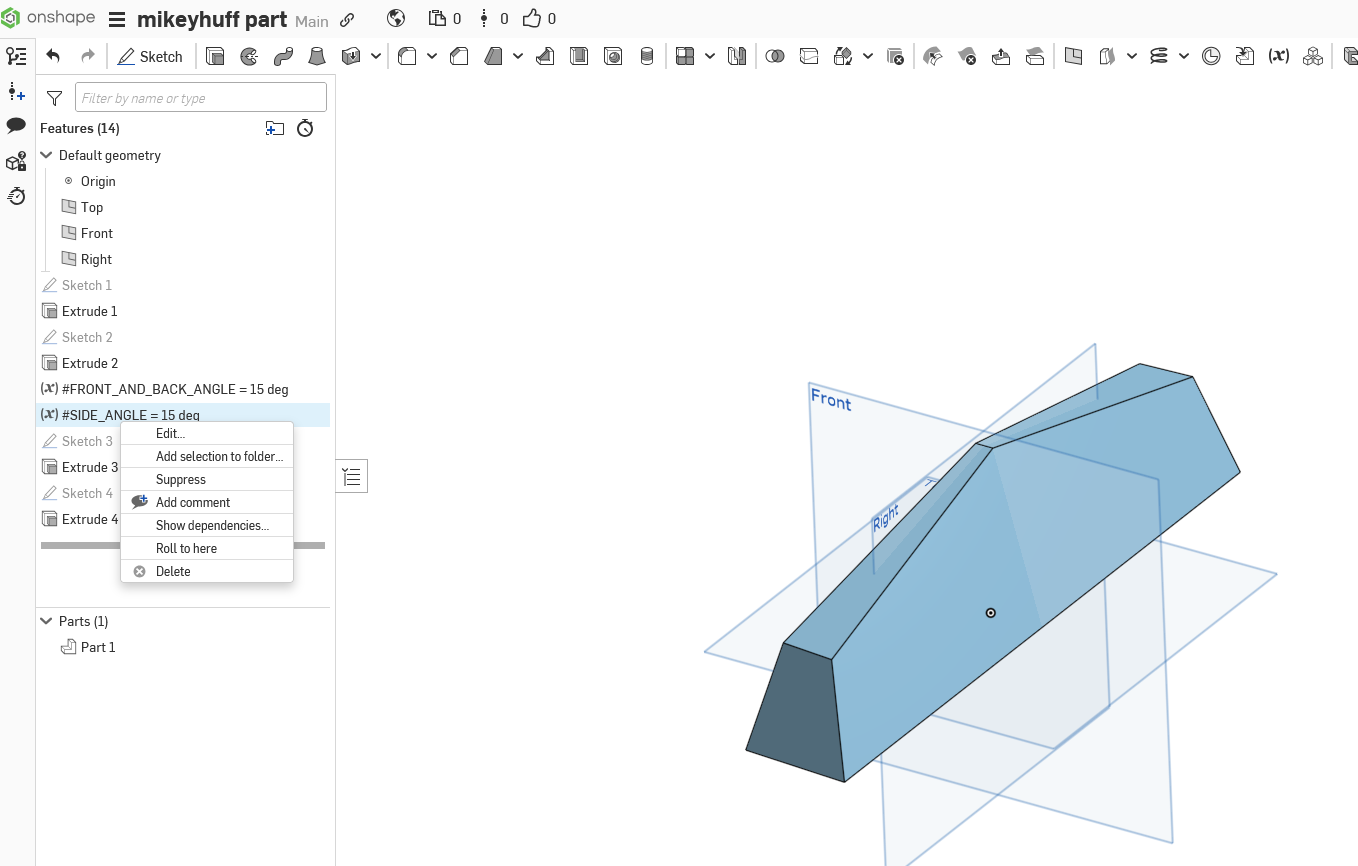
Yeah, it’s easy. I’ve gone ahead and added some variables to the OnShape model so you can mess around with it easier if you want. Simply create a copy of my part, right click on one of the variables on the side and hit edit, and enter a new number. I wasn’t sure which outside edges you meant, but I made them all 15* so you get a 75* angle from the vertical. In this case, the bottom will still match your design dimensions while the top is shrunk as its cut out, but you can also make it so that the top matches your 4.5x27cm dims and the bottom is enlarged. Up to you
yeah that looks great, If we could enlarge the top surface to match the original dimensions, and increase the bottom surface, that would be perfect. I appreciate it so much.