As we approach the end of the year, we want to celebrate all the incredible creativity and innovation that’s happened within our makerspace. We’re putting together a year-end recap and we need YOUR help!
What was your favorite project of 2024?
Whether it was a tiny prototype, a massive build, something that worked perfectly, or even a “learning experience” gone sideways - we want to hear about it! Share:
A brief description of your project
What tools or spaces you used
What you learned
Photos or videos of your project
Drop your projects below. We’ll be compiling the best submissions for our social media year-end celebration, giving a shout-out to the amazing makers who make Asmbly such an incredible community.
Can’t wait to see what everyone’s been working on!
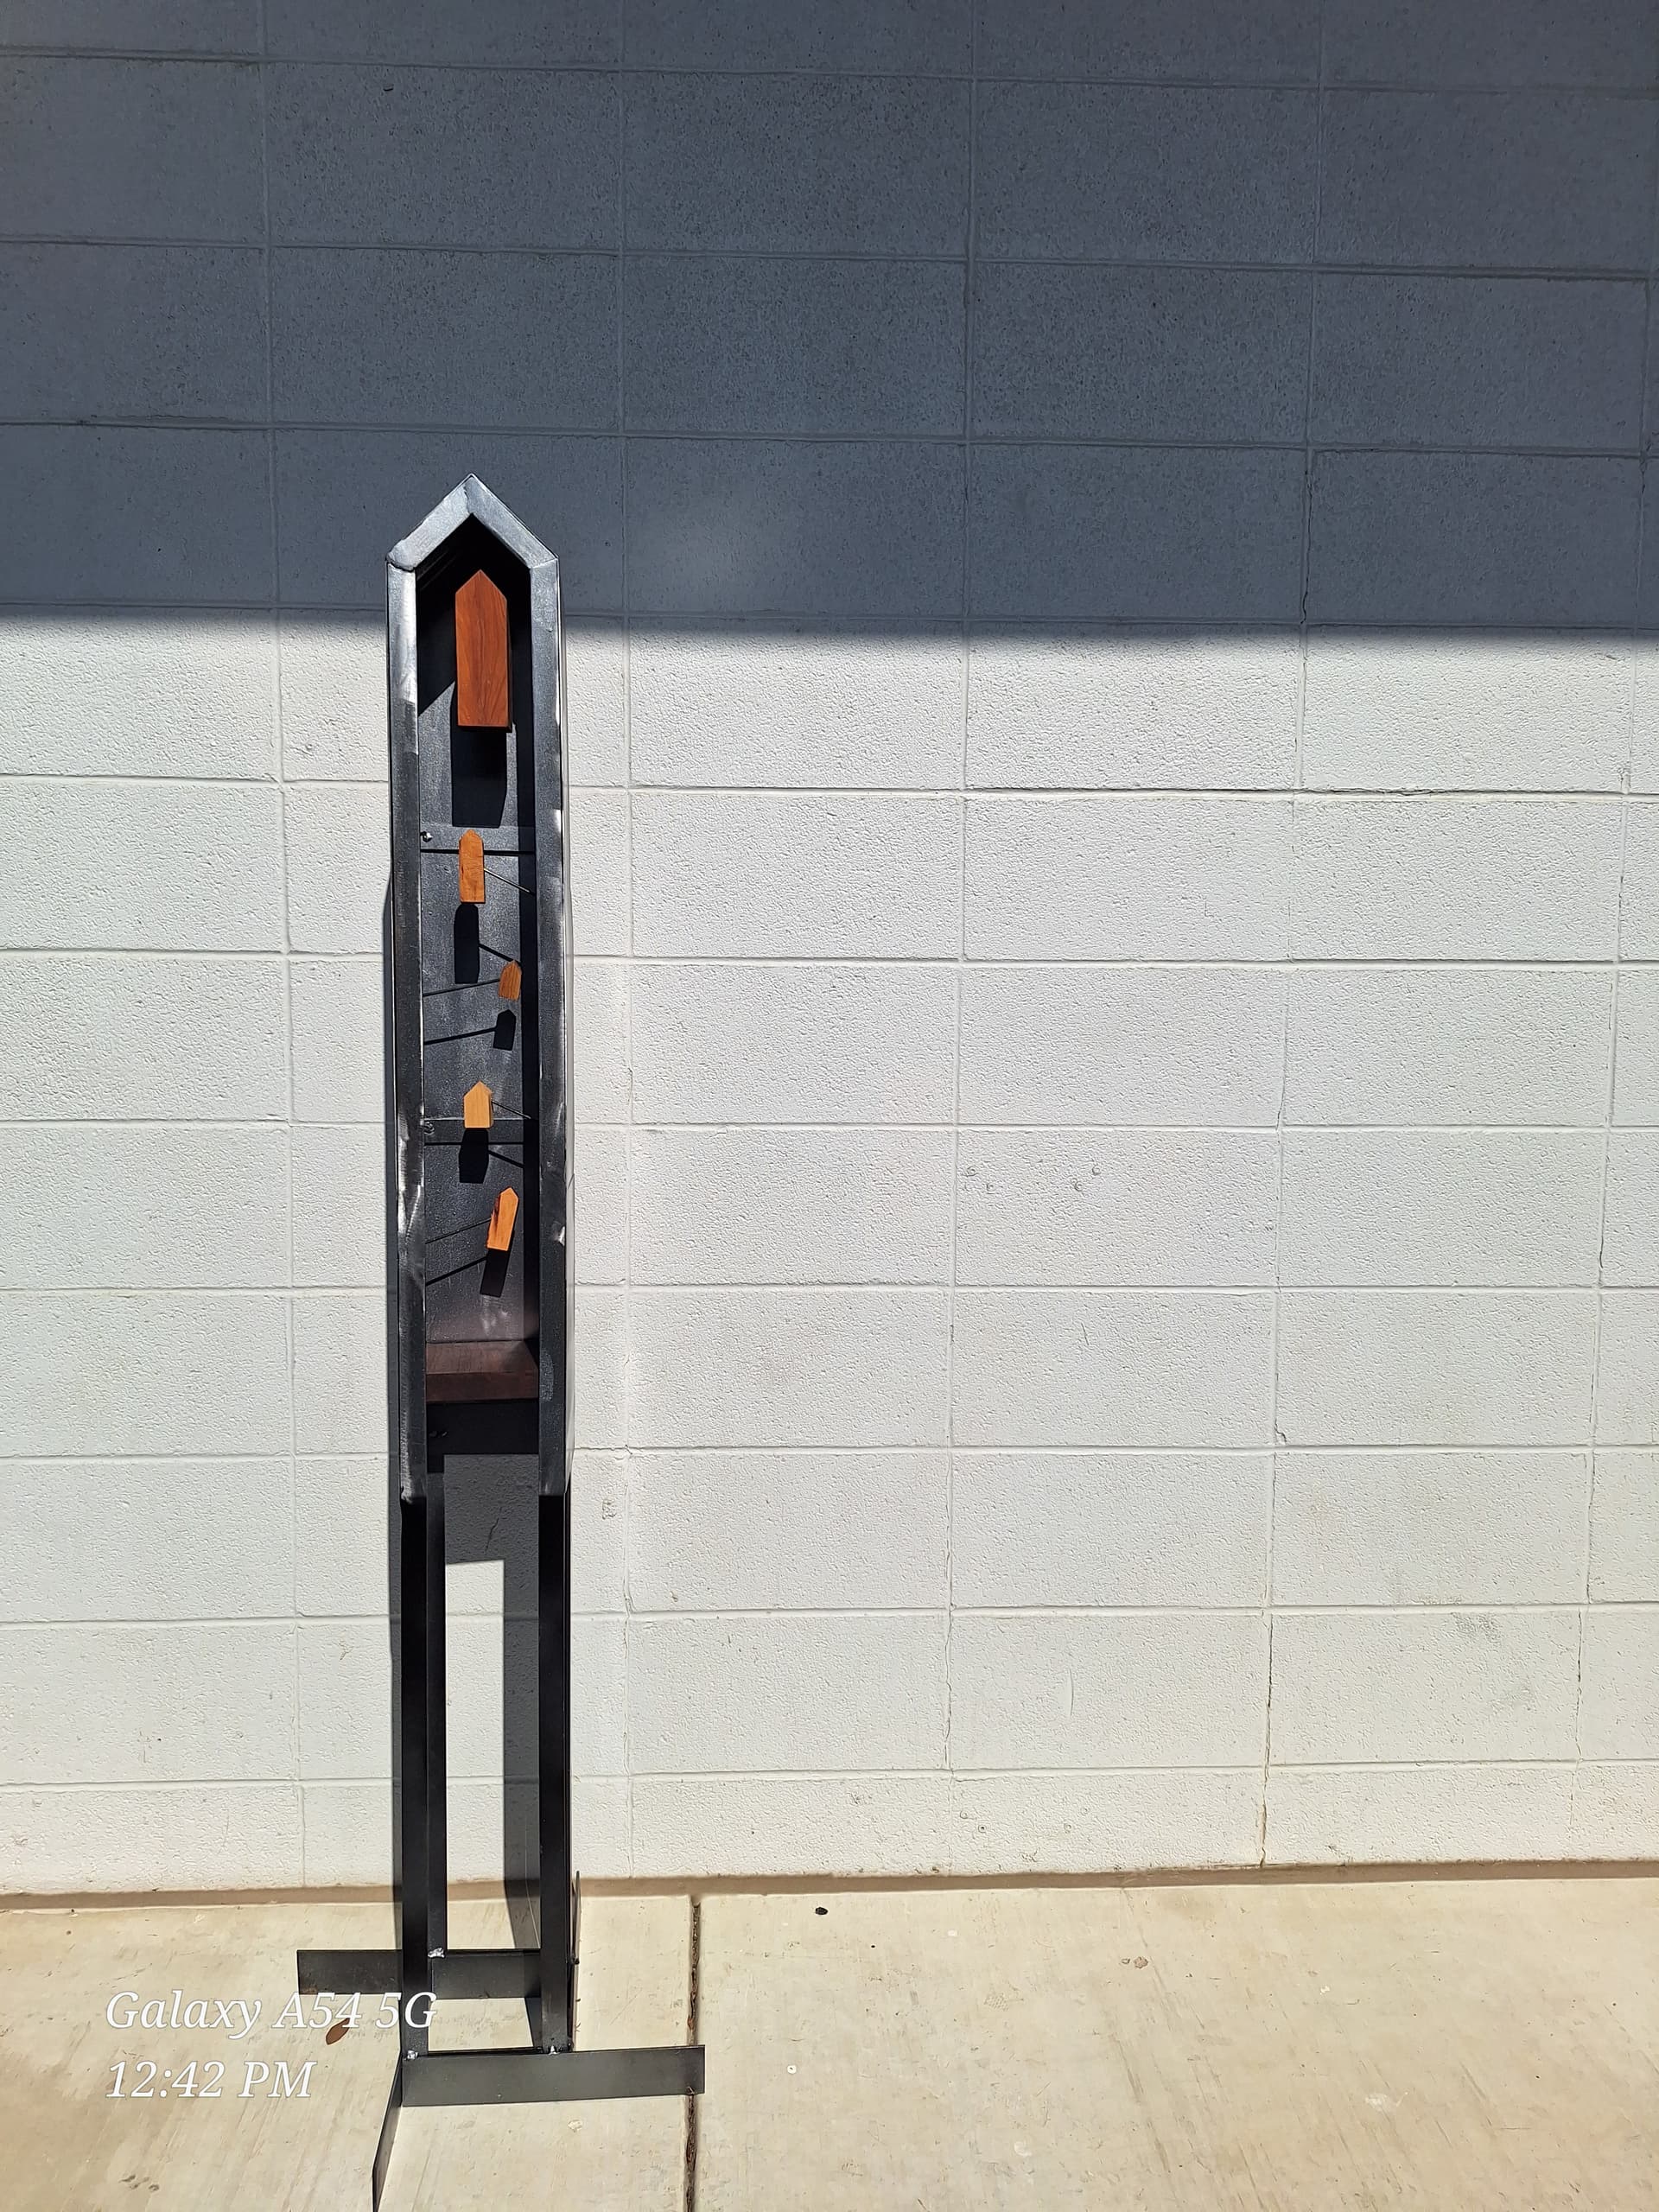
An art piece I call Journey. Welded mild steel and scrap wood from Asmbly. The one innovation was mounting the wooden house pieces on metal bases that attach to the walls with magnets. All but about 6ft of angle iron came from left overs or scrap. All the wood was scrap from assembly. If you look closely you might recognize an off cast piece of one of your projects. As an artist, the big challenge is to merge stability with aesthetics.
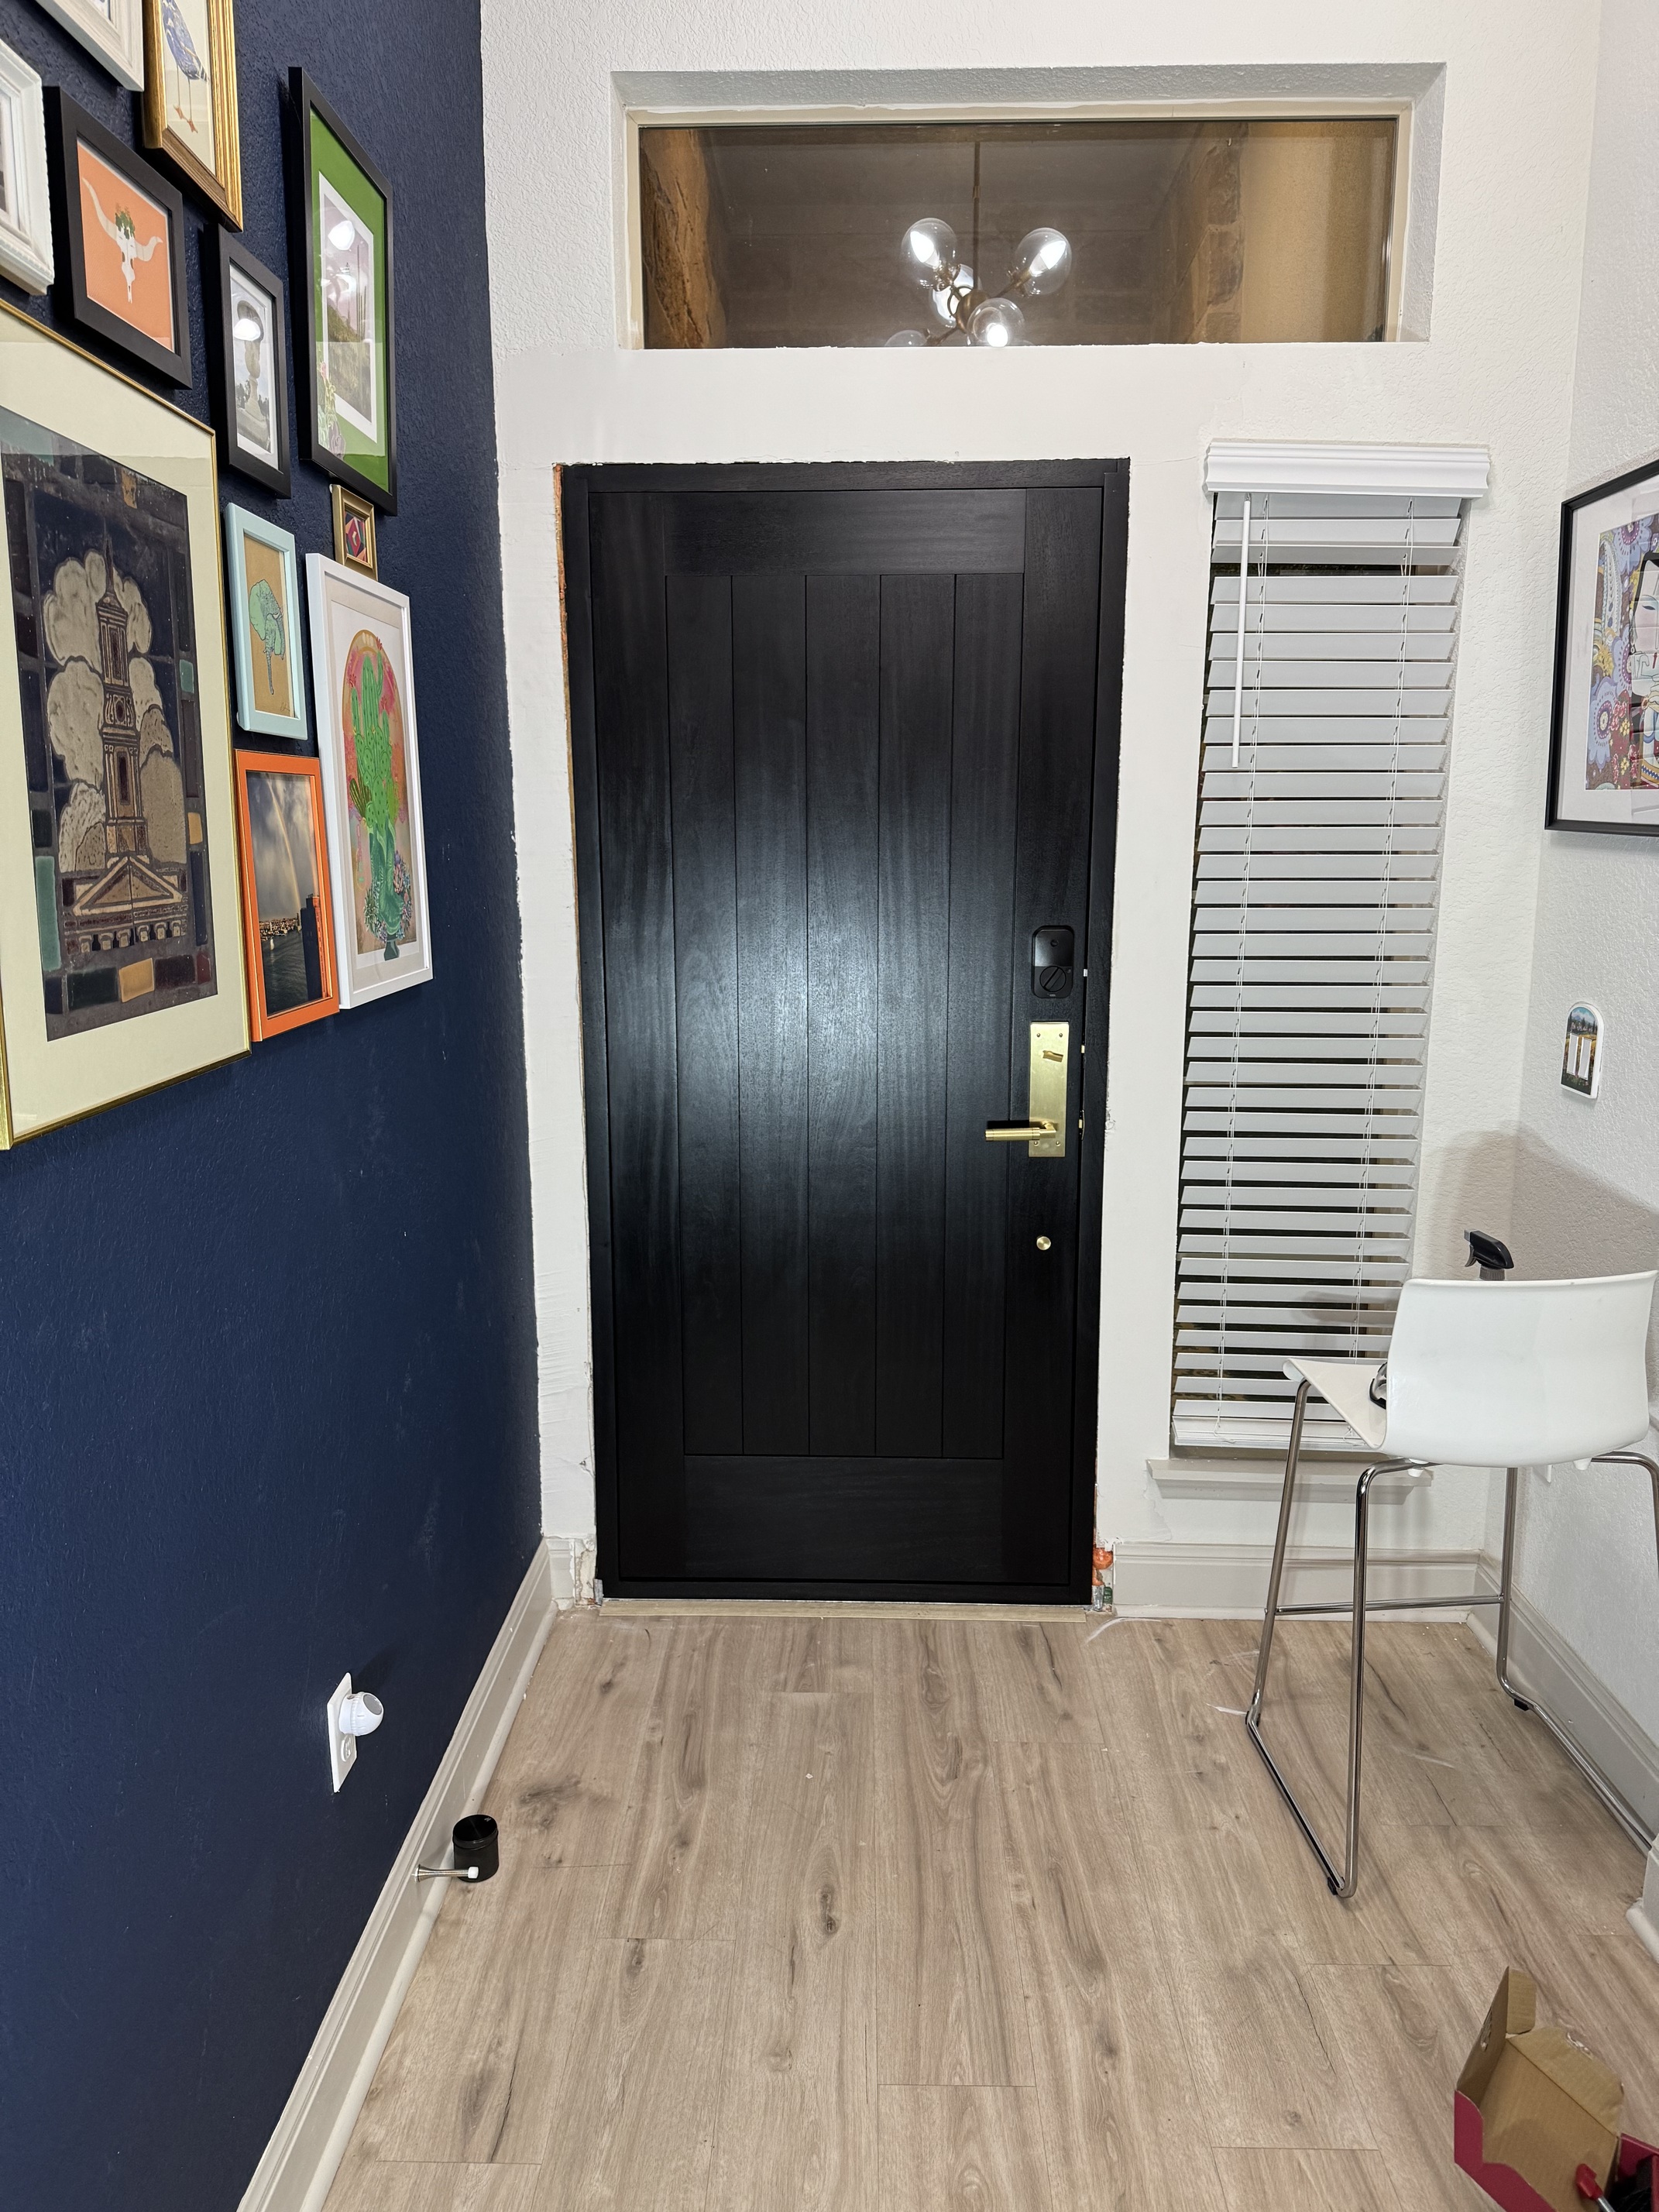
Latest project is a front door made from sapele. Used everything in the woodshop… almost? CnC for final flattening and metal shop to cut the door sweep
What I learned… my wife’s suggestion of painting the original door black would have definitely been faster BUT this was way more fun and exhausting. The project was a bit rushed to finish before Christmas so we could host… took 5 weeks
The most nerve wracking thing was the moment we hung the door and it opening/closing properly
Overall, making the door itself was “easy” but I also planned and mapped out each step and due to its design.
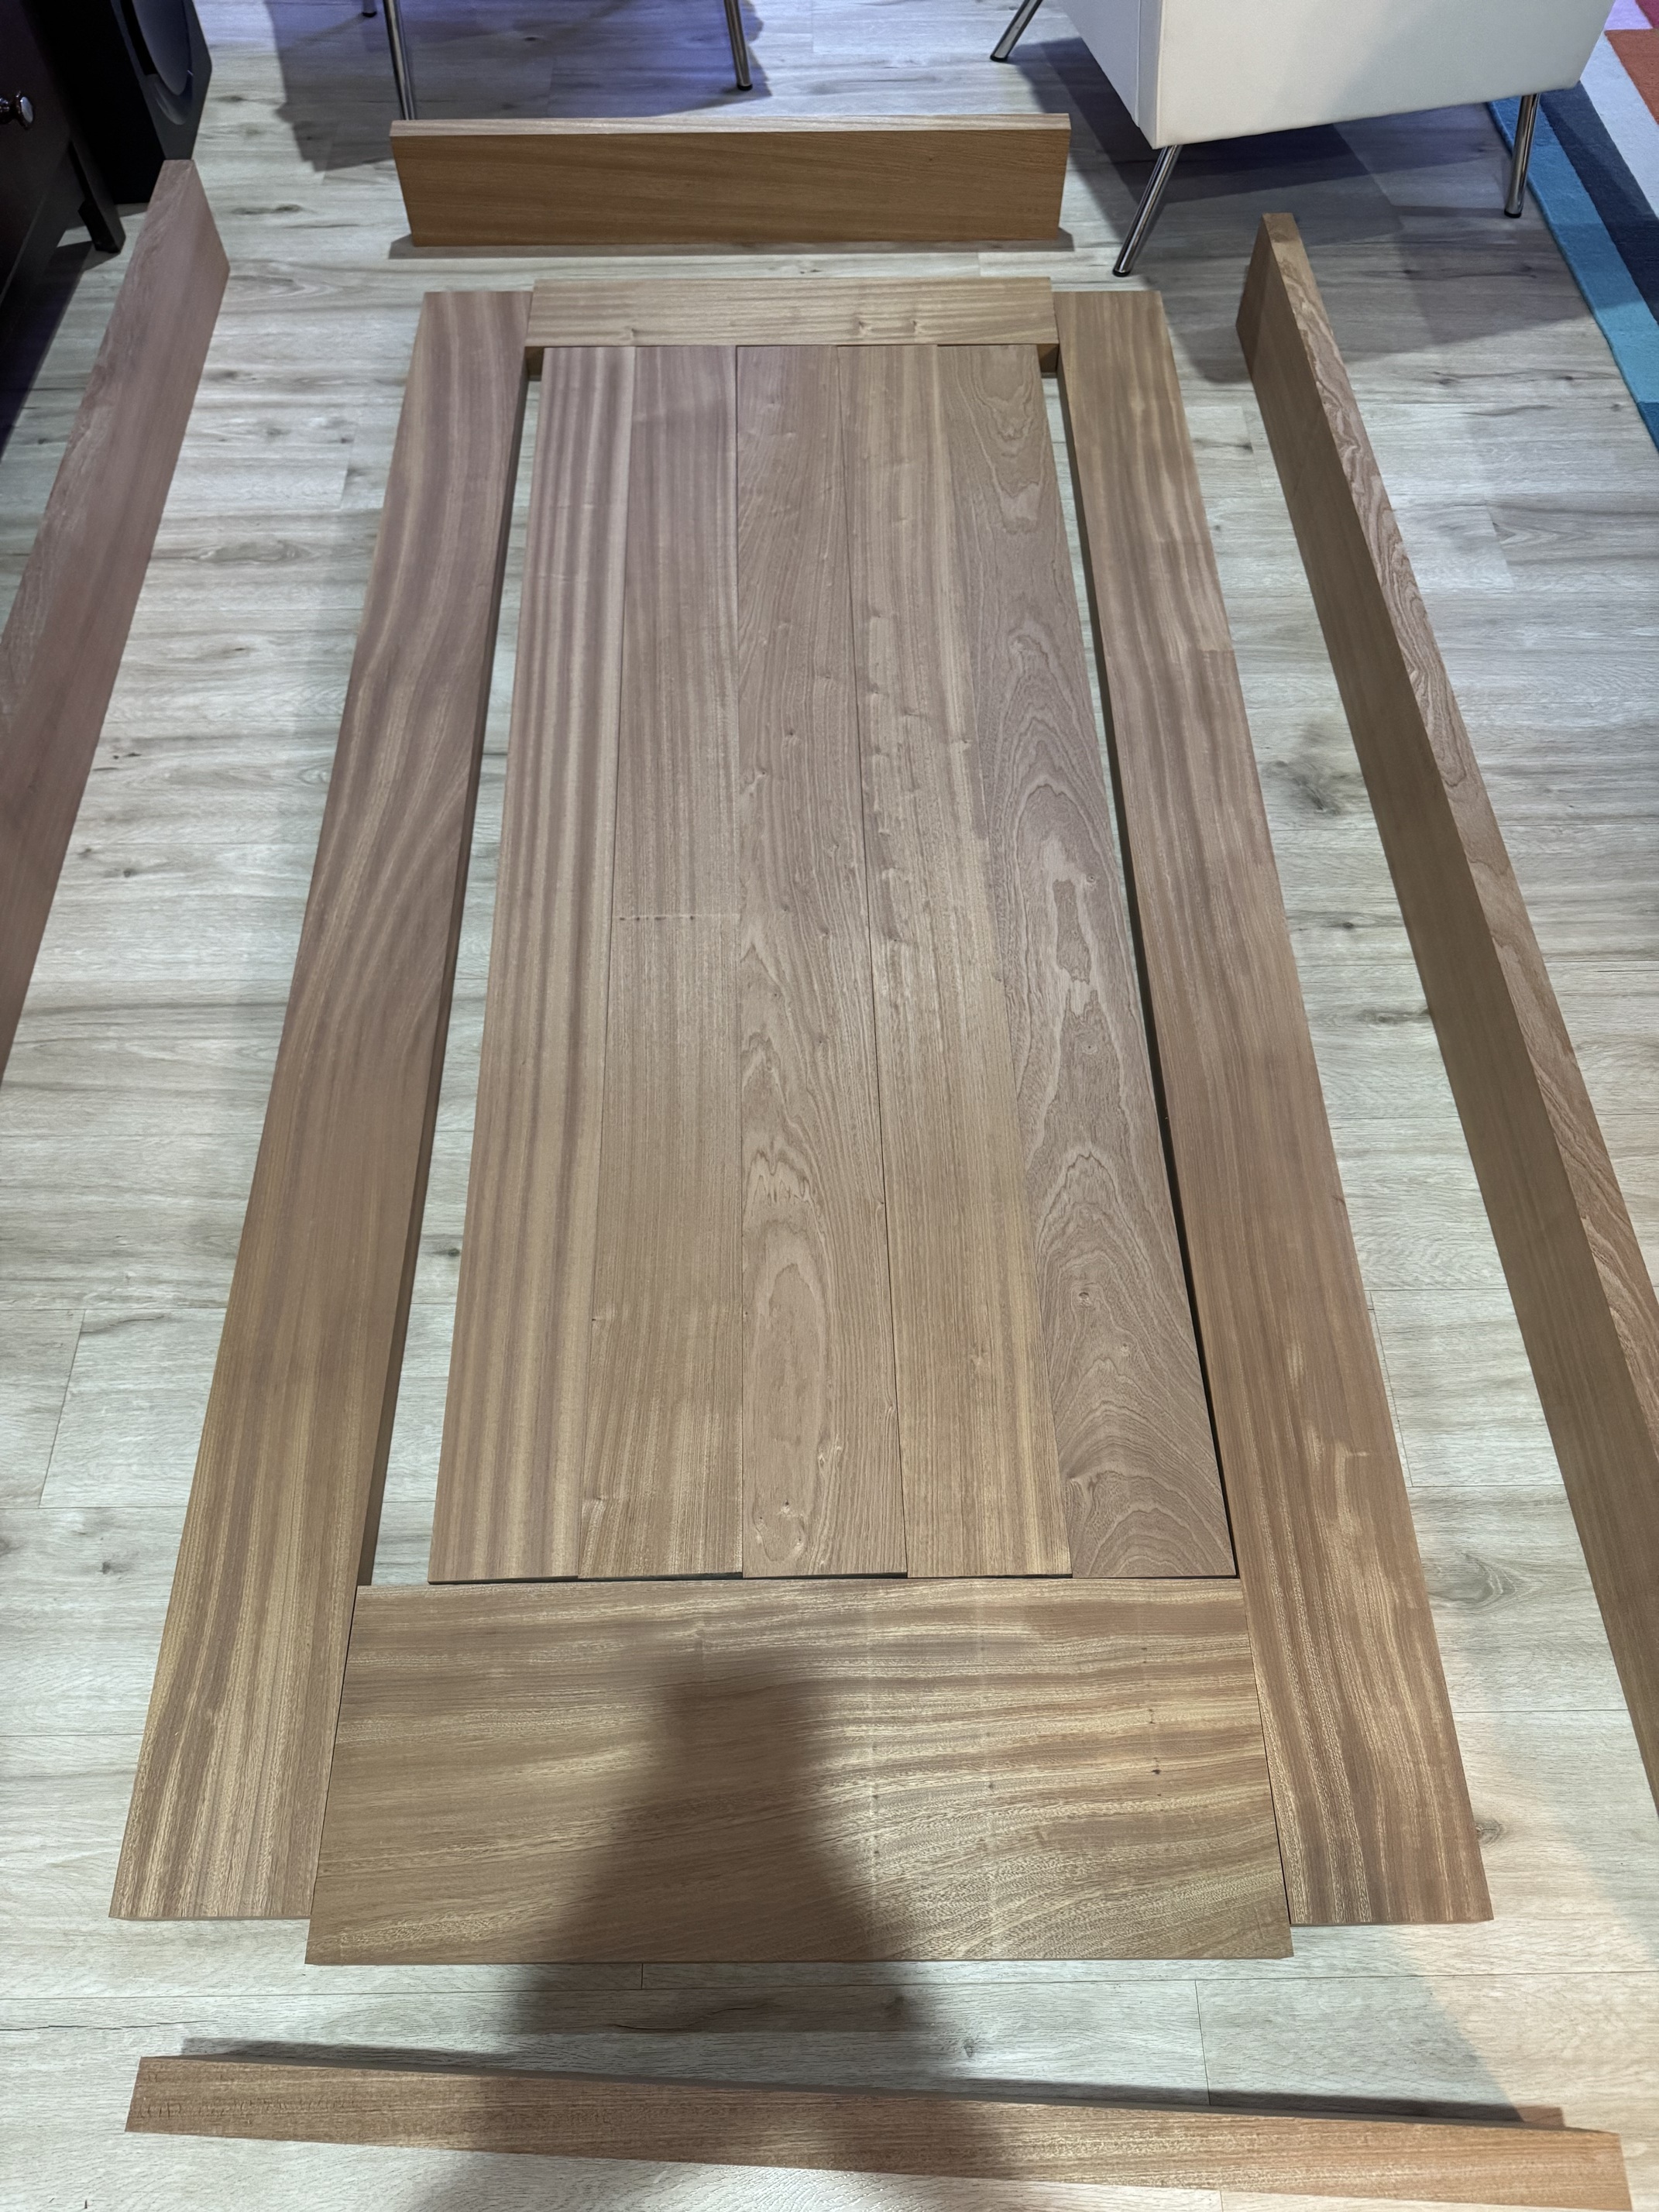
Lots of blue tape to flag each piece and its position. I think the most helpful thing for me was having the space for the components. I laid each piece in its place every night in the same orientation.
The router was easily the most used tool with a 1/2” downbit… regret getting the 1.5” and the 2” cost almost double for the tenons
Make/buy templates and jigs. That helped me a ton… especially for the concealed hinges
Time… 5 weeks was a rushed product. 8 is more realistic.
Compared to all previous projects I’ve done and made a mistake. “You could always make the project smaller” mantra doesn’t really apply here (to an extent). The frame being a specific size to fit the home’s rough opening, then the door being a specific size in relation to the frame since door hardware has specific sizes as well
Feel free to message me when you start the project or just before
Is great too see someone engineer joints for a door and roughing the construction of one. I say roughing because you could use some help with the router bit set. There are several models with different costs
The above does have an instructional video
By the way the same set can be used for windows, door cabinets, and some fancy joints for cabinets. The bad is that is an additional cost to the project, requires a lot of set-up and precision.