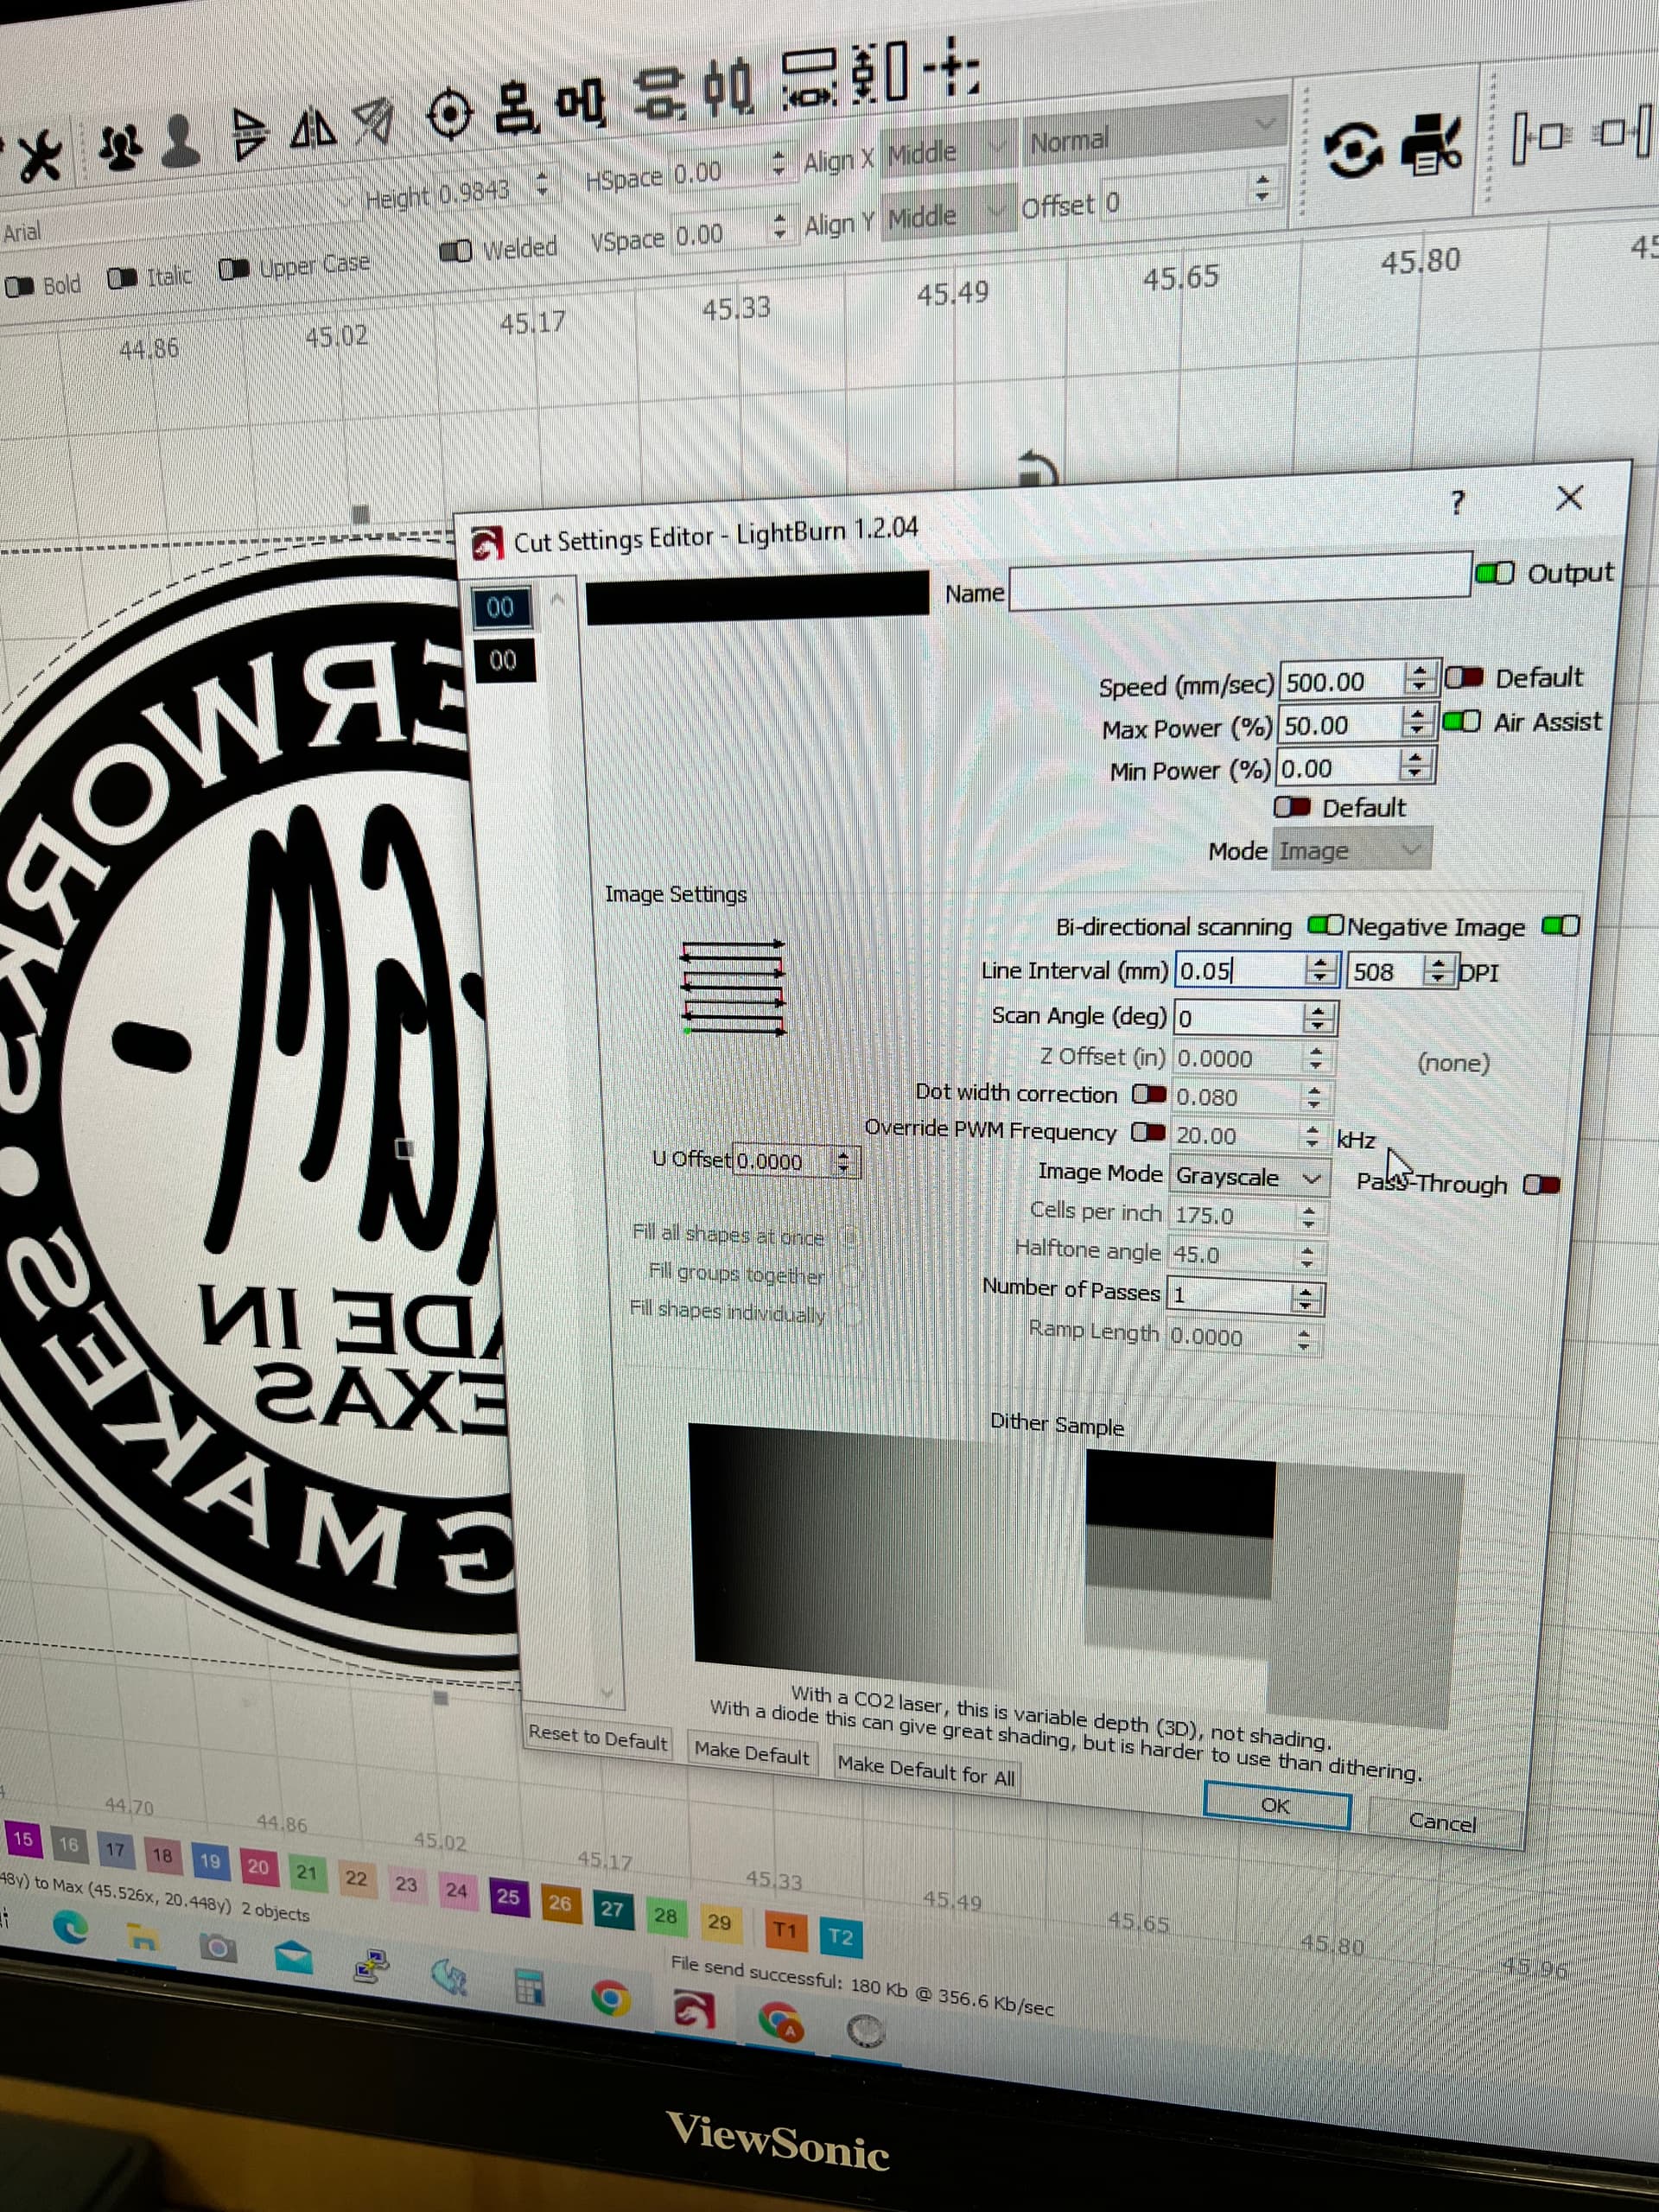
I would recommend Grayscale mode, and this means the background needs to be 0xff black, rather than converting the red image to grayscale which would probably yield a 0x55 shade.
If instead you use Threshold mode, then red should still be OK. But there’s no option forward with variable depth in this mode. Variable depth may be need to slope the edges of the stamp features to avoid cutting the leather.
I did some test runs last night, here’s what I found:
Image mode worked well for me, I did not try anything else, but it rastered well every time.
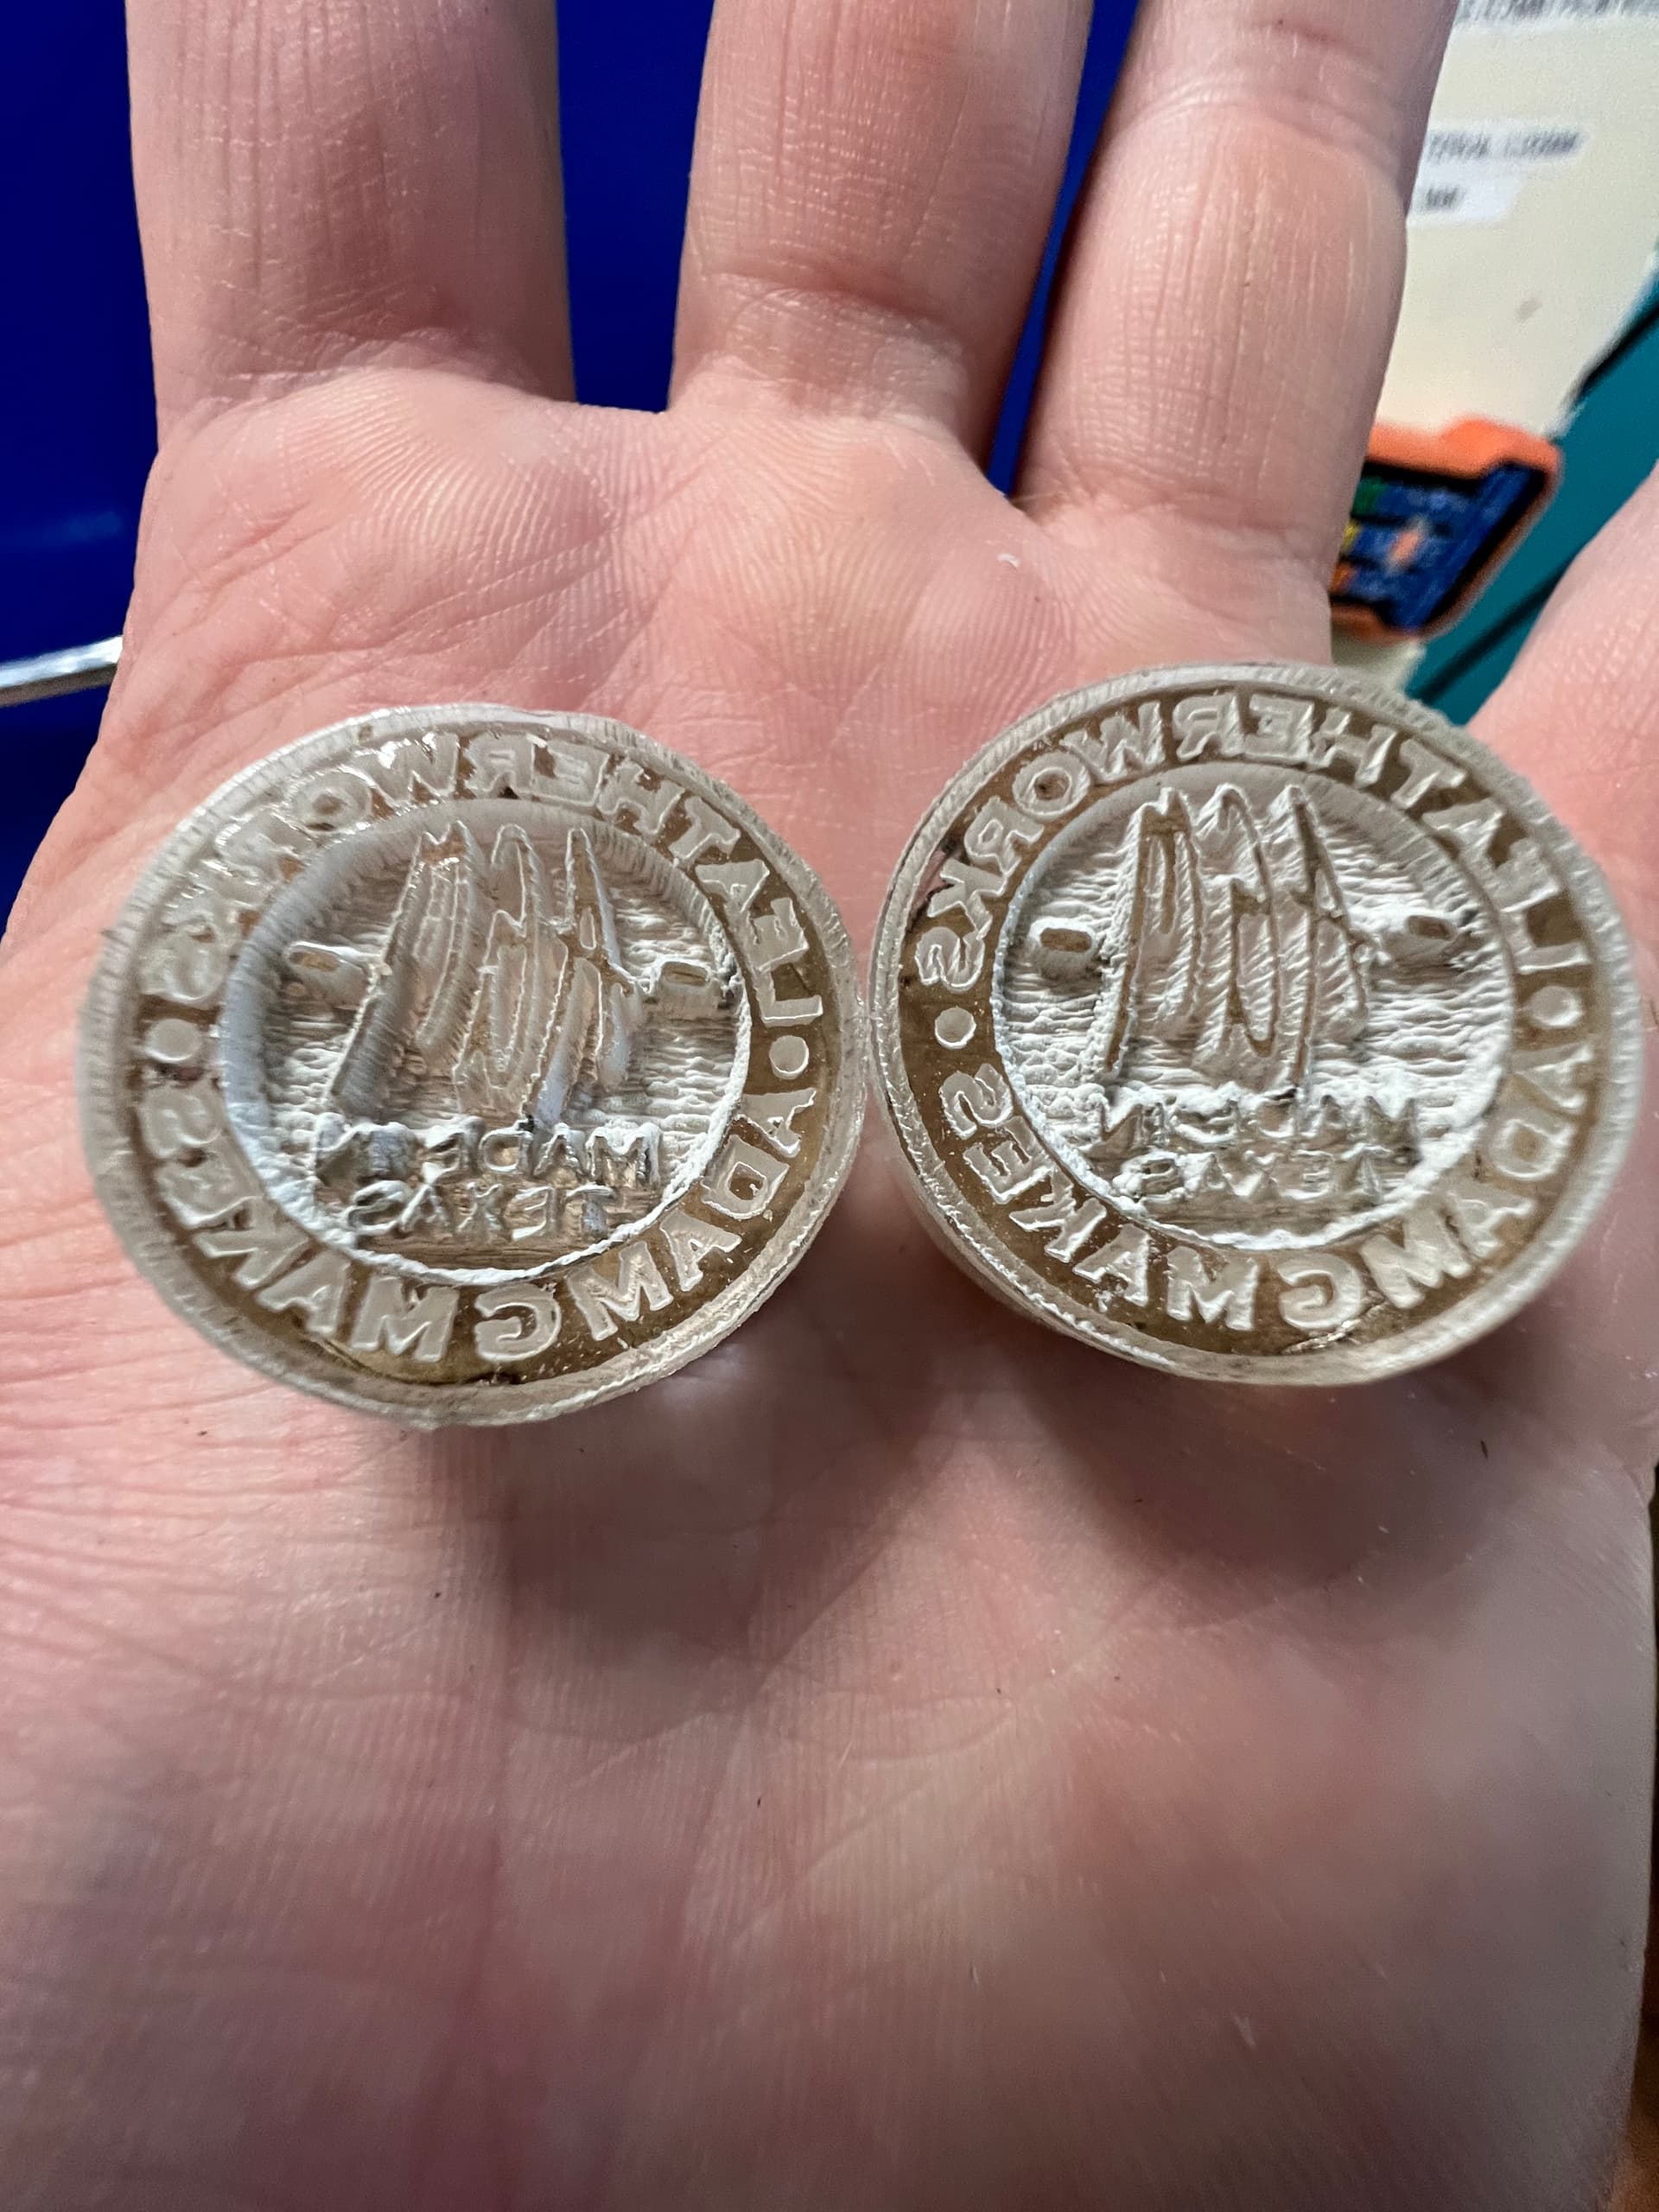
Here were my settings – I tried one on 50% 500mm/s and one on 35% 500 mm/s and I think the 35% one turned out better – some of the smaller details were warped on the higher powered one, and it didn’t need to be as deep as it cut. The left is 50% and the right is 35%.
Don’t forget to mirror the image haha, I forgot on one of mine but still worked as a tester
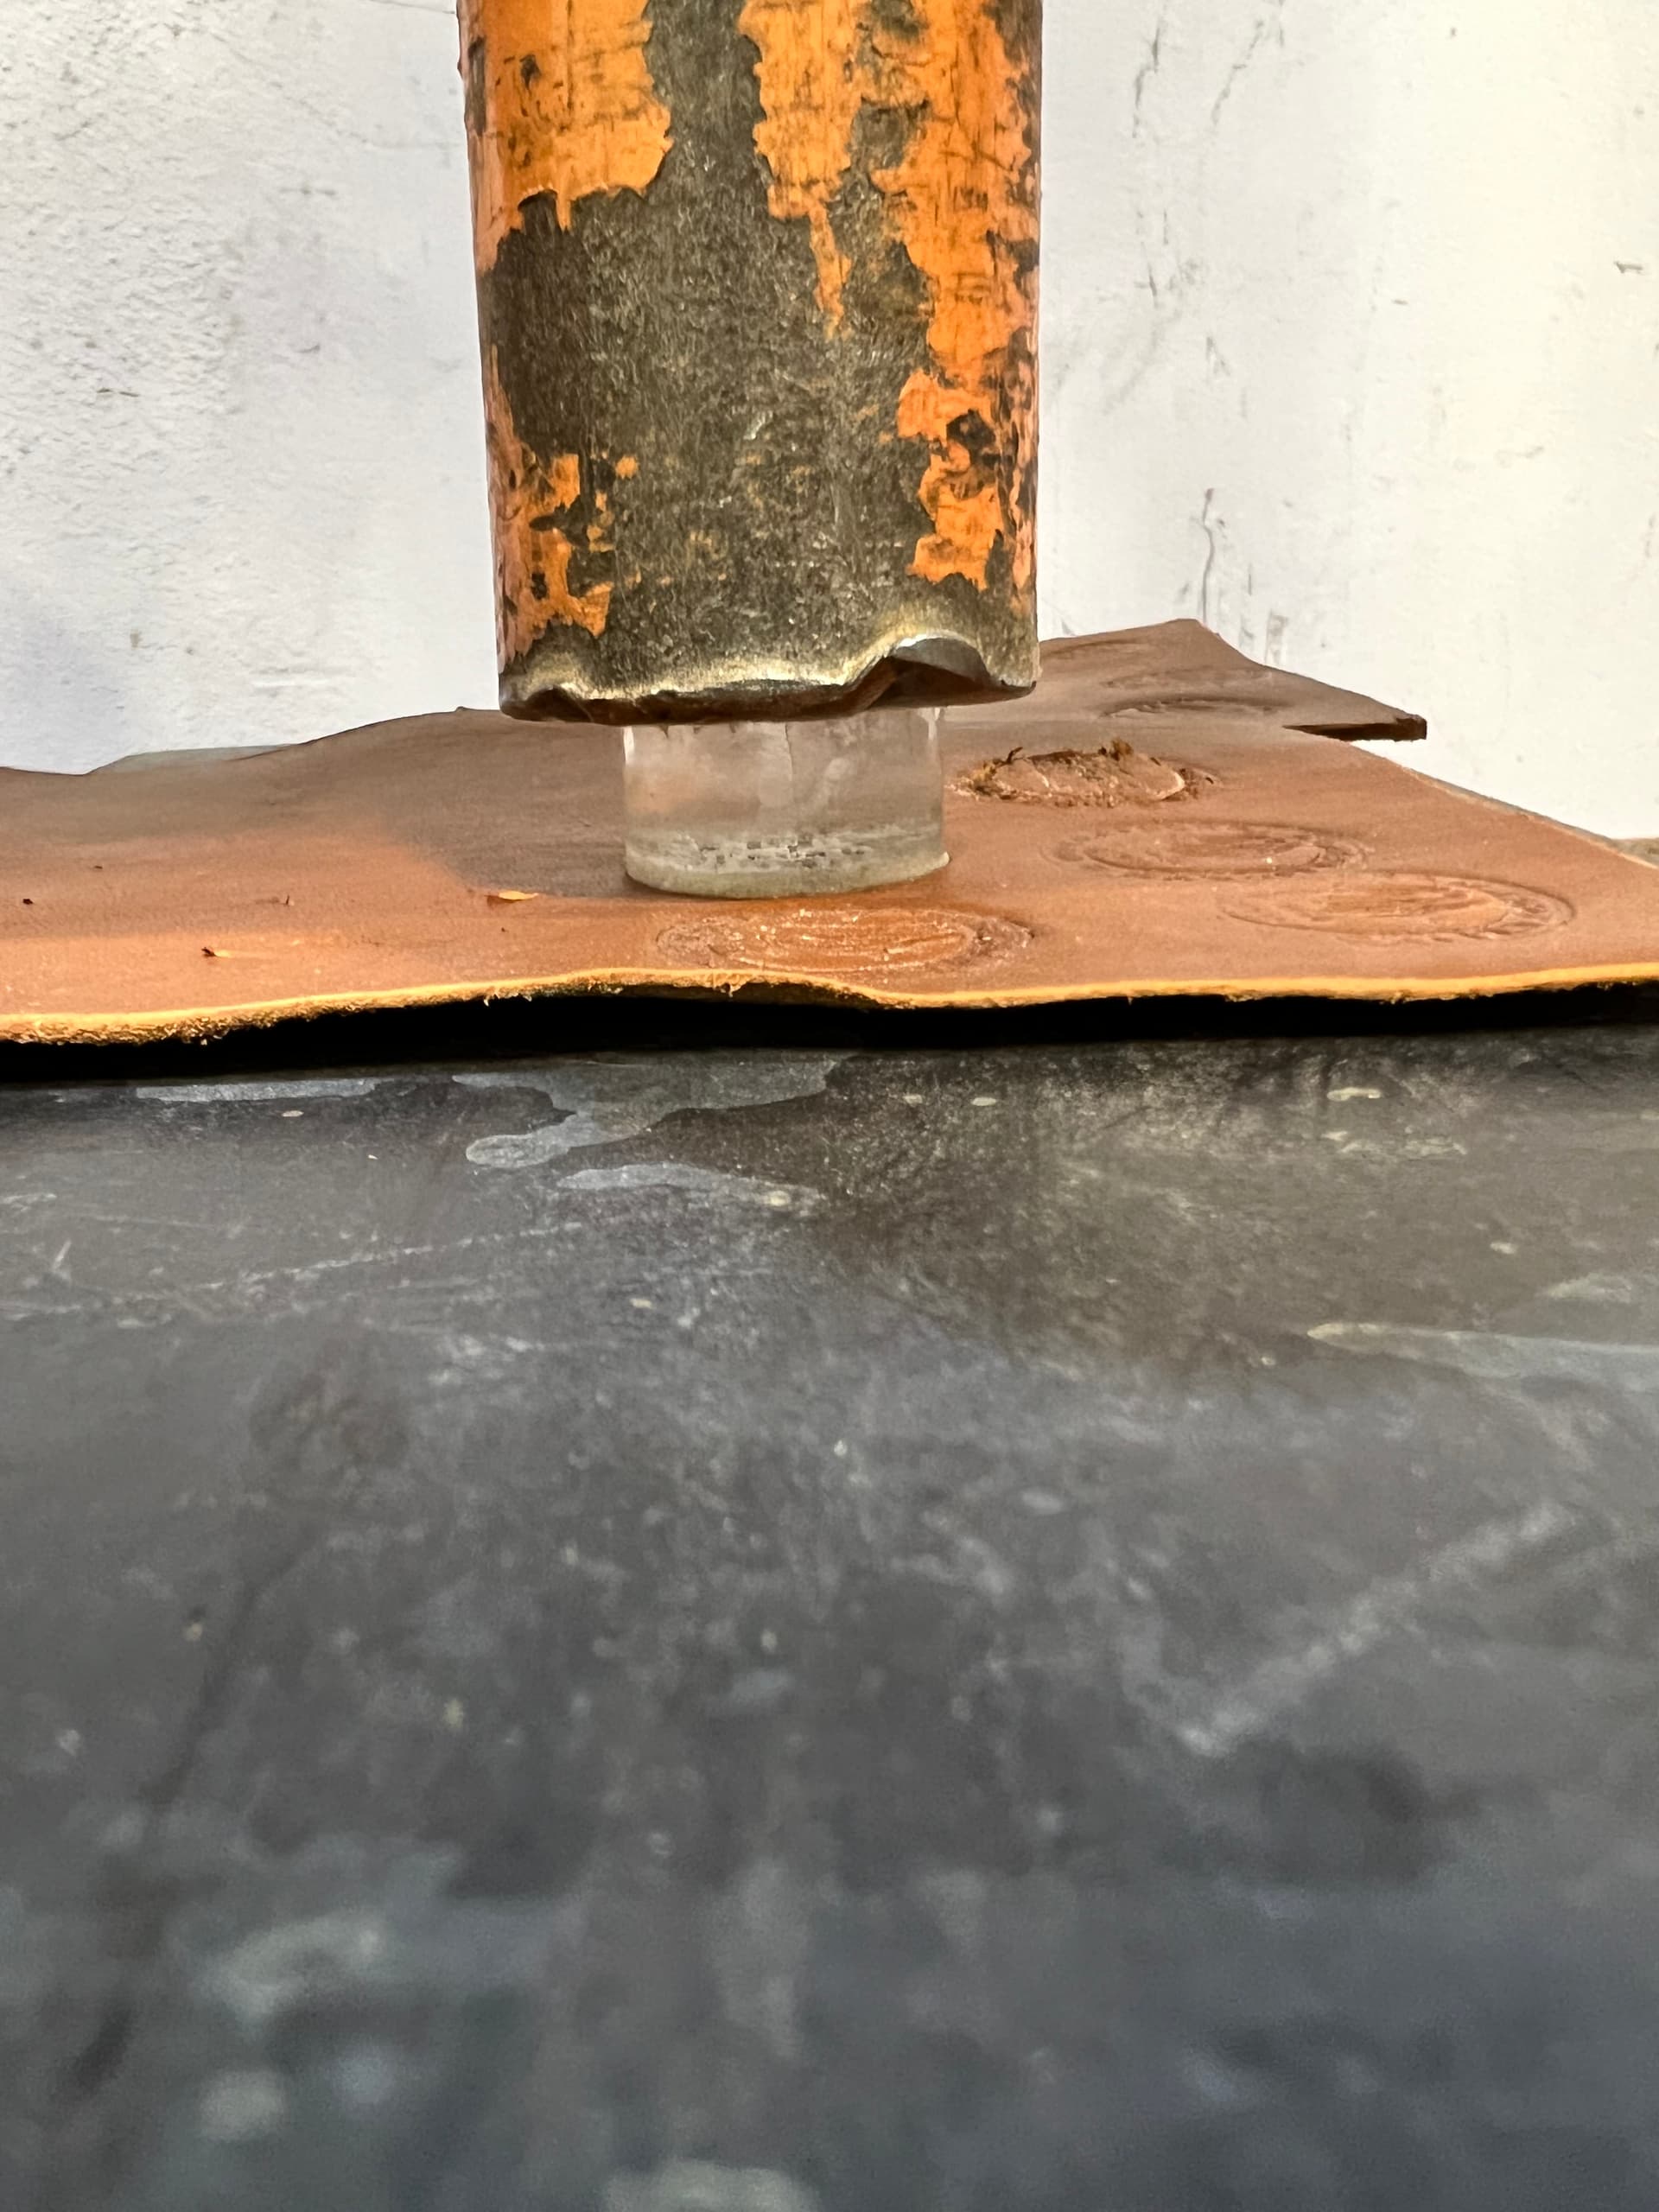
My stamps were about 1" in diameter, and for that size, the vise on the worktable in the woodshop provided pretty much the perfect pressure, for me. I would place it in there, and crank down on it as much as I could muster, and it would provide a pretty decent deboss. I also tried the pneumatic press in the metal shop, and while that did work, the results were inconsistent and because the presser-foot thing is not parallel, it would press at an angle and get a deeper impression on one side than the other (see the stamp on the top left of the image in the vise – that one was done with the pneumatic press). Also one time I pressed with waaaay too much force accidentally (the valve on that thing sticks, FYI), and damaged the leather and the stamp (see the fifth stamp up on the second row, in the image below)
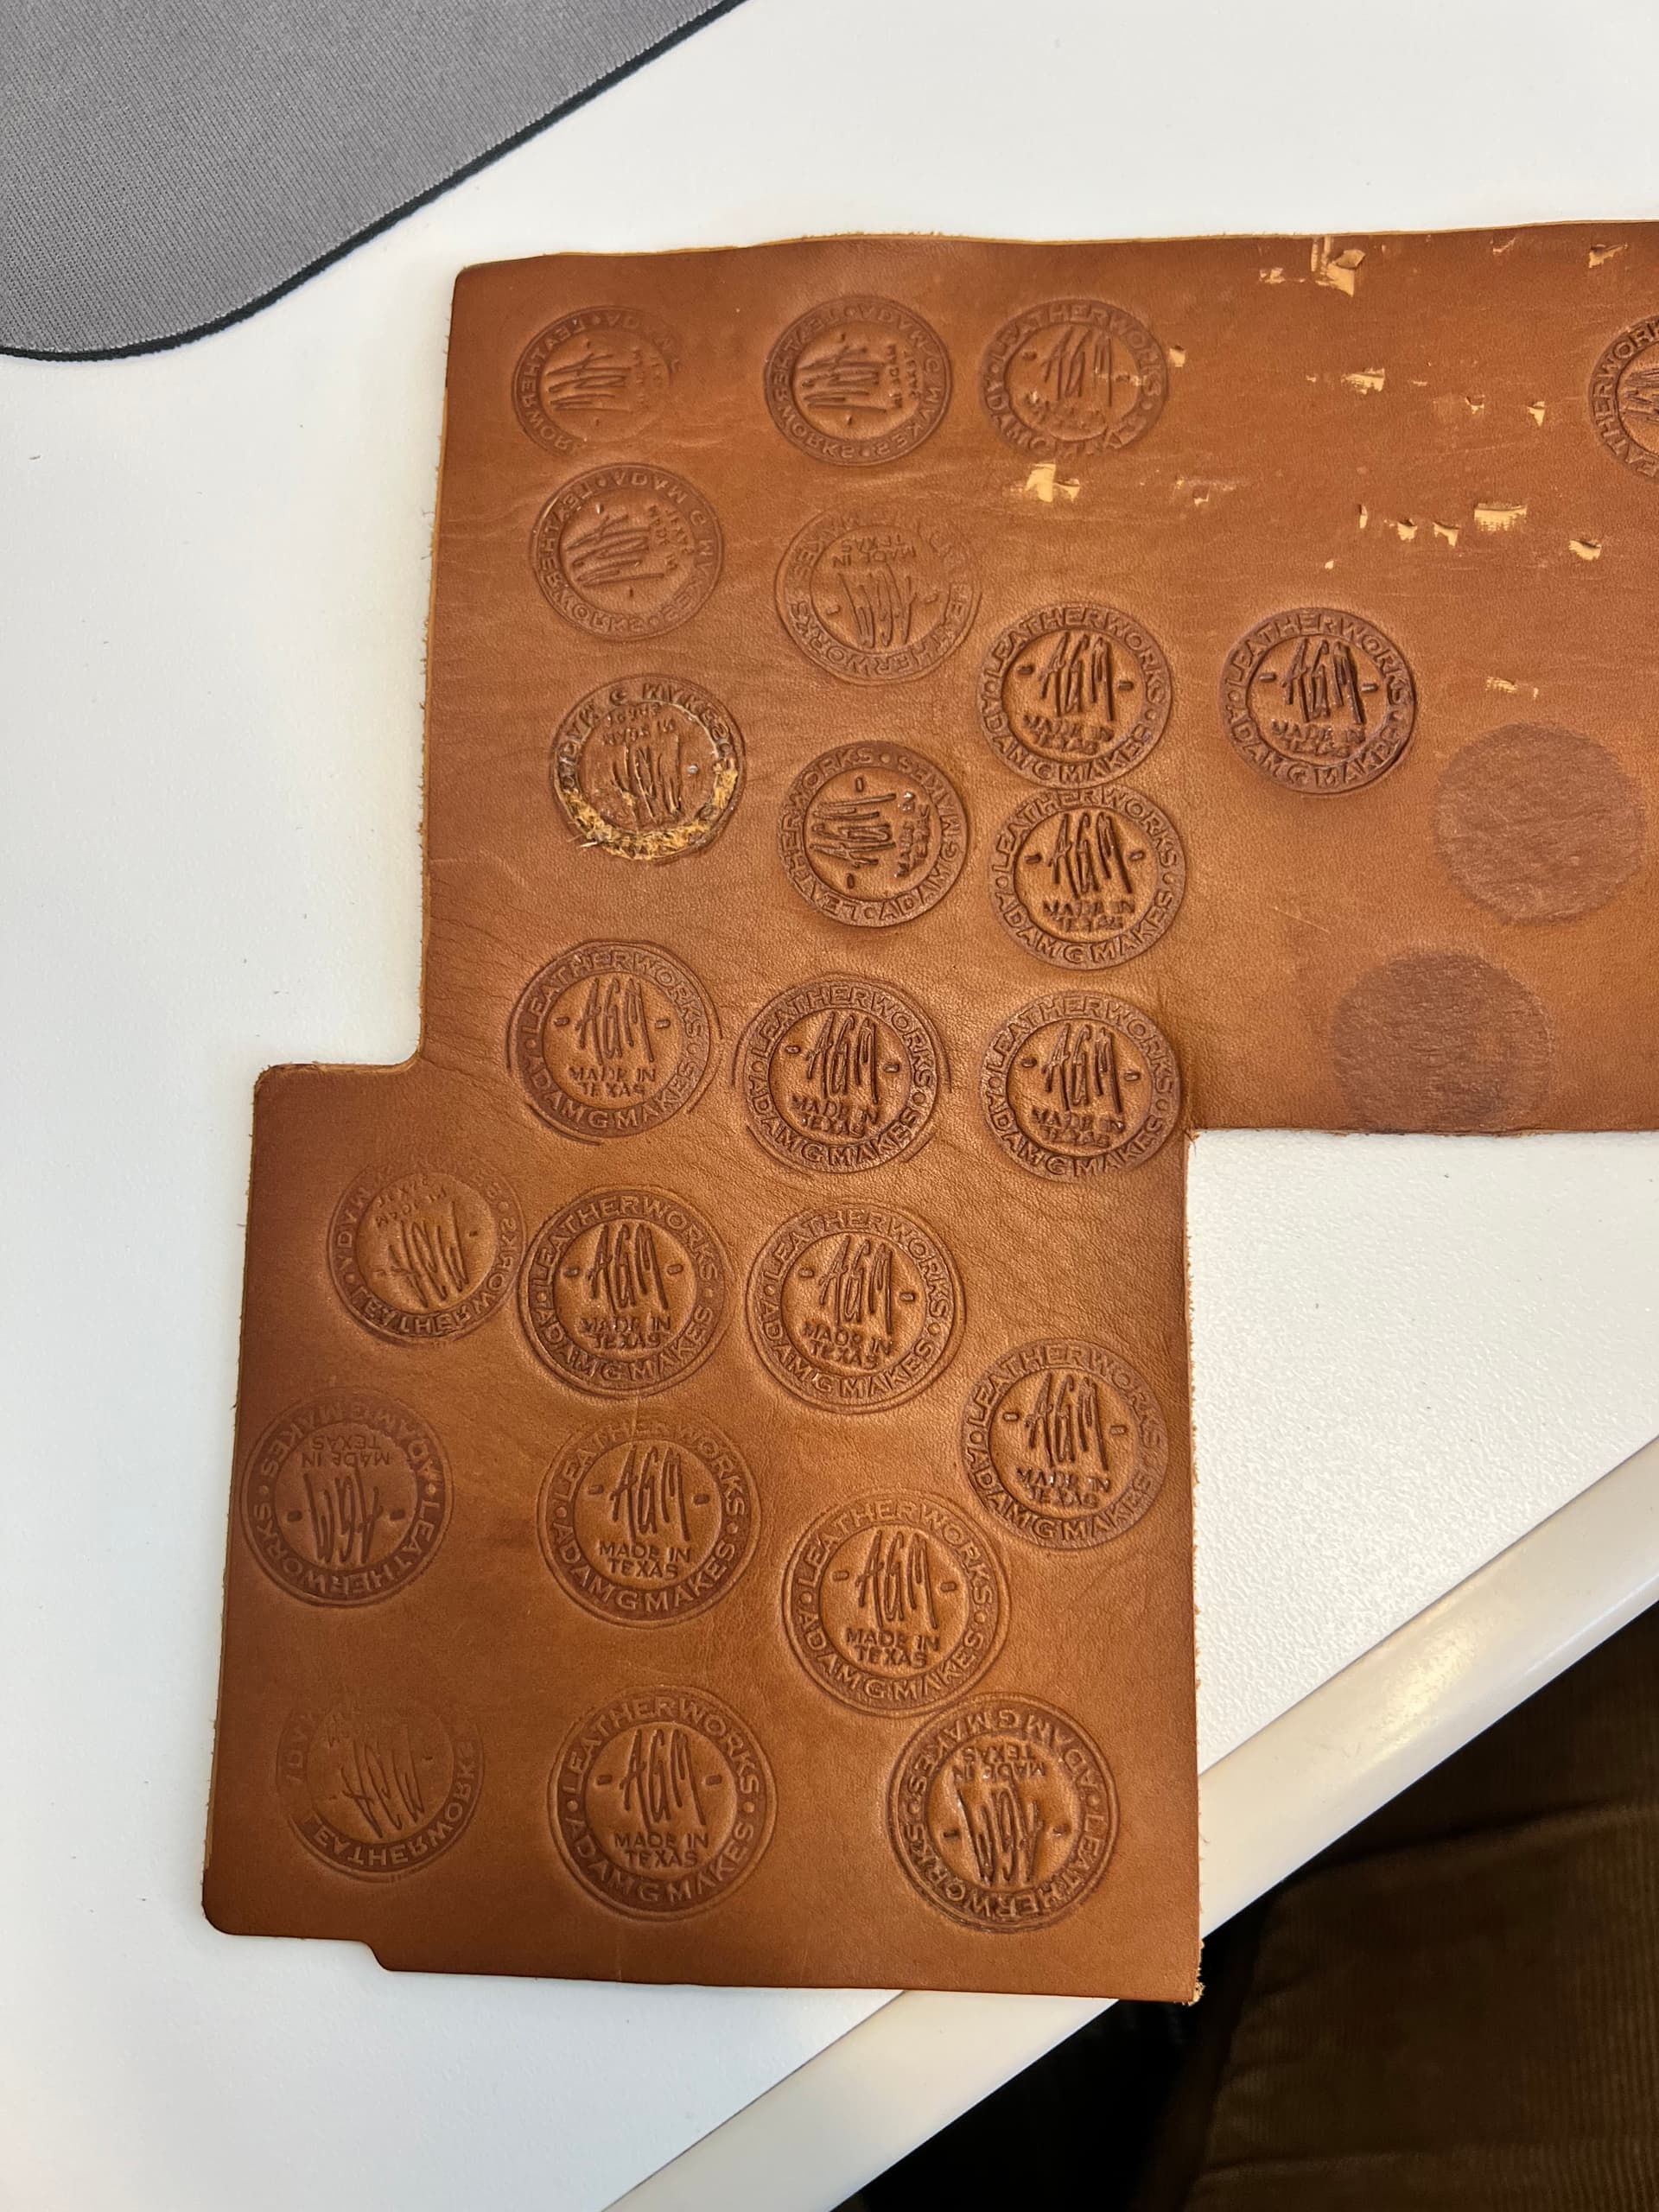
Here were my results from my experiment when I was at the shop, and then a day later when the leather had mostly dried. Some of the ones on the bottom were done on the press, but most of them were done on the vise just playing around with pressure and placement. I used two stamps for these, so they lasted for at least like 10 presses each. They probably could have gone much longer, if they didn’t have as much detail like the really thin line around the perimeter or the small “Made in Texas” text, those were the first to go on all of them.
I found that for the purposes of this stamp, I didn’t need to both with the Gaussian blur thing for sloping the edges, none of the stamps damaged my leather besides the pneumatic press one where I applied probably way too much force. I did try to create one with that method, but I think I blurred a bit too much and it turned out bad.
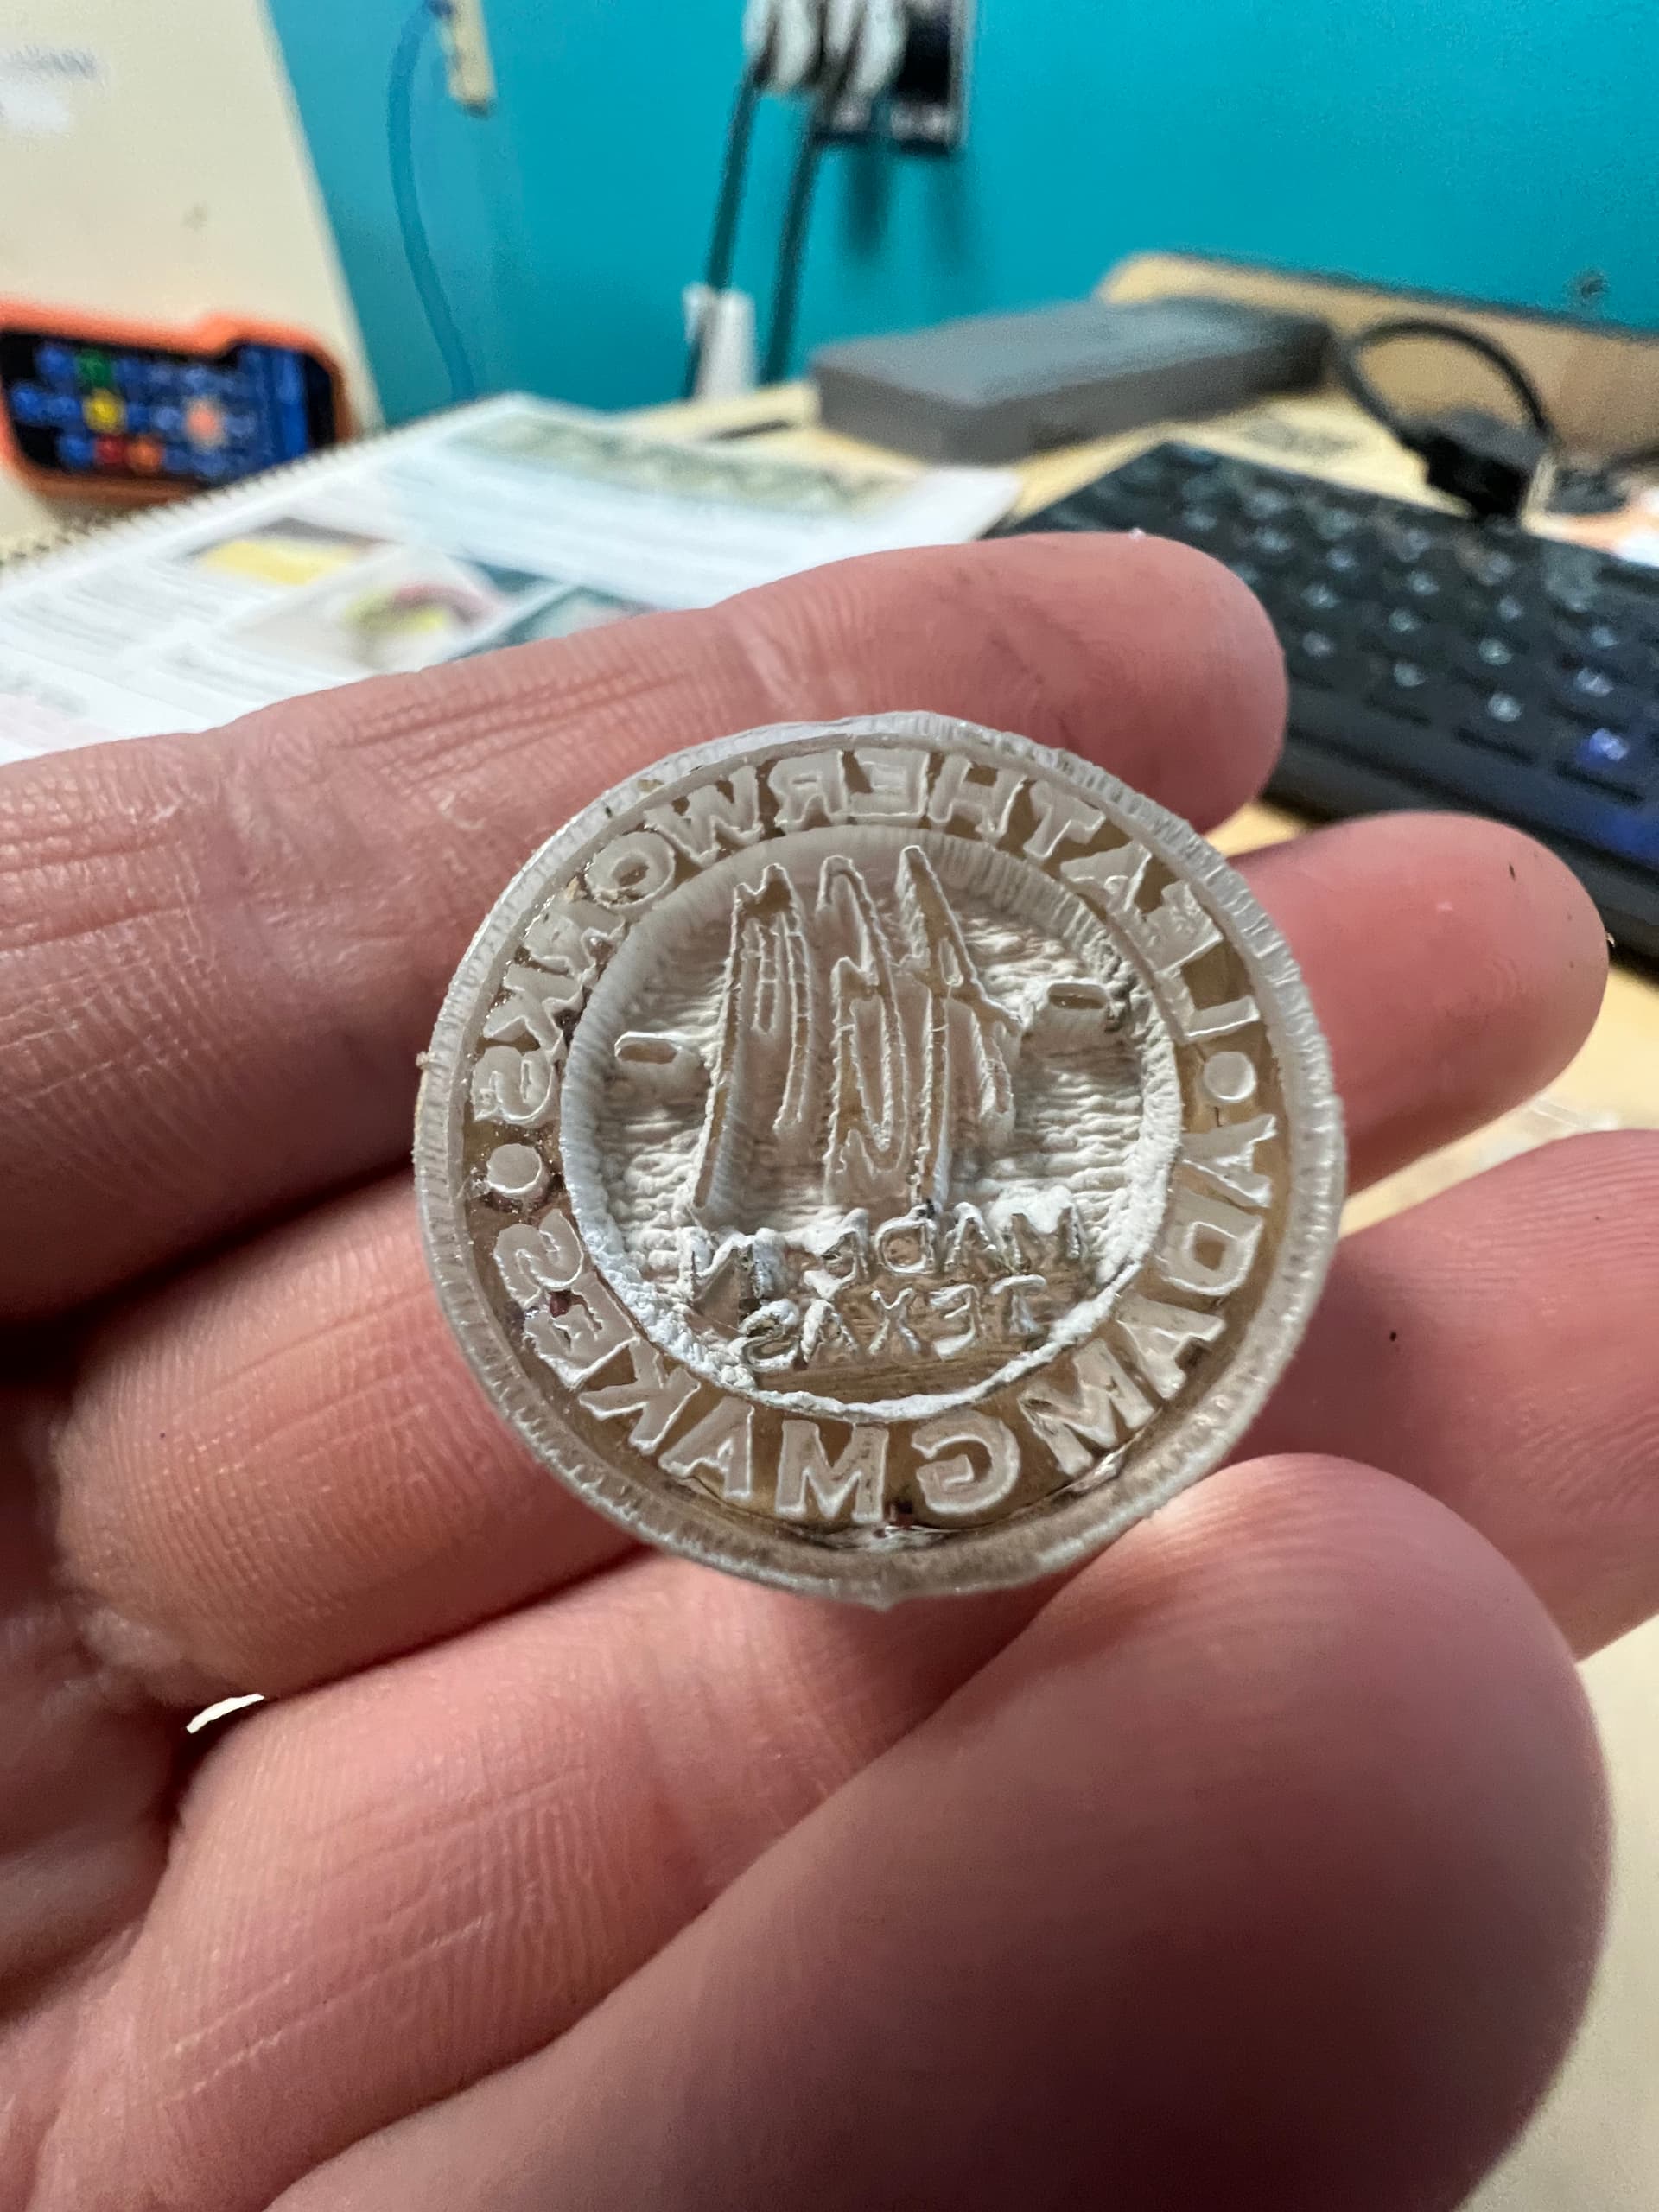
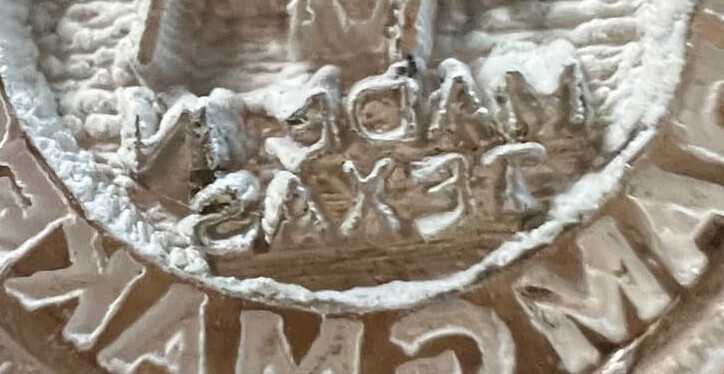
Here’s a closer up image of the 50%, 500mm/s, .05 mm line interval stamp. You can see how the “Made in Texas” letters were damaged/warped. I think they were just too thin for the laser/acrylic to handle in this application.
@gordoa40: that is really useful information, thank you very much for plowing through all the different settings and conditions.
I don’t know what my next stamping project will be, but it sounds like at least a few of us could use a power/speed/interval matrix in acrylic. Most of the ones I’ve seen out there are greyscale squares so I’m thinking something that incorporates lines and text would be useful. Here’s a (really low-effort) PowerPoint mockup of the test design:
And/or include varying letter sizes. Then engrave a bunch of these designs in a matrix varying power/speed, labeling each setting in the design. We could deboss a few pieces of scrap leather with all the resulting stamps and mount both the matrix and the leather somewhere visible to everyone.
The things that would be hard to control for from one application to another are on the leather side: the temper, casing process, pressure applied… I think it could still be a decent starting point.
I’m happy to collaborate with anyone interested in creating a shared test design. I don’t have any particularly strong feelings about what it should look like other than making sure we vary the line thickness and include alphanumerics.
(I apologize for dropping out of the discussion for the last 10 days or so, it’s been an unpleasant time)