Summary: The Cold Saw is back online, with a number of fixes beyond just the bent flange. But there are new procedures for using it, embodied in a checklist you will find attached to the saw.
The Cold Saw is back up and running, using a replacement flange that I machined. (We still have a replacement from the manufacturer en route.)
Unlike many recent shop problems, I don’t think the problems with the Cold Saw arose from misuse by any single individual. But we want to make a number of small changes in the procedures for using the Cold Saw to prevent those problems from recurring.
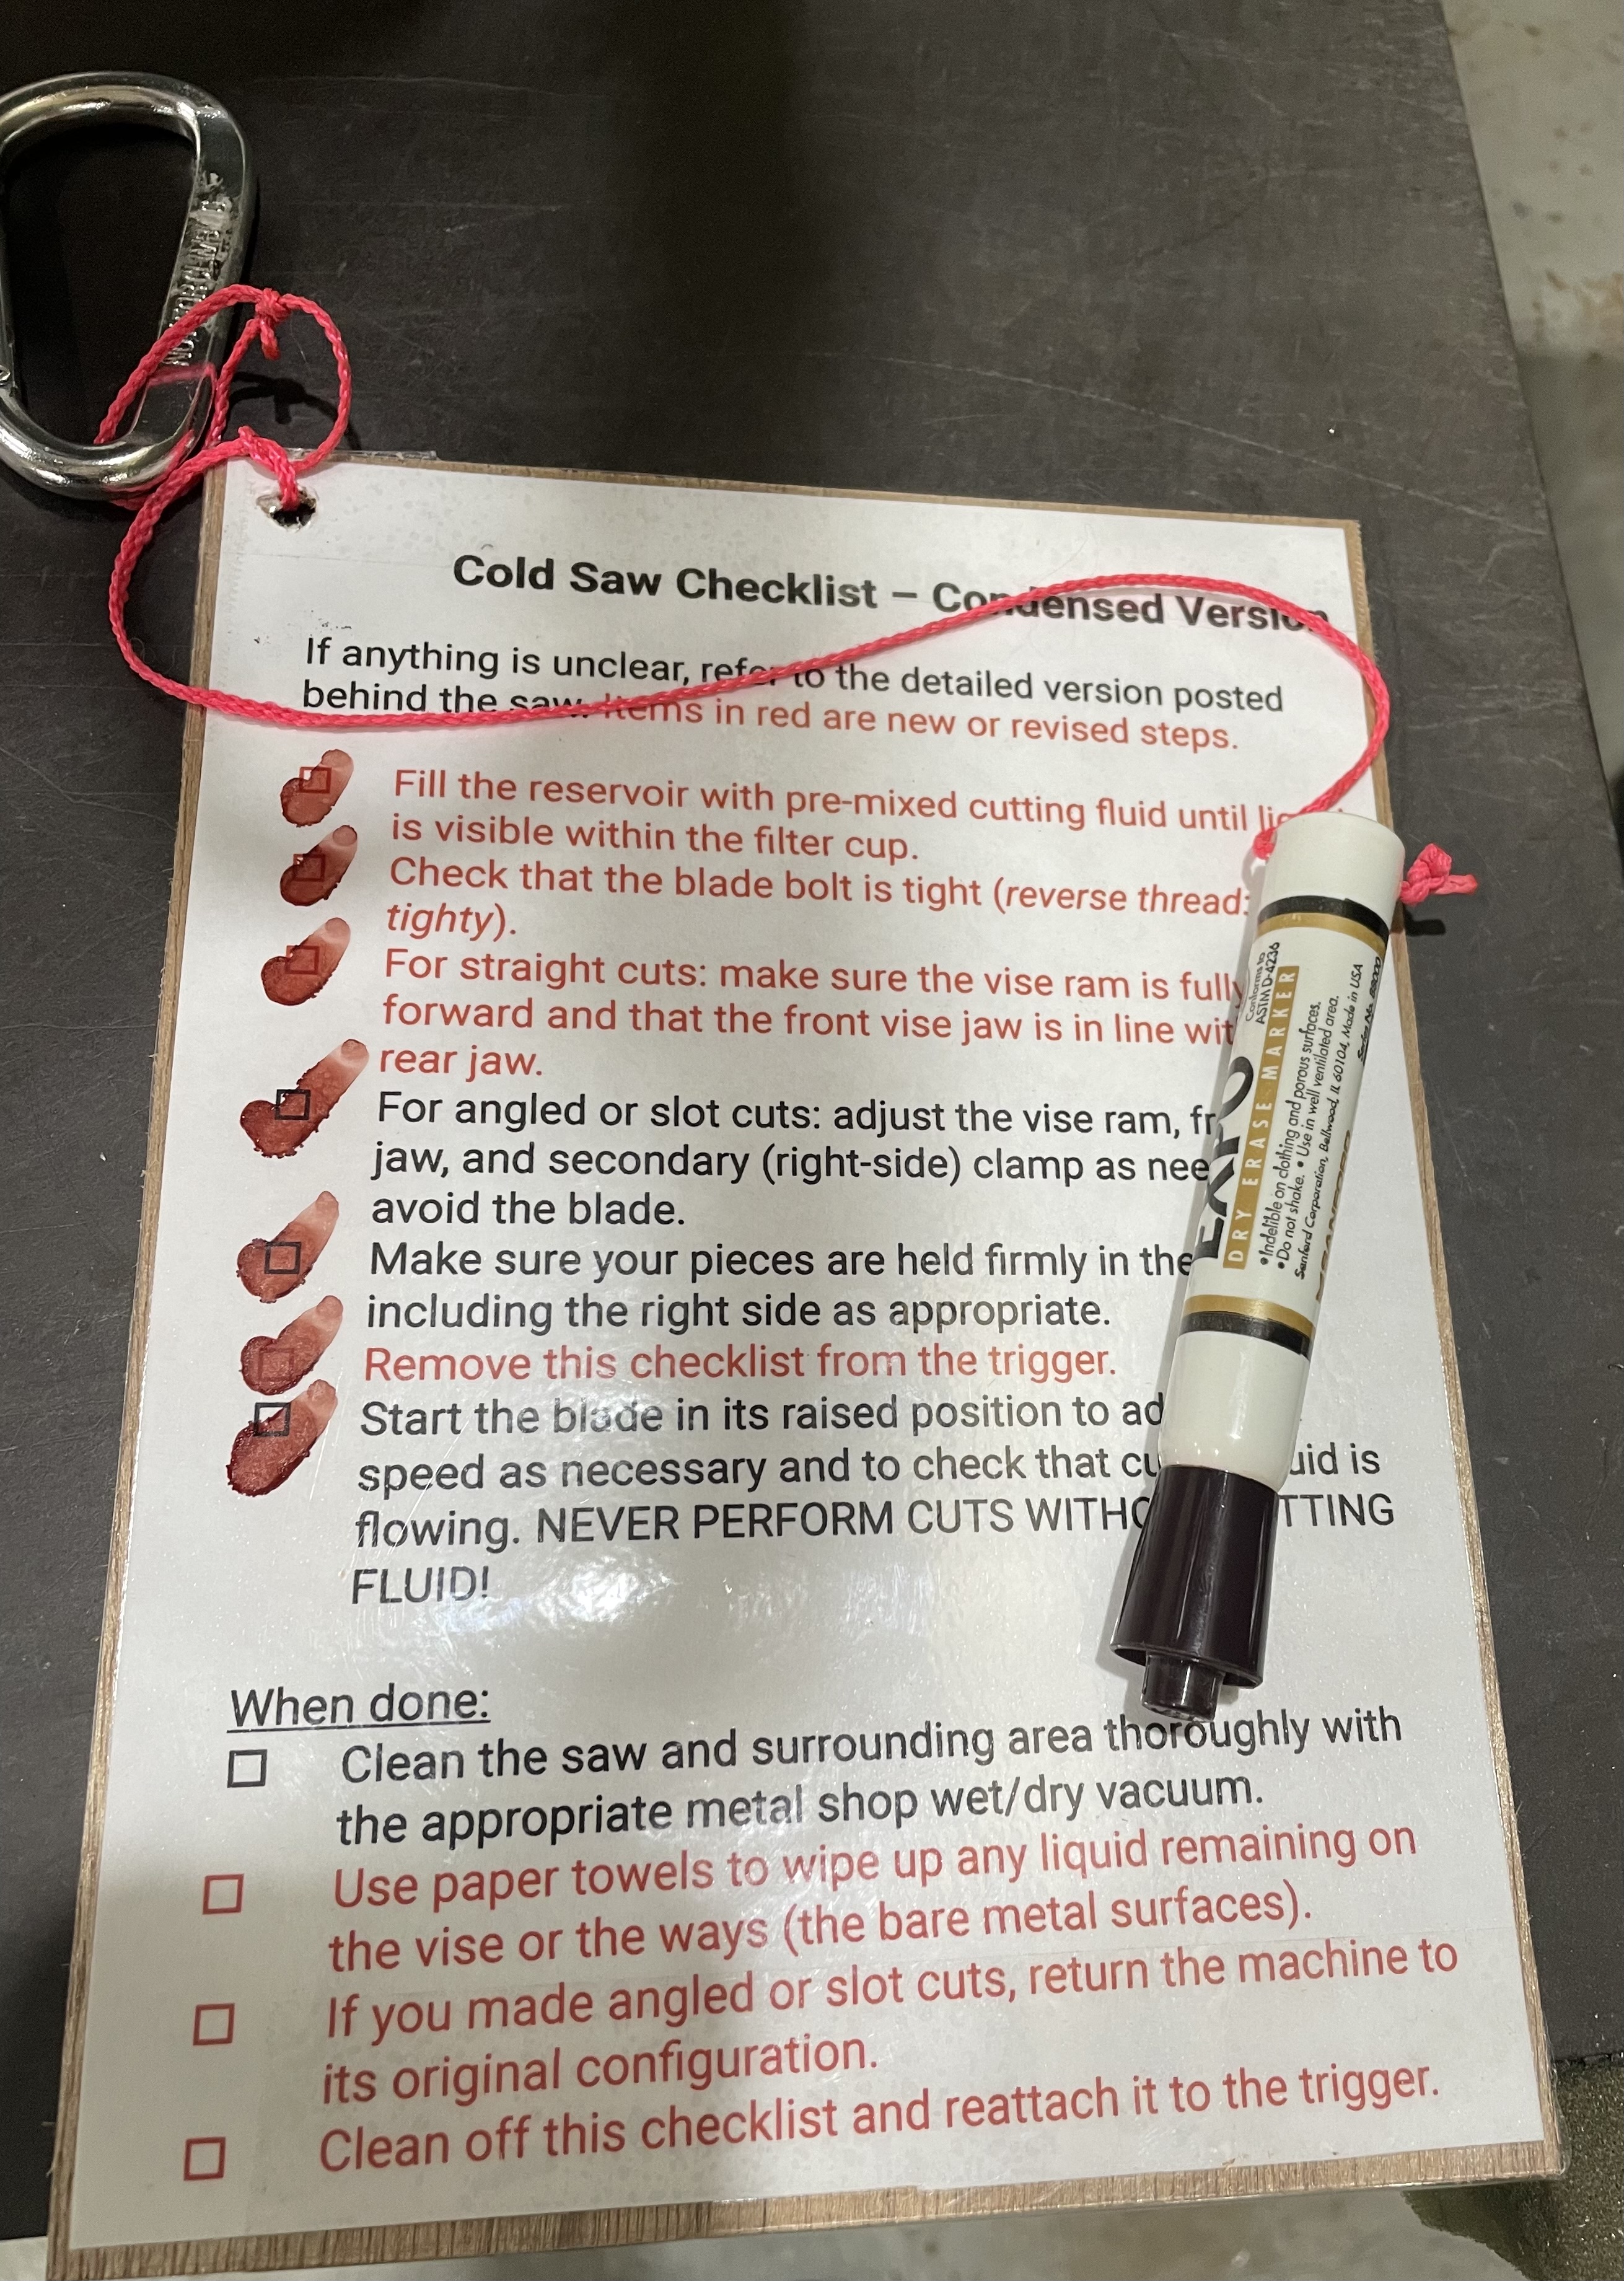
First, the change I just announced about how to handle low cutting fluid reservoirs in the metal shop as a whole certainly applies here, as issues with the Cold Saw inspired that. I would like to take it a step further though: every time you use the Cold Saw, add cutting fluid until the reservoir is full. At some point, we may add some sort of level gauge; for now, just fill it until you can see fluid in the white filter basket. Doing this should greatly reduce the chance of running out of fluid during a cut.
One related change: the red fluid flow valve had not been set for maximum flow before; now it is, and it should remain that way. That does mean there is going to be a greater risk of fluid splashing around.
Second, while it’s still unclear why, the bolt holding the blade in place has become loose in the past, leading to blade wobble. Unfortunately, the shaking of the blade safety cover makes it very difficult to notice if the blade is wobbling or not. So now we are directing everyone to check that the blade bolt is tight every time the saw is used. The appropriate Allen wrench is on the right side of the machine’s base at the front. But try not to loosen it accidentally when checking it, which means you must remember that the bolt is reverse threaded. Tight is left/counterclockwise!
Finally, the vise ram (the part that moves forward and back to allow the blade to clear the vise when the saw is angled) should be all the way forward when performing straight cuts. In addition, the forward vise jaw should be moved in line with the rear jaw, so that the clamping location is kept close to the line of cut. The vise and front jaw both have to be moved to perform angled cuts, but people were then performing straight cuts without moving them back, putting unusual stresses on the blade and piece.
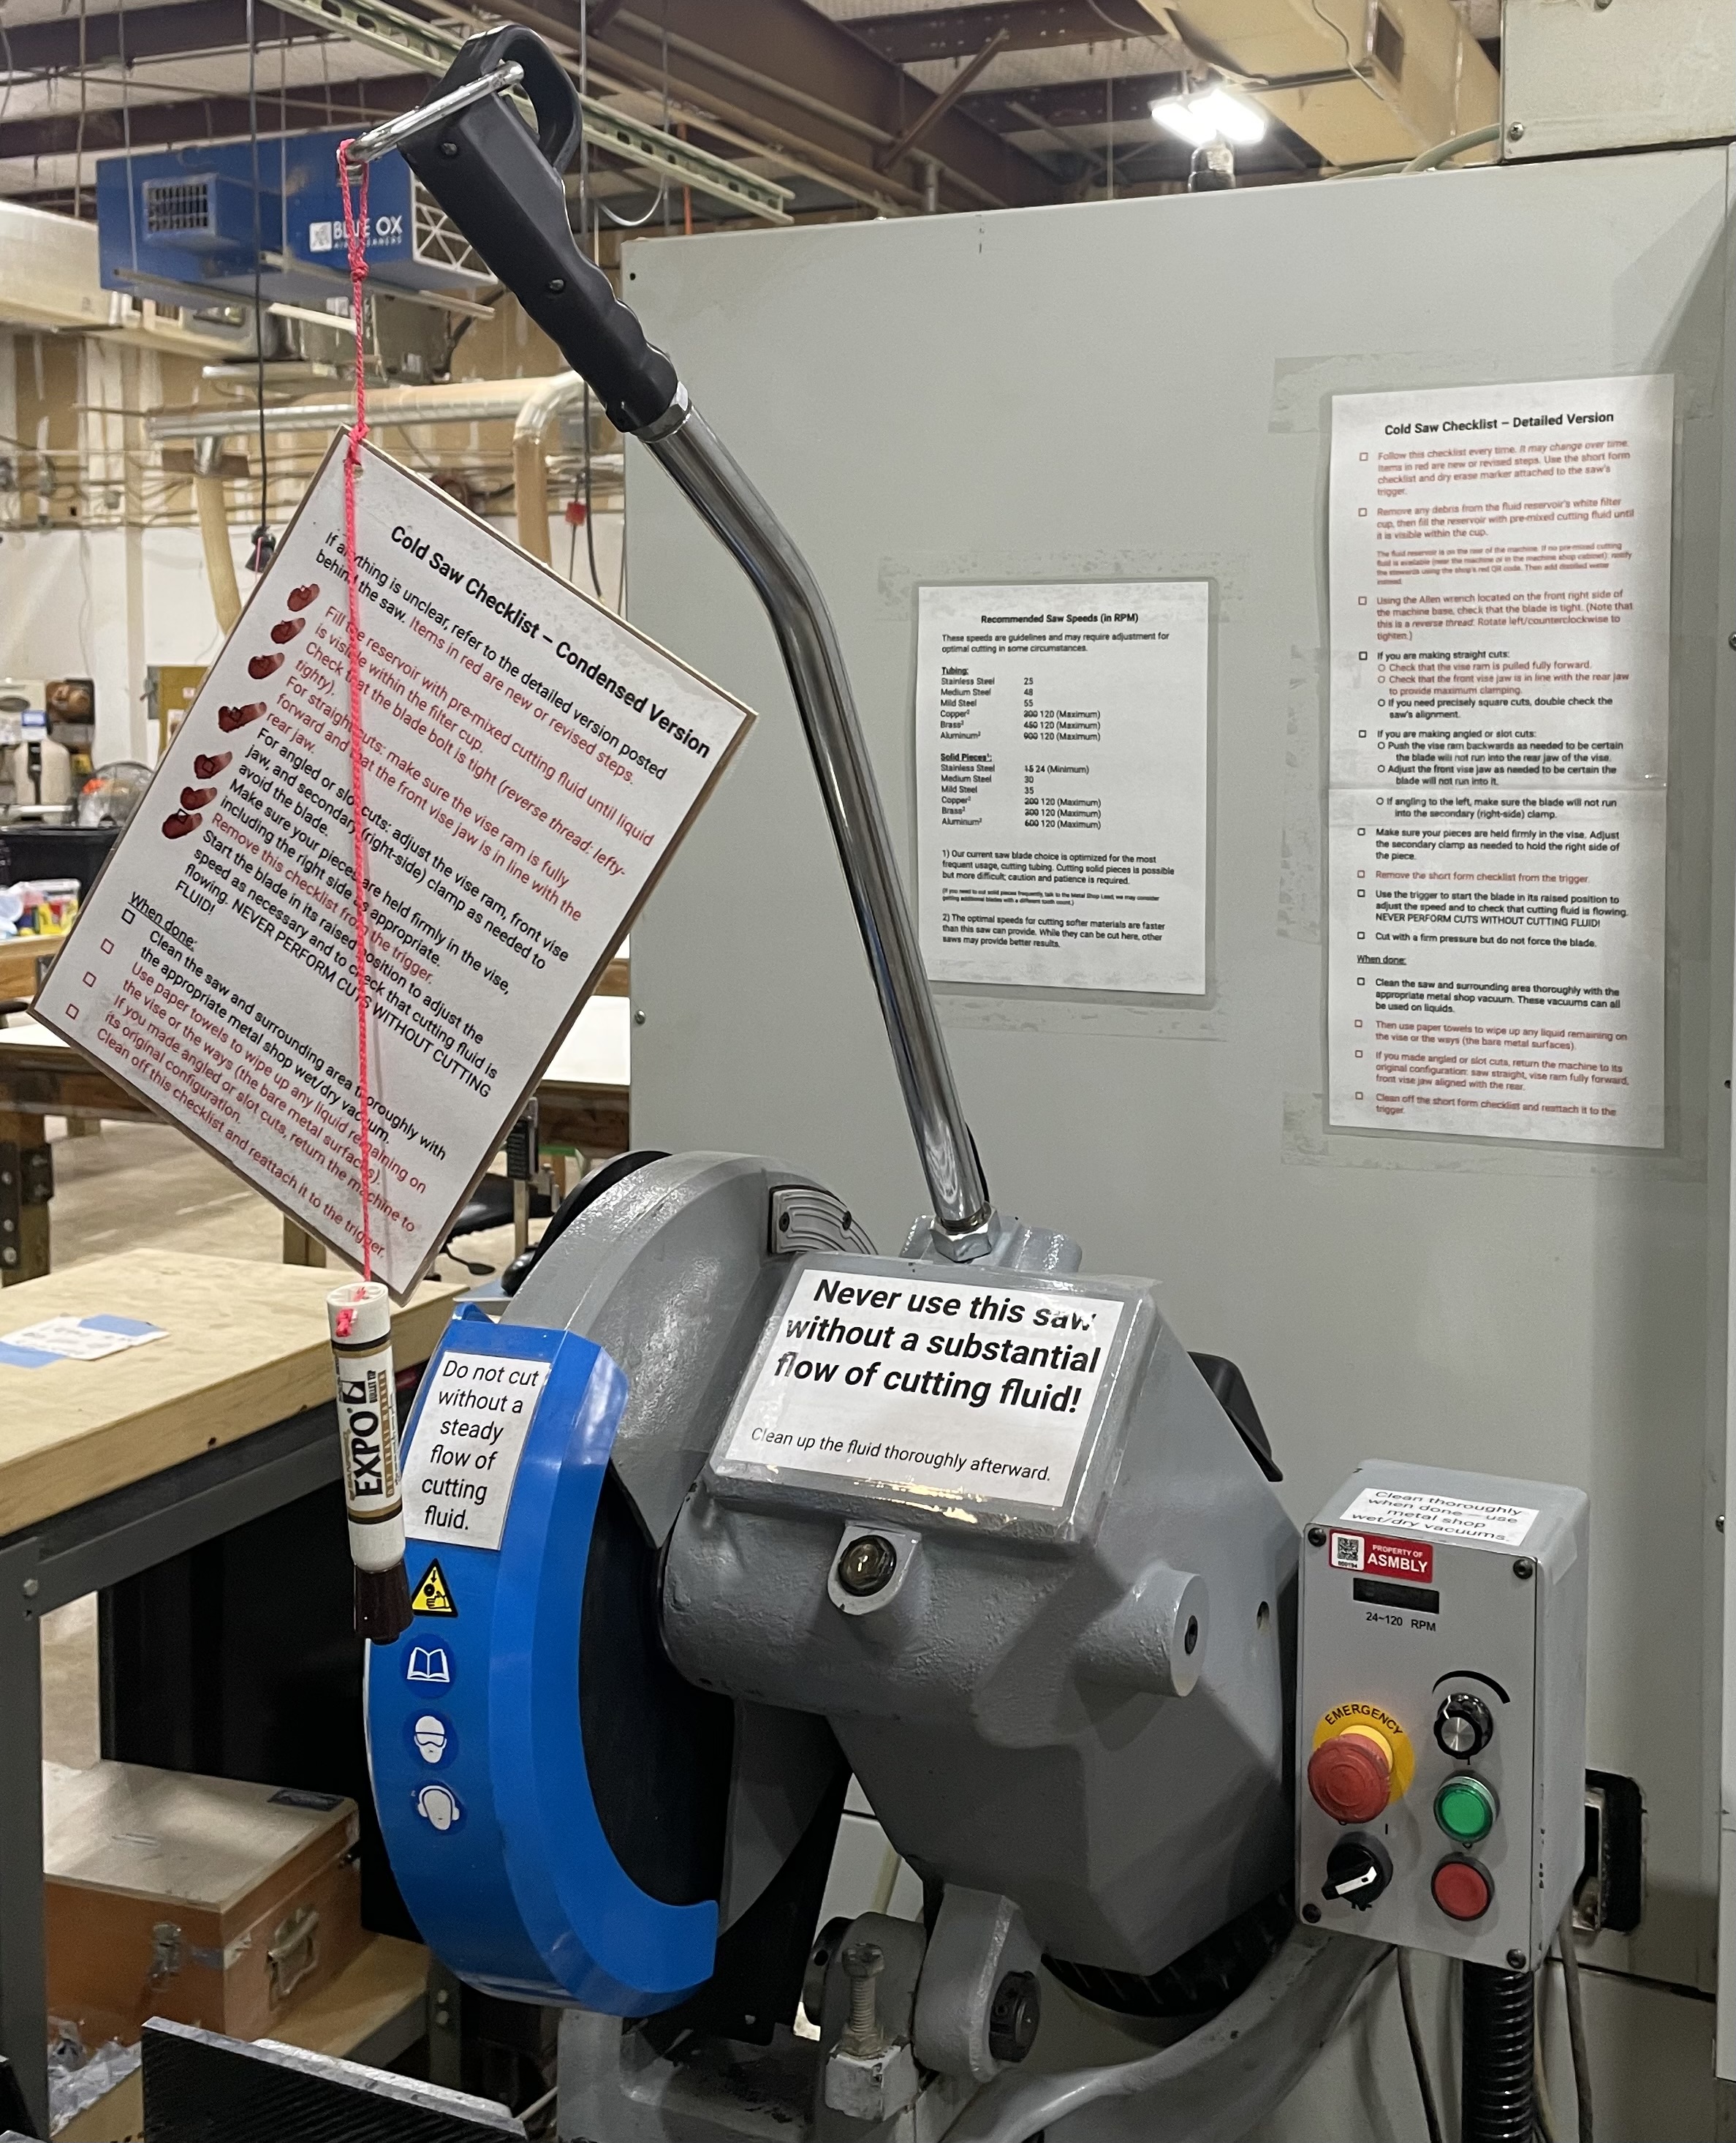
To handle all of these procedure changes, I have put together a checklist for using the Cold Saw, with two versions. One is posted behind the Cold Saw and contains all the details. The other is condensed because it is literally a check list: it and a dry erase marker are attached to the saw’s trigger, and I expect everyone using the saw to perform each action intentionally then physically check each item off.
I think these additional steps will reduce the risk of future damage to the saw, and I don’t expect them to be burdensome. And they are in turn offset by several other fixes to the Cold Saw.
First, the machine is now bolted down to the floor. Where it is set, the vise should be able to handle pieces that extend many feet in either direction (though you will have to move the black machine shop tool chest to go far to the left). And with it secured, it feels much safer to rotate the saw and move the vise ram.
Especially because moving them requires a lot less effort now. From day one, several of us had suspected something was wrong with the vise ram – the effort required to move it was ridiculous – but we had never had time to check it. I finally did, and there was indeed a small pit with raised edges on one of the ways. Those were removed when I stoned all of the accessible ways to remove rust that had developed. The ram is now vastly easier to move, and the saw rotation is also improved a bit.
As always, let me or another metal shop steward (or Shane) know of any issues that arise.