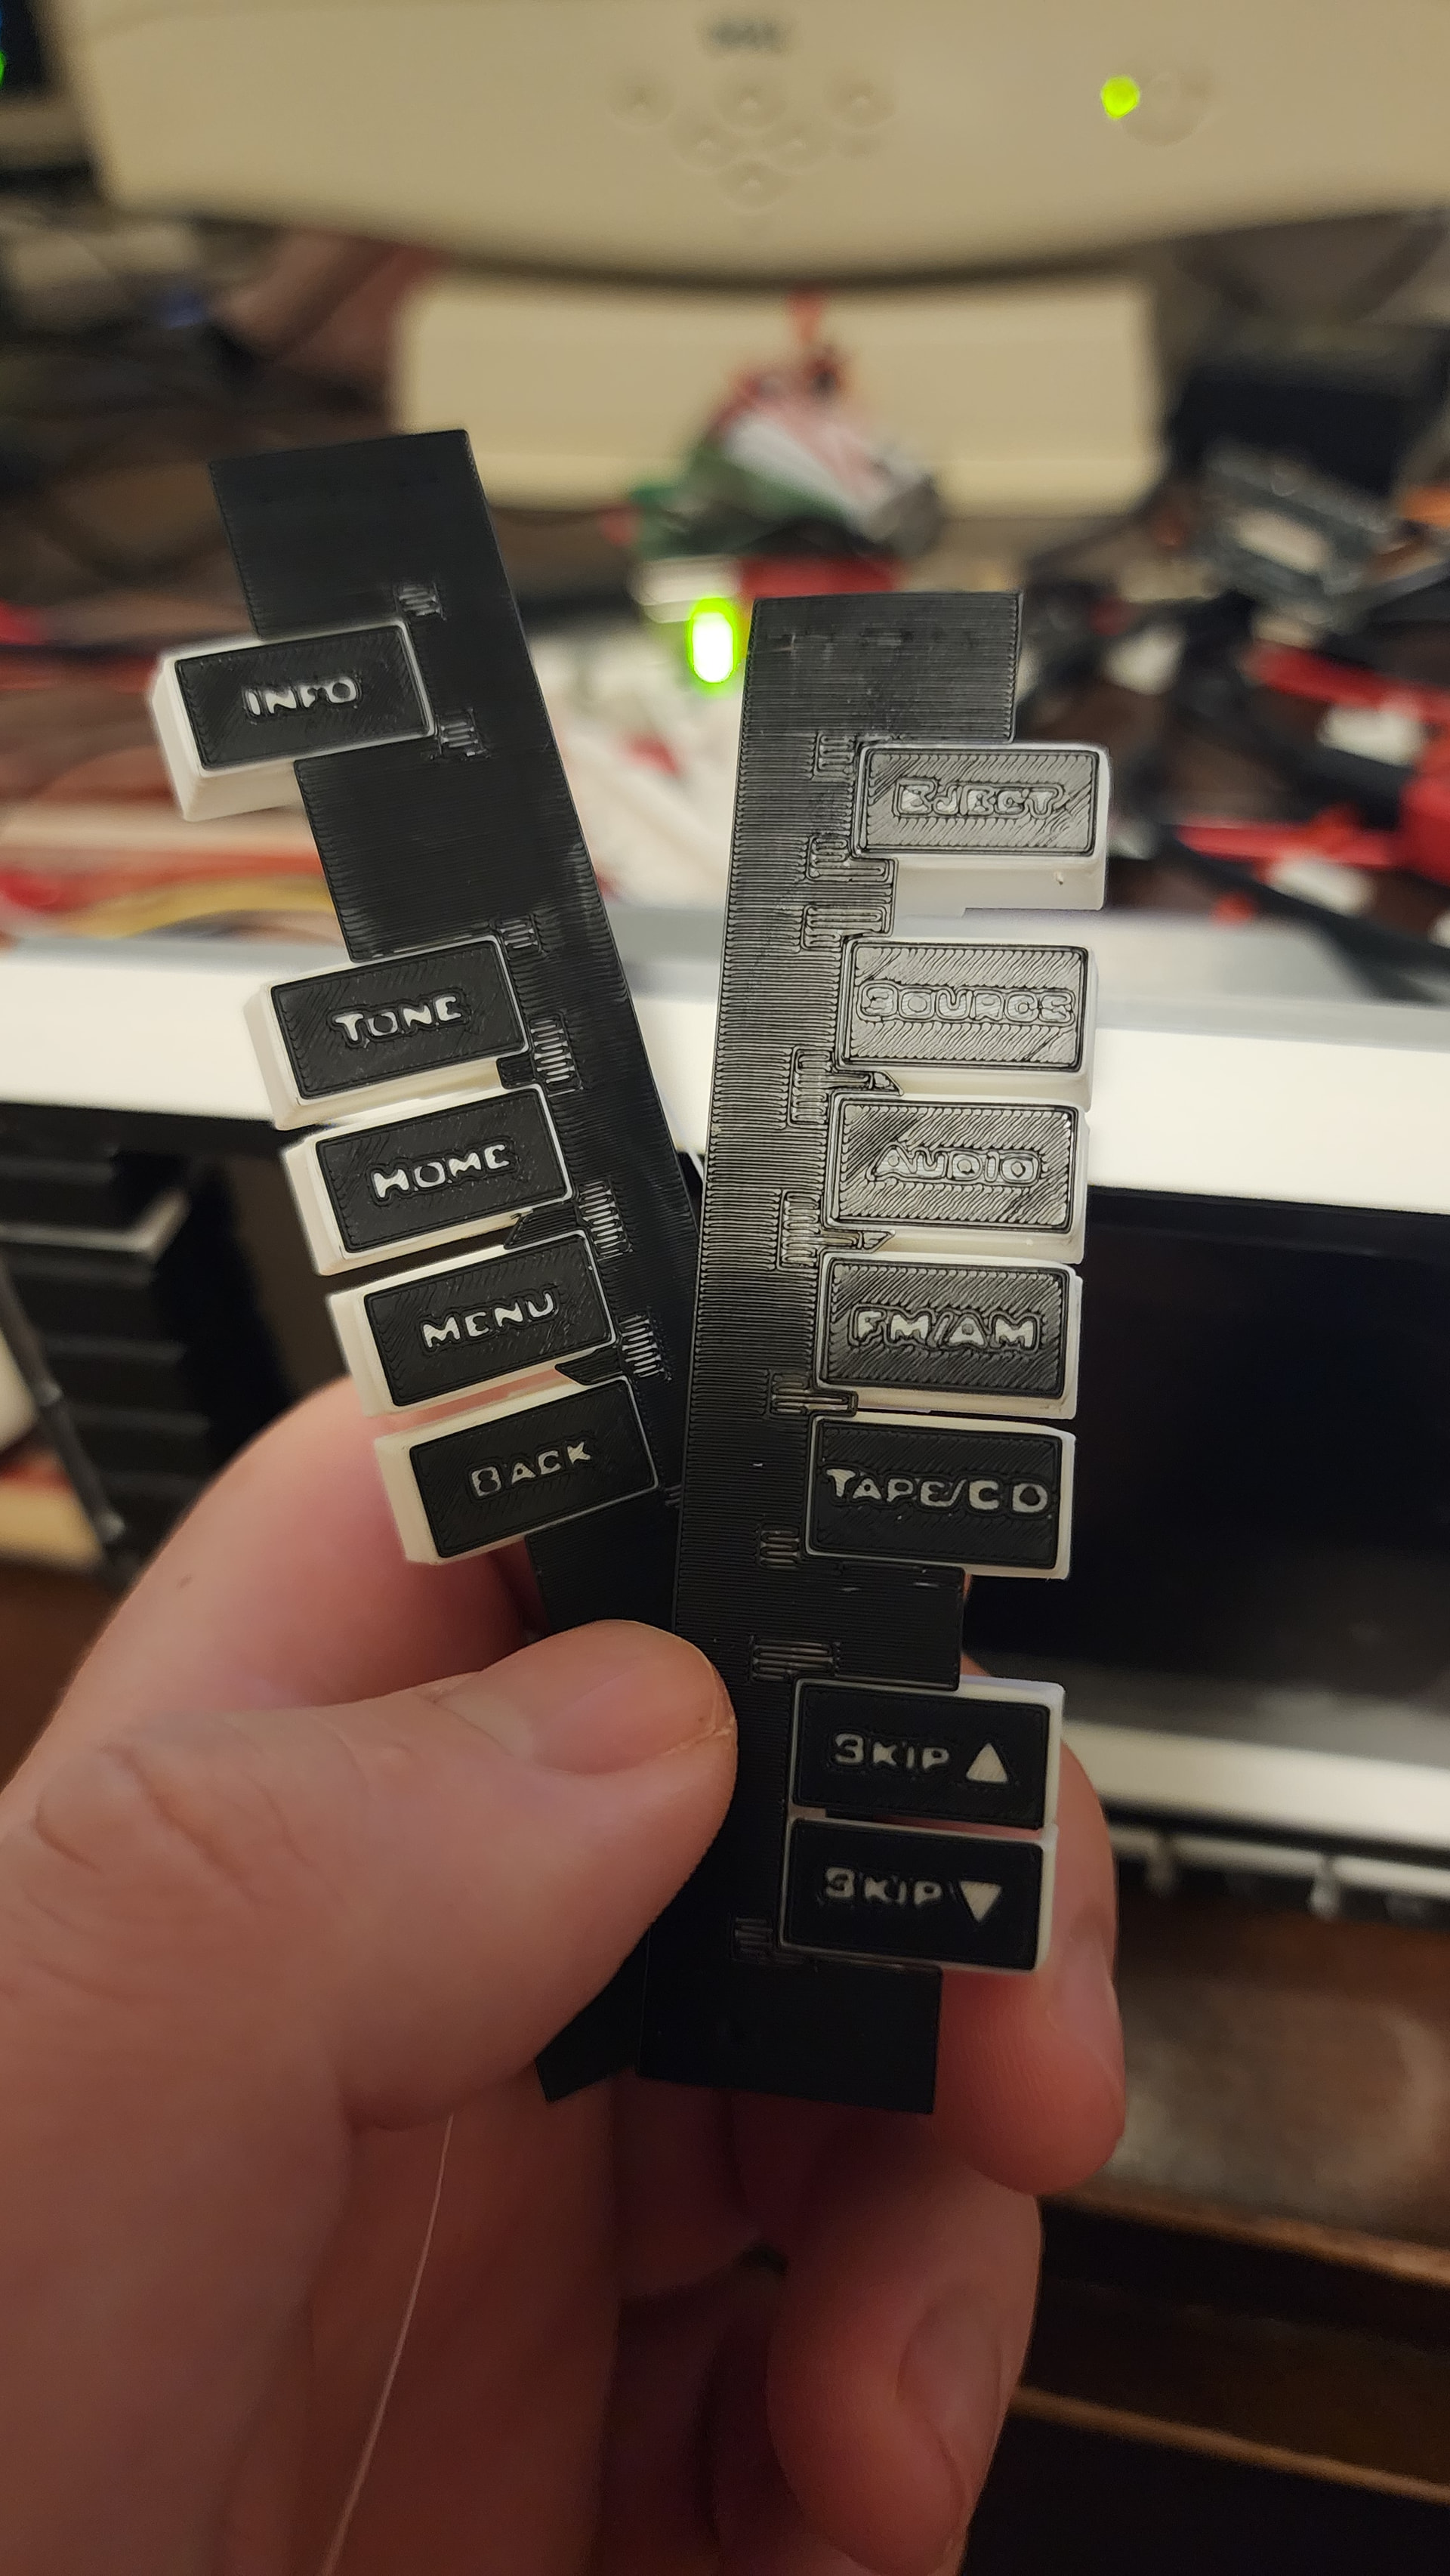
Regarding my previous post here, I tried printing a single layer of black filament with the text cut out and white filament on top of it. That worked great until I had to print smaller text. I finished another set of buttons last night and the text (height 1.6mm) is a bit blobby, even with a 0.25mm nozzle. The “Os” and “Bs” caught my eye when I first removed the print.
Are there any settings in Prusaslicer I can adjust to make it a bit more fine? I’ve already changed the first layer extrusion width to be the same as the rest of the print.
if you send me a stl preferably with the text cut all the way through I will resin print it.(then you can add sticker or thin transparent colored piece on the back.) you can add paint for more uv protection.
I was debating printing separate labels from back to front (so white would be printed first) so I could iron the top, though not sure if that would look as good or if that could be easily adhered to the button surface..
Make sure you are slicing with the Arachne line generator! It makes a huge difference for text. Then you can view the first layer slice to see if you want it to put down text first, or background first.
Adjust the default extrusion width for walls to a minimum - usually a min of 40% of nozzle diameter, maybe a little less.
You can make some difference by adjusting Z offset as well. The defaults are set to squish the extruded line slightly for bed adhesion. Adjust until it doesn’t stick, then back down until it barely sticks. That way your bed-adjacent line width is almost exactly what was ordered. You should be able to see almost zero elephants foot when that is working correctly.
If you’re usually a non-asmbly printer, consider a specific adhesive layer so you can back way off on the offset.
For a consistent finish on the bed surface, I like using 1 wall only and solid infill. You could consider the infill direction too - rectilinear on the first layer exactly horizontal could subtly improve the contrast with vertical text lines.
the EudyMale machine isn’t available for use yet, but maybe it will be an option? You could 3d print the piece with a simple rectangle of light transmitting filament, and add a light resist later at a much more fine resolution right on the print itself?
The solid extrusion width? I tried the first layer at 0.15mm and the filaments melted together (and caused a print error). I then tried the first layer at 0.2mm and it looked basically the same.
I can try that, is there a way to configure/adjust Z offset on the Prusa MK3S+ that doesn’t involve having to redo the test print every single time?
Regarding UV printing, JLCPCB offers WJP with multicolor prints, is that what the EudyMale machine would do?
I like printing a rectangle or other bed pattern that takes much longer, and live adjusting Z while it goes. The prusa test pattern is much too short and hard to see IMO.
 the EudyMale machine isn’t available for use yet, but maybe it will be an option? You could 3d print the piece with a simple rectangle of light transmitting filament, and add a light resist later at a much more fine resolution right on the print itself?