I was trying to flatten out the clearance insert this morning and noticed a couple things:
Lots of sawdust compacted underneath the plate, screwing up alignment
I cannot for the life of me find an Allen key that fits the adjustment screws in that disaster pile in the tool bin. Is there one hidden on the saw I didn’t see?
One of the adjustment screw tabs has completely broken off:
Yes, thank you @DirtHurt for reporting it. Clearly someone else did not.
There are a few things going on here. Folks should be cleaning out under the insert after using the saw. Dust buildup messes with the leveling of the insert.
Numerous times I have seen those back insert screws driven all the way into the table. Those particular screws are captured above and below by the insert. The ones towards the front are setscrews embedded in the lie completely under the insert. When they are driven into the table, the insert will always ride high at the back. I have repeatedly found the screws bottomed out hard, I’m assuming to get them lower.
It’s possible someone snapped the wing off trying to overdrive one of those screws. I’m struggling to see how that could have snapped cast iron, but it’s the only thing I can think of.
Either way, this is unfortunate. Particularly as this piece of cast iron was just replaced a few months ago. Several hundred dollars and hours of time a few people to rebuild the saw.
Stuff happens, but it’s important to report damage quickly so that we can get a plan of action together and repairs made.
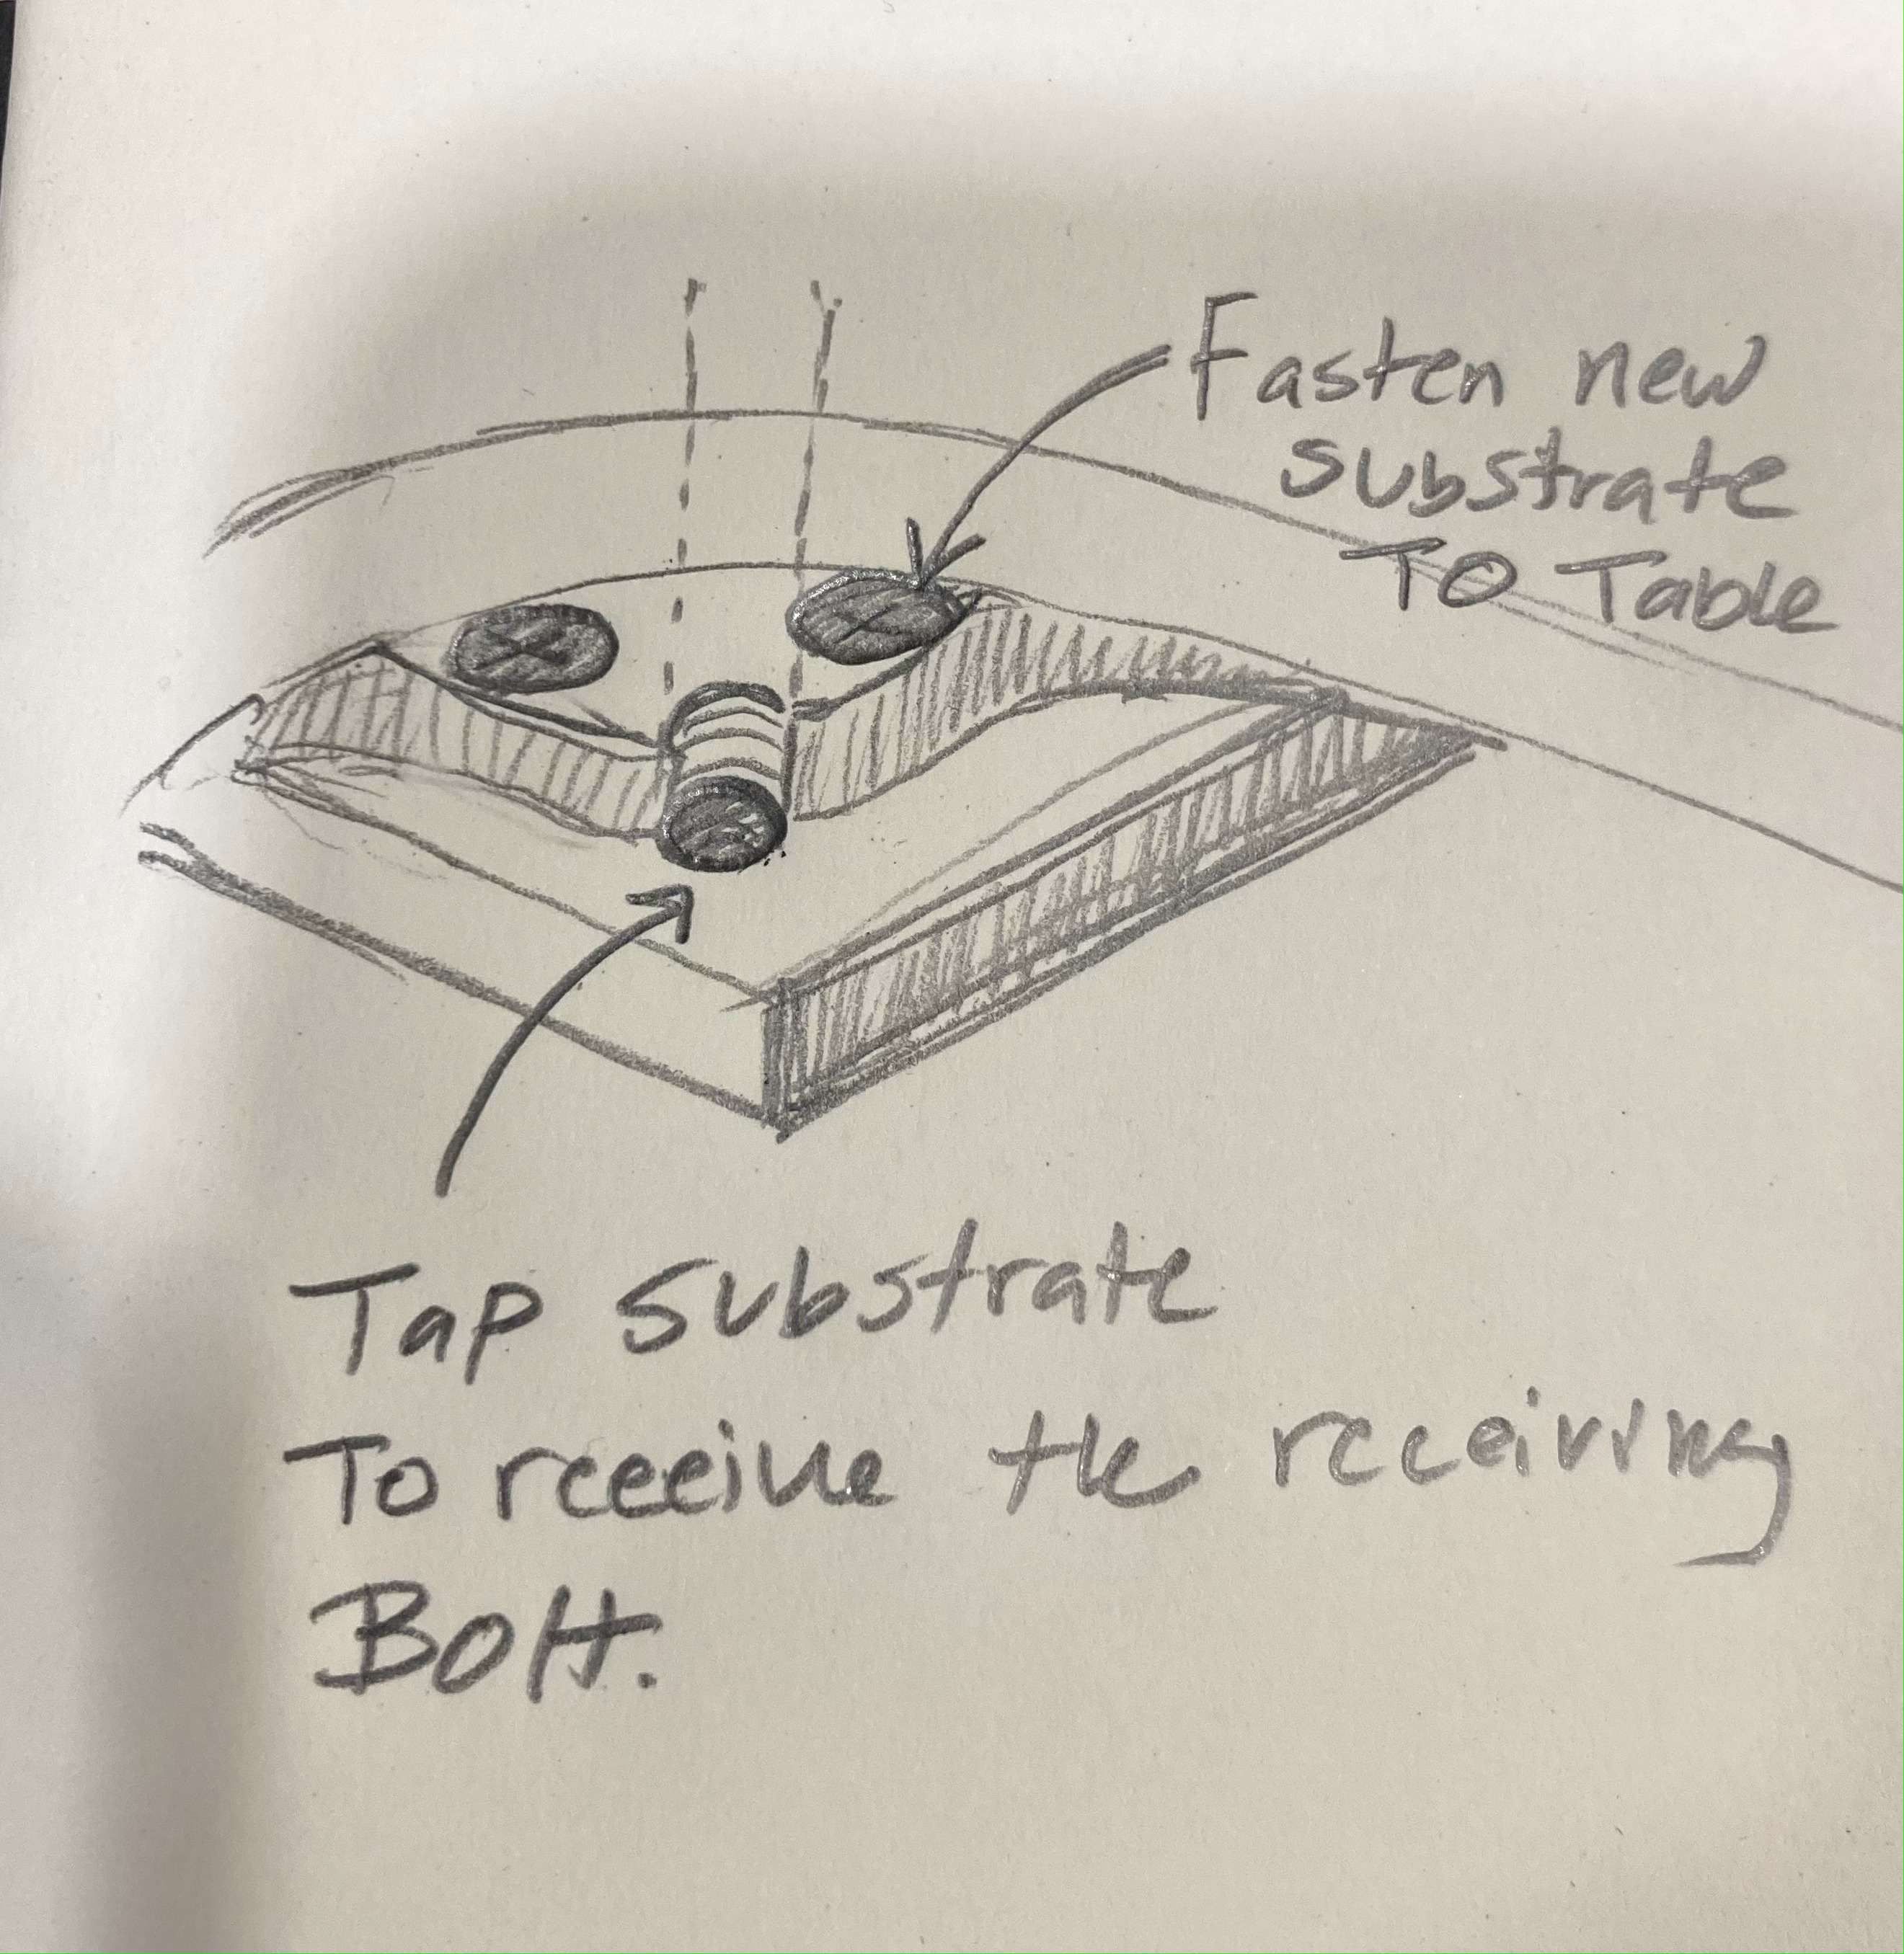
Build up new material with any number of terrible idea’s, and tapping the new build up:
brazing
epoxy (I supposed pretty cheap, but hard to reverse if it doesn’t work well.
weld
Not being a cast iron welder, I’d be weary of applying any kind of heat. But I’m open to hear other folks thoughts on the matter. I know cast iron takes heat really well, but I’m not certain on it’s propensity to warp.
Not sure it matters, but if I had to guess someone whacked the insert with a mallet or something trying to get it to settle into place and that broke off the corner.
Brazing is a lower temp process than welding. I would grind past remaining threads and braze silicone bronze to build it back up to drill and tap a new hole
My ignorance tells me that you should probably put damp rags on the tabletop while brazing.
It would be a real shame to warp the top.
I’ve done my fair share of brazing on mild steel/Chromoly. But I’ve generally shy’d away from cast iron due to the whole pre-heat thing. Is there non-op cast iron parts laying around for someone to practice on?
A “get by” option could be drilling and taping a hole on the insert itself a littlle towards the edge using a set screw (like the ones towards the front). Not sure if there is enough room. Or making a metal spacer instead of the screw and keep it in place with a magnet. There are some round magnets inside a small white box in the laser room locker. The magnet itself maybe thick enough. Use some nonmetallic shims and keep in place with double sided tape. Fabricate an insert with stub legs instead of screws out of MDF.
Never mind the magnet option thinking about it that may activate the cartridge. So another option grind some of the metal off and fabricate a bracket with the threads for the screw that can be attached/screwed from the bottom.
What about an idea similar to @jiggliemon 's, except put recessed screws into the top surface of the saw instead of the smaller ear, and grinding off some amount of the old ear that’s damaged.