I’ve recently made a few cutting boards, and I was thinking it might be fun to try engraving them with one of the lasers (probably Tarkin)
I’m wondering what the best way to test my designs is though? I made them a little thick in case I mess up, but will having 4 different types of wood make engraving difficult? I used padauk, hard maple, walnut, and cherry.
Test. There’s no better way to set the stage for success. You’ve got to do test engraves on the same woods in your board. If the results vary widely then perhaps limit the number of woods on which you actually engrave. That said, laser engraving is a fast path to easy personalization.
Whenever I engrave something new, I go through a specific test pattern. If I don;t have any spare material, I start with a high speed and a lower power. I run one pass and check the results. If it’s not the desired effect, I run the same pass again and re check. You can also design a logo or other “test” image to etch on the back first, and dial in the settings before doing the front.
One problem I ran into with cutting boards, you generally want a clear defined etching, but don’t want a lot of depth to it. Ideally you want the cutting board to remain useful, and having a deep engraving can effect that spot on the board. I was able to save a couple of my first boards after etching to deep by filling with food grade epoxy and sanding afterwards. Not quite the effect I hoped for, and more post production work, but the client didn’t seem to mind.
I do a bunch of cutting boards. Never with the tarkin, but I’ve got a low power laser at my house. One of the things I’d add is dont move your workpiece until your finished. Like others have said fast pass low power. You can always go deeper. If you dont like the initial pass hopefully it is not to deep and worst case you can sand the burn off and figure out the next move.
Thanks for the tips everyone! I just finished gluing up one of them last night, and it has a bit of extra length on it. Hopefully, I can use that for testing.
@TravisGood The end board(s) are maple too, so if worst comes to worst I can just put a name/small design only on the bottom corner to limit the variance.
@jamesfreeman I hadn’t even considered the depth of the cut to be honest. I actually kind of like the epoxy idea though.
One of the cutting boards is for a friend (I’m not confident enough to sell anything tbh,) and I was considering engraving a small logo of his home state on it. No experience with epoxy really, but I might consider trying a deep engraving to just fill it in. Perhaps about 1/8" deep or so should work.
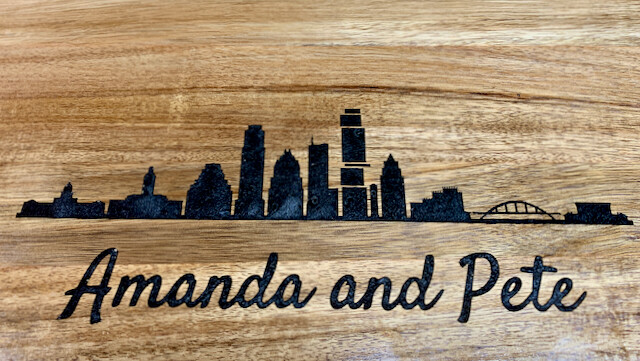
Yes, one of the many projects requested by my daughter.
Looking back, I think coloration was probably mica powder.
If it had only been pigment then it’d have been transparent.
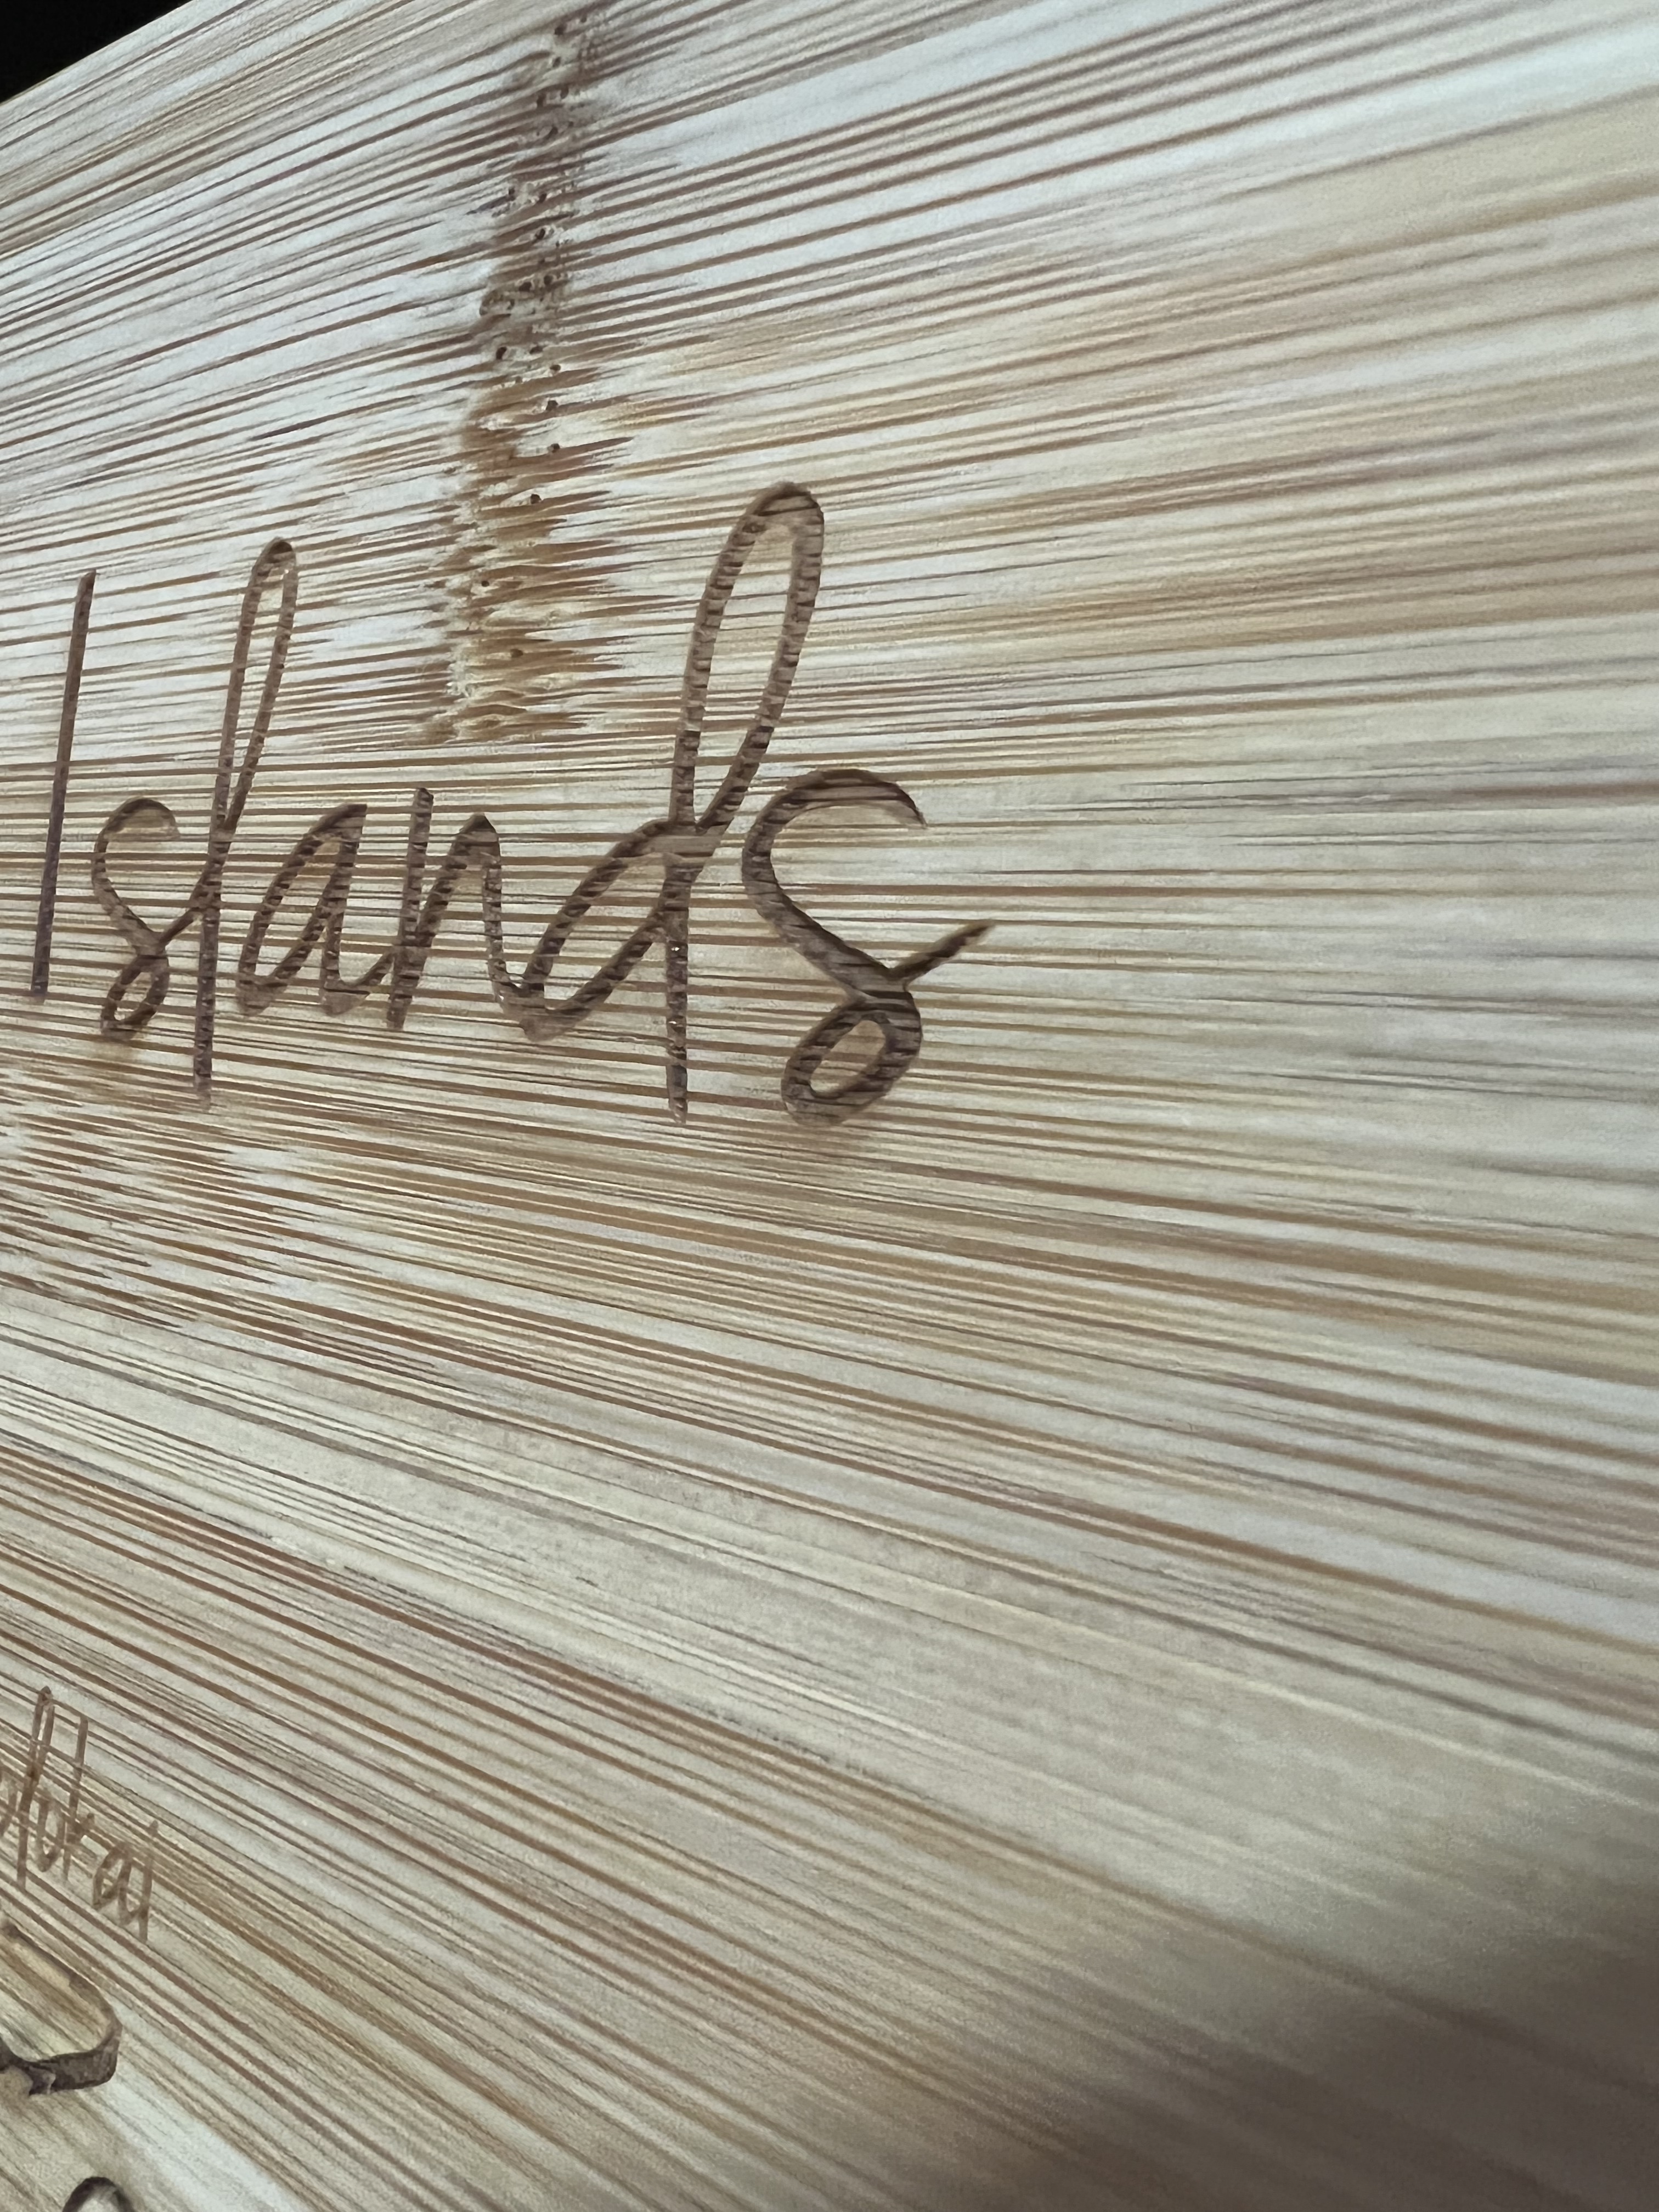
I encountered this cutting board in a shop today, and it has a very shallow engrave. I paid closer attention based on this post a few days back. I think the approach of filling it in with an epoxy (as discussed) is a good way to go. The recessed area could so easily just be hard to ever get fully clean. And even brand new, with just the single board type (bamboo) had an inconsistency in overall look that the tinted epoxy could minimize.
Thanks for sharing tips and tricks, y’all. I like the general idea of filling engravings with tinted epoxy, but I’m curious if you would share a bit more detail about the process y’all use for that?
Do you re-plane the whole surface after filling with epoxy? Or is it a more local/precise fill?
I would pour over slightly and then sand back down to flat. This method allows more error for air bubbles to reach the surface, and your entire board is flat. You do need to account for the extra sanding though, in your thickness design. If you don’t have the material to sand, you can use a syringe for more precise filling.
I think you’re already convinced, but another argument for epoxy fill:
We got a couple lasered cutting boards as meeting swag (or something) a while back. After a few trips through the dishwasher, the etching basically disappears.
To prevent seepage of epoxy into neighboring end grain, seal it first. You want something very thin (low viscosity) so it just blocks the pathway but doesn’t itself express into the space for infill. Try shellac or a thin CA glue like Gluboost Thin.
You don’t want the crest of your fill to recede below the surface during curing.
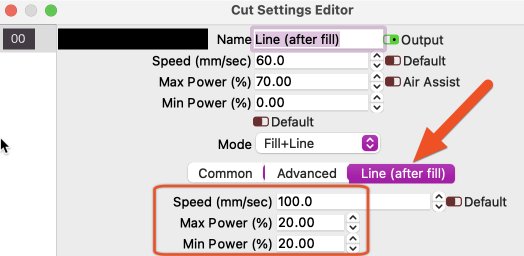
I’ve been asked several times recently so I’ll let everyone know here:
Speed and Power for the “Fill+Line” do NOT need to be the same for the etch and score.
While it isn’t obvious, inside the Cut Settings Editor are tabs for each Mode. When the Mode is “Fill+Line”, the third tab is Line (after fill) wherein you can choose a separate Speed and Max/Min Power for the scoring (Line) after the etch (Fill).
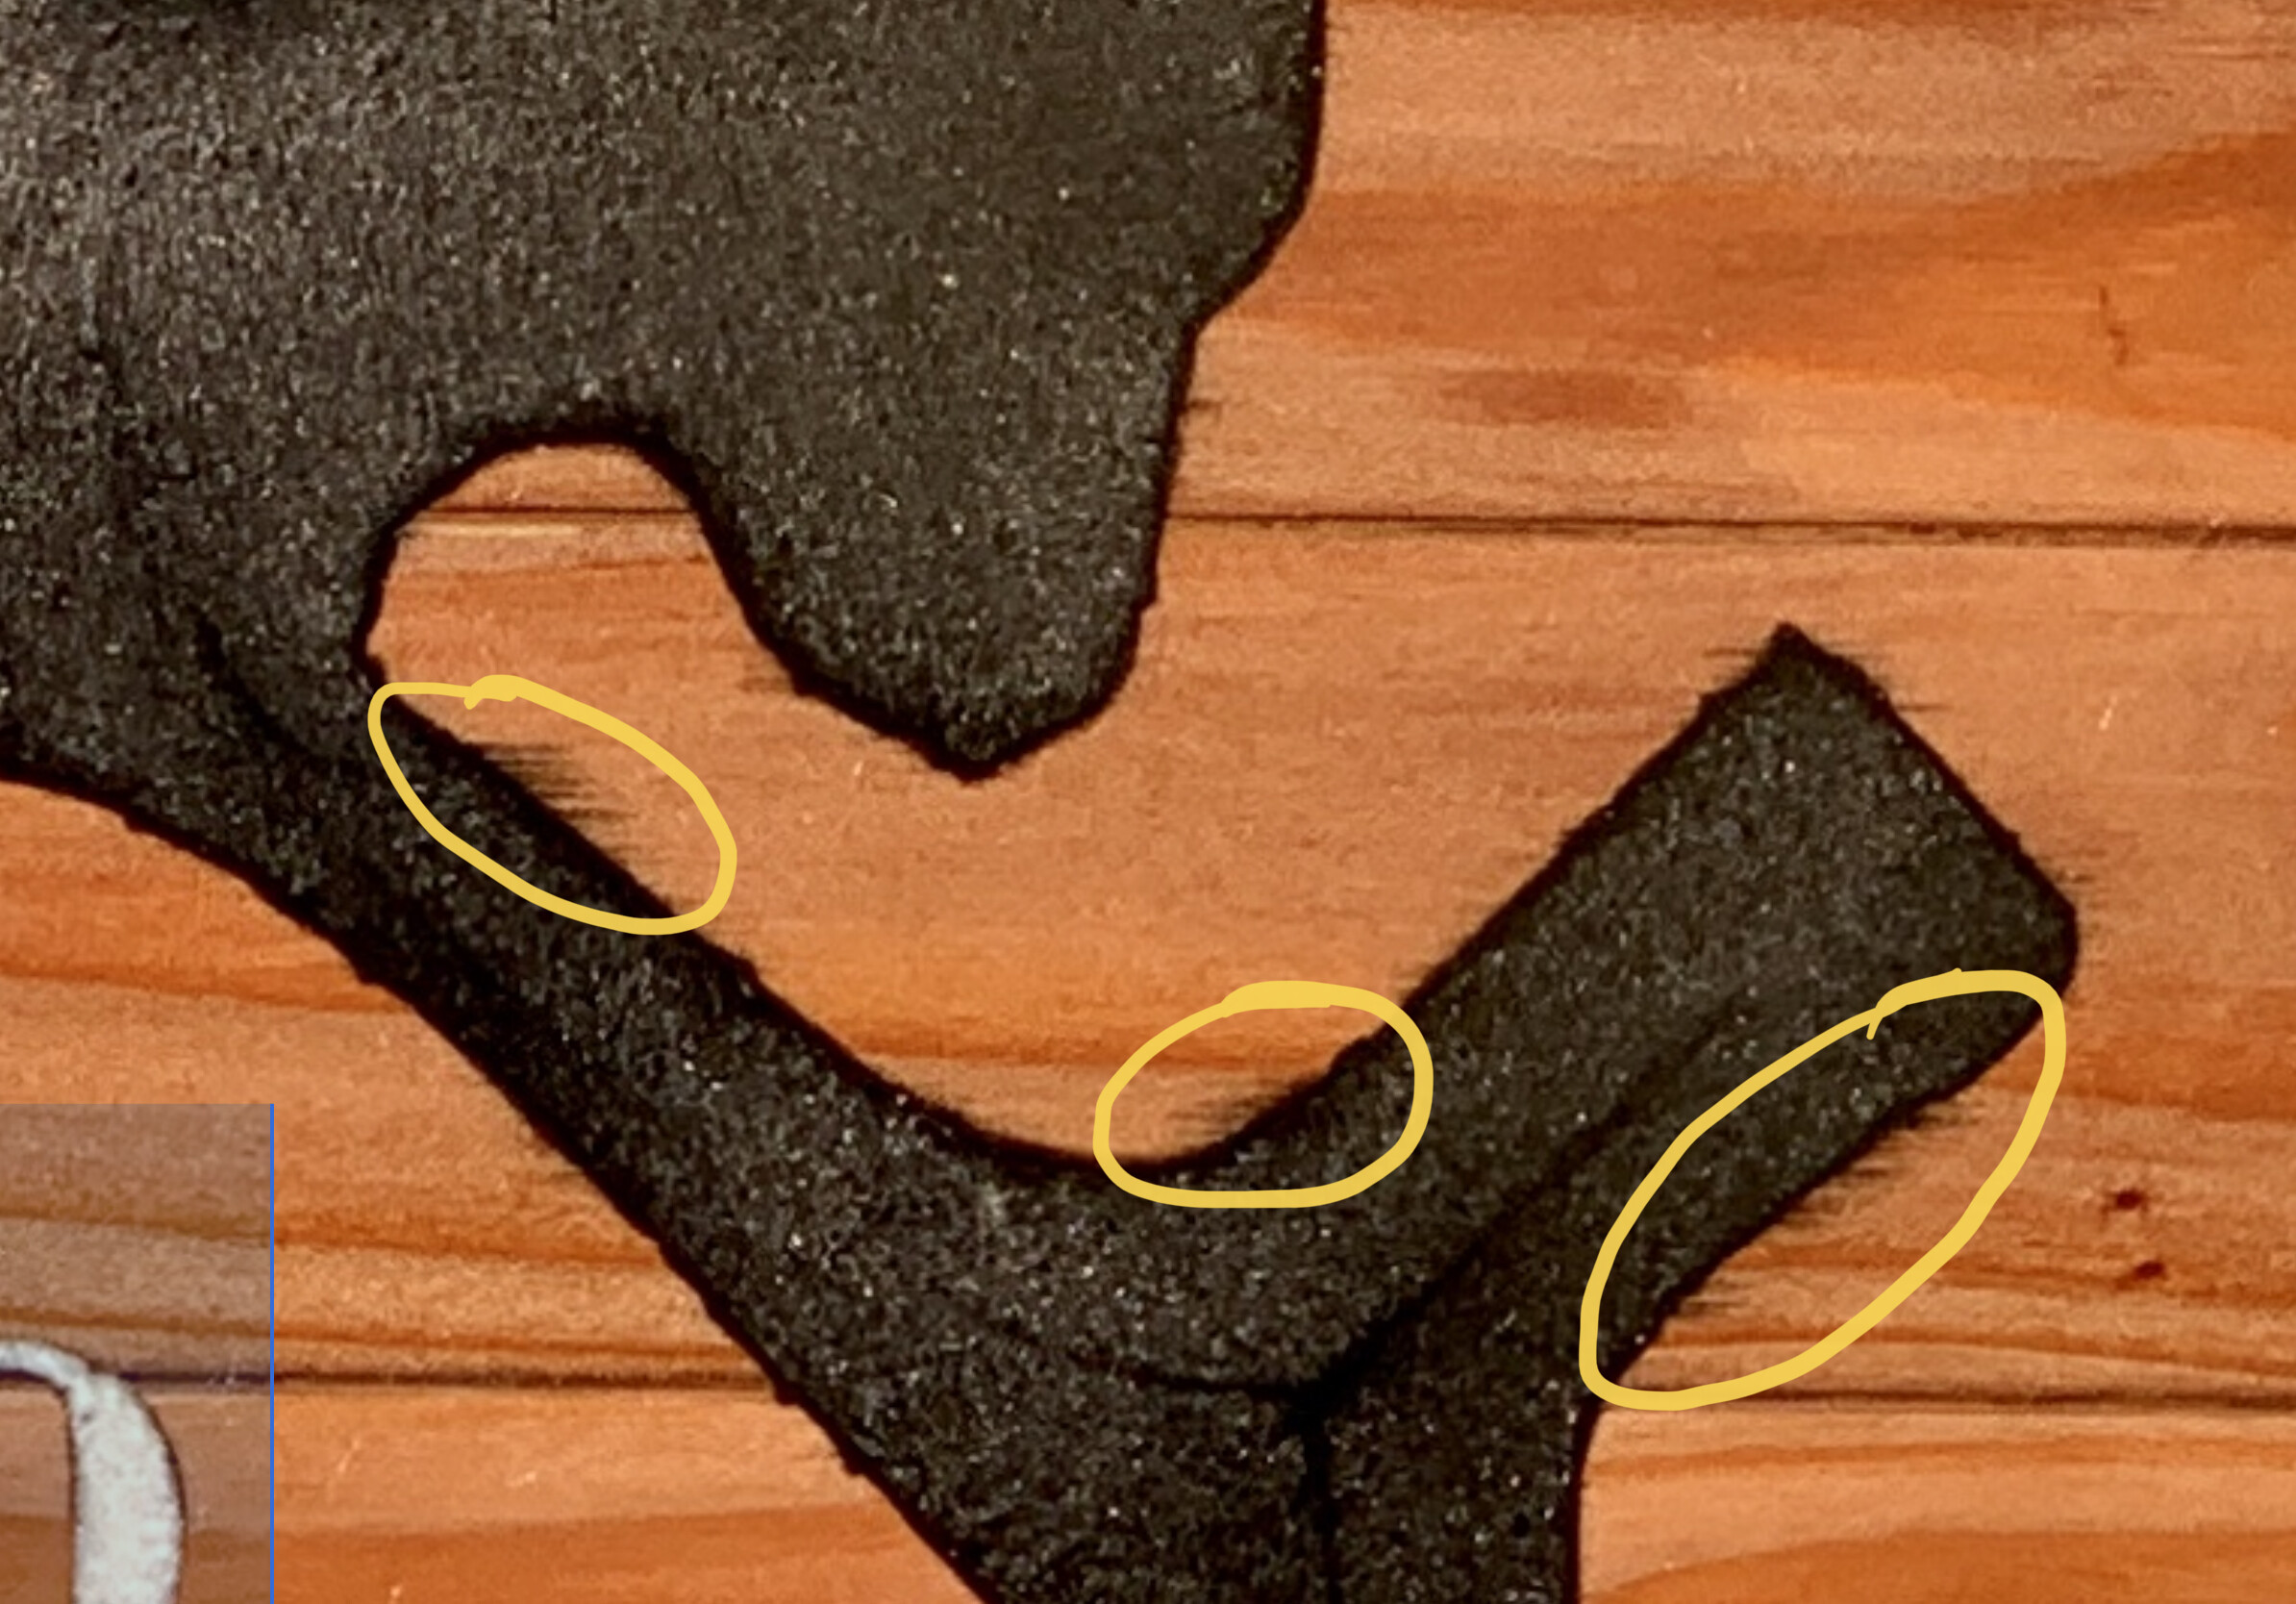
To performing an edge cleaning around the etched area, you should consider reducing the settings to avoid doubling the depth along the periphery.

 I’ll post an update once it’s finished!